How to Change Brightness for Photos on iPhone: The Ultimate Guide
Learn how to change brightness for photos on iPhone. Avoid dark, muddy shots with our easy manual editing guide and quick AI optimization tips. Discover Vmake Labs image enhancer today!

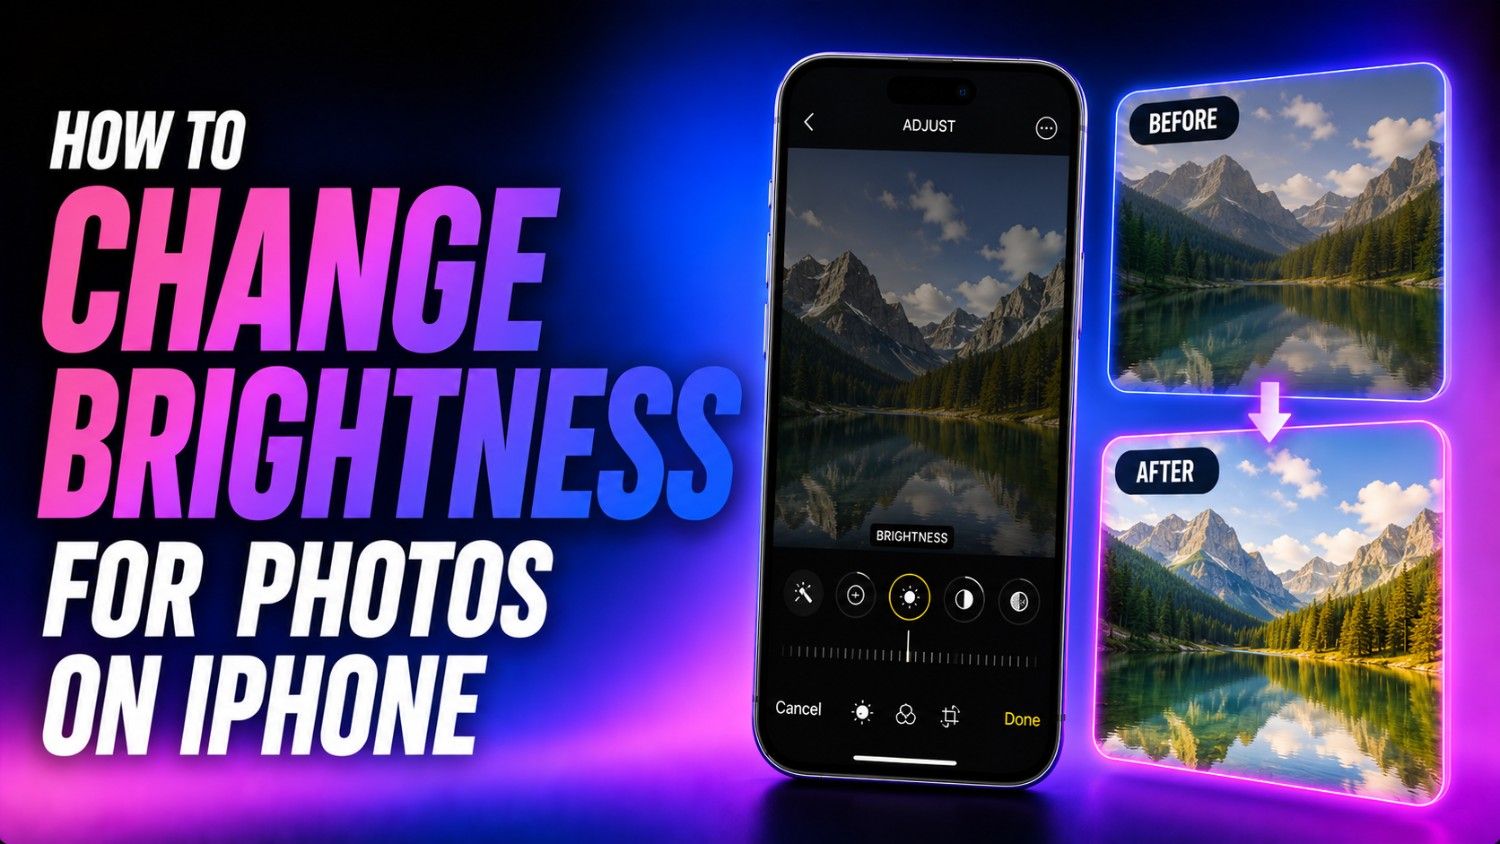
Capturing a moment on your iPhone does not always yield ideal lighting. Environmental factors like harsh sunlight, dark indoor rooms, or heavy shadows can leave photos looking dim and unappealing. Fortunately, adjusting photo brightness on your iPhone is straightforward. This guide covers how to change brightness for photos on iPhone natively and automatically enhance your images using AI for clean, professional results.
How to change brightness for photos on iPhone?
If you are wondering "how to brighten a photo on iPhone?", then the following steps should help you out in this image editing process. While Apple's native Photos app offers quick, built-in exposure and shadow sliders to instantly lift a dim shot, you can easily elevate your edits by using dedicated, top-tier third-party photo apps available on the App Store.
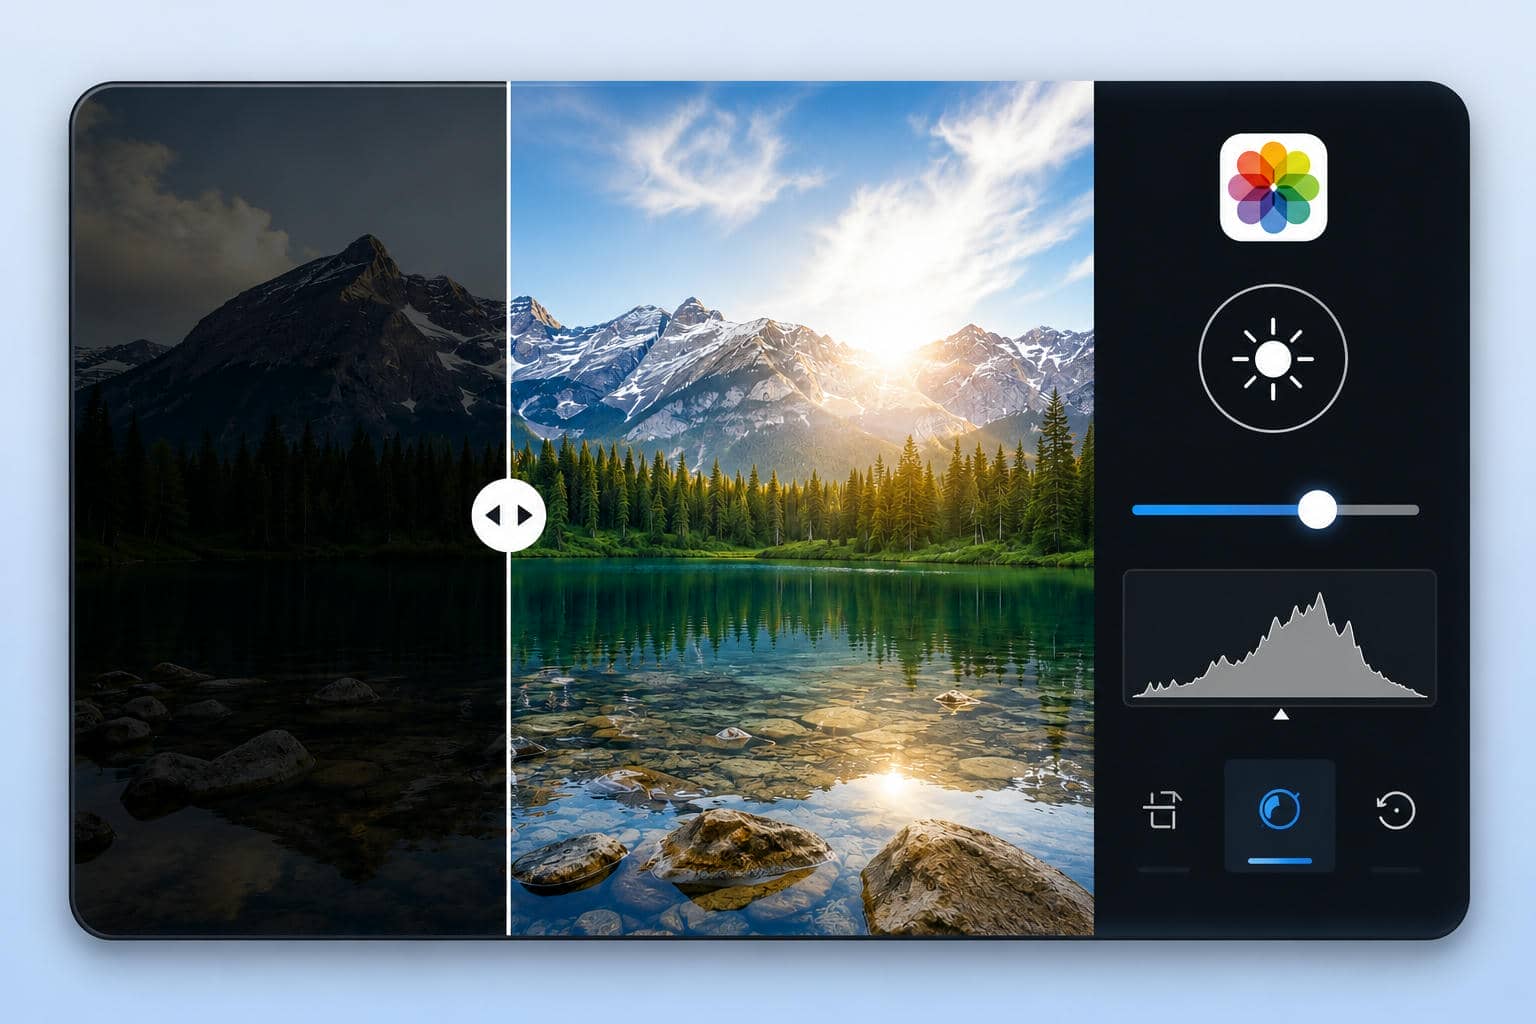
Step 1: Access the "Photos" app on your iPhone
Unlock your iPhone and then click on the "Photos" app. You can either find the app on your homescreen, or your phone's taskbar (available on the bottom-end of the screen). After that, proceed to click on any photo to open it and adjust its brightness.
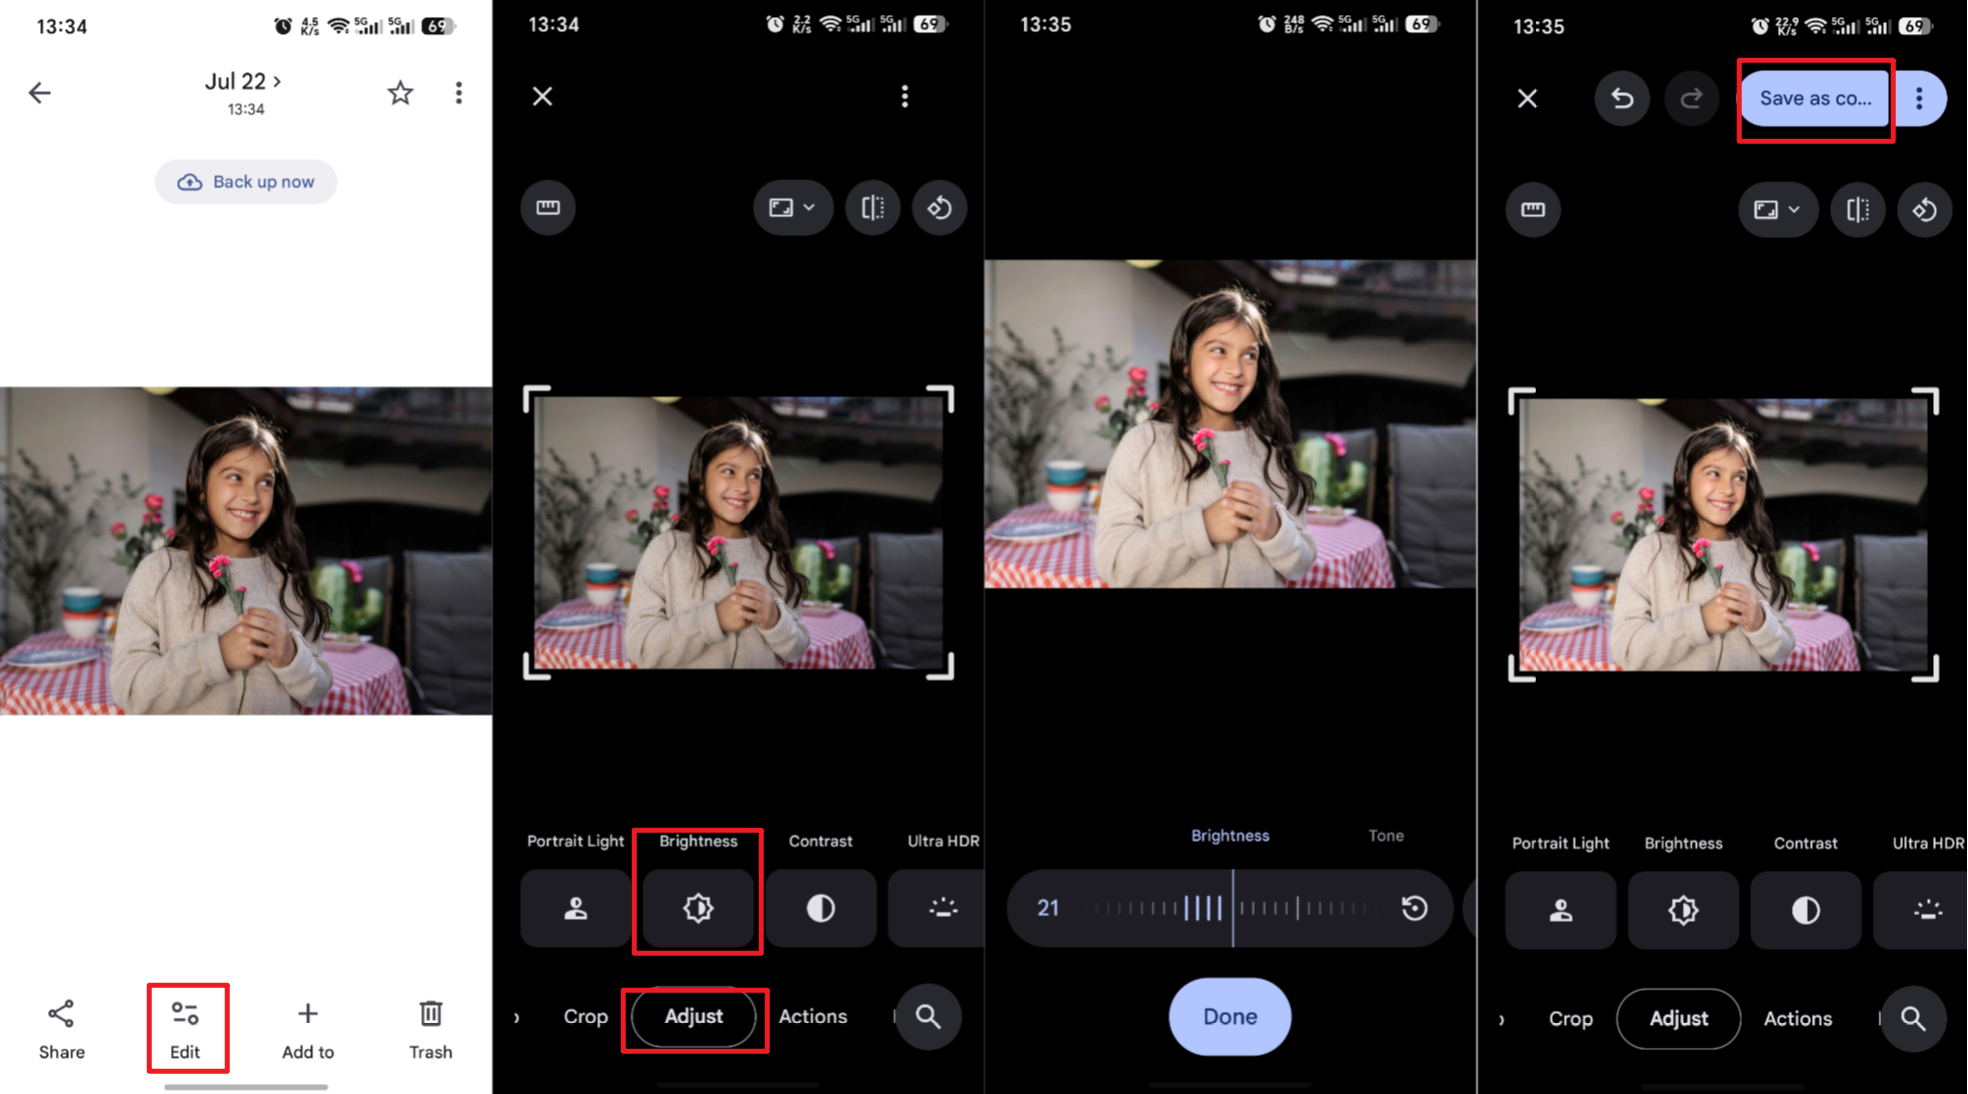
Step 2: Click "Adjust" and drag your preferred sliders
After opening your photo, click on the settings option (visible by the three horizontal lines) and then choose the "Adjust" option. From there, you can adjust the exposure, brilliance, and highlights on your photo. Simply click on the slider and drag it to make any precise adjustments.
Step 3: Save your edited photo
Once you are happy with the results, click on "Done" to save the settings. Otherwise, you can click on "Cancel" to revert back to the original settings.
How to automatically change brightness for photos using Vmake Labs
While native iPhone controls offer manual adjustments, correcting complex lighting issues across multiple photos can be time-consuming. Vmake Labs Image Enhancer provides an automated AI solution designed to analyze and optimize image lighting instantly. Rather than manually tweaking sliders for individual shots, the tool evaluates dark regions, exposure levels, and tonal balance automatically.
It uses AI to improve brightness, recover visible details, and reduce noise while maintaining a natural-looking appearance. The automated process offers an alternative to manual adjustments, making it suitable for restoring individual photos or processing multiple scanned images in batches.
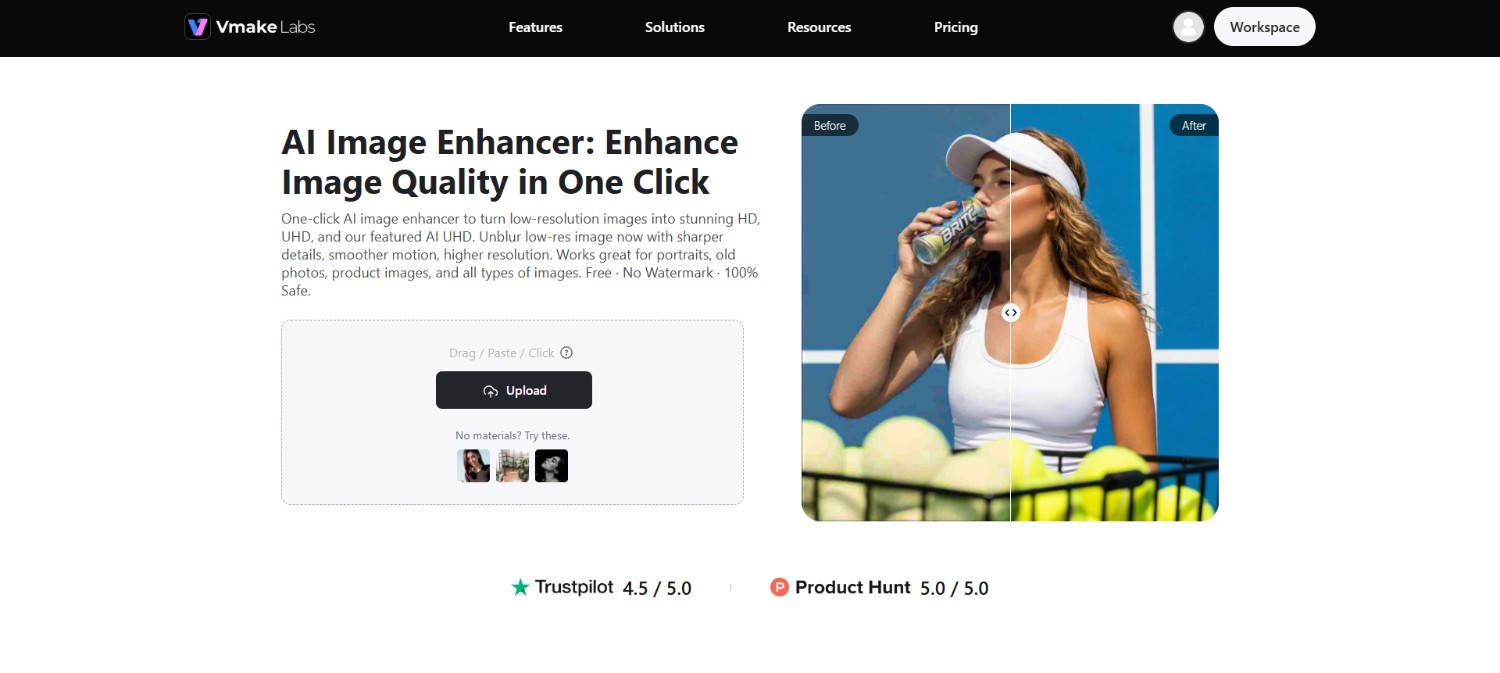
Key features of Vmake Labs image enhancer
-
Brighten dark photos naturally: AI analyzes the image and adjusts brightness based on the scene, helping improve underexposed photos without requiring manual photo editing or complex settings.
-
Reduce grain after brightening: Increasing brightness can make image noise more noticeable. AI helps reduce grain and compression artifacts, producing a cleaner and more natural-looking result.
-
Recover lost details automatically: AI enhances textures, edges, and fine details that may become difficult to see in dark photos, improving overall clarity while maintaining a balanced appearance.
-
Enhance multiple photos more efficiently: Restore and upscale several brightened images in a single workflow, making it easier to process photo collections while preserving image quality.
How to use Vmake Labs to enhance photo brightness and sharpness?
Step 1: Access Vmake Labs "Video & image enhancer" tool
Begin your journey by first accessing Vmake Labs from its official website and then signing into your account. After signing in, select the "All tools" option from the left menu-bar and then choose the "Video & image enhancer" option from the list of given tools.
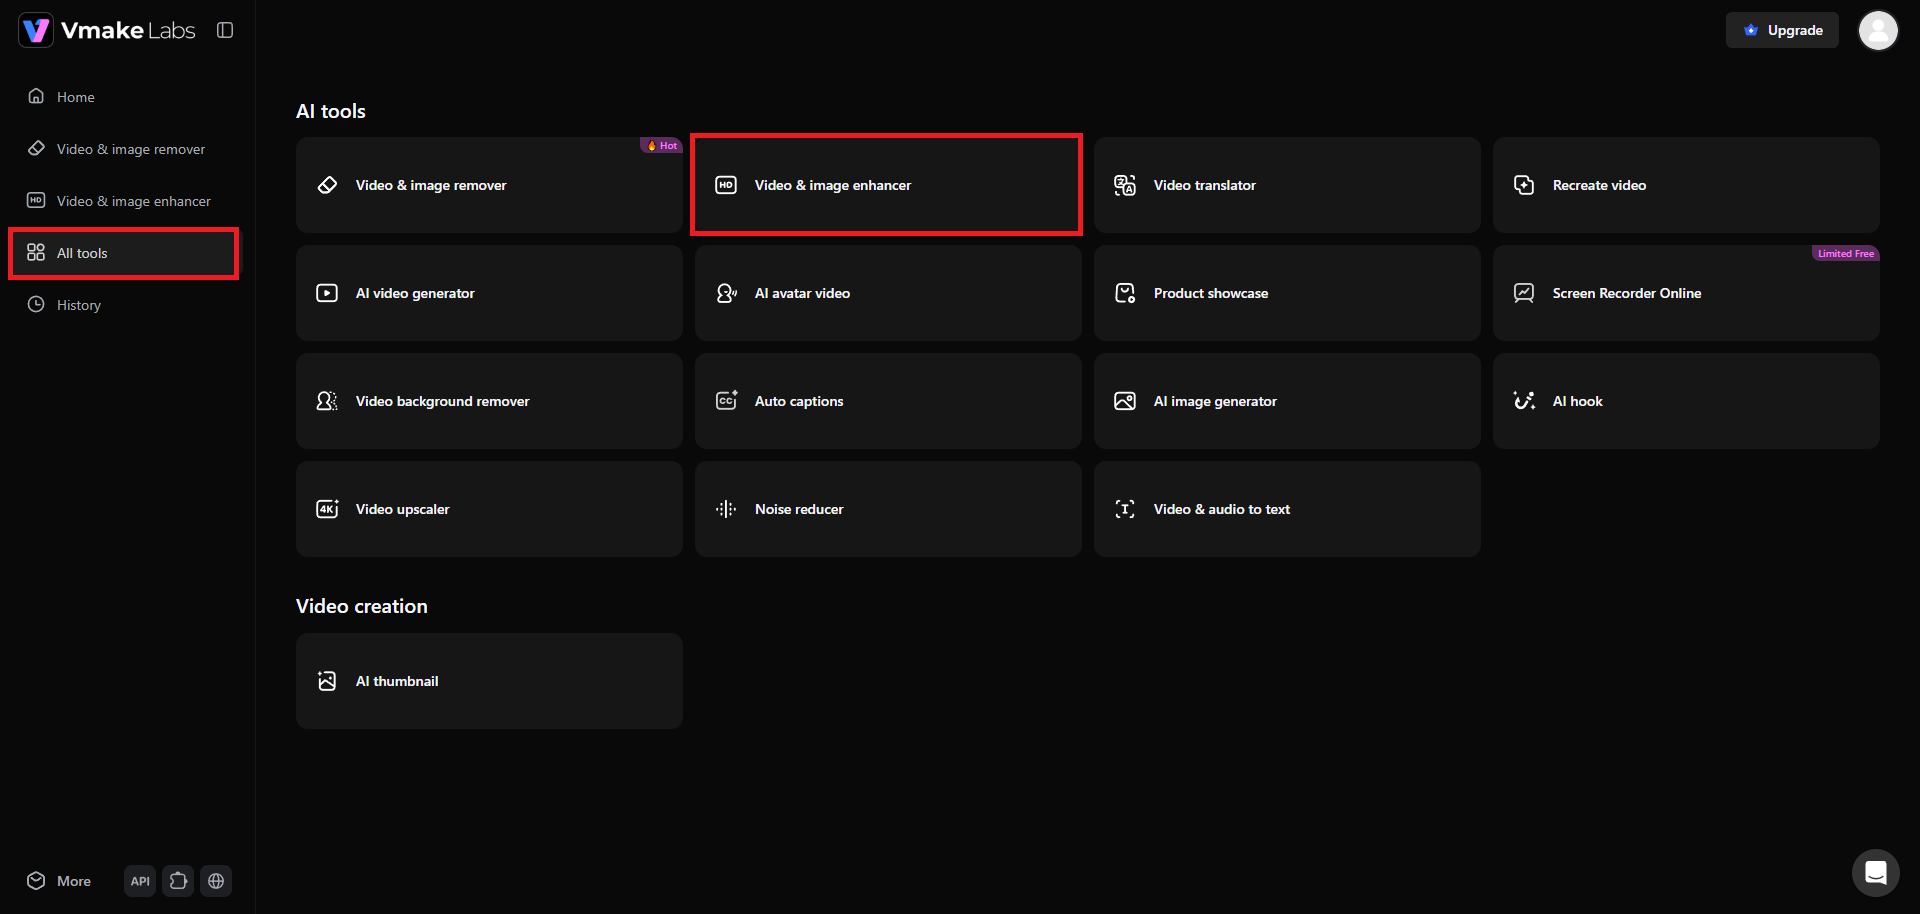
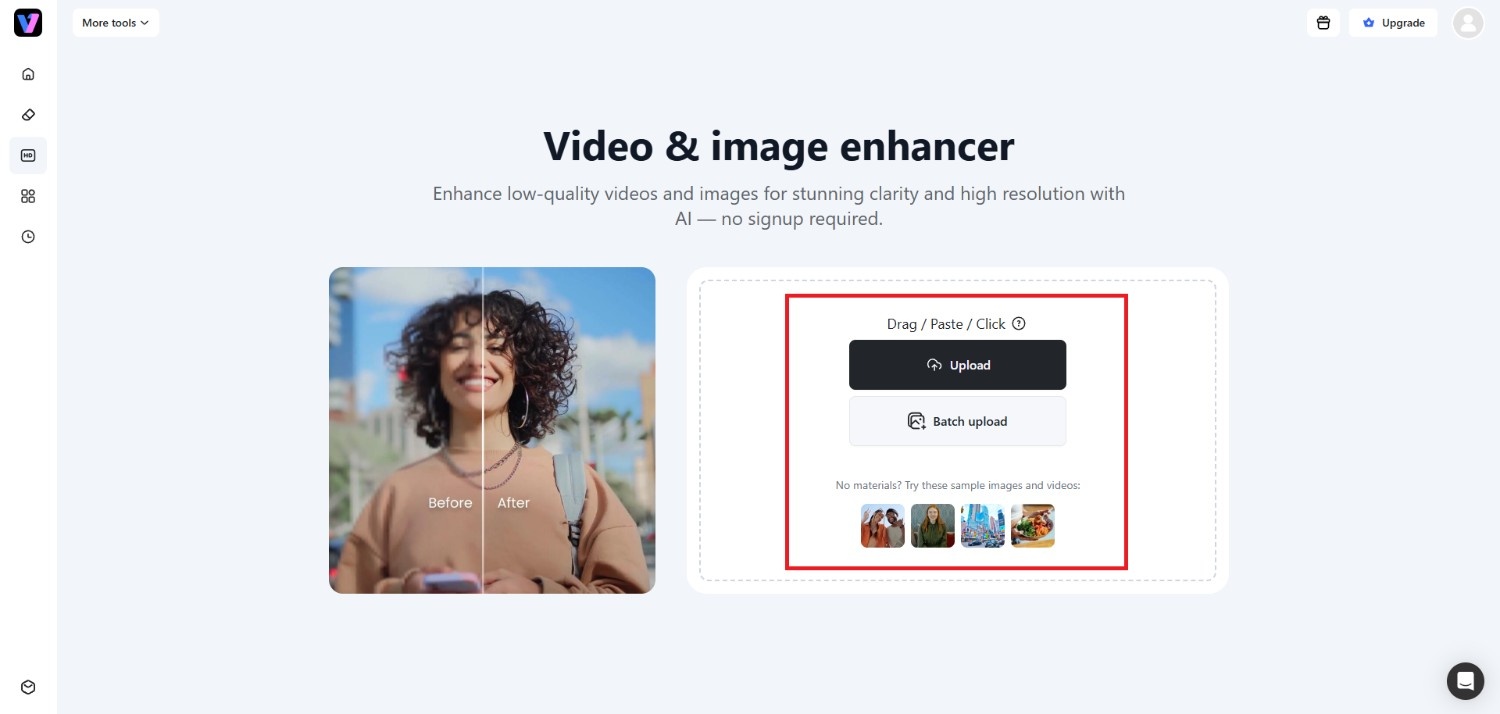
Step 2: Upload the image which you want to enhancer
In the next step, you will need to upload the image that you want to enhance. Vmake Labs image enhancer also supports batch uploading facility, up to 30 images at a single time, which you can use to enhance more than one image.
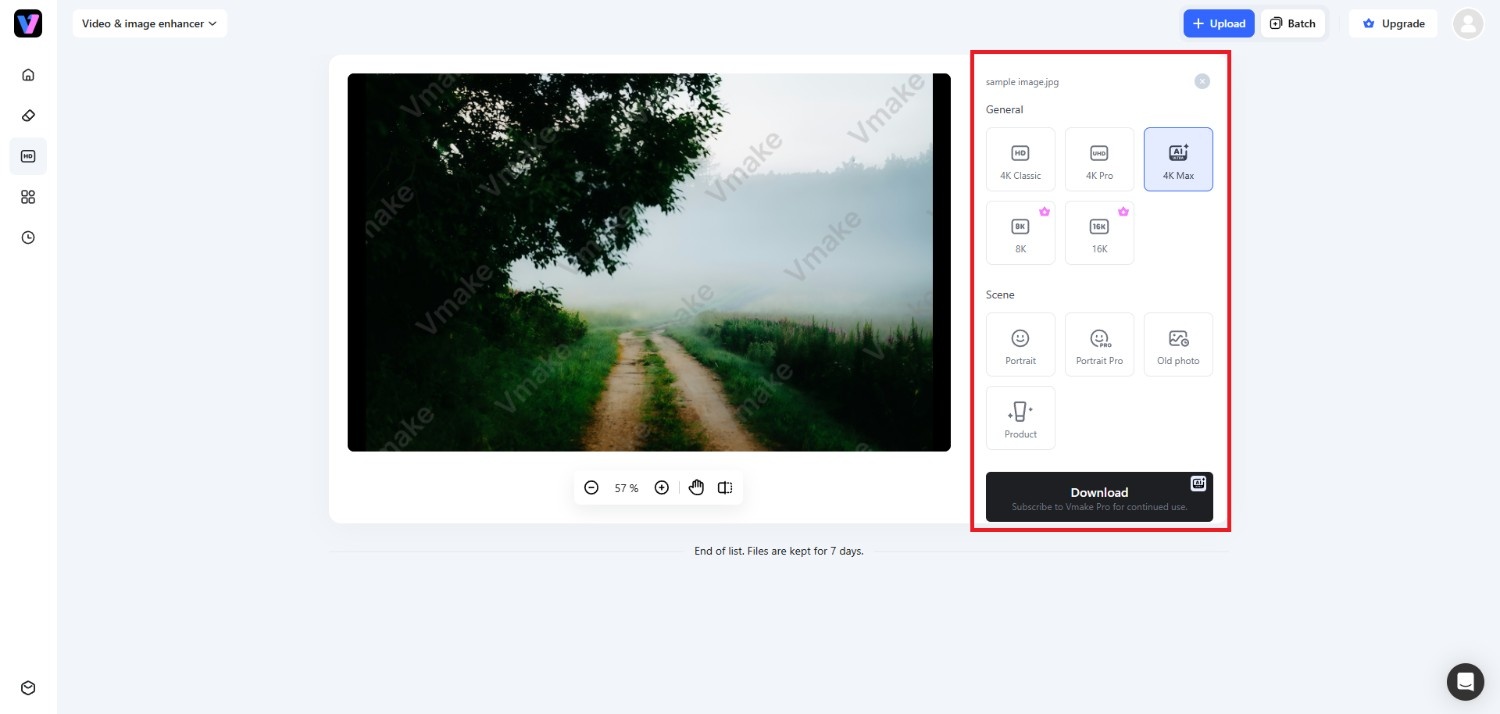
Step 3: Enhance and export the image
After successfully uploading the image, you need to choose between "General" or Scenes" to select your enhancement option. If you want an all-over enhancement, then choose the "General" option, which offers up to 16K resolution enhancement. On the other hand, if you want a specific scene enhancement, like brightening up an old photo or portrait, then choose the available scene options.
The effect will be applied automatically and once you are happy with the results, click on "Download".
Tips to follow when changing brightness for a photo on your iPhone
Achieving clean results is the best way to brighten photos on the iPhone, as it requires careful moderation. Applying adjustments thoughtfully prevents loss of texture and maintains overall photo realism.
-
Guard your highlights to avoid loss of texture and "clipping"
Pushing brightness too high clips light areas, turning clouds, skin tones, or white backgrounds into flat, featureless solid blocks. Monitor bright highlights closely while editing to retain fine surface details, natural gradients, and overall realistic highlights throughout the image.
-
Balance increased brightness with contrast to keep photos grounded
Increasing brightness lowers image contrast, making photos look flat or gray. Pair brightness adjustments with a subtle boost in contrast or black point to preserve shadows, maintain deep blacks, and keep the image grounded with balanced visual depth.
-
Use the brilliance slider to lift dark shadows neutrally
The iOS Brilliance slider intelligently adjusts shadows and highlights simultaneously without overexposing midtones. Use Brilliance alongside brightness to lift dark foreground regions naturally, resulting in balanced illumination across complex, high-contrast scenes without harsh artificial lighting artifacts.
-
Edit in low or neutral ambient lighting for true-to-life adjustments
Editing under direct sunlight or extreme screen brightness skews your perception of photo exposure. Adjust brightness in neutral ambient lighting with True Tone disabled to ensure your final edits look accurate across different viewing screens and printing media.
Why change the brightness of a photo on your iPhone?
Adjusting photo exposure goes beyond basic cosmetic tweaks. Proper brightness correction transforms unusable shots into balanced, clear visual assets.
-
Correcting underexposure in low-light environments
Low-light conditions often cause camera sensors to capture insufficient light, resulting in dark images. Increasing brightness lifts overall illumination across the frame, bringing out hidden foreground elements and making night or evening photos look clear, readable, and properly lit without losing atmosphere.
-
Revealing hidden fine details in shadowed regions
Deep shadows can obscure critical textures, background elements, and facial features. Raising brightness selectively illuminates dark areas, helping recover structural detail, facial expressions, and ambient patterns that were suppressed during image capture due to dynamic range limitations of the sensor.
-
Preparing visuals for eye-catching social media posts
Bright images consistently perform better on digital feeds because screens display them with greater clarity and color vibrancy. Adjusting brightness ensures your photos maintain visual appeal, stand out during fast scrolling, and meet platform content standards across various display devices.
-
Elevating colors and contrast for a natural look
Underexposed images frequently appear muddy, muted, and washed out. Increasing brightness restores proper luminance levels, which allows underlying color hues and natural contrast to emerge, giving the photograph realistic depth, vivid saturation, and accurate tonal fidelity.
-
Standardizing image exposure across your whole library
Photos taken across different environments often suffer from inconsistent lighting levels. Brightness adjustments align lighting across photo sets, creating a uniform visual aesthetic across personal galleries, professional portfolios, real estate listings, or curated social media grids.
Practical scenarios where changing photo brightness on iPhone can be useful
Adjusting photo brightness on your iPhone can improve visibility and make images more suitable for sharing, printing, or professional use. Here are some common situations where it helps:
-
Brightening indoor family photos: Increase brightness to make faces and details more visible in photos taken under dim indoor lighting.
-
Fixing backlit selfies: Improve subjects that appear too dark when strong light comes from behind, creating a more balanced image.
-
Improving travel photos: Enhance landscape and sightseeing photos captured in changing lighting conditions to reveal more details.
-
Enhancing product images for ecommerce: Adjust brightness to make products appear clearer and easier for customers to view in online listings.
Conclusion
Learning how to change brightness for photos on iPhone is useful for improving underexposed images and making everyday photos easier to view. The built-in Photos app provides simple editing tools that work well for quick brightness adjustments, especially when only a few images need minor corrections.
For photos with more challenging lighting issues, noticeable noise, or larger collections of images, AI-based tools such as Vmake Labs can provide additional enhancement options. They can help recover visible details, improve brightness, and reduce noise with less manual editing.
Choosing the right method depends on your editing needs. Whether you use the Photos app or an AI-assisted workflow, thoughtful brightness adjustments can help your images look clearer and more balanced.
FAQs
What is the actual difference between "Exposure" and "Brightness" on iPhone?
Exposure alters overall light capture, shifting highlights and shadows equally across the entire frame. Brightness specifically targets midtones, brightening dim areas while preserving dark blacks and bright highlights without clipping extremes.
Why does my iPhone screen suddenly dim or brighten when viewing photos?
iPhones automatically adjust screen luminance using auto-brightness sensors or Auto-HDR display settings. When viewing high-dynamic-range photos or when the device detects high temperatures, display brightness adjusts automatically to protect hardware.
Can I apply the same brightness adjustments to multiple iPhone photos at once?
Yes. In iOS Photos, edit a photo, tap the three-dot menu, and select "Copy Edits." Select multiple photos, tap the menu again, and click "Paste Edits" to apply uniform brightness adjustments instantly.
Will turning up the brightness make my low-light photos look noisy or grainy?
Yes, brightening dark shadow areas amplifies existing digital sensor noise and grain hidden in underexposed regions. Using AI denoising tools alongside brightness adjustments helps clean up grainy artifacts for smoother results.
How can I undo brightness adjustments and restore my original photo?
Open the edited photo in the iPhone Photos app, tap "Edit" in the top-right corner, and select "Revert" at the bottom right. This removes all edits and restores the original unedited file.
You May Be Interested

Unblurimage 2026 Review: Video Enhancer Hands-On
Best AI Image Upscaler Tools in 2026: Upscale Images to 4K, 8K & Beyond
Best AI Image Enhancer in 2026: Top Tools to Upscale and Fix Blurry Images
Best AI Photo Enhancer Tools in 2026 (Free & Online): Improve Image Quality Instantly
iPhone Speech to Text: Complete Guide for Beginners