How to Brighten Image Instantly: Bring Dark Photos Back to Life
Struggling with dark or underexposed photos? Bring your visuals back to life instantly with advanced AI. Easily brighten an image in seconds. Try Vmake for free and enhance your content today!

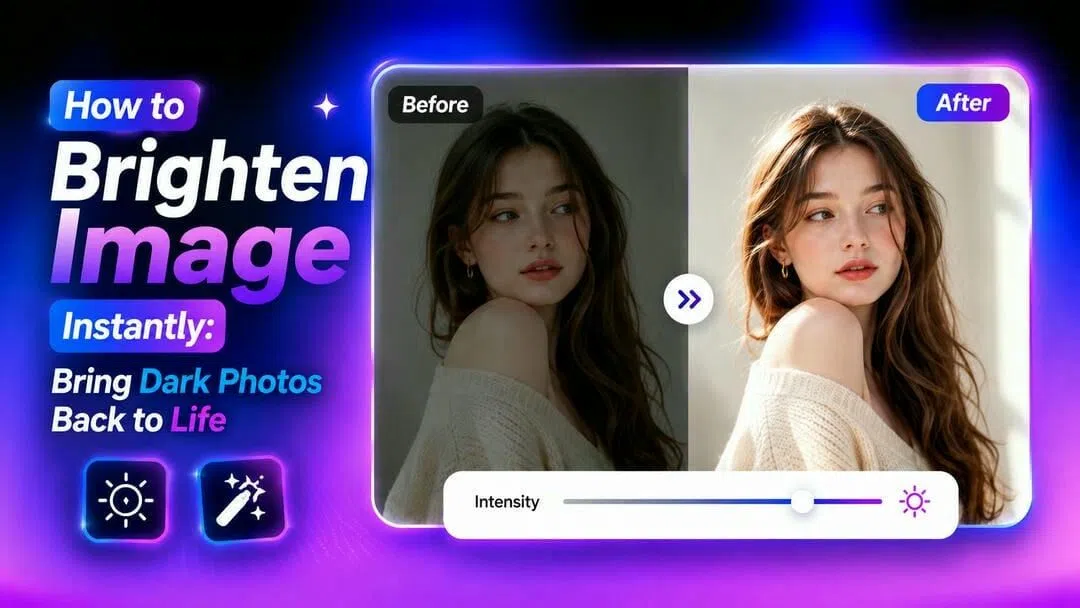
Nothing ruins a good picture faster than terrible lighting. Dark, muddy photos hide your best details and make people scroll right past. But fixing them is actually quite simple. Here is exactly how to brighten an image and bring those underexposed shots back to life in seconds.
Why you need to brighten image files for better engagement
Lighting serves as the absolute backbone of digital media. When creators take time to enhance images with AI, that extra polish directly boosts audience retention and builds trust.
Understanding the profound impact of lighting on digital assets helps creators optimize their workflow. The following breakdown highlights how correcting underexposed visuals directly elevates audience engagement and brand perception:
|
Visual Element |
Impact of Underexposed (Dark) Images |
Benefit When You Brighten Image Files |
|---|---|---|
|
User Engagement |
High bounce rate; viewers miss critical details. |
Captures attention instantly; reduces scroll fatigue. |
|
Brand Perception |
Looks amateurish, untrustworthy, or low-budget. |
Appears polished, credible, and professionally produced. |
|
Visual Clarity |
Shadows obscure facial expressions or product textures. |
Highlights fine details, improving overall image quality. |
Traditional Way: How to Brighten an Image with Photoshop
Photoshop is still the heavy hitter for precise lighting control. Because the manual adjustments go so deep, it is genuinely best suited for experienced designers and photographers who already know their way around complex editing workflows. Using adjustment layers lets these pros paint light in by hand, keeping the original source file totally safe.
Step 1: Set up the adjustment layer
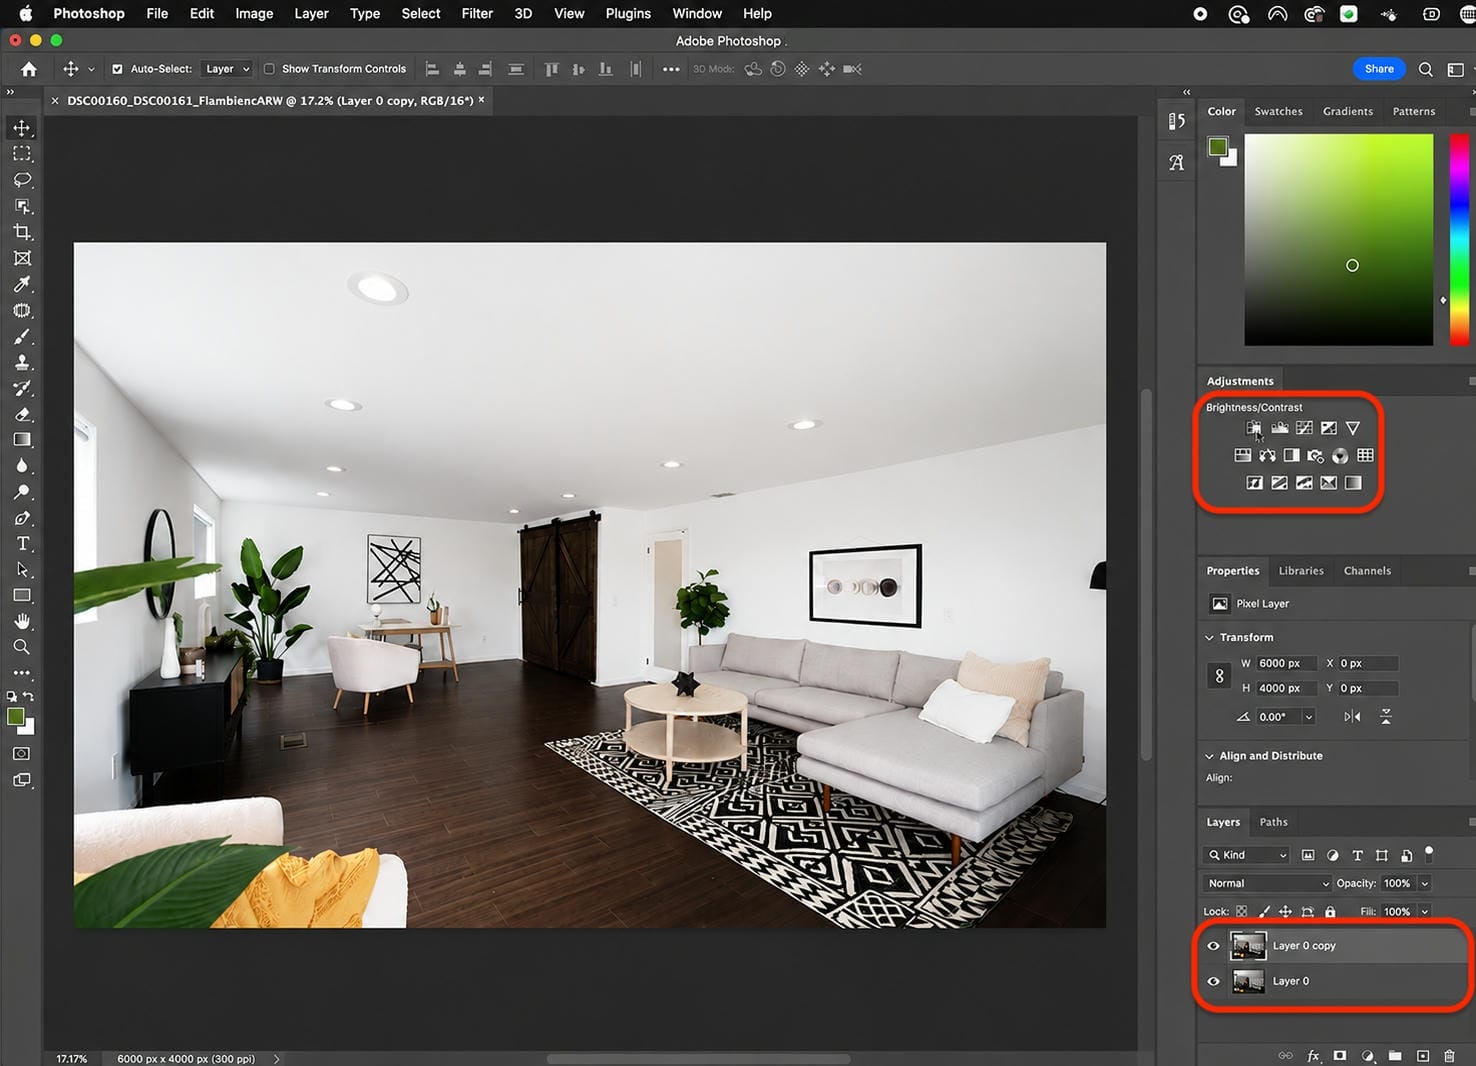
Open the file and duplicate the background layer. Head over to the Adjustments panel and click the Brightness/Contrast icon.
Step 2: Push the brightness slider
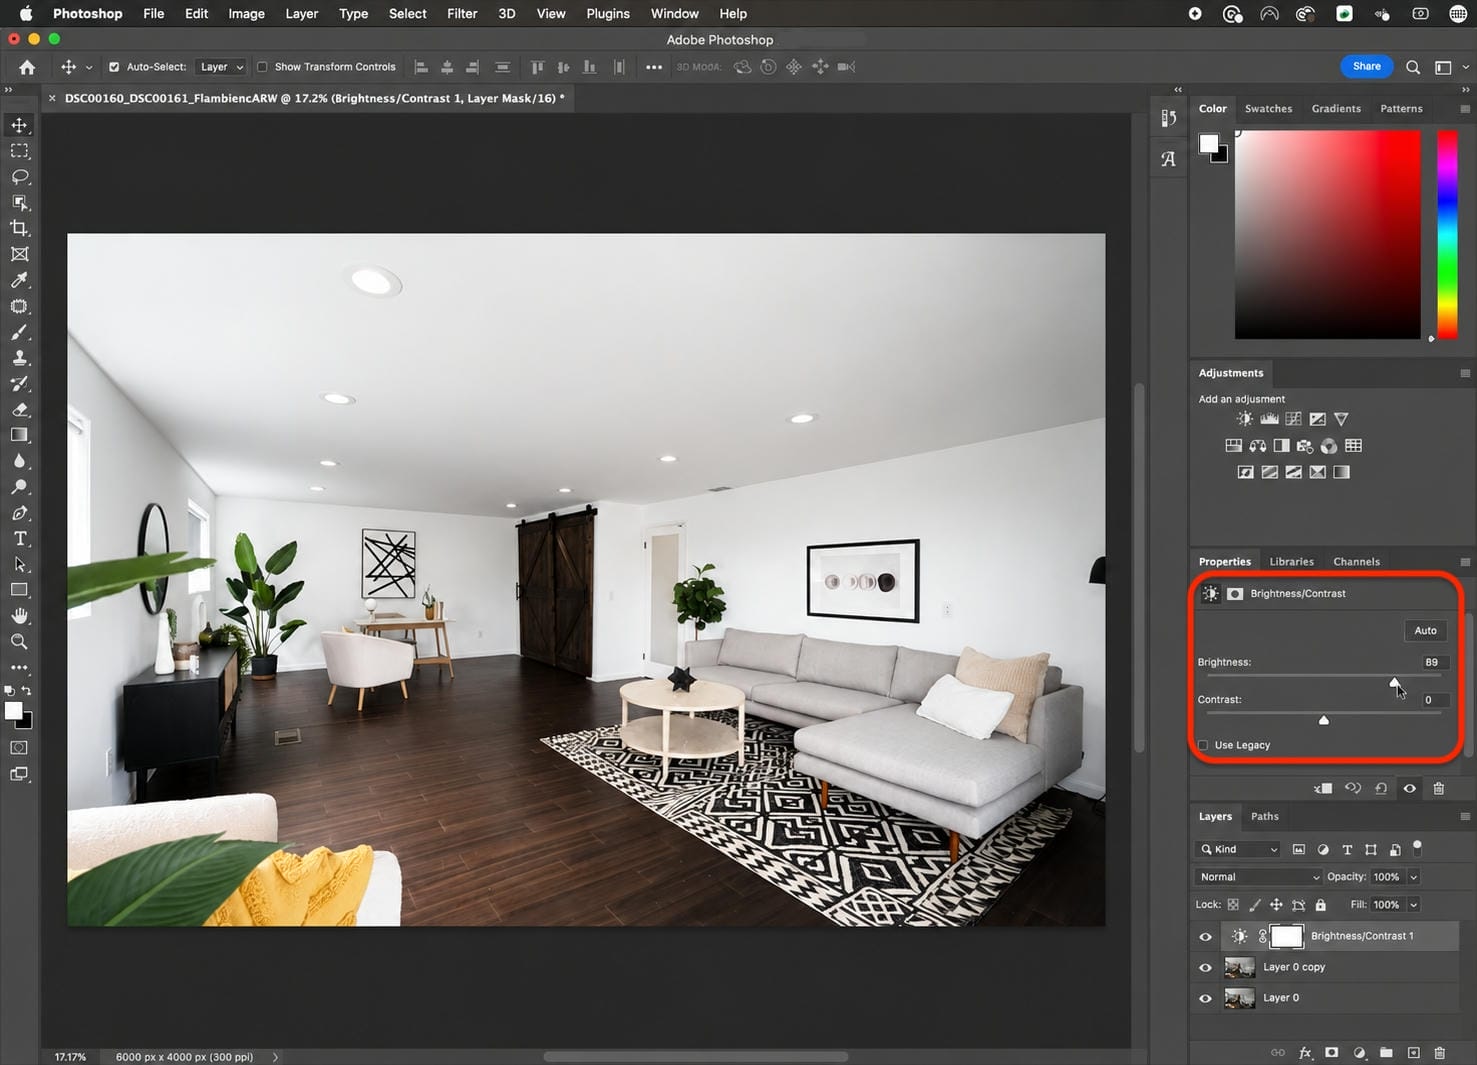
In the Properties tab, drag the Brightness slider right. Keep going until those darkest shadows look properly lit, ignoring blown-out areas for a second.
Step 3: Brush in the light selectively
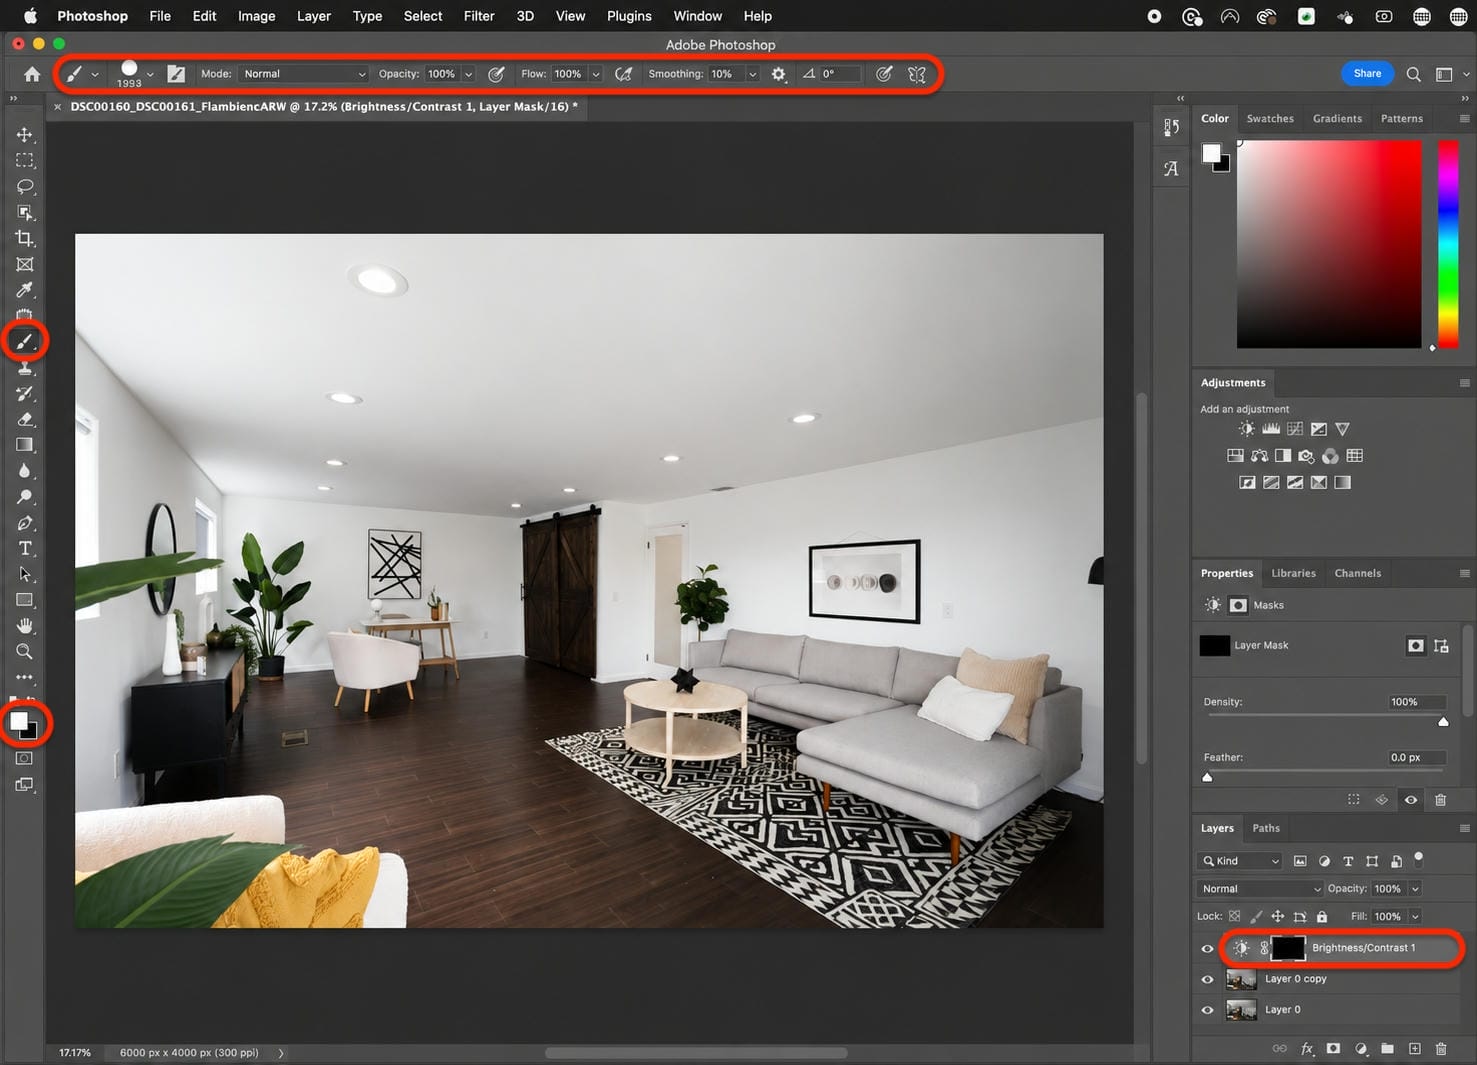
Click the layer mask thumbnail and press Ctrl+I (Cmd+I on Mac) to turn it black. Grab a soft, white brush tool, set the hardness to 0%, lower the brush opacity, and paint over the dark patches to reveal the brightness smoothly.
Step 4: Save the final edit
When the lighting looks balanced, go to the file menu and export the finished photo as a standard JPG or PNG.
Photoshop vs. AI Image Brightening
If you are stuck deciding between firing up a massive software program or using a quick web tool, it usually comes down to your experience level and how much time you have. Here is a quick breakdown of how traditional manual editing stacks up against modern AI tools:
|
Feature |
Adobe Photoshop |
AI Image Brightening |
|---|---|---|
|
Ease of use |
Steep learning curve; requires manual masking. |
Beginner-friendly; zero editing skills needed. |
|
Processing time |
Several minutes per photo. |
A few seconds. |
|
Installation |
Heavy desktop software is required. |
Usually web-based; no download is needed. |
|
Batch support |
Yes, but requires setting up complex actions. |
Often built-in with one-click bulk processing. |
|
Automatic enhancement |
No; relies entirely on the user to balance light. |
Yes; AI automatically analyzes and fixes lighting. |
|
Best users |
Professional photographers and experienced designers. |
Marketers, content creators, and absolute beginners. |
While Photoshop gives you pixel-perfect control over every shadow, it can be total overkill if you just need to quickly salvage a dark photo for social media or a blog post. If speed and simplicity are your main goals, letting an AI handle the heavy lifting is usually the better move.
AI Resolution: How to Brighten an Image with Vmake Labs
Vmake Labs is an ultimate AI social video studio that helps small businesses generate, enhance, and optimize videos to capture attention, build brands, and drive sales. When searching for the most reliable way to brighten an image, Vmake Labs Image Enhancer stands out. Powered by a self-developed large model repair algorithm, it utilizes world-leading AI completion capabilities to intelligently address blurring, over-darkness, and corruption, while actively eliminating AI artifacts like fake faces, jitter, and unnatural reflections.
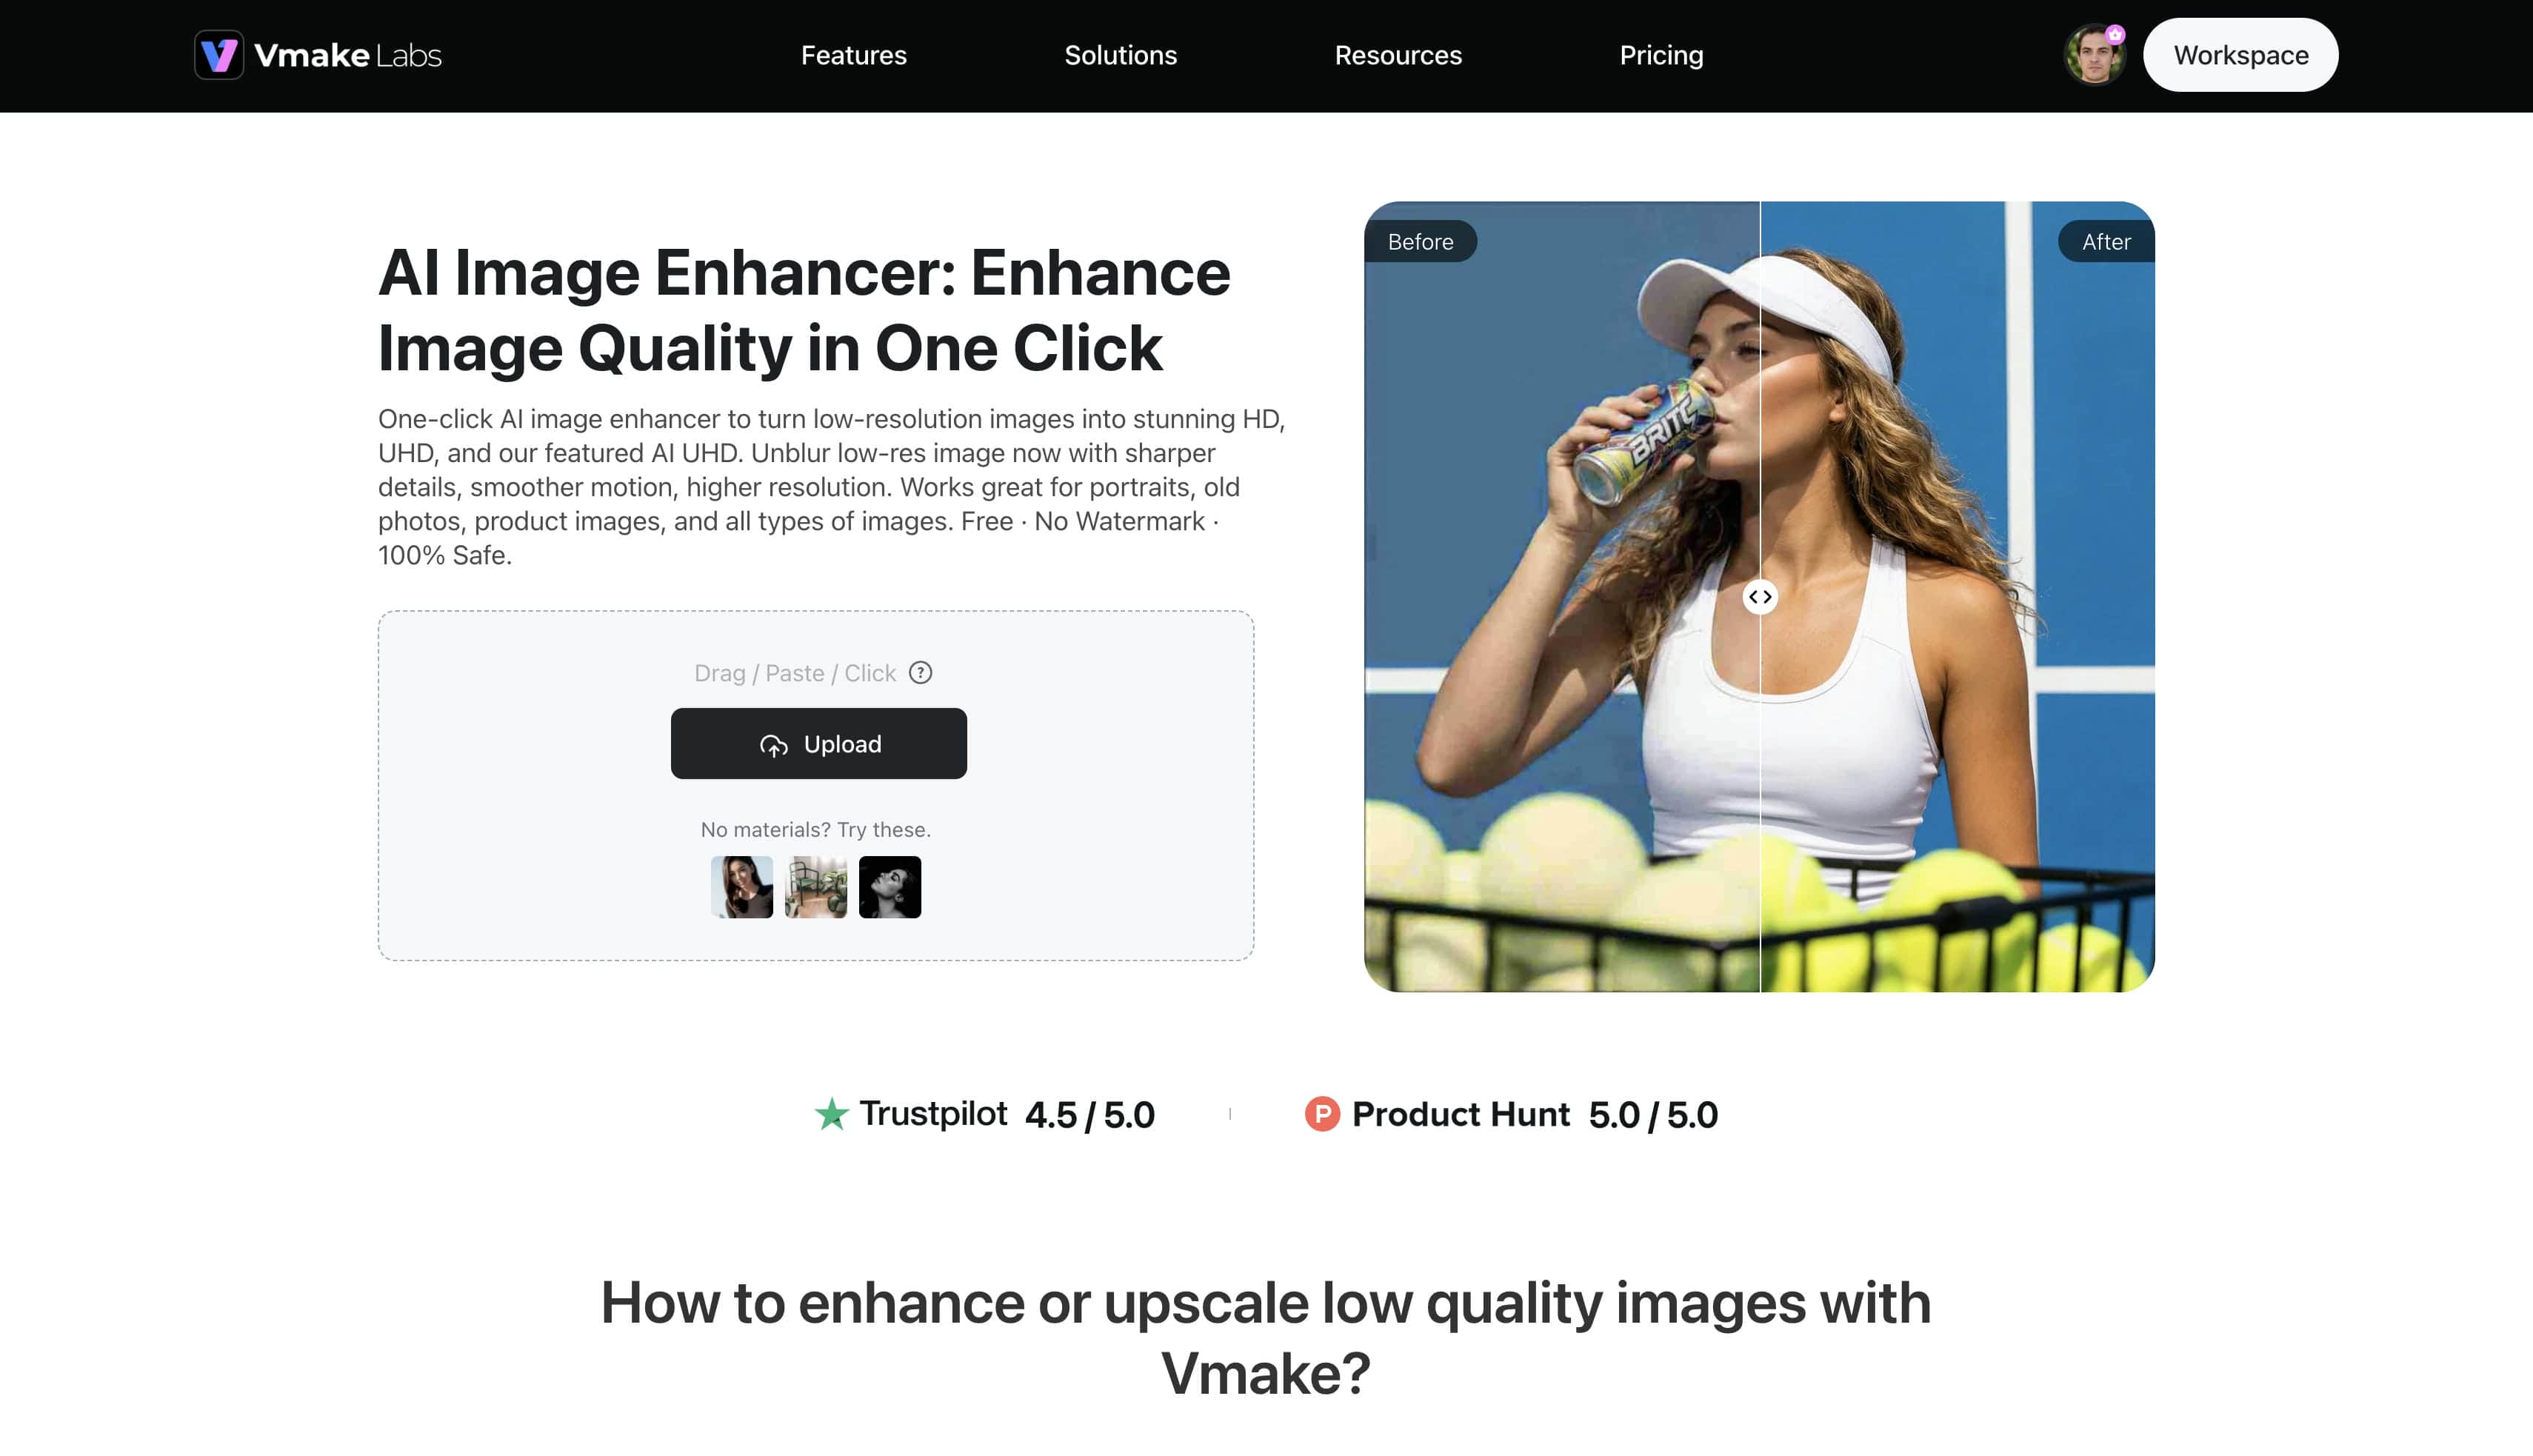
Key features of Vmake Labs Image Enhancer
-
Portrait Mode: Specialized in Portrait Photography to naturally brighten faces and correct uneven shadows without washing out skin tones. It preserves natural facial characteristics effortlessly.
-
Portrait Pro Mode: Based on portrait enhancement, large AI models generate more skin texture and improve clarity for professional-grade results. This advanced setting ensures high-end commercial quality.
-
Product Mode: Specialized research on E-commerce scenarios ensures product textures and colors are accurately restored and brightened. Accurate color representation builds buyer trust instantly.
-
Old Photo Restoration: Deep learning algorithms specifically target damaged, faded vintage photos. Using dedicated photo restoration mechanics, historical details hidden in dark shadows become visible again.
-
General Resolution Enhancement: Supports upscaling outputs to HD, UHD, AI UHD, 8K, and even 16K. Visuals receive an incredible boost in sharpness and clarity.
-
Efficient Batch Repair: One-click batch processing of up to 30 creatives at once, offering a massive concurrency advantage over typical editing tools. Workflows become significantly faster for bulk operations.
Step-by-step guide: How to brighten an image with Vmake Labs
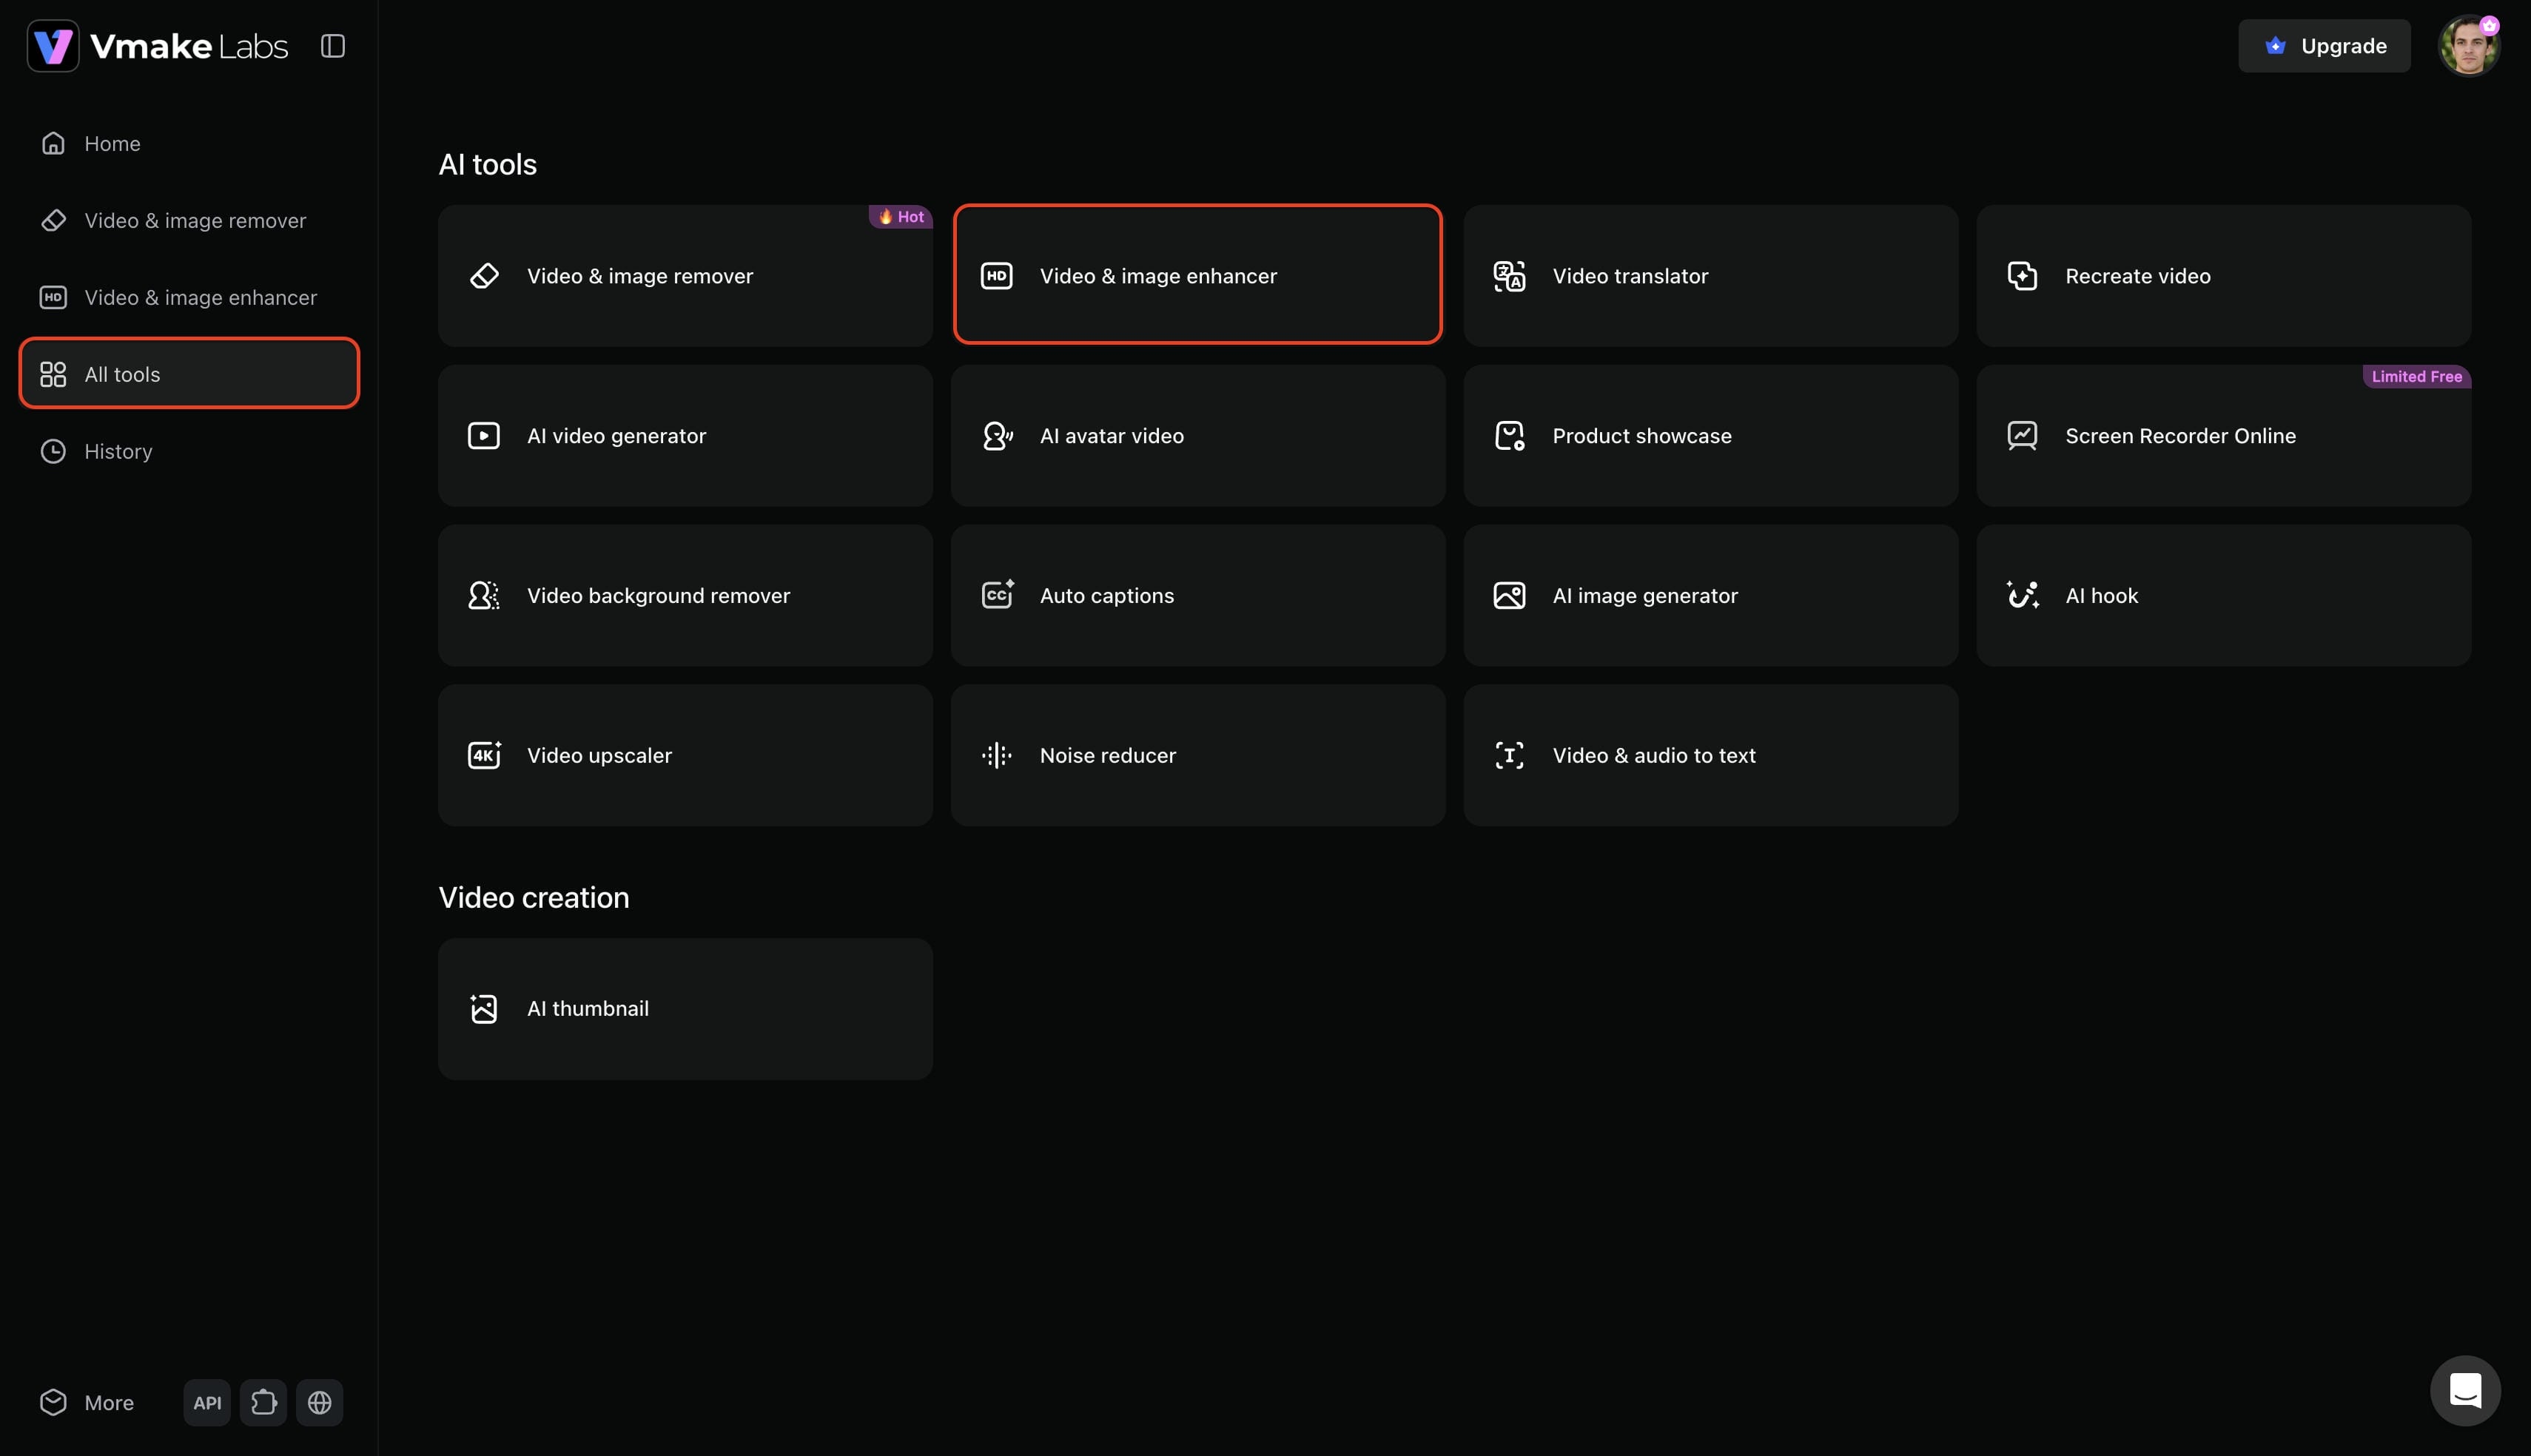
Step 1: Access Vmake Labs "Video & image enhancer" tool
Begin the journey by accessing the official website and signing into an account. Select the "All tools" option from the left menu bar, and then choose the "Video & image enhancer" option from the list of provided tools.
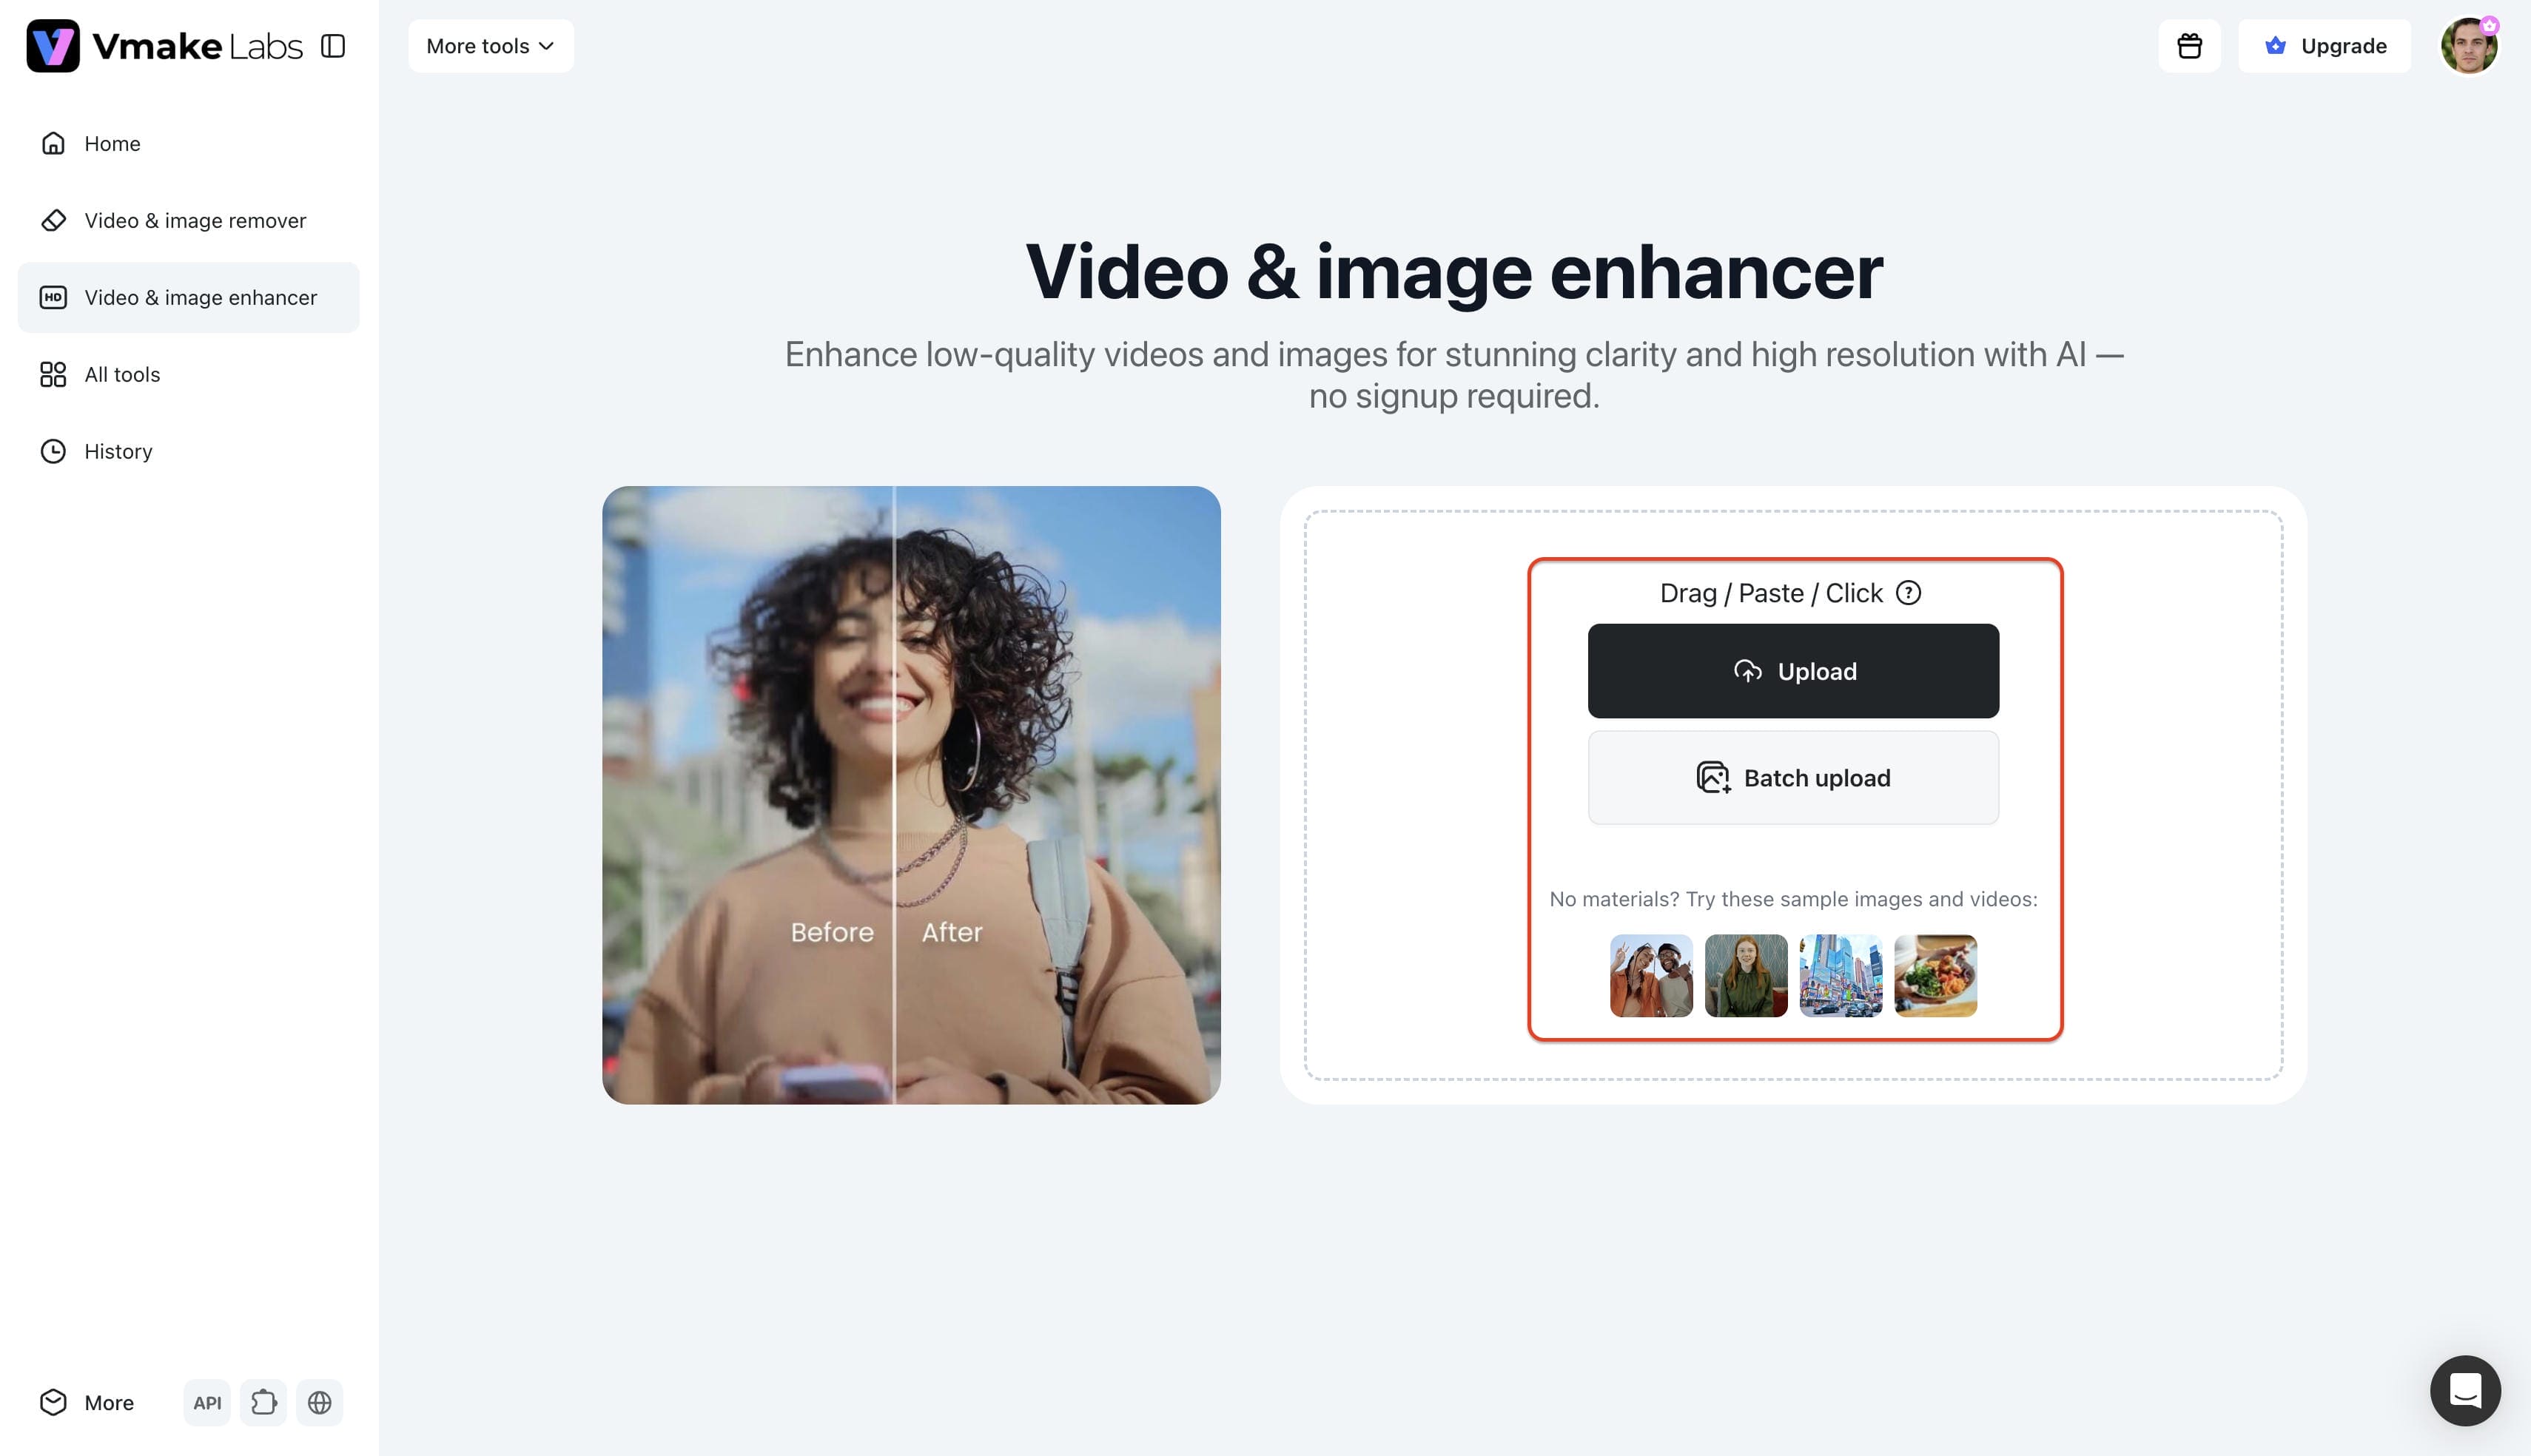
Step 2: Upload the image to enhance
Next, upload the file requiring adjustment into the workspace. The system supports a batch uploading facility, allowing up to 30 files at a single time for bulk processing.
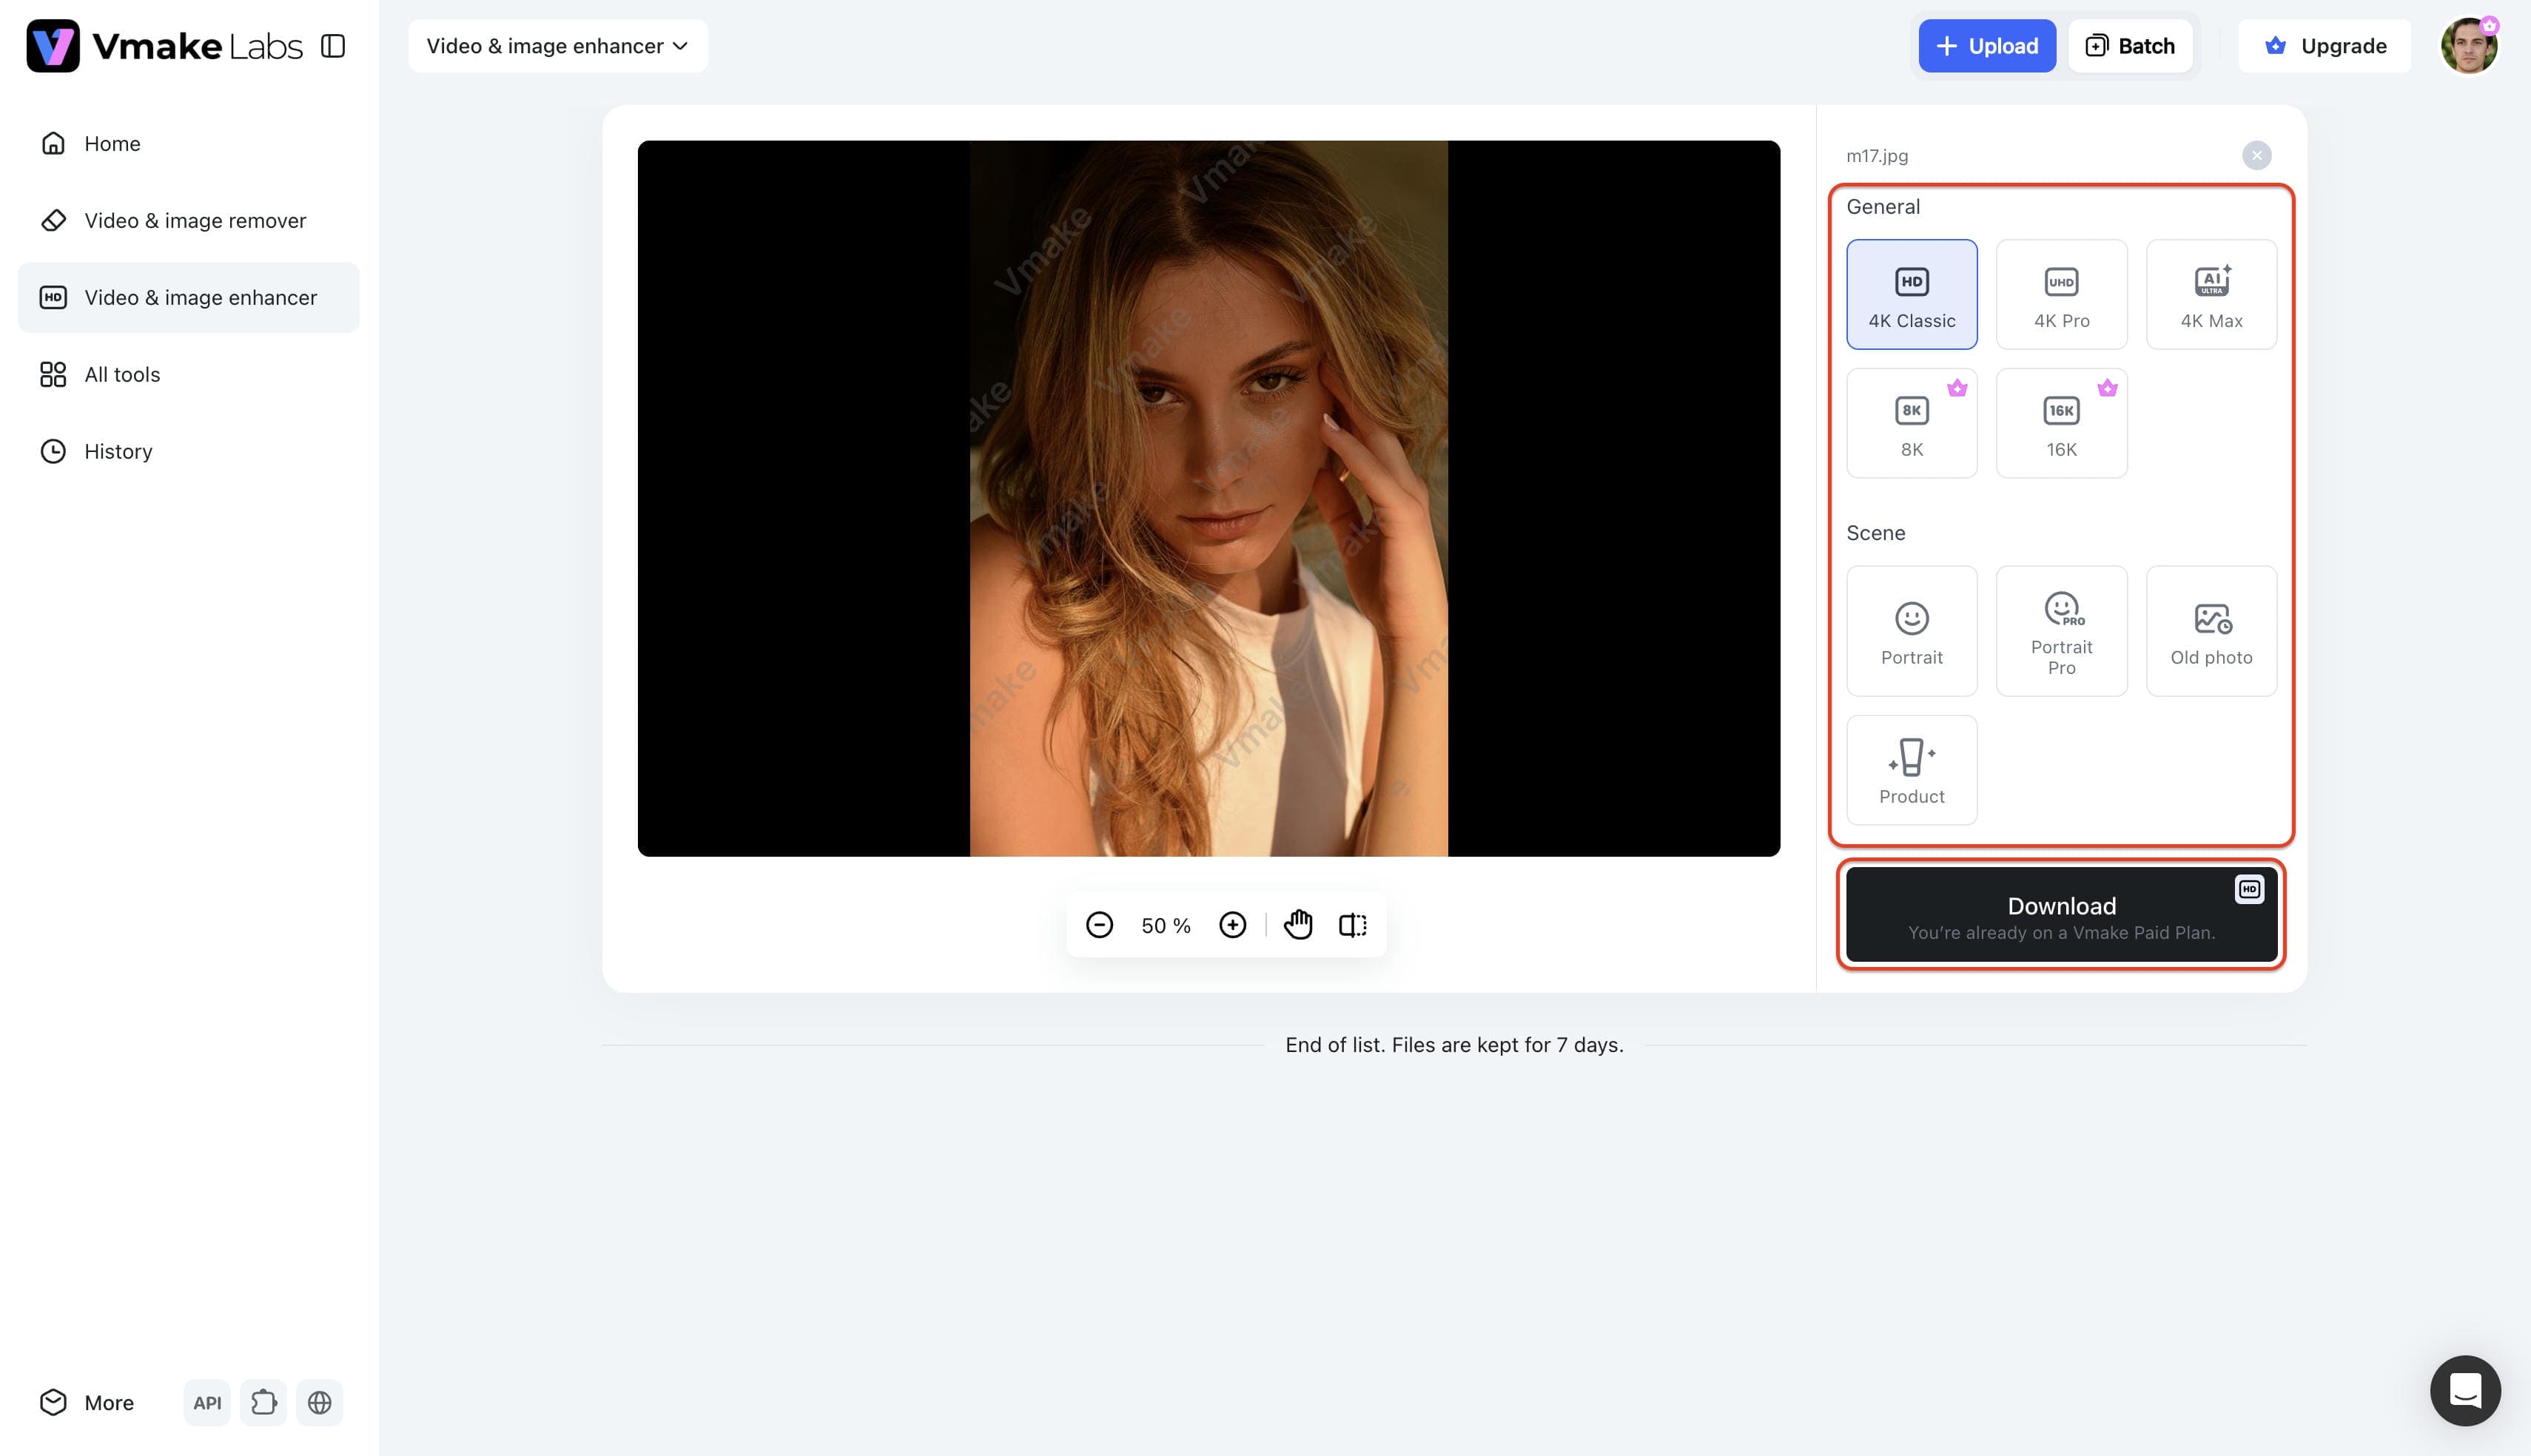
Step 3: Enhance and export the image
Choose between "General" or "Scenes" to select the preferred enhancement option. If an all-over enhancement is desired, select "General", which offers up to 16K resolution enhancement. For specific scenes, like brightening an old photo or portrait, choose the available scene options. The effect applies automatically, and clicking "Download" saves the finalized result.
Best Practices to Follow When You Brighten an Image
Getting the lighting right means paying attention to the specific context of a photo. A universal brightness slider rarely produces a natural aesthetic, meaning different types of shots require tailored adjustments.
-
For social media marketers: Since 52% of enhancement tool users work in social media, keeping that authentic look matters immensely. Instead of cranking up the exposure and blowing out the highlights, try using specialized portrait settings. This targeted approach lifts shadows around the face while keeping skin textures crisp. Ultimately, the objective is to stop the scroll, not blind the audience.
-
For e-commerce product images: E-commerce relies heavily on accurate color representation. When lifting shadows for a storefront, specialized product modes ensure the true color remains intact. High-definition details build buyer trust and minimize return rates, proving crucial for revolutionizing e-commerce product photography across digital platforms.
-
For restoring vintage or family photos: Reviving old memories means brightening is only half the battle. Gently lifting dark shadows while addressing physical damage ensures historical integrity remains intact.
-
For travel and outdoor photography: Shooting directly against the sun leaves stunning landscapes looking flat. Focus on pulling out hidden textures in the foreground while preserving natural sky gradients. This technique retains breathtaking realism.
Common Mistakes to Avoid When Lightening Dark Photos
Attempting to brighten an image manually often leads to predictable traps that compromise visual integrity. Sidestepping these pitfalls guarantees a professional finish.
-
Overexposing the highlights: Pushing overall brightness too far blows out the lightest parts of the picture. Detail gets erased, leaving solid white patches that cannot be recovered.
-
Introducing extreme color noise: Increasing exposure on a severely underexposed photo often reveals heavy, colorful pixelation hidden in the shadows. Advanced models intelligently remove this grain rather than amplifying it.
-
Washing out contrast: Uniform adjustments flatten the picture, making it look dull and hazy. True enhancement requires lifting shadows while maintaining deep blacks to keep the visual dynamic, often achieved by utilizing a dedicated color correction upscaler.
-
Neglecting color saturation and warmth: Heavy exposure adjustments often leave skin tones looking ashy or unnatural. High-quality edits require rebalancing vibrancy so the photo looks completely natural.
-
Applying blanket brightness: A master slider affects the entire photo equally, often ruining well-lit areas. Targeting specific shadows distinguishes between dark regions and properly exposed subjects.
Conclusion
Mastering how to brighten an image effectively serves as a necessary skill for anyone working with digital media. While manual adjustments require time and expertise, modern algorithmic solutions have completely revolutionized everyday workflows. Fixing underexposed shots, restoring old memories, and elevating product visuals now takes merely seconds. Stop letting poor lighting dictate the quality of visual content. Embracing advanced technology unlocks vibrant, high-resolution imagery effortlessly, ensuring every photograph reaches its maximum aesthetic potential without compromising original details.
FAQs
How can I brighten an image without losing quality?
Maintaining quality requires lifting shadows selectively rather than applying a universal exposure increase. AI-driven algorithms analyze the pixel data to brighten specific areas while preserving contrast and sharpness.
Can I batch brighten an image collection?
Yes, processing multiple files simultaneously saves significant time for large projects. Advanced platforms allow up to 30 creatives to be uploaded and enhanced in a single click.
What are the upload limits for the Vmake enhancer?
Users can upload files sized up to 20MB with a resolution of less than 2K. Accepted formats include standard digital files like JPG, PNG, and JPEG for comprehensive media management.
Does brightening an image fix blurry details?
Adjusting lighting alone does not automatically resolve underlying blurriness or focus issues. However, utilizing an integrated AI image fixer repairs corrupted pixels while correcting the exposure simultaneously.
What file formats are supported for image brightening?
Most versatile platforms accept a wide variety of formats including JPG, PNG, and JPEG. Certain advanced tools also support video formats like MP4 and MOV for moving media.
You May Be Interested
Best AI Image Enhancer in 2026: Top Tools to Upscale and Fix Blurry Images
Best Photo Eraser Tools in 2026: Remove Objects, Text & People from Photos

5 Free Apps to Remove Watermarks From Photos in 2026

How to Fix Blurry Photos in 2026: Best Tools to Sharpen Blurry Images