Ultimate Guide: How to Remove Faded Parts of a Scanned Image
Easily remove faded parts of scanned images. From simple brightness adjustments to quick online AI restoration, here is how to recover lost details in your scans. Enhance your images today!

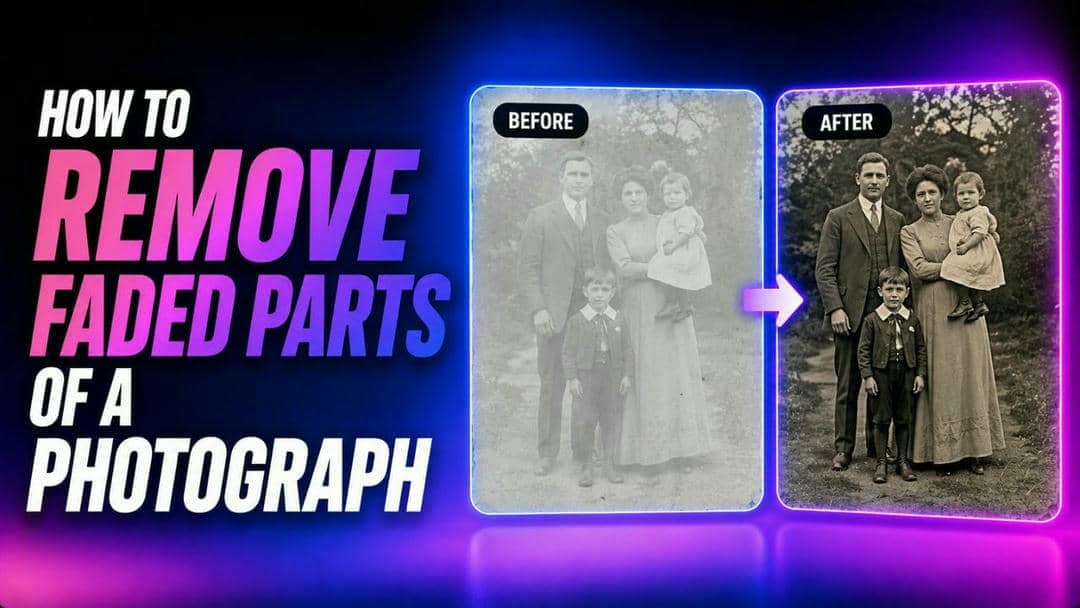
Old photographs and scanned documents often lose clarity over time, leaving certain areas faded or difficult to recognize. While physical damage cannot always be reversed, digital restoration techniques can improve visibility and recover lost detail. This guide explains why scanned images fade, how to enhance them manually, and how AI-powered tools such as Vmake Labs can simplify the restoration process for both personal and professional projects.
Why do parts of a scanned image become faded?
Different factors can affect only certain areas of a printed photograph or scanned document. Understanding these causes helps you choose the most suitable restoration method before editing the image digitally.
|
Degradation Cause |
Mechanism & Impact |
Visual Result on Scanned Image |
|---|---|---|
|
Natural Aging & Chemical Breakdown |
Chemical layers react with oxygen and pollutants over many years. |
Reduced color density and contrast; localized fading alongside unchanged areas. |
|
Light, UV, & Heat Exposure |
Sunlight, UV radiation, and high temperatures weaken photo pigments and inks. |
Uneven brightness, washed-out colors, and noticeable inconsistencies. |
|
Acidic Album Adhesives |
Acidic adhesives in older magnetic albums slowly react with the photo paper. |
Discolored surfaces, faded patches, and permanent marks. |
|
Poor Scanner Calibration & Settings |
Incorrect brightness capture, lost tonal differences, and low resolution. |
Loss of fine detail; faded areas appear even lighter and less distinguishable. |
|
Moisture, Humidity, & Environment |
Dust, humidity, and airborne contaminants gradually attack the print. |
Localized fading, stains, discoloration, and uneven image quality. |
Common situations where faded image restoration is useful
Faded image restoration is helpful in many everyday and professional situations. Restoring image quality makes photos and scanned files easier to view, preserve, and share.
-
Restoring family photo albums: Bring back faded details in treasured family photographs before preserving or sharing them with future generations.
-
Digitizing historical archives: Improve the visibility of old photographs and archival materials for easier storage, research, and digital preservation.
-
Recovering scanned documents: Enhance faded scans so printed text, signatures, and important details become easier to read.
-
Preparing photos for printing: Restore colors and contrast before printing to produce clearer, more balanced photo prints.
-
Restoring old film scans: Correct faded colors and low contrast in digitized film negatives or slides for a more natural appearance.
How to fix faded scanned images manually?
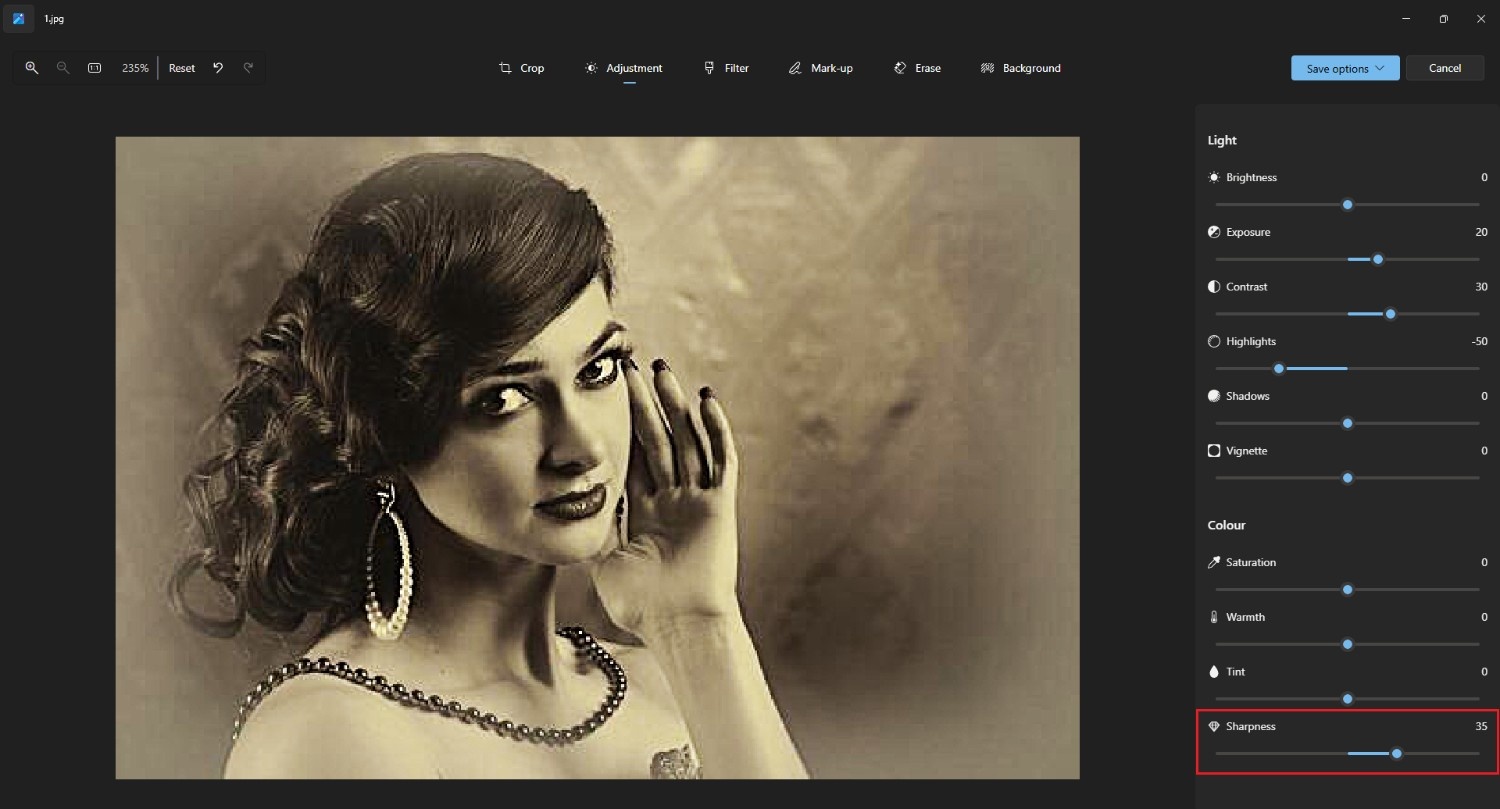
Basic image editing software includes several adjustment tools that can improve faded scans. Although these methods require manual effort, they often help recover visibility without introducing major changes to the original photograph. Here we take the Windows built-in tool, Microsoft Photos, as an example.

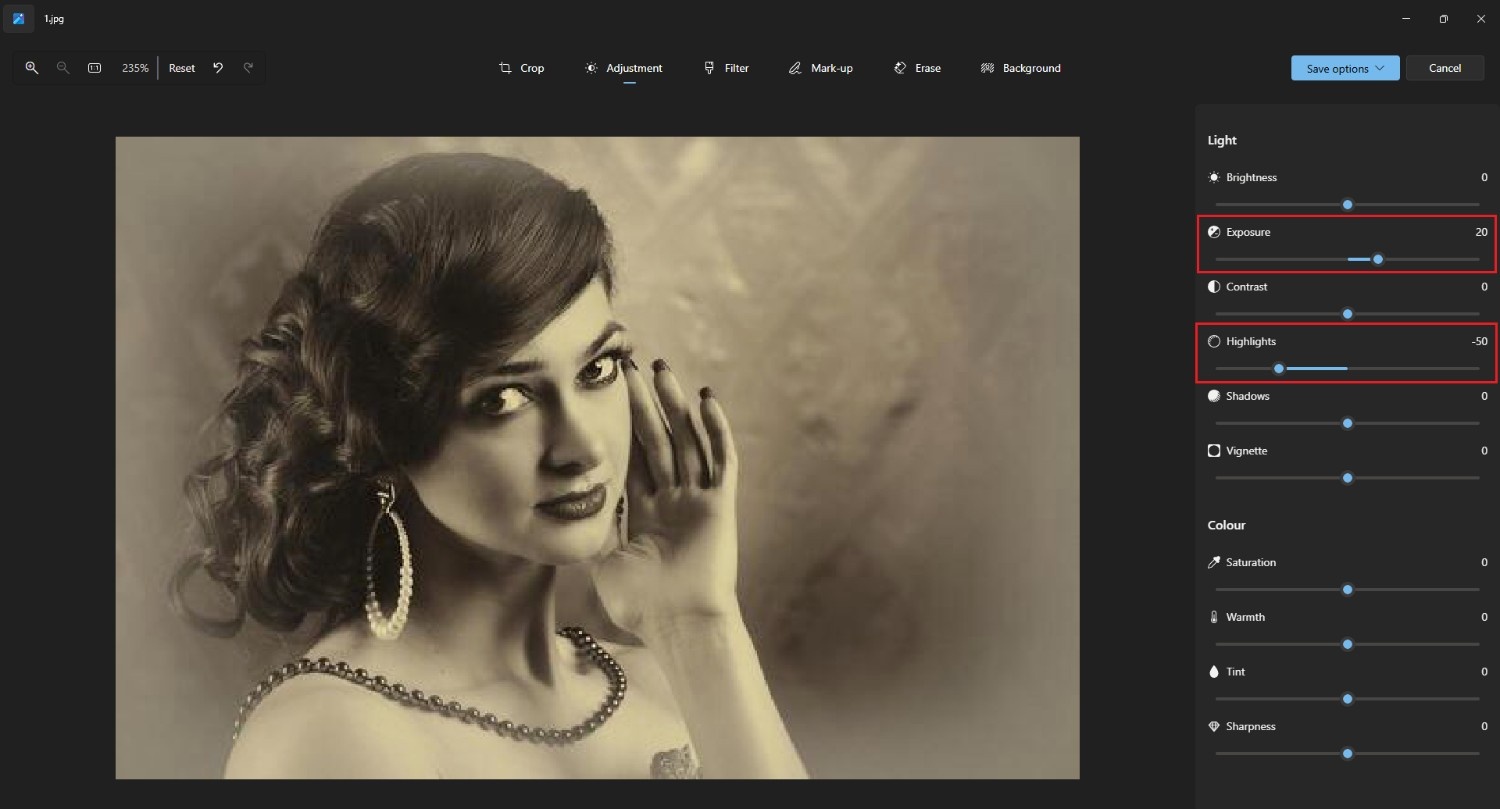
Step 1: Correcting exposure and highlighting lost details
Reduce excessive highlights while increasing shadow detail to recover washed-out regions. Small exposure adjustments often reveal hidden textures without significantly affecting the remaining parts of the scanned photograph.
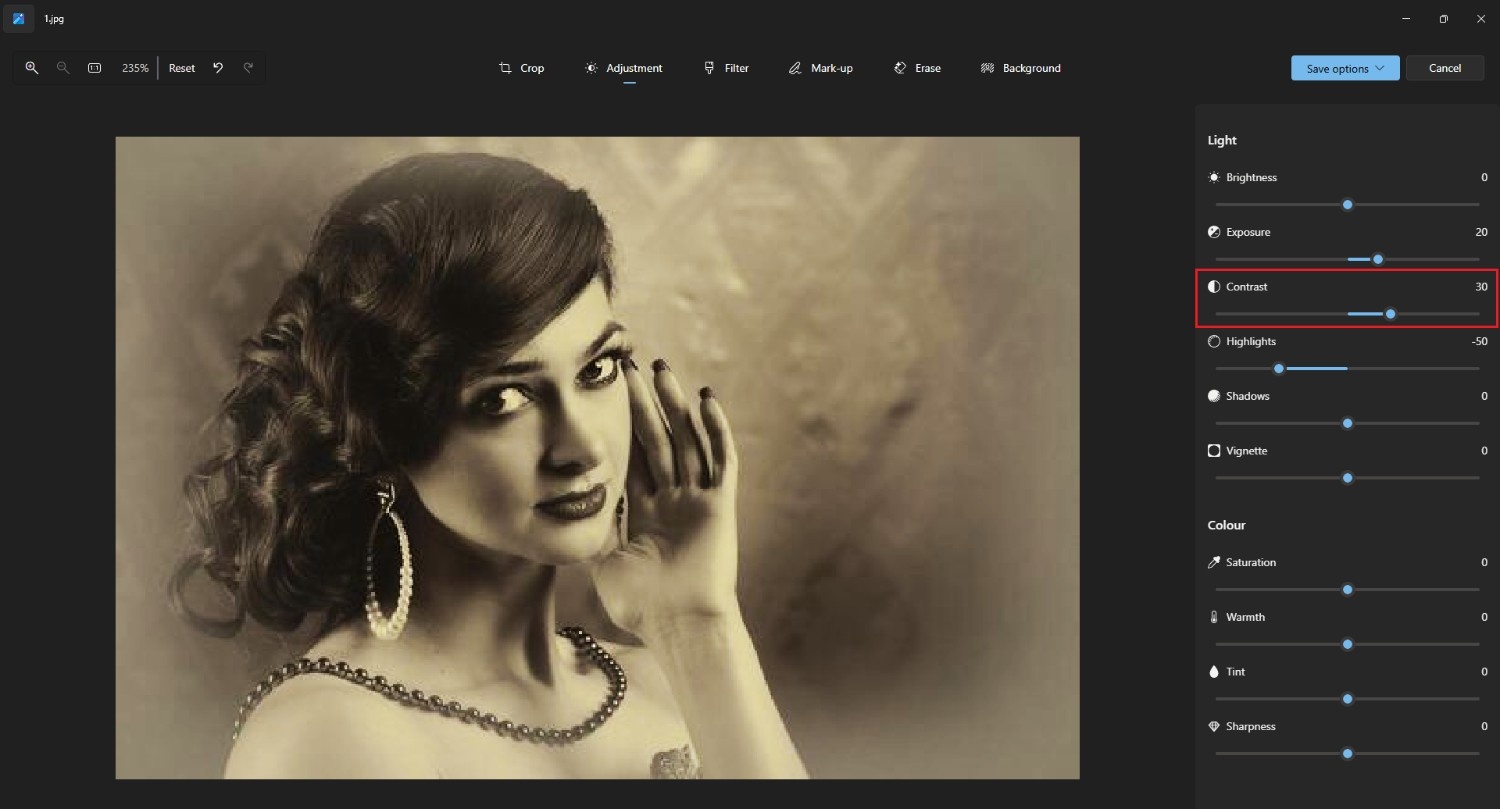
Step 2: Increasing contrast to recapture faded borders
A moderate contrast adjustment improves separation between light and dark areas. This helps restore object boundaries, text, and facial features that become difficult to distinguish because of uneven fading.
Step 3: Applying edge sharpening filters
Edge sharpening enhances fine outlines and improves perceived clarity after exposure corrections. Apply sharpening conservatively to avoid creating halos, excessive noise, or unnatural textures within the restored image.
How to remove faded parts of a scanned image with AI?
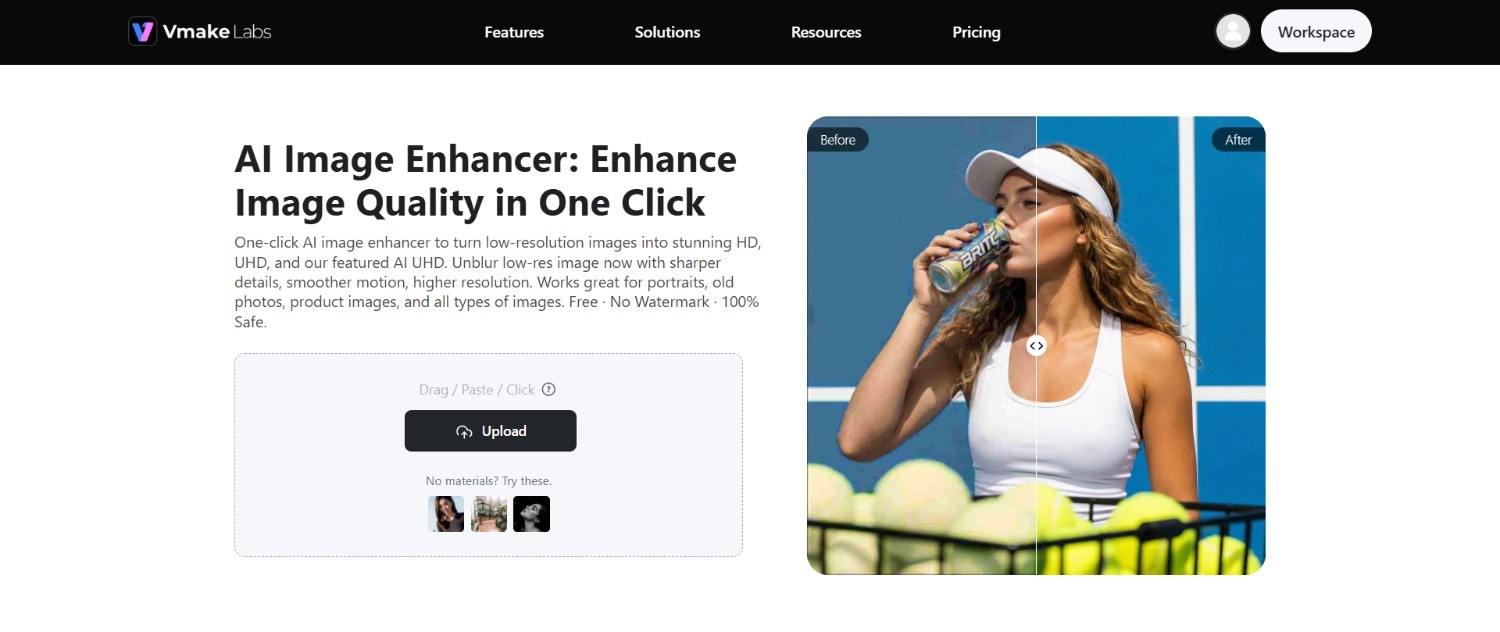
Restoring faded scans manually can be effective for minor issues, but processing multiple images or recovering fine details often requires additional time and effort. Vmake Labs Image Enhancer offers an AI-powered image enhancement workflow that analyzes scanned photos and automatically improves sharpness, color, and texture with minimal manual editing.
Users can choose enhancement modes based on the image type, adjust output quality for different purposes, and process multiple images in one session. This makes it a practical option for preserving family photographs, digitizing archives, or preparing scanned images for printing and online sharing.
Key features of Vmake Labs image enhancer
-
Multi-level sharpness enhancement: Choose from a range of output sharpness levels, HD, UHD, AI UHD, 8K, and 16K, letting users scale image quality to match their exact use case, from web thumbnails to large-format prints.
-
Scene-aware enhancement modes: Select a dedicated mode such as Old Photo or Portrait, and the AI applies model-specific processing tuned to that scene type, restoring fading, blur, and detail loss appropriately for each image category.
-
Automatic color and detail correction: AI analyzes each upload and enhances color, texture, and fine detail in a single pass, producing a sharper, cleaner, more natural-looking result without requiring manual adjustment or prior editing experience.
-
Batch processing for multiple images: Upload and enhance up to roughly 30 images in a single batch, streamlining high-volume workflows for photographers, e-commerce sellers, and anyone restoring or upgrading large photo collections at once.
Step-by-step: how to use Vmake Labs to remove faded parts of a scanned image?
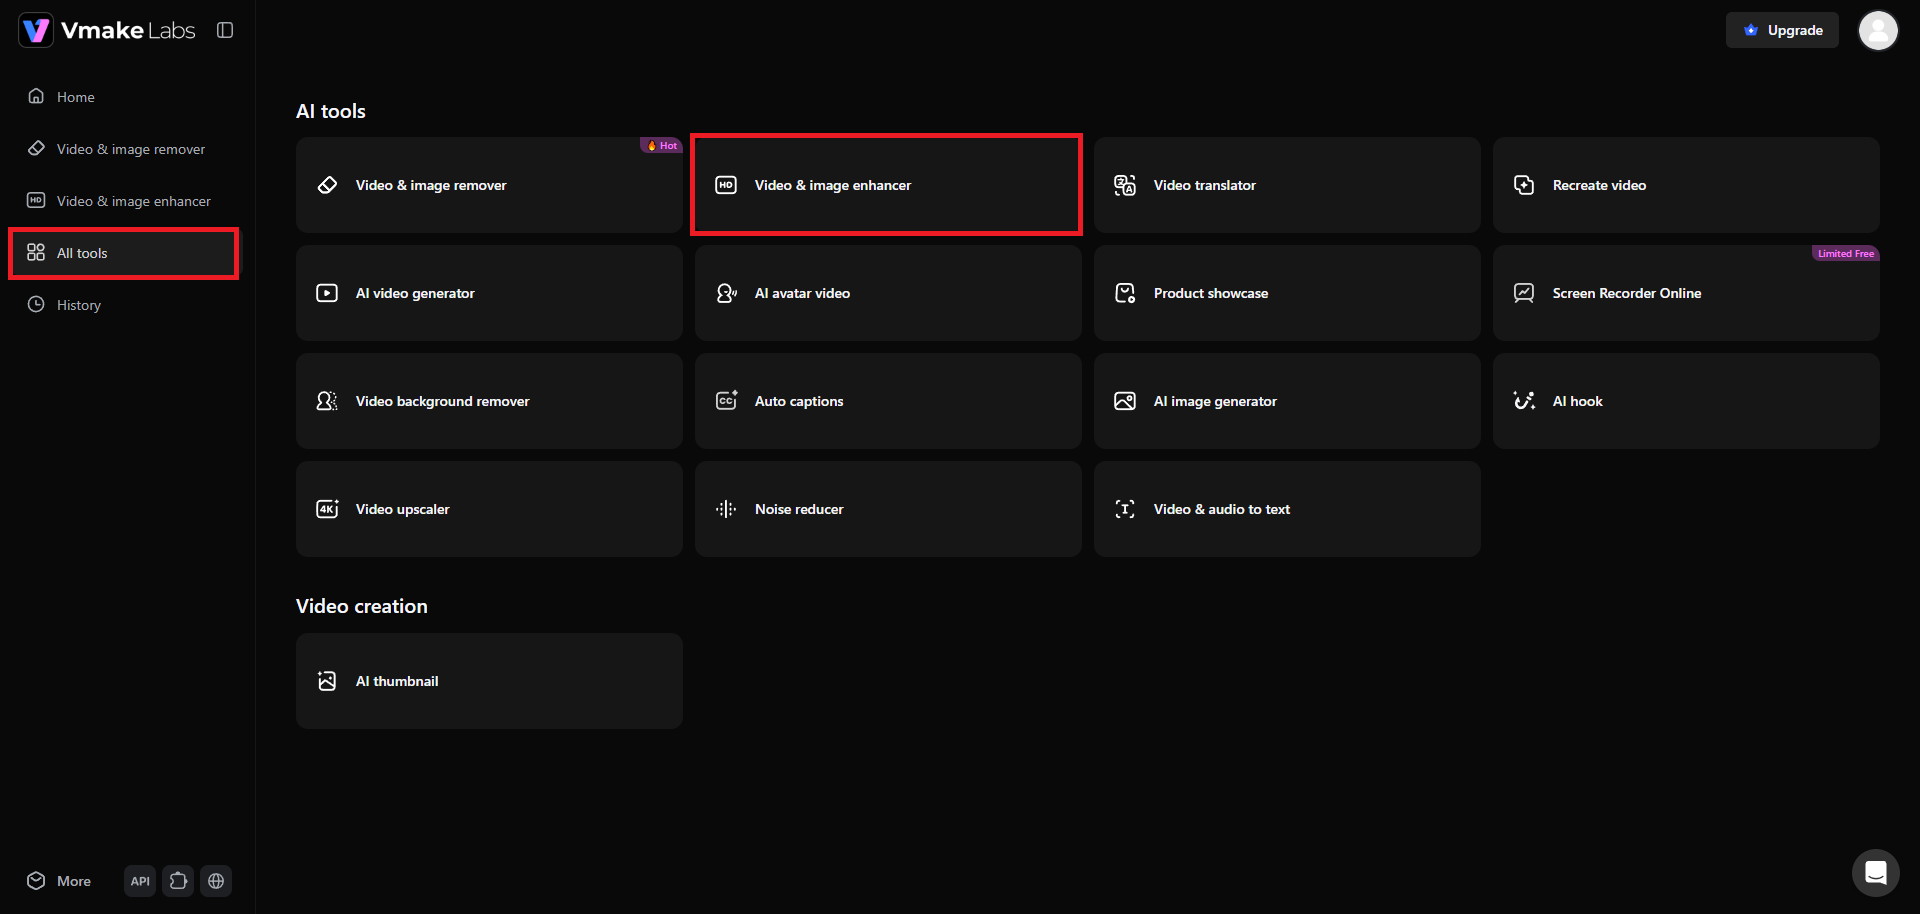
Step 1: Access Vmake Labs "Video & image enhancer"
Begin your journey by first accessing the Vmake Labs official website. From there, you need to first sign-in to your account and then access the "All tools" menu from the left-hand side-bar. From the given tools, you need to select the "Video & image enhancer" tool.
Step 2: Upload your photo
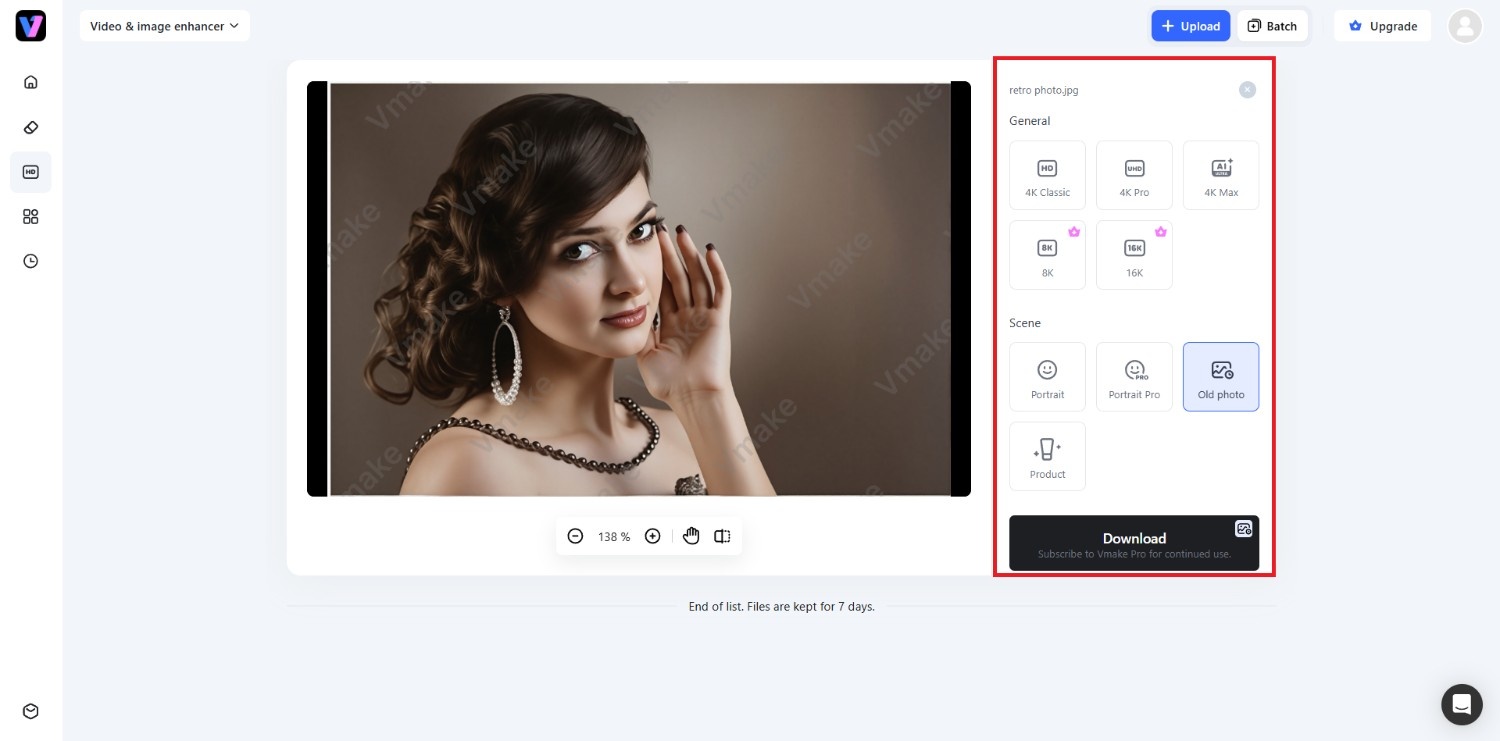
In the next step, you will need to upload the scanned photo or image that you want to enhance, and remove the faded parts. Keep in mind that Vmake Labs also support a "Batch upload" feature, so you can upload up to 30 images at a time, making the process easier for bulk editing.

Step 3: Enhance and export your photo
After successfully uploading your photo, you will need to choose the ideal option between "General" and "Scene". Under "General" you can enhance the resolution of the scanned image, while the "Scene" option offers pre-set templates to auto-enhance based on the scanned picture you have.
Since we are working with an old scanned picture here, you will need to ideally select the "Old photo" option. Once done, hit the "Apply" button. Vmake Labs will take some time to apply the effects, after which you will be able to download your enhanced image.
Microsoft Photos and Vmake Labs: which method is best for restoring faded scanned images?
Both manual editing via Microsoft Photos and AI-powered restoration via Vmake Labs can improve faded scanned images, but they suit different needs. The right choice depends on the amount of editing required, the number of photos, and the level of control you want.
|
Feature |
Microsoft Photos |
Vmake Labs |
|---|---|---|
|
Ease of use |
Simple interface with basic adjustment tools. |
Automated workflow with minimal manual editing. |
|
Restoration quality |
Depends on manual adjustments and user experience. |
AI analyzes faded areas and enhances colors and details automatically. |
|
Speed |
Requires individual edits for each image. |
Restores photos in just a few steps. |
|
AI automation |
No dedicated AI restoration for faded photos. |
Uses AI to improve faded images with limited manual input. |
|
Batch processing |
Not designed for bulk photo restoration. |
Supports restoring multiple images in a single workflow. |
|
Best use cases |
Occasional edits and users who prefer manual control. |
Restoring large photo collections or quickly enhancing faded scanned images. |
If you only need to restore a few photos and want full control over every adjustment, Microsoft Photos is a practical choice. For faster processing, automatic enhancements, and restoring multiple faded scanned images, Vmake Labs offers a more streamlined workflow.
Essential tips and tricks to follow when enhancing scanned images
A high-quality scan provides the best foundation for digital restoration. Following a few preparation and scanning practices can preserve more image information, making it easier to improve faded areas without introducing unnecessary artifacts during enhancement.
-
Thoroughly clean your scanner bed glass and the photo surface
Dust, fingerprints, and small debris can appear as spots or streaks after scanning. Clean both the scanner glass and the photograph gently with a lint-free microfiber cloth before scanning to reduce unwanted marks and improve overall image quality.
-
Scan at a minimum resolution of 600 DPI to capture fine textures
Scanning at 600 DPI preserves more detail than lower resolutions, making it easier to recover faded textures during image editing. Higher-resolution scans also provide greater flexibility for cropping, printing, and applying AI enhancement without noticeable quality loss.
-
Disable all default auto-correction settings in the scanner software
Many scanners automatically adjust brightness, contrast, and color during scanning. Disabling these corrections preserves the original image data, giving you greater control during manual editing or AI enhancement while reducing the risk of excessive processing.
-
Scan in flat, diffused lighting if digitizing with a smartphone
When using a smartphone instead of a scanner, photograph the print under soft, even lighting. Diffused illumination minimizes glare, reflections, and harsh shadows, producing a cleaner source image that responds more effectively to restoration techniques.
-
Store restored files in lossless formats like TIFF or high-quality PNG
After restoring your images, save a master copy in a lossless format such as TIFF or PNG. These formats preserve image data without compression artifacts, allowing future edits while maintaining consistent quality over time.
Conclusion
Faded areas in scanned images can result from aging, environmental exposure, or scanning limitations, but they are often possible to improve with the right restoration approach.
Manual editing techniques to remove faded parts of a scanned image help correct basic issues, while AI-powered enhancement tools can simplify the process for more complex or larger restoration projects. Starting with a high-quality scan and following recommended scanning practices also contributes to better results.
Whether you are preserving family photographs, restoring historical images, or digitizing printed archives, combining careful preparation with suitable enhancement methods can produce clearer and more usable digital copies.
FAQs
Why are only certain parts of my scanned image faded while others look intact?
Uneven fading usually occurs because different parts of the original photograph experienced varying levels of light exposure, moisture, heat, or chemical deterioration. Scanner settings can also make existing damage appear more noticeable in specific regions.
Can I restore a severely faded color photo to black and white for better clarity?
Yes. Converting a heavily faded color photograph to black and white can improve contrast and reduce distracting color shifts. While missing details cannot always be recovered, important subjects may become easier to recognize.
What scanner DPI is optimal for fixing faded parts of vintage photos?
A scanning resolution of at least 600 DPI is generally recommended for vintage photographs. Higher resolutions preserve more fine details, providing greater flexibility for manual editing, AI enhancement, and future printing without significant quality loss.
How does Vmake Labs recover details in completely washed-out white areas?
Vmake Labs analyzes surrounding textures, contrast, and color information to enhance visible image details. However, if an area contains no remaining image data, AI enhancement may improve appearance but cannot recreate information that was never captured.
Is it possible to remove physical crease lines and water spots using AI enhancers?
Many AI enhancement tools can reduce the visibility of crease lines, stains, and water spots, especially when the damage is moderate. More severe physical damage may still require manual retouching alongside AI-assisted restoration techniques.
You May Be Interested
AniEraser Watermark Remover by Media.io: 2026 Hands-On Review

How to Remove CapCut Watermark
How to Remove Background Noise from Video: Best AI Tools in 2026
Best Photo Eraser Tools in 2026: Remove Objects, Text & People from Photos