How to Enhance Image Quality in Photoshop: 3 Steps You Should Know
Learn how to enhance image quality in Photoshop using Camera Raw, AI upscaling, sharpening, and noise reduction. Follow simple steps, then try Vmake Labs for fast AI image enhancement today.
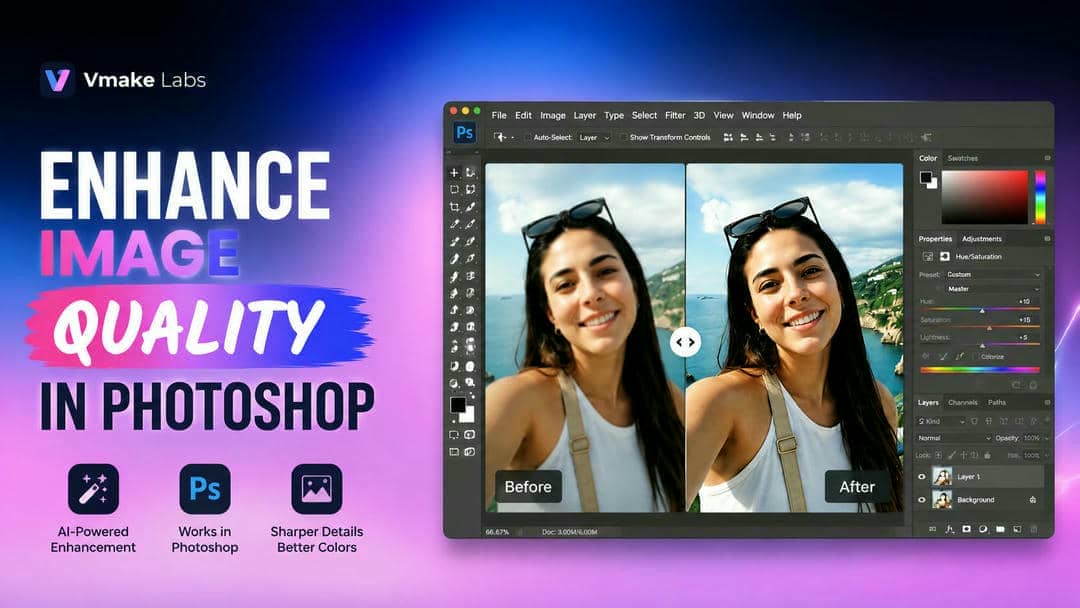
Visual quality may suffer from poor-quality images, e.g. blurry images or images of low resolution. This tutorial shows how to upgrade image quality in Photoshop by changing the resolution, reducing noise, and correcting color. You'll also learn how Vmake Labs delivers faster AI image enhancement.
Why Image Quality Matters Before Editing
Image quality is what makes your photos look clear, detailed and professional. Starting with a good image helps to preserve detail in the editing process, minimizes unwanted artifacts, and yields sharper output for digital and print applications. Knowing what causes bad image quality also helps you choose the right Photoshop tools for each problem.
Common Causes of Poor Image Quality
Different image issues require different editing techniques. The table below highlights common image quality problems and the Photoshop tools best suited to fix them.
|
Issue |
Recommended Photoshop Tool |
|---|---|
|
Low resolution |
Preserve Details 2.0 / Generative Upscale |
|
Blurry image |
Smart Sharpen / High Pass Filter |
|
Poor lighting |
Camera Raw Filter |
|
Digital noise |
Camera Raw Noise Reduction |
|
Compression artifacts |
AI Upscaling |
Enhancing Image Quality in Photoshop: From Editing to Export
Photoshop has a lot of built-in tools to improve image quality. You can increase resolution, reduce noise and correct colors. Together, these features can assist you in creating cleaner, sharper images while maintaining natural-looking details. Follow the steps below to make your photos better.
Step-by-Step Guide to Enhancing Image Quality in Photoshop
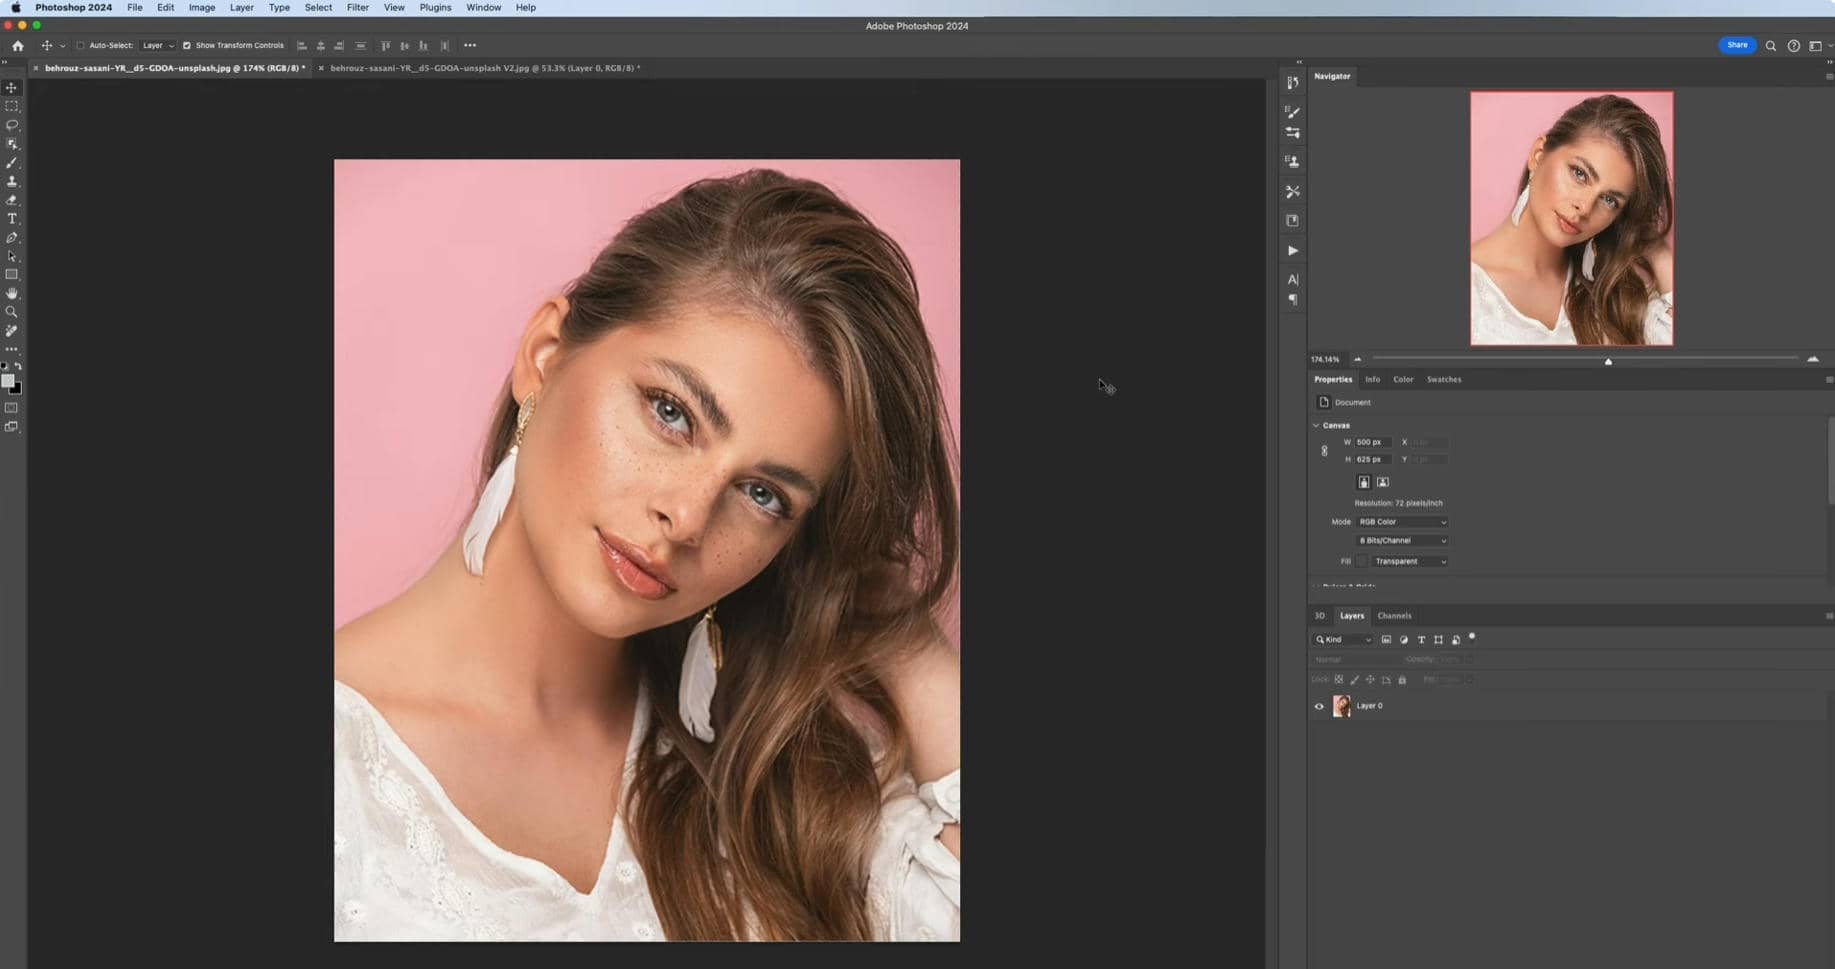
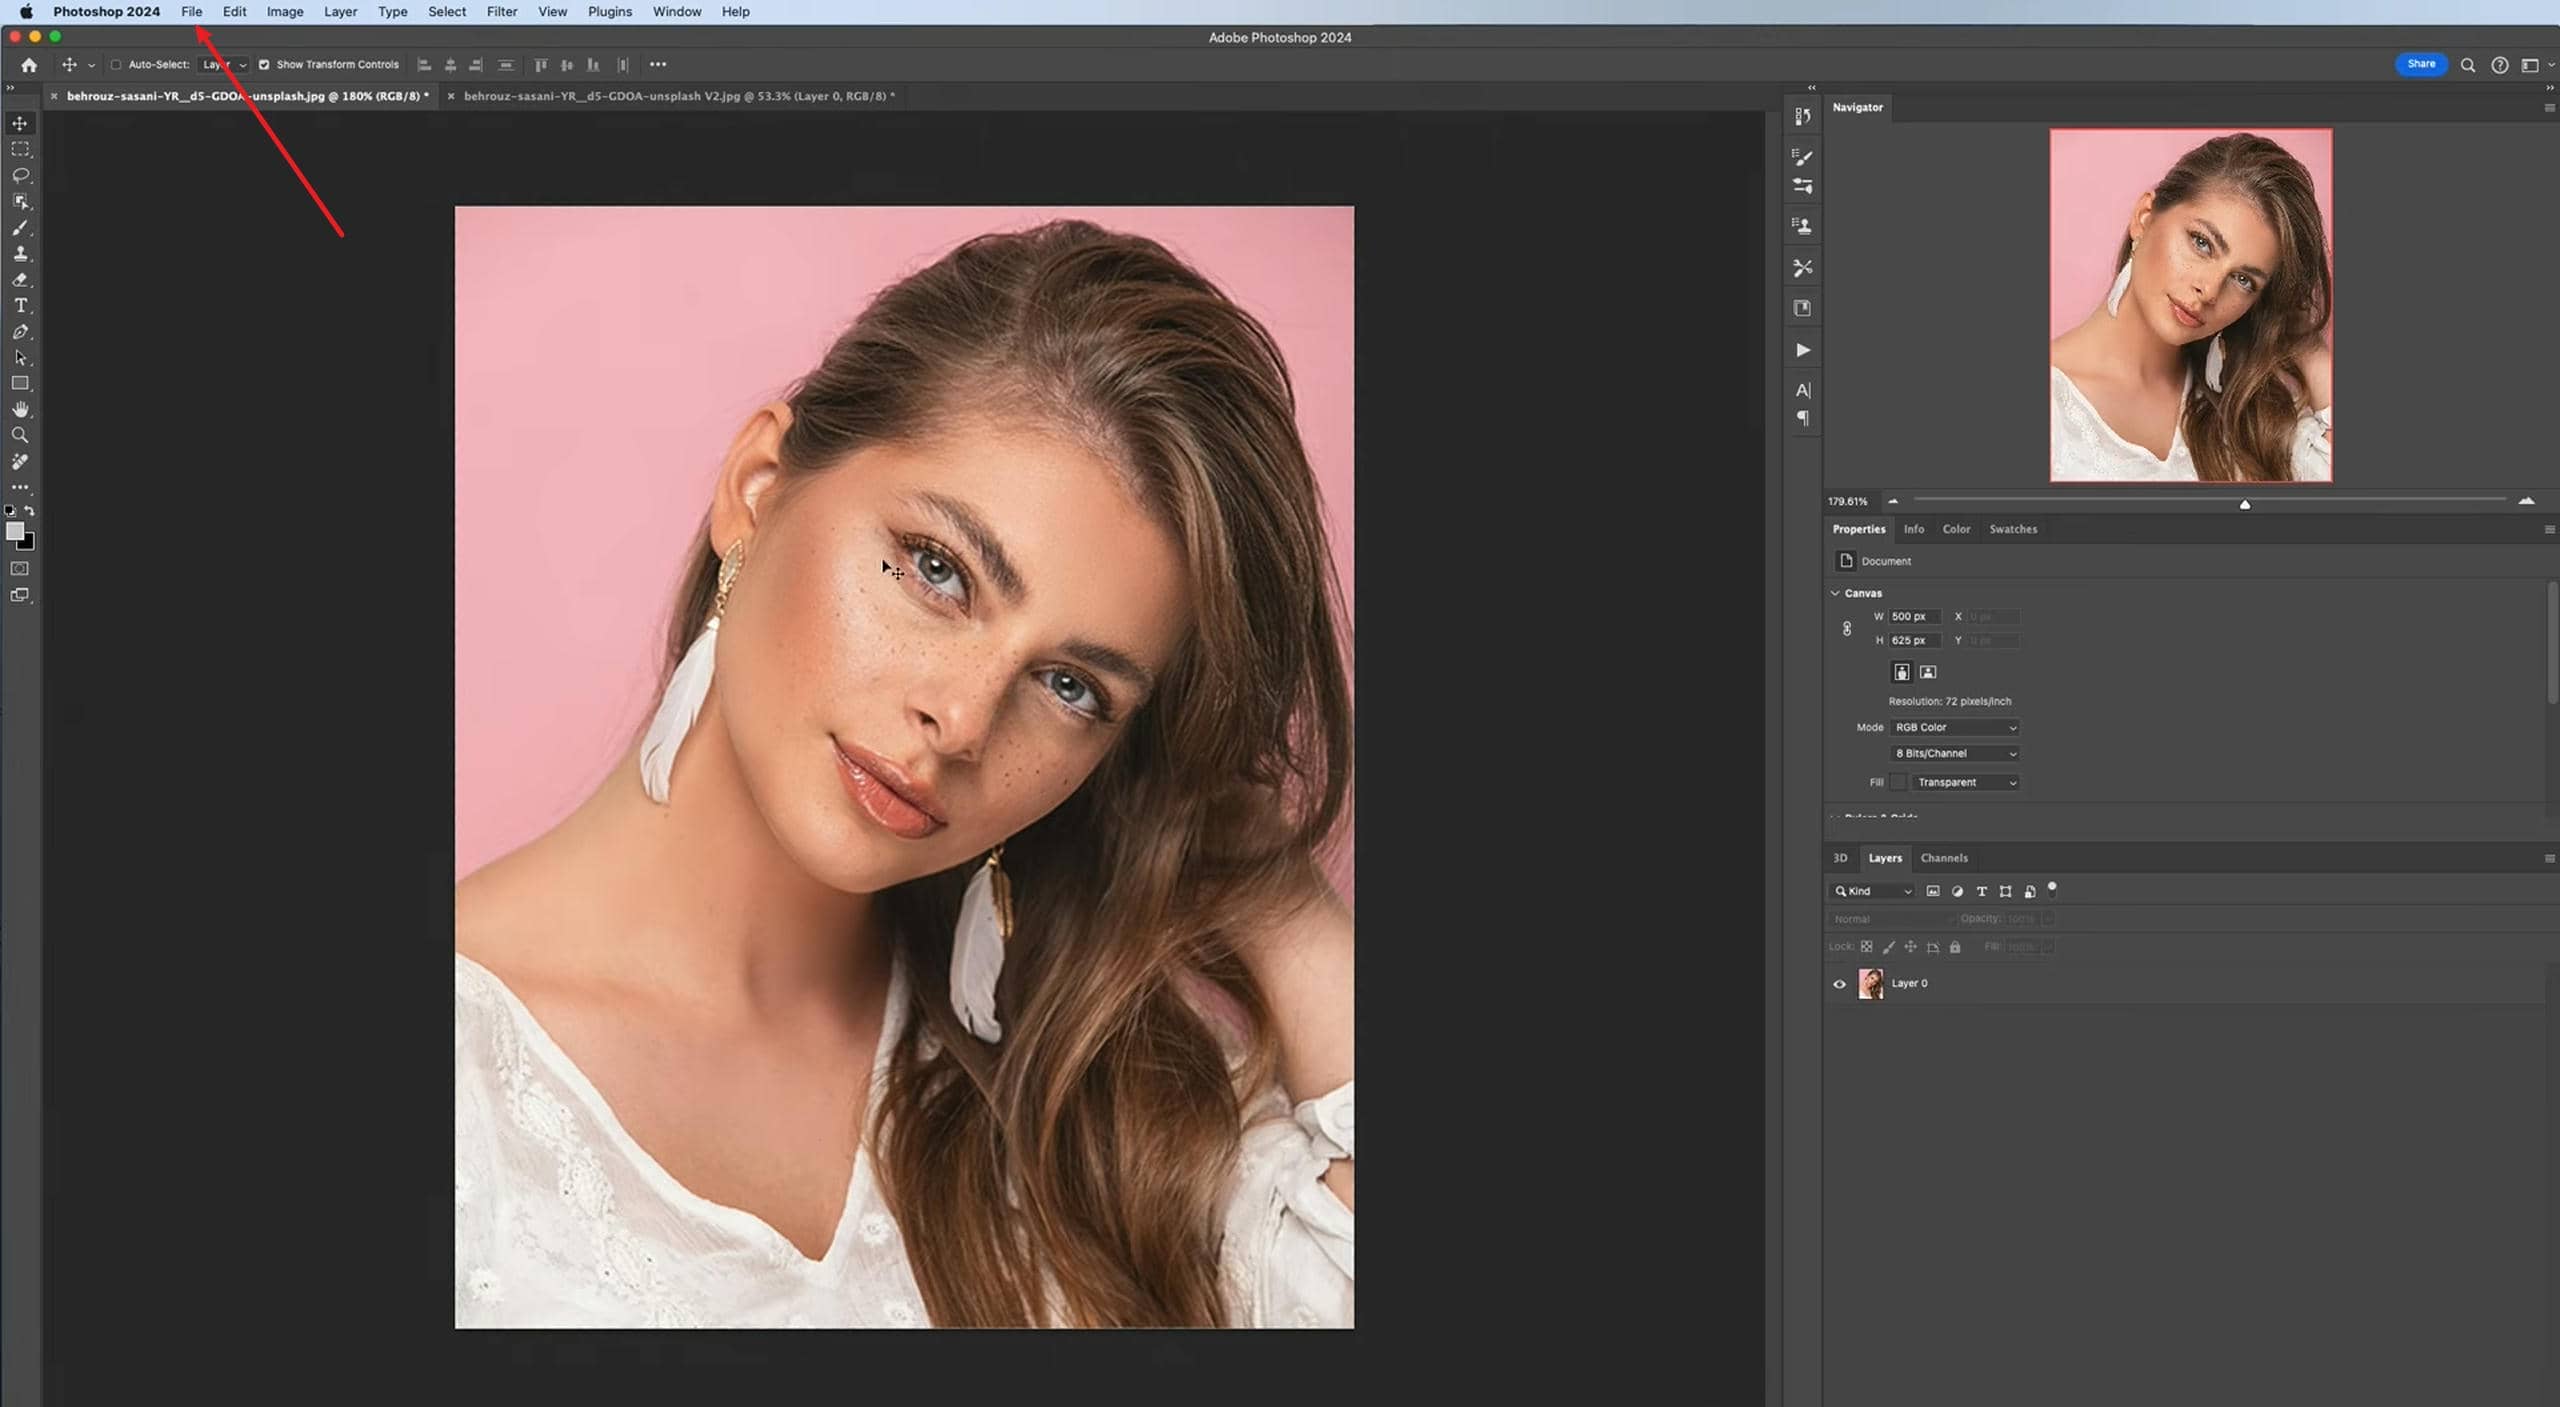
Step 1. Open the Image
Open the File in Adobe Photoshop by going to File > Open. Select the image from your computer that you want to enhance and click Open to import it into your workspace.
Step 2. Increase Image Resolution
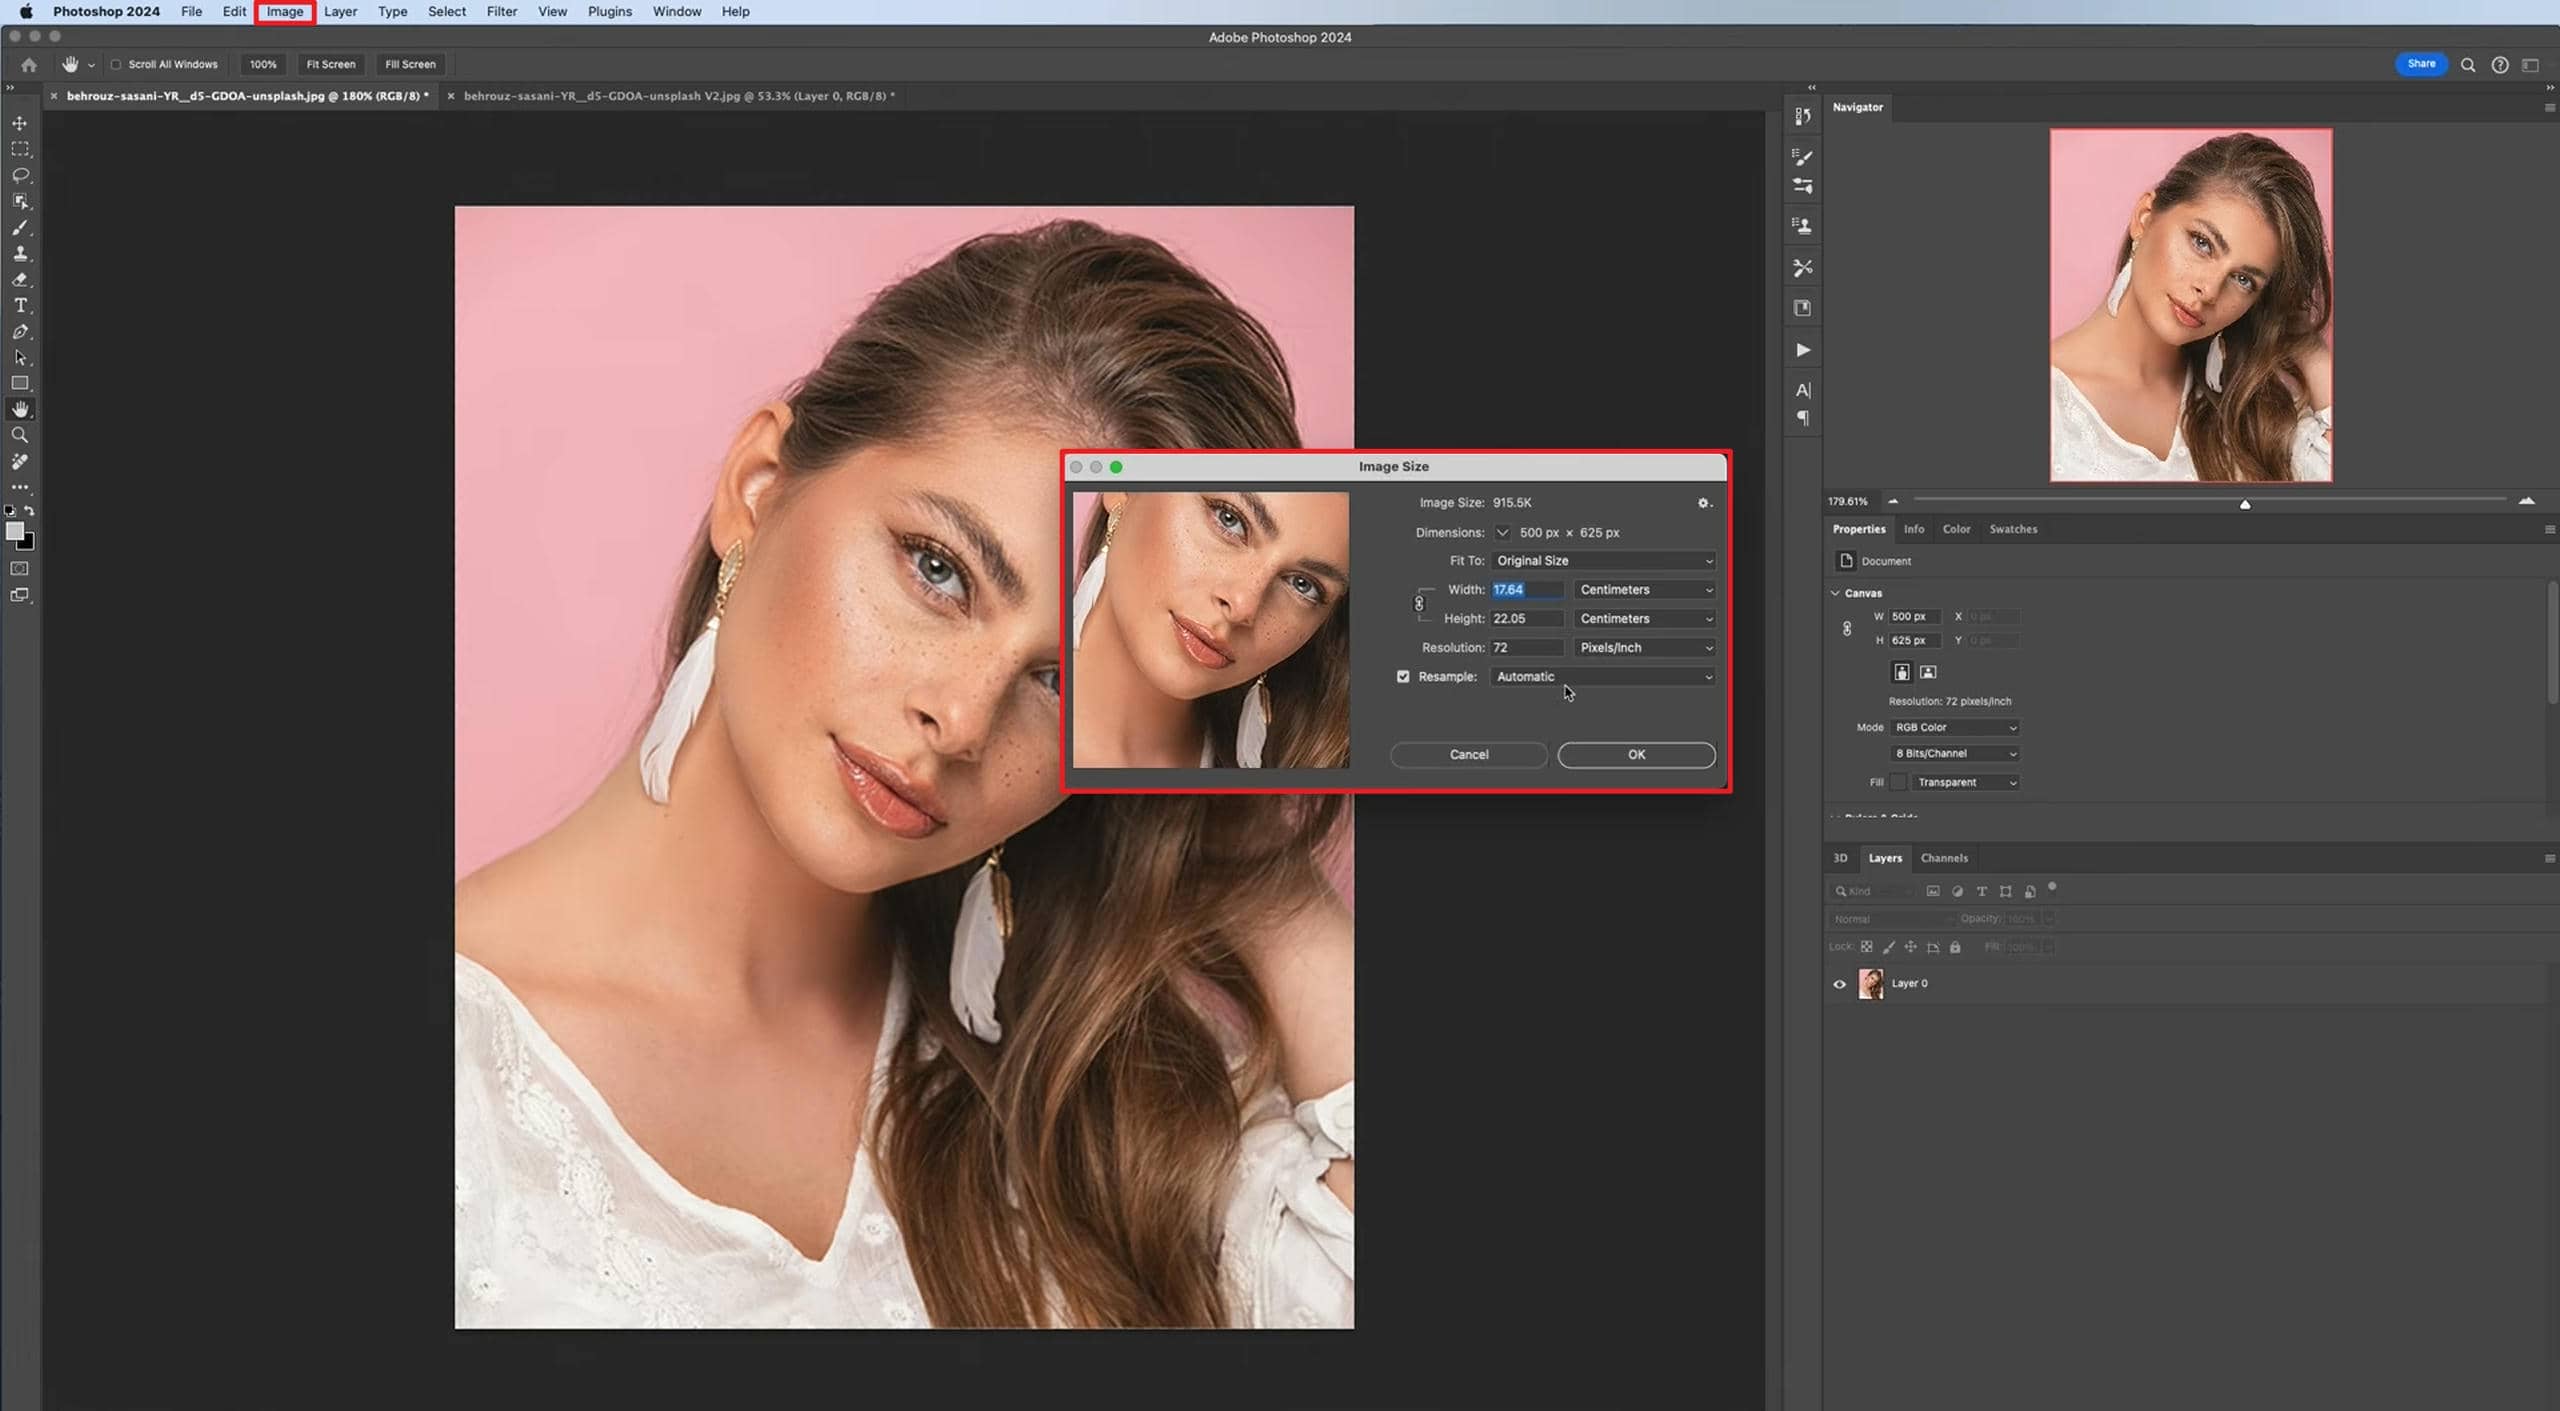
Go to Image > Image Size, enable Resample, and increase the image resolution using Preserve Details 2.0 (or Generative Upscale in Photoshop 2025+ for supported versions). If you're editing a RAW image, you can also use Super Resolution in Adobe Camera Raw to enlarge the image while preserving detail. Click OK to apply the changes.
Step 3. Improve Colors and Reduce Noise
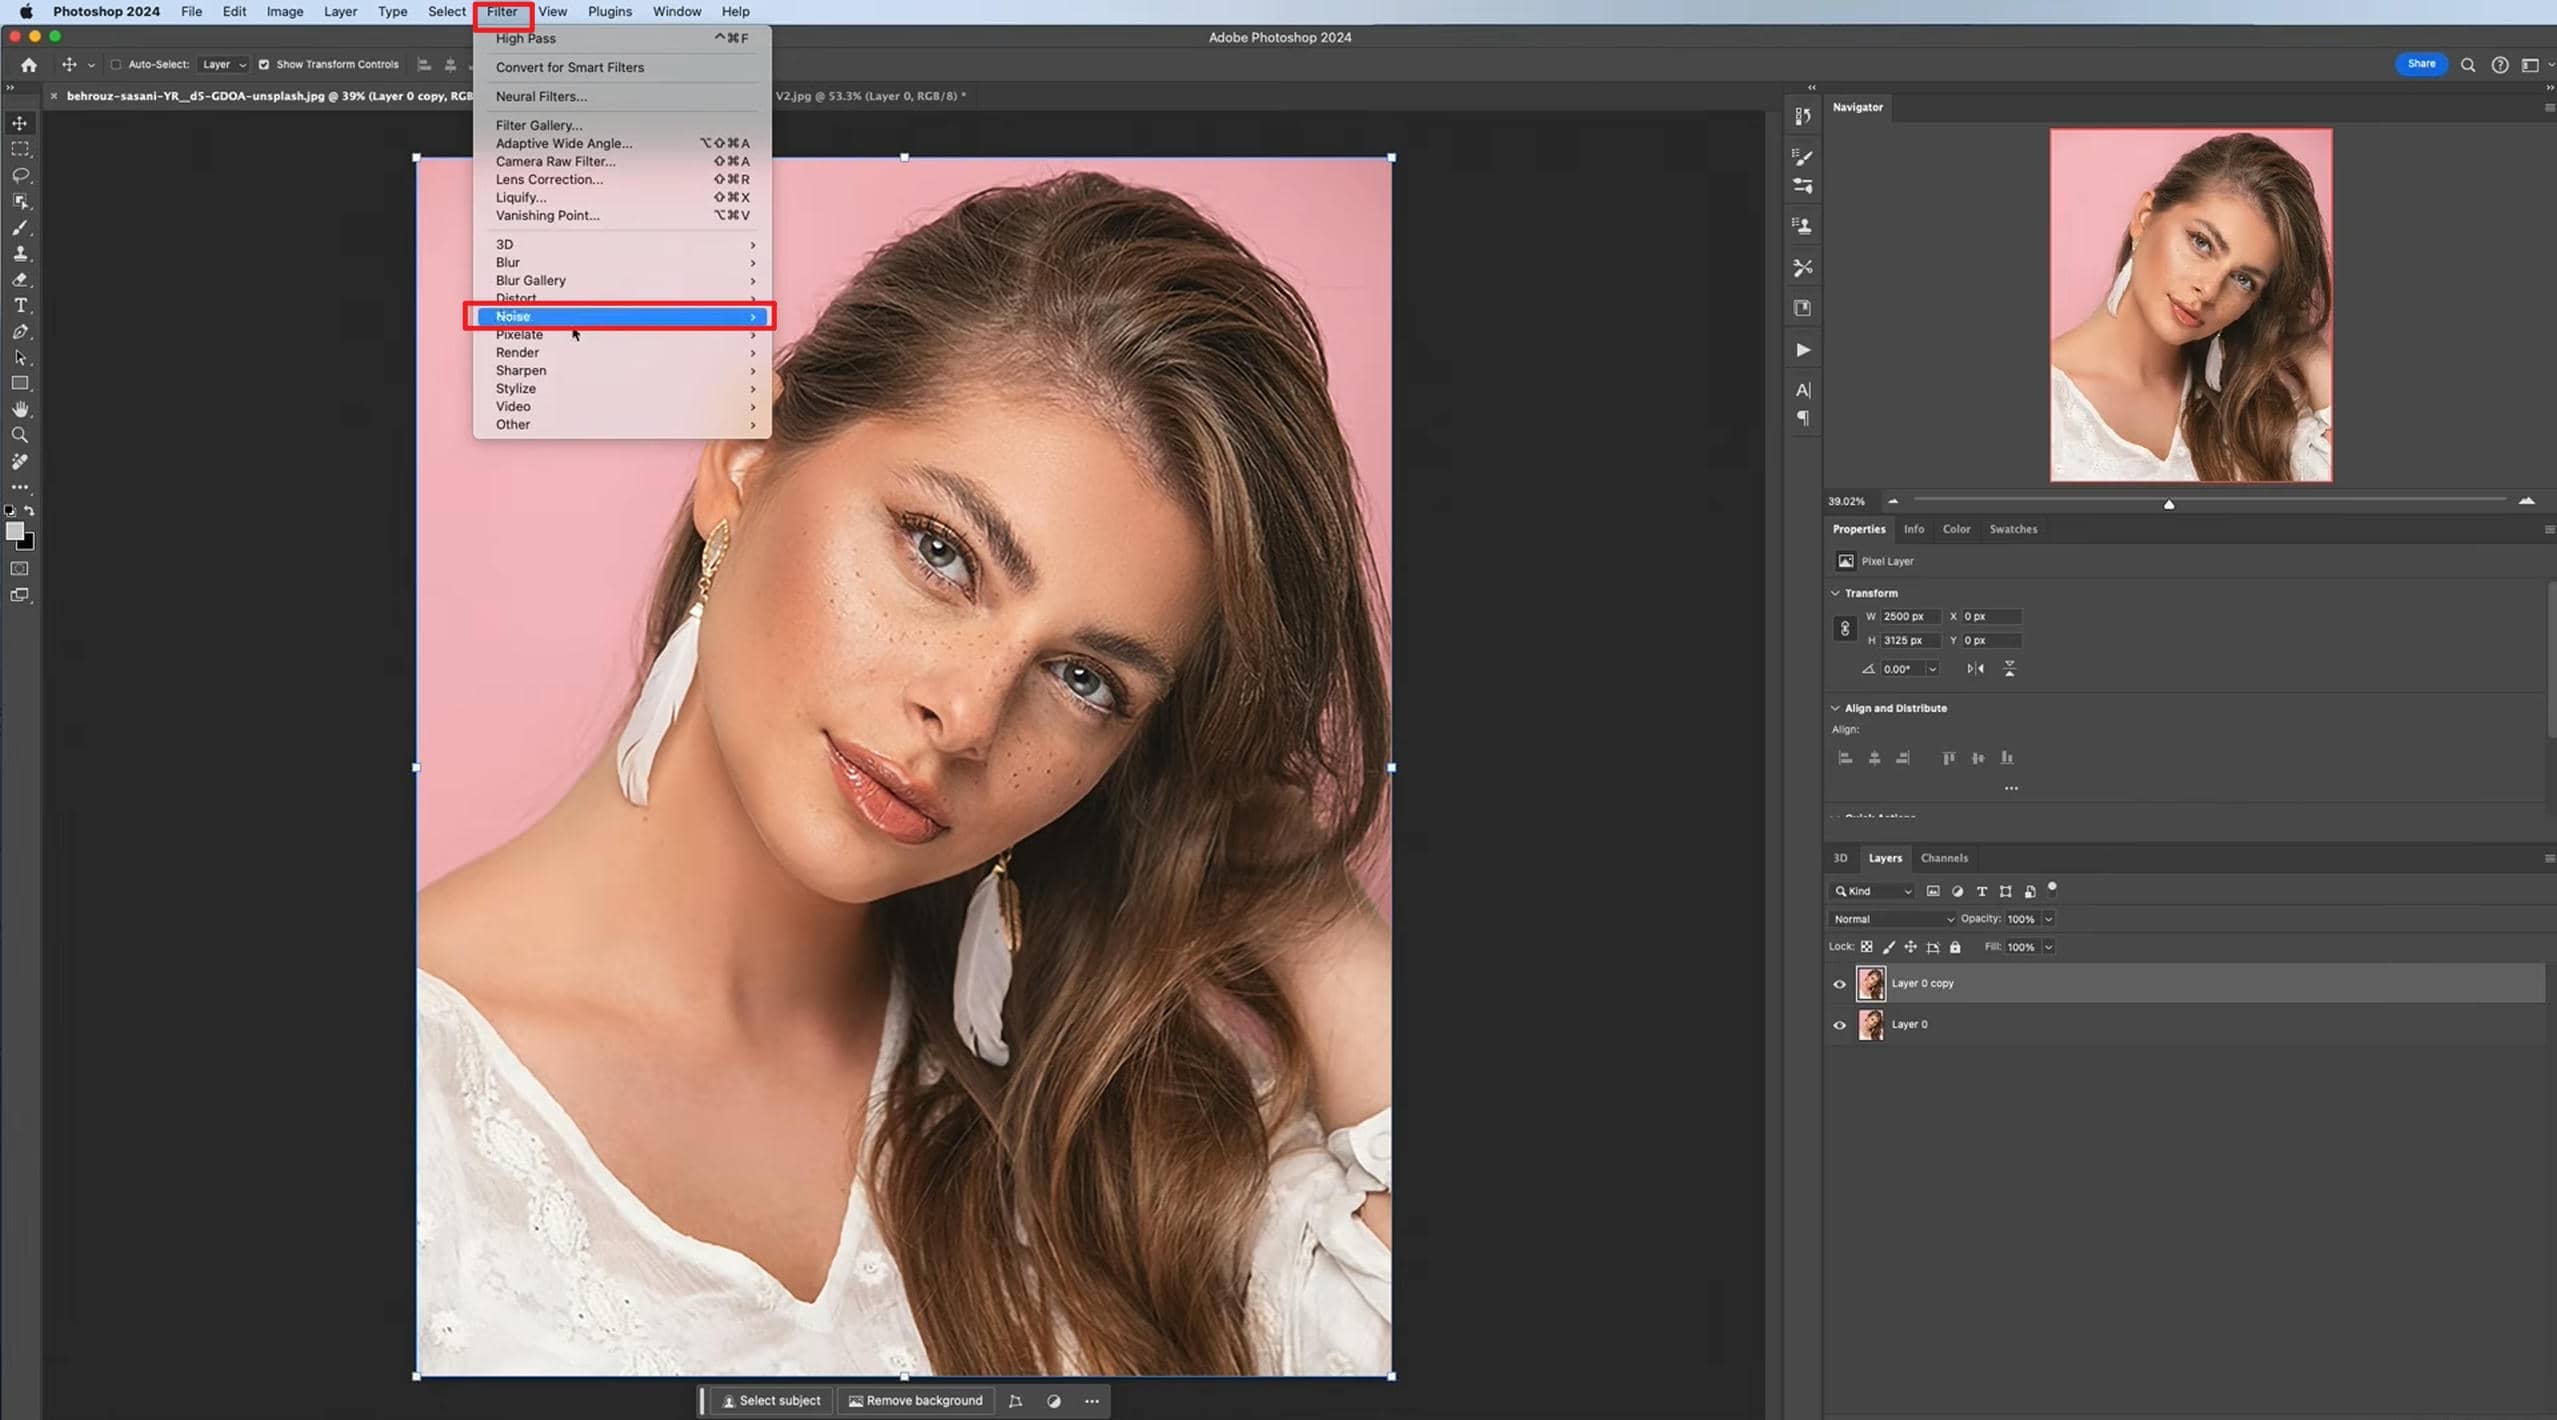
Open Filter > Camera Raw Filter and adjust Exposure, Highlights, Shadows, Texture, Clarity, and Dehaze to improve overall image quality. Then apply Filter > Sharpen > Smart Sharpen or Filter > Noise > Reduce Noise to sharpen details and reduce digital noise while maintaining a natural-looking result.
Step 4. Review and Save the Image
Review the enhanced image to ensure the resolution and overall quality meet your expectations. Then go to File> Save, choose your preferred format, such as JPEG or PNG, and save the enhanced image.
Essential Photoshop Tools for Image Enhancement
Photoshop has a variety of tools that can improve image quality. Each is designed to solve a specific problem. Using the right feature means you get sharper, cleaner, more natural-looking results whilst keeping important image details.
|
Tool |
Best For |
|---|---|
|
Camera Raw Filter |
Color correction and exposure adjustments |
|
Smart Sharpen |
Improving edge sharpness with an image sharpener workflow |
|
Unsharp Mask |
Enhancing fine details |
|
High Pass Filter |
Edge sharpening |
|
Preserve Details 2.0 |
AI upscaling (older workflow) |
|
Generative Upscale |
AI image enlargement (newer Photoshop versions) |
|
Super Resolution |
Enlarging RAW images |
Afterthought
Photoshop offers powerful manual editing tools that provide precise control over image quality, making it a strong choice for photographers and experienced editors. However, achieving the best results often requires time and editing experience. If you prefer a faster, simpler workflow, AI tools like Vmake Labs are better suited for automatically enhancing resolution, sharpness, and overall image quality with minimal manual adjustments.
Meet Vmake Labs: How to Enhance Image Quality with AI
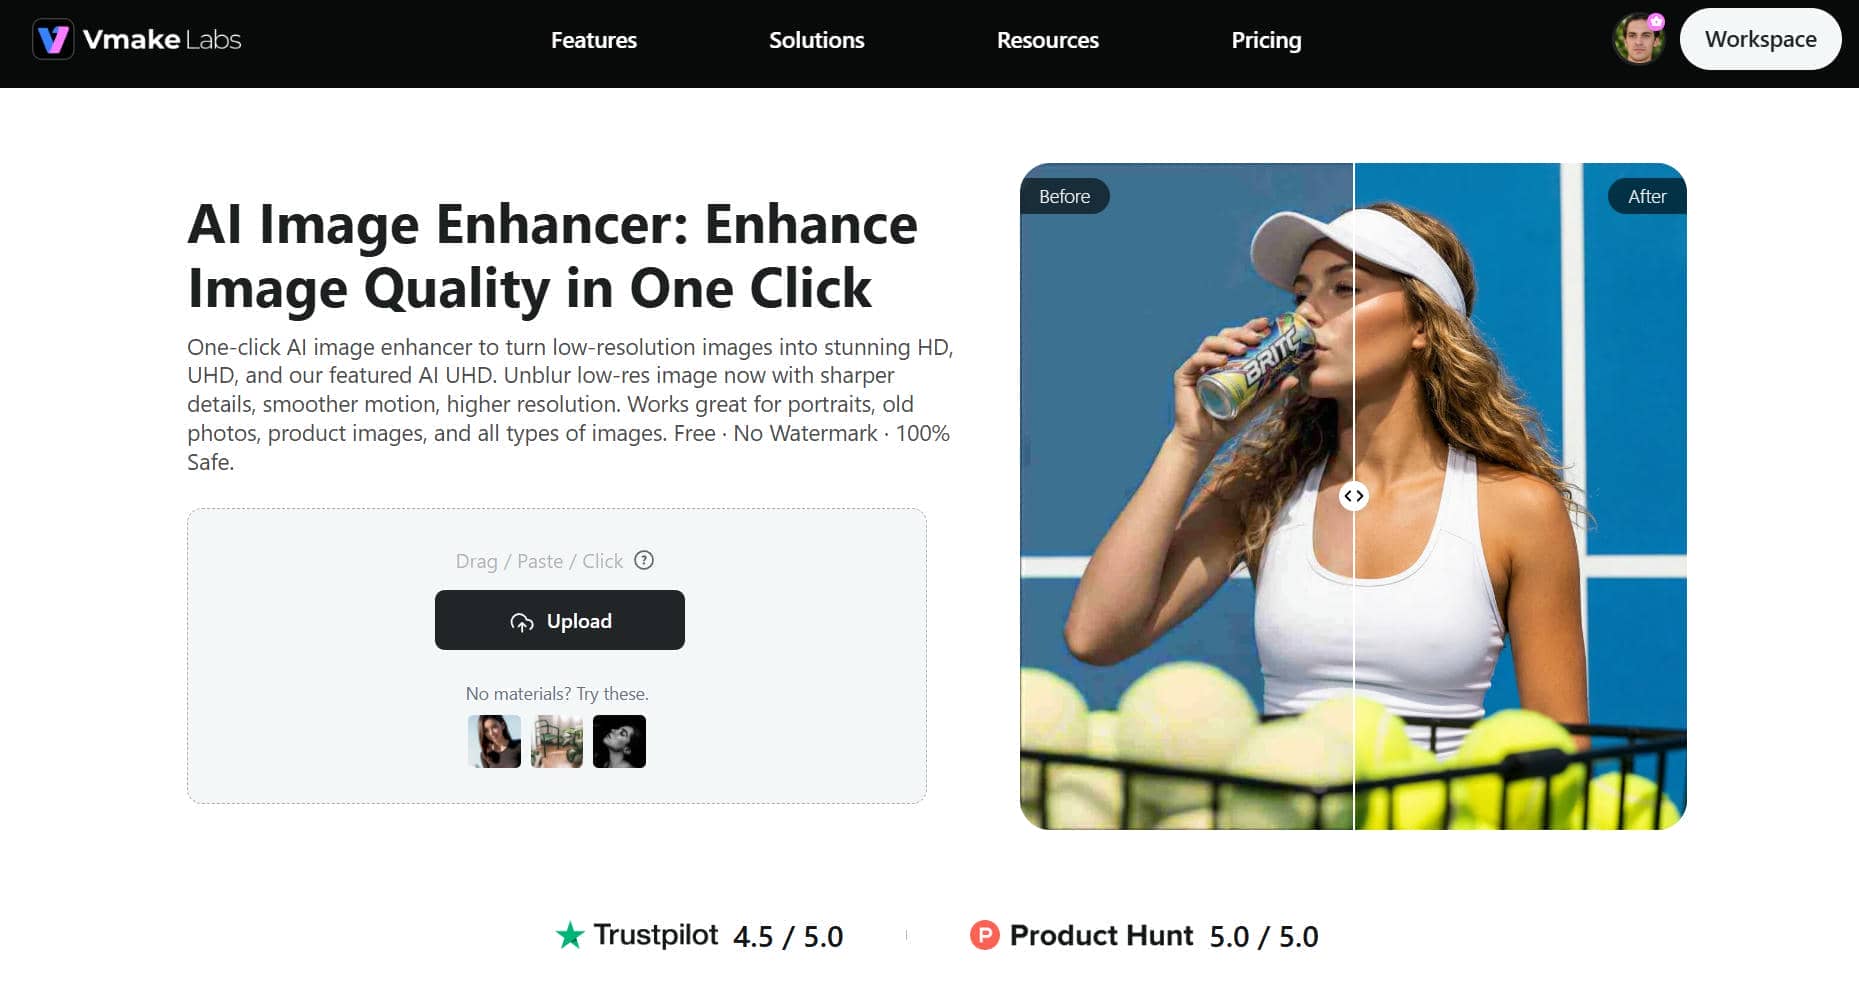
Vmake Labs makes it easy to improve image quality with AI, even if you have no editing experience. Upload your image, choose an enhancement mode that suits your needs, and let the AI automatically sharpen details, increase resolution, and improve overall clarity in just a few clicks.
Step-by-Step Guide to Enhancing Image Quality with Vmake Labs
Step 1. Upload Your Image
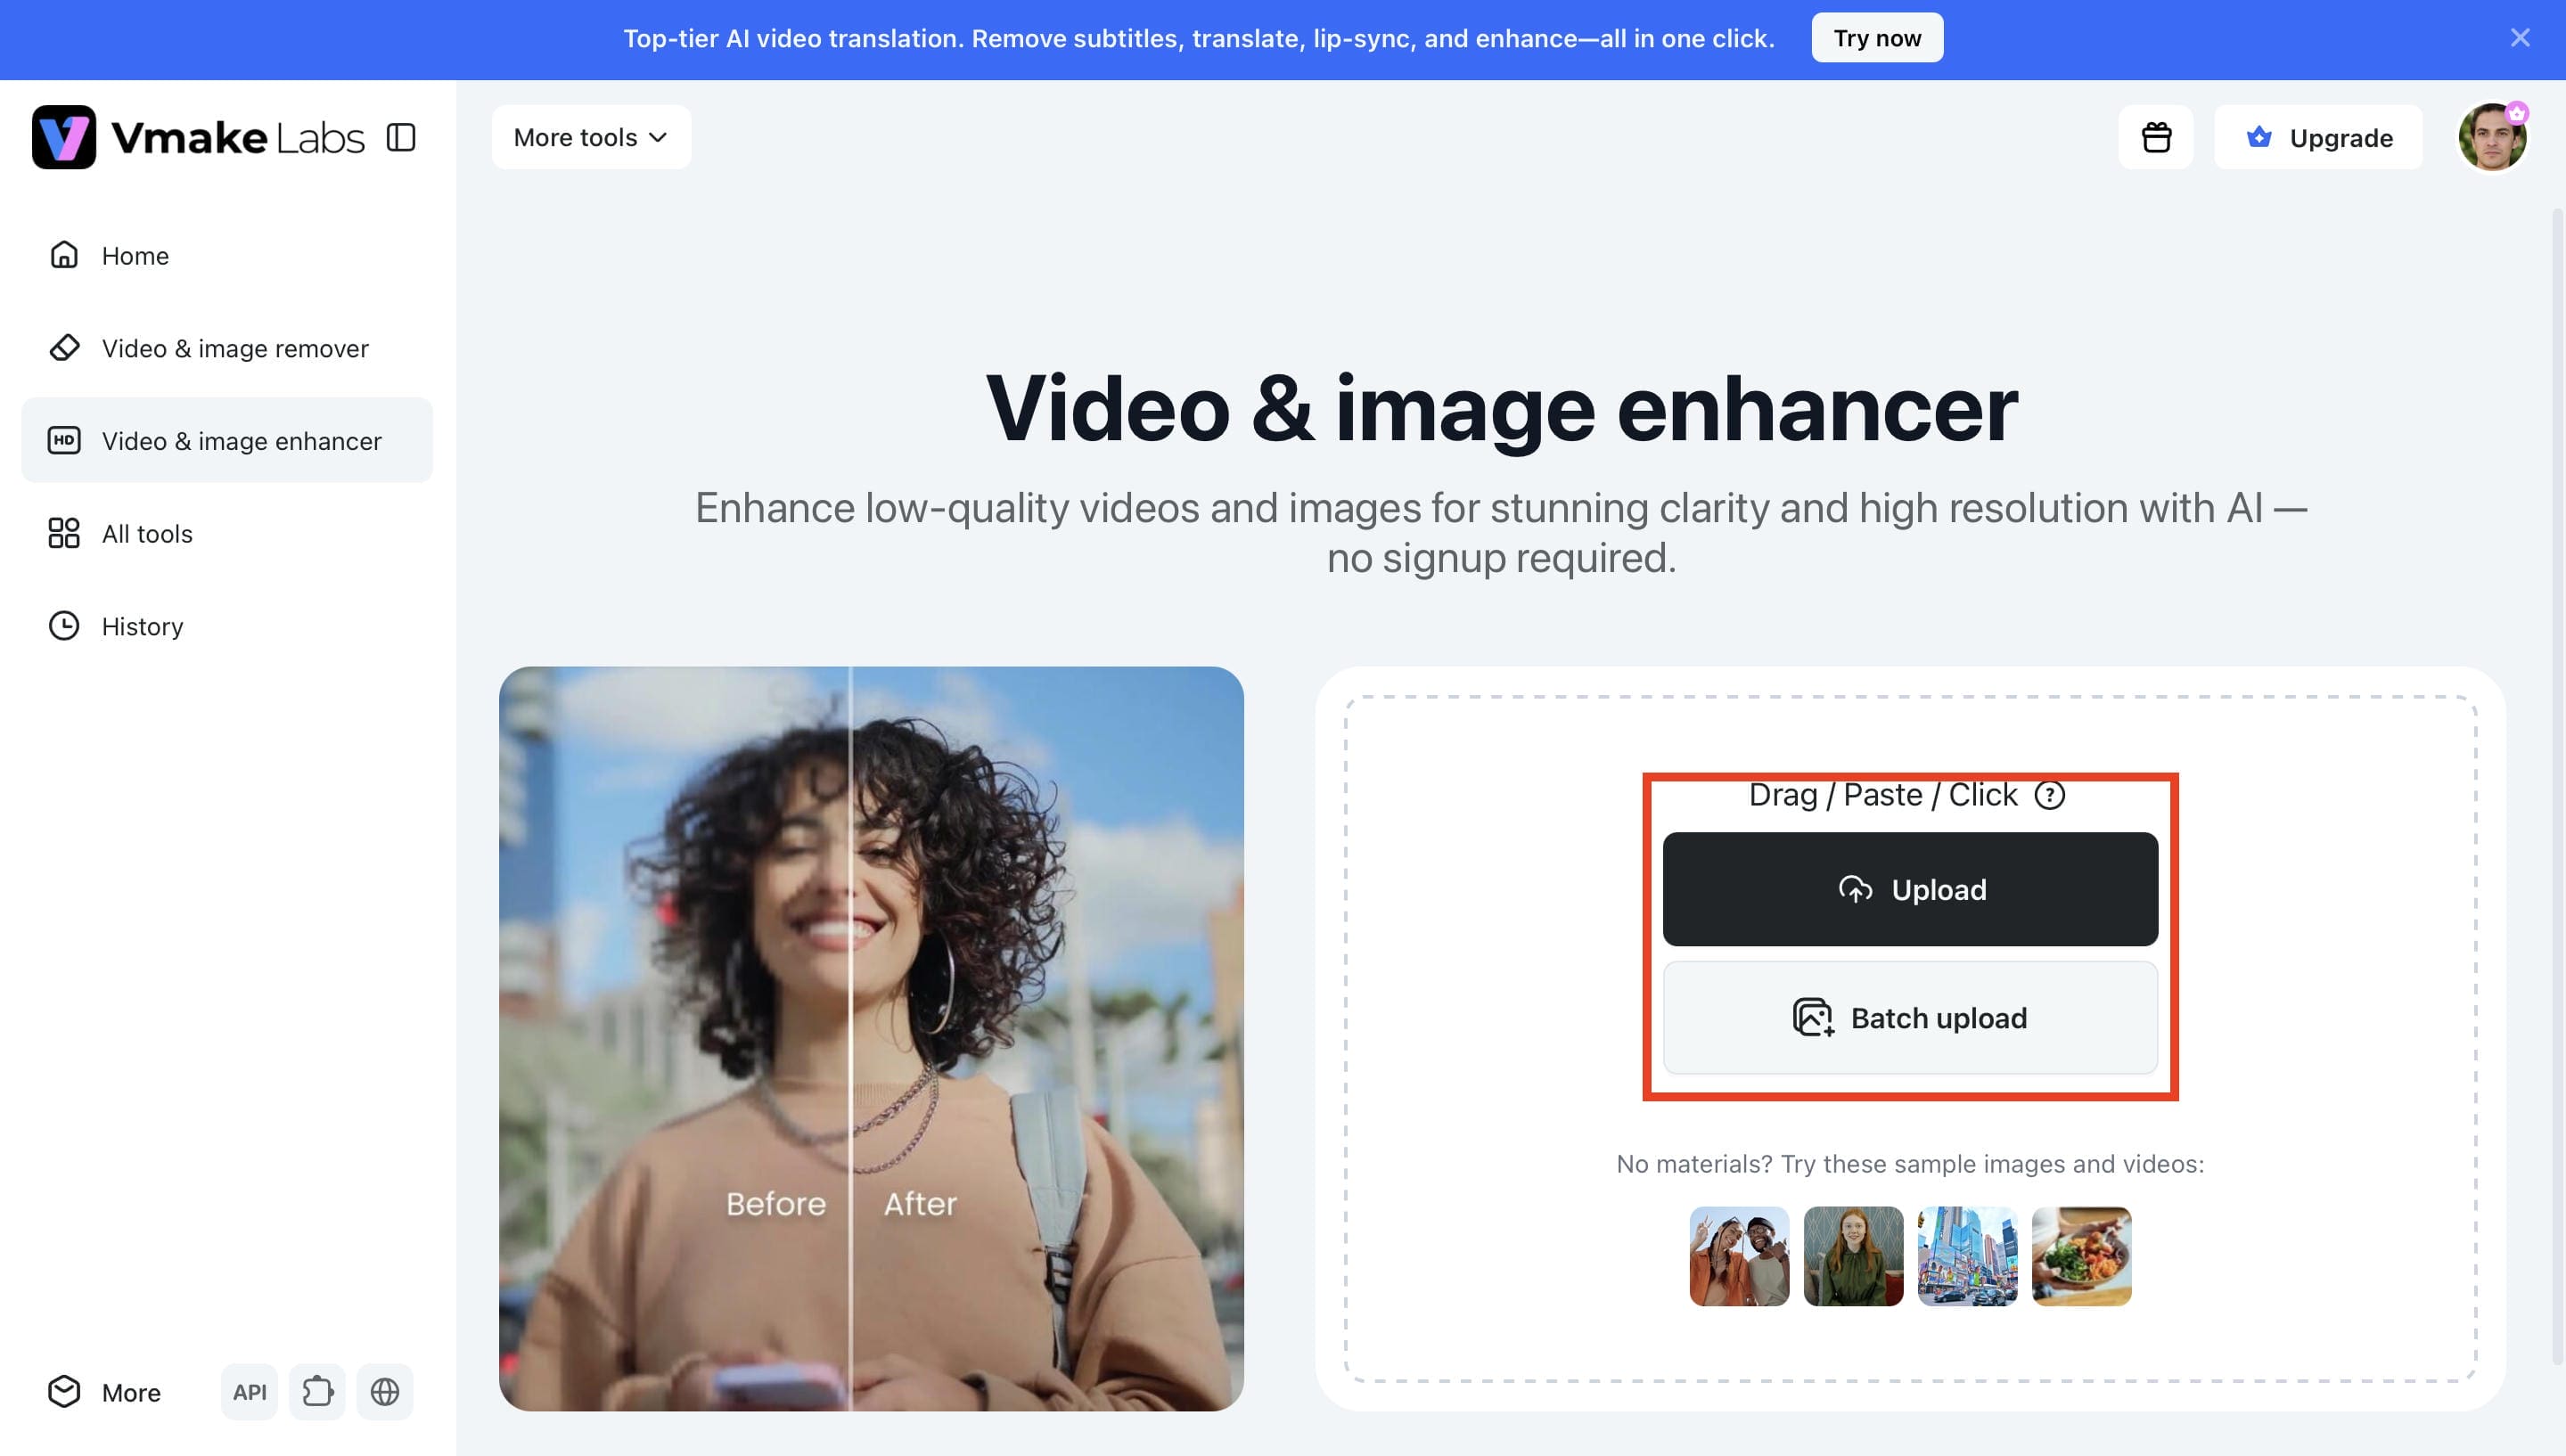
Tap Upload and select the picture you want to enhance from your device. You can also drop and drag your image, or pick one of the sample images to get started. Once uploaded, Vmake Labs enhances the image for AI.
Step 2. Choose an AI Enhancement Mode
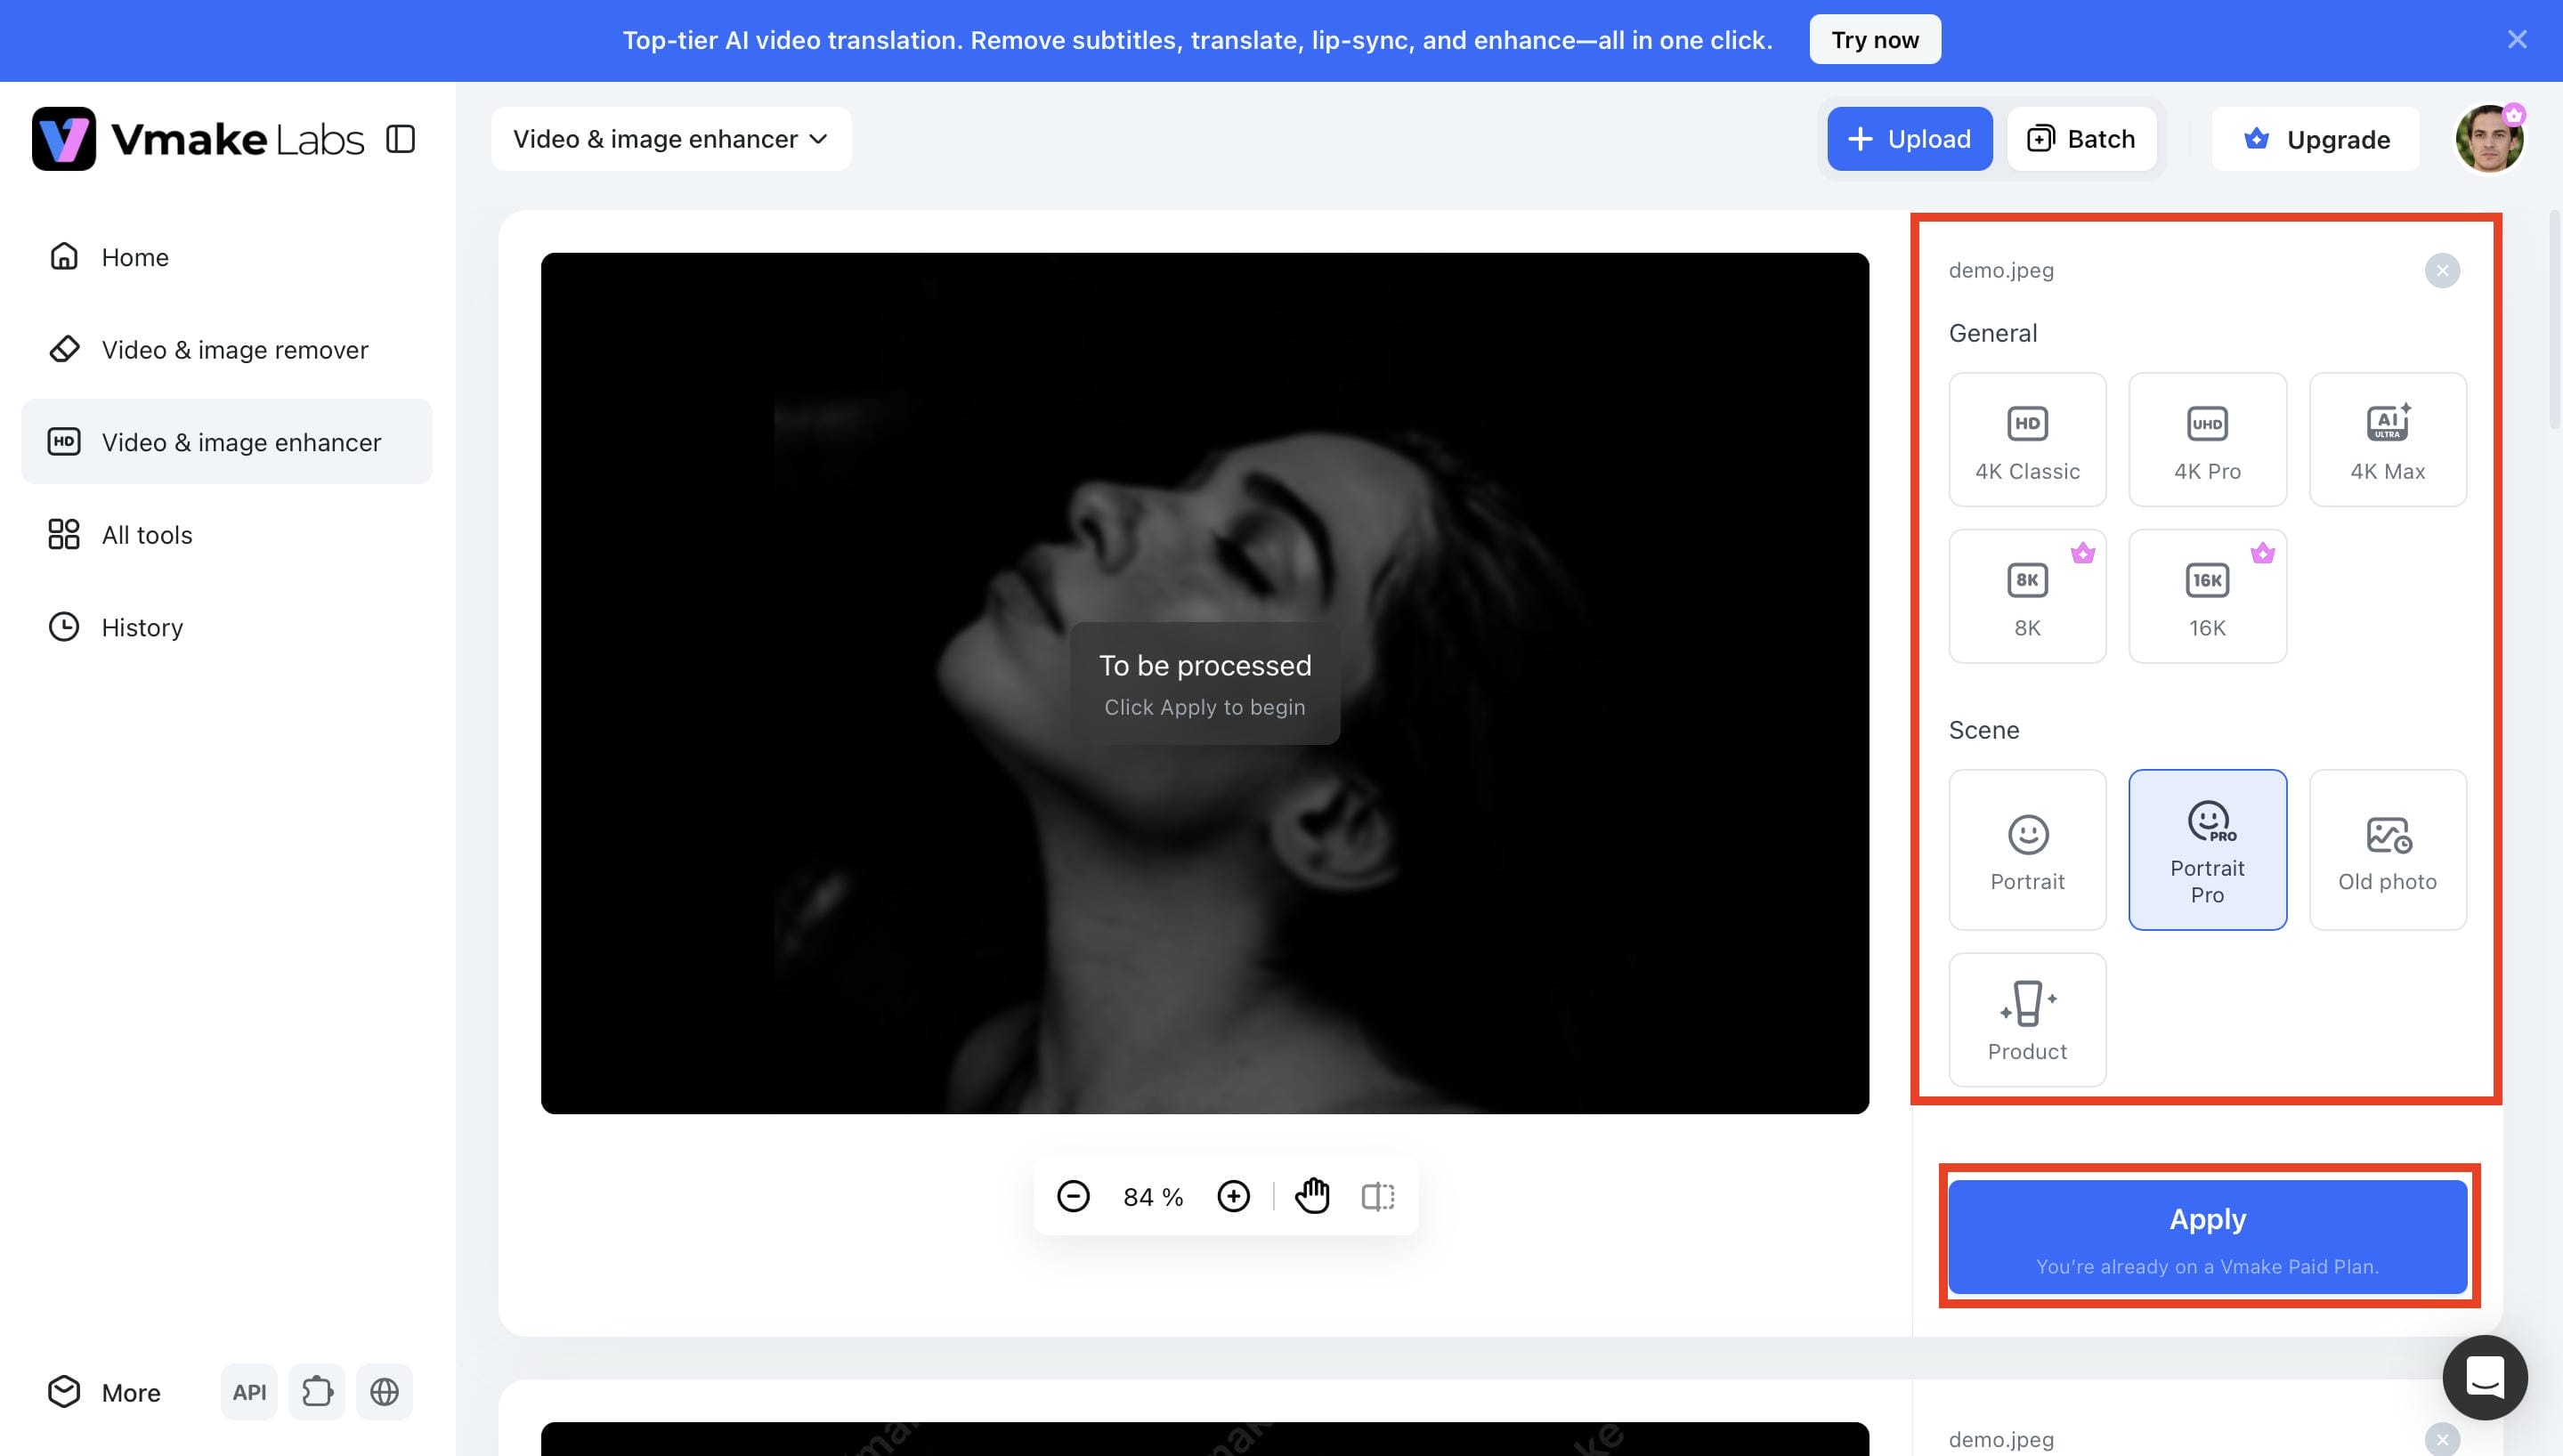
Choose the enhancement mode that suits your image best, such as 4K Classic, 4K Pro, 4K Max, 8K, 16K, Portrait, Portrait Pro, Old Photo, or Product. Select a mode you prefer and click Apply. The AI will analyze your image and improve it.
Step 3. Preview and Download the Enhanced Image
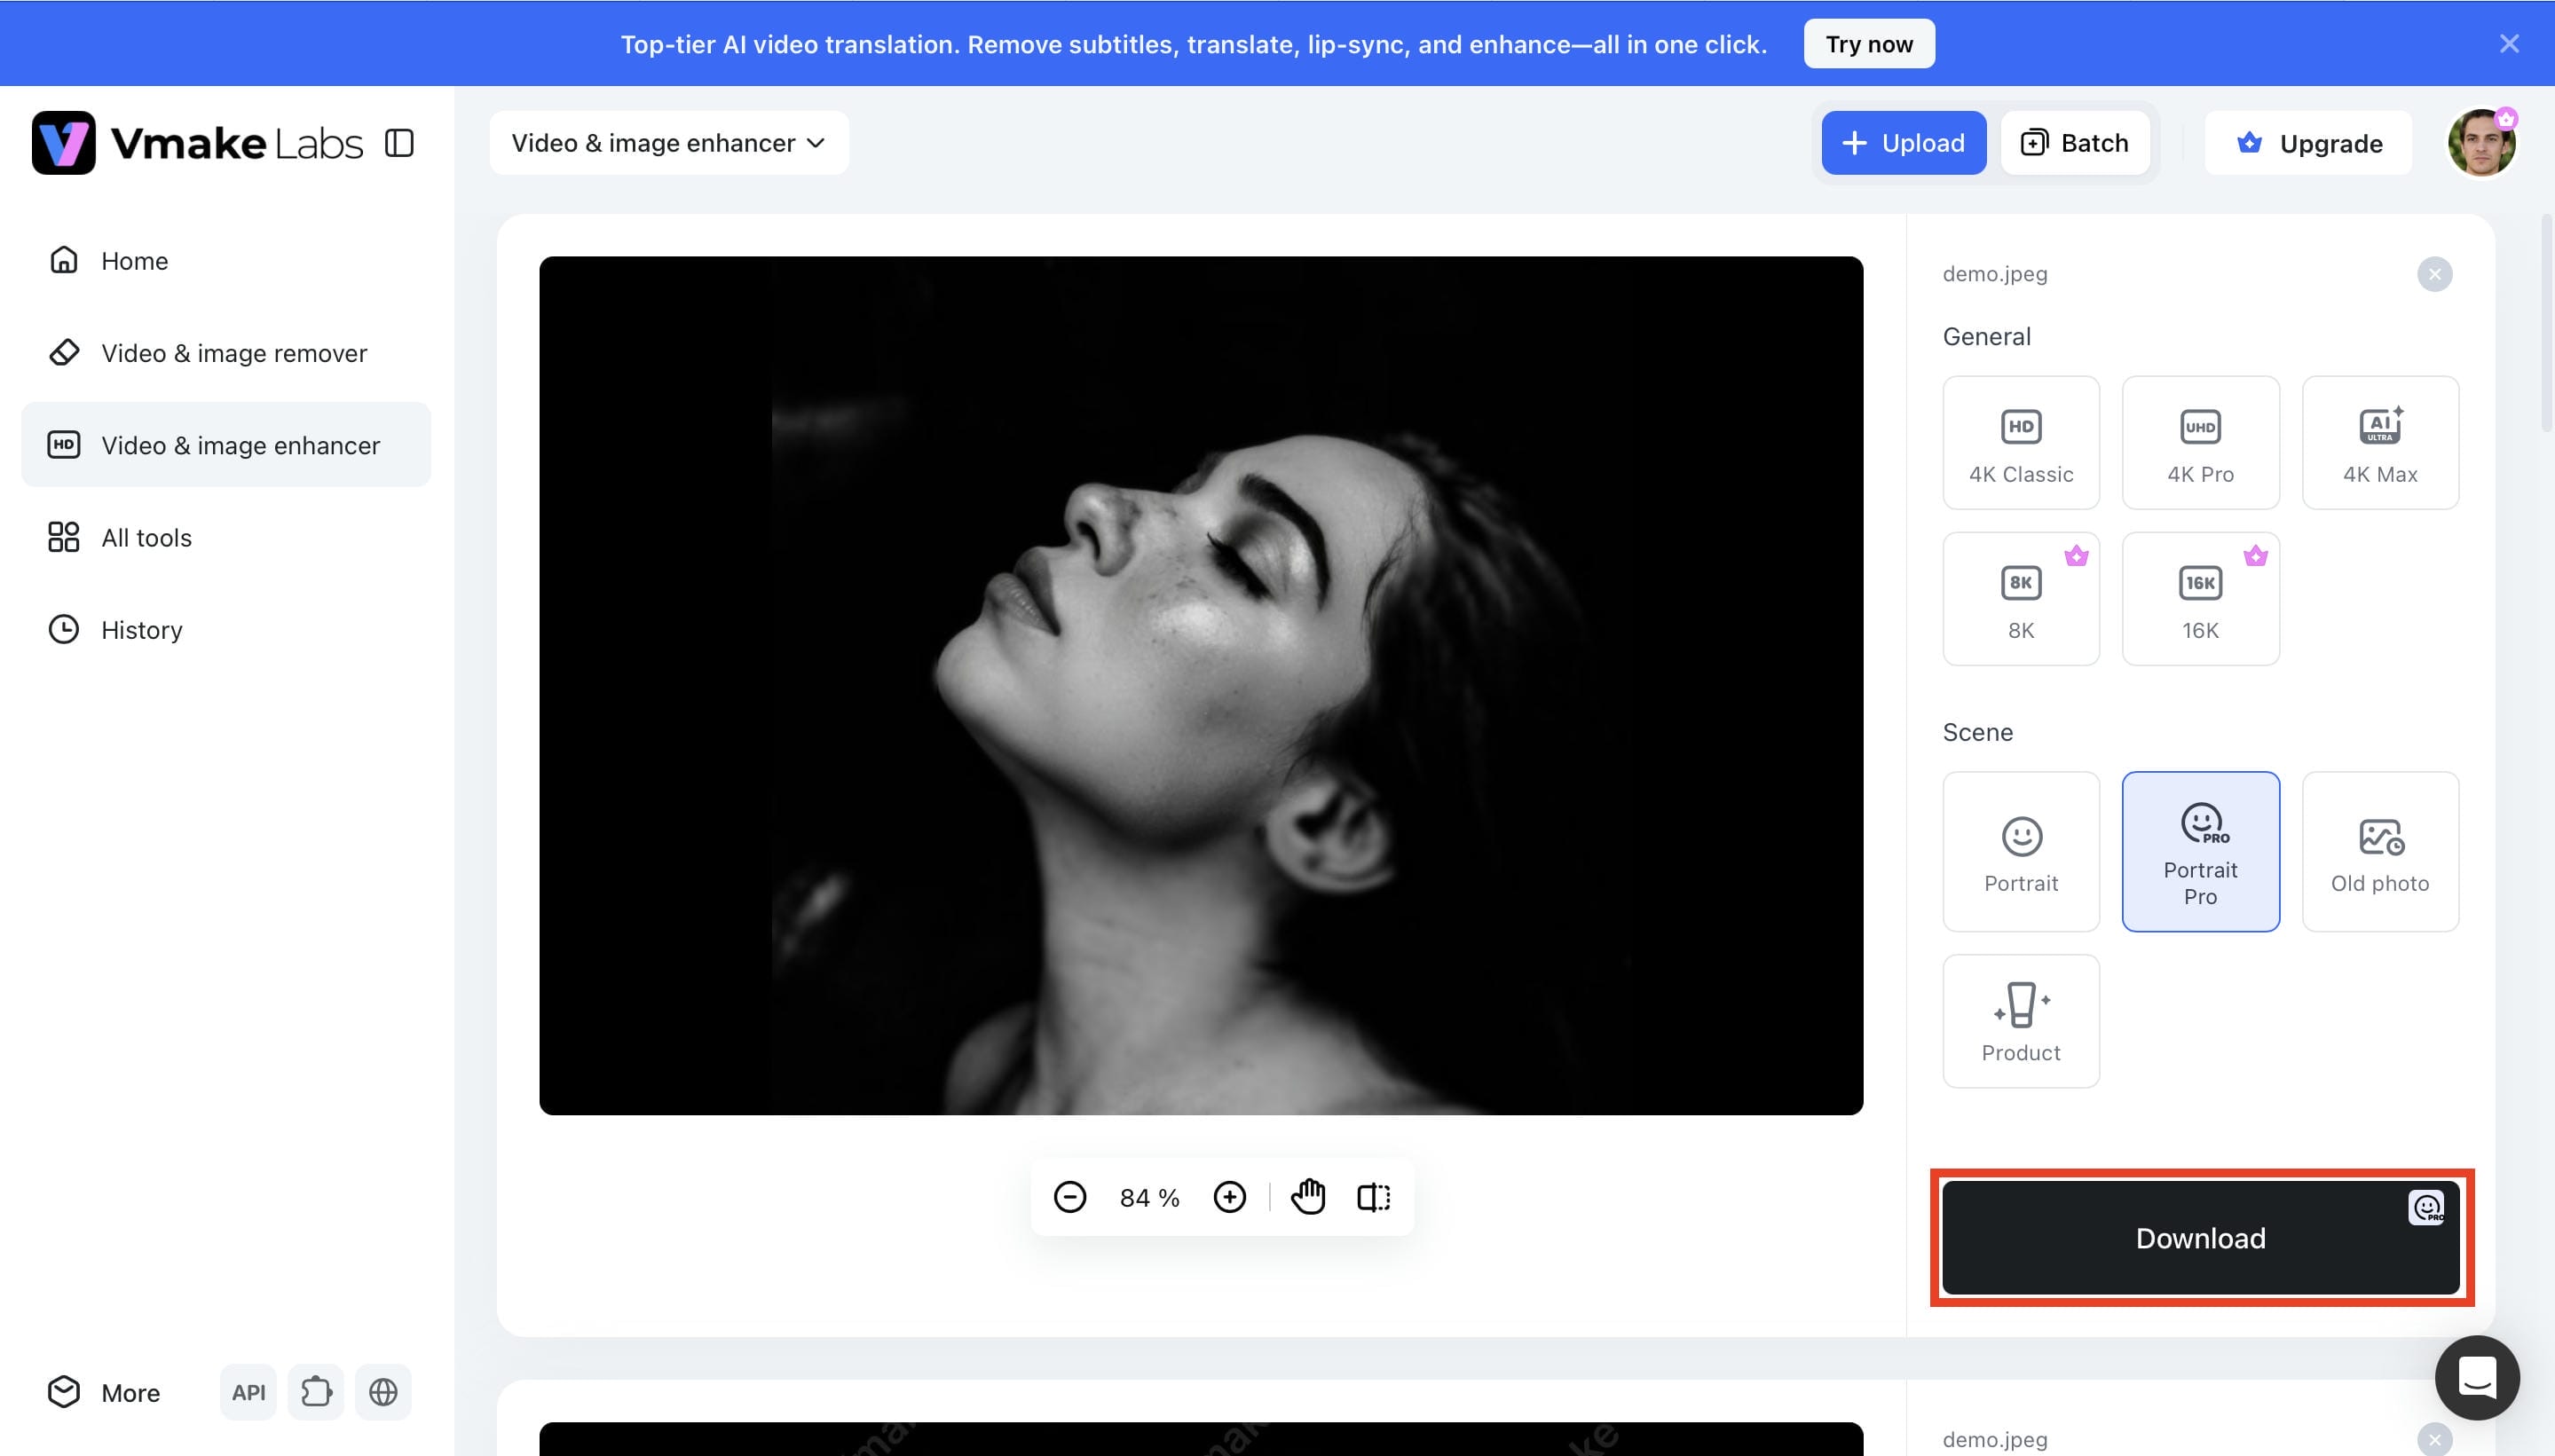
Once the enhancement is done, review the final image and compare it with the original to appreciate the improvements. Click Download if you're happy with the result to download the improved high-quality image to your device.
Key Features of Vmake Labs Image Enhancer
-
Multiple AI Enhancement Modes: Vmake Labs Image Enhancer offers multiple dedicated enhancement modes for portraits, products, old photos and high-resolution upscaling. Each mode is tuned to give the best results for different types of images without manual tuning.
-
HD, UHD, AI UHD, 8K, and 16K Enhancement: Vmake Labs supports multiple output resolutions, allowing you to upscale images for social media, presentations, e-commerce, or professional printing. The AI maintains image clarity while enlarging photos.
-
AI-Powered Detail Recovery: This AI image fixer intelligently restores textures, edges, and fine details that may be lost in blurry or low-quality images, producing sharper and more natural-looking results.
-
Automatic Noise and Artifact Reduction: Vmake Labs reduces digital noise, compression artifacts and unwanted imperfections automatically during enhancement. This results in cleaner images, while preserving important details and realistic textures.
-
Batch Processing: Enhance multiple images simultaneously instead of editing them one by one. Batch processing saves time and makes Vmake Labs an efficient solution for photographers, marketers, and businesses managing large image collections.
Photoshop vs Vmake Labs: Which Should You Choose?
Both Photoshop and Vmake Labs can improve the quality of images, but have different editing needs. Photoshop has advanced manual controls for professional editing; Vmake Labs makes it simpler with AI-powered enhancement. Here's a comparison of their main differences to help you make the right choice.
|
Criteria |
Photoshop |
Vmake Labs |
|---|---|---|
|
Editing Style |
Manual editing |
AI-assisted enhancement |
|
Skill Level |
Intermediate–Advanced |
Beginner-friendly |
|
Processing Speed |
Slower |
Faster |
|
Software Installation |
Required |
Browser-based |
|
Best For |
Precise editing and creative control |
Quick AI-powered image enhancement |
Which Tool Should You Choose?
Photoshop is the better choice if you need precise manual editing, advanced retouching, and complete creative control. It's ideal for photographers, designers, and experienced editors. If you want to improve image quality fast with AI, then Vmake Labs is a better choice. This browser-based workflow is ideal for beginners, content creators, marketers and anyone who needs fast, high-quality results.
Tips for Better Image Enhancement Results
The quality of results depends not only on the tools you use, but also on the editing workflow. These best practices help you to retain image details and avoid common editing mistakes.
-
Start with the highest-quality original image. A better source image gives Photoshop and AI tools more information to work with, resulting in cleaner and sharper enhancements.
-
Work on a duplicate layer or Smart Object. This keeps your original image intact and allows you to make non-destructive edits that can be adjusted later.
-
Correct exposure before reducing noise. Adjusting brightness and contrast first helps produce more natural-looking noise reduction and prevents unnecessary detail loss.
-
Apply sharpening as the final editing step. Sharpening should be done after resizing and other edits to achieve crisp edges without introducing unwanted artifacts.
-
Avoid excessive sharpening or upscaling. Over-processing can create halos, grain, and unnatural textures that reduce overall image quality.
-
Zoom 100% to inspect fine details. Reviewing your image at full size helps you identify remaining noise, blur, or sharpening artifacts before exporting.
-
Save a high-quality copy of the final image. Export your finished image using a suitable format such as PNG or high-quality JPEG to preserve as much detail as possible.
Conclusion
Photoshop offers a comprehensive set of tools for enhancing image quality through resolution adjustment, color correction, noise reduction, sharpening, and AI-powered upscaling. It remains an excellent choice for users who need precise manual control and advanced editing features. If you prefer a faster, more automated workflow, Vmake Labs provides AI-powered image enhancement that improves resolution, sharpness, and clarity in just a few clicks. The best option depends on your editing experience, workflow, and the level of control you need.
FAQs
Can I improve image quality without making the photo look unnatural?
Yes. Change gradually and don't over-sharpen or over-apply noise reduction. Previewing edits at 100% zoom and working with Smart Objects helps to keep the textures realistic and the results natural. Vmake Labs automatically balances sharpness and detail for faster AI enhancement while maintaining a natural look.
What is the difference between sharpening and AI upscaling?
Sharpening emphasizes the contrast of edges to make the existing details more prominent. AI upscaling enlarges the size of an image by creating new pixels and restoring lost details. The combination of both techniques can lead to an improvement in the overall image quality. Vmake Labs uses AI to upscale and sharpen images simultaneously.
Which image format is best for editing in Photoshop?
RAW files have more image data, meaning you have the most editing latitude. TIFF is also good for high-quality editing, while JPEG is good for everyday photos but offers less room for editing due to compression. Vmake Labs supports popular image formats for fast AI enhancement.
When should I use AI image enhancement instead of manual editing?
If you want to improve the quality of images quickly without the need for manual adjustments, then AI image enhancement is great. For detailed retouching or creative projects where you need precise control, manual editing is the way to go. Vmake Labs is a useful tool for fast AI-based image enhancement.
Does enhancing image quality increase file size?
Yes, many times higher resolution, lower compression, or higher quality file formats will likely result in larger file sizes when exporting. The final size depends on the size, format and compression of the image. Vmake Labs helps you find the right balance between image quality and efficiency for a range of applications.
You May Be Interested

Airbrush Video Enhancer Review 2026: Features, Pros, and Cons
Best AI Image Enhancer in 2026: Top Tools to Upscale and Fix Blurry Images
Best AI Photo Enhancer Tools in 2026 (Free & Online): Improve Image Quality Instantly
2026 Fotor Video Enhancer Review: Features and Top Alternatives