How to Delete Audio From Video: The Ultimate 2026 Guide
Want to remove unwanted sound from your clips? Learn how to delete audio from video on iPhone, desktop, Premiere Pro, and online in just a few steps using beginner-friendly and professional methods.

Have you ever captured the perfect video, only to realize the background audio ruins it? A gust of wind, a car horn, or copyrighted music can turn a great clip unusable. This guide shows how to quickly delete audio from video using online tools, iPhone, Premiere Pro, and desktop editors.
Things to know before removing audio
Before you dive into any of the methods below, it helps to understand a few basics.
-
Muting vs deleting an audio track
Muting just silences the sound during playback, but the audio data is often still there in the file. Deleting actually strips the audio track out, which usually results in a smaller file size.
-
Will video quality change?
No. Removing audio only affects the sound, not the visual quality of your footage. Your resolution, frame rate, and color all stay untouched.
-
Supported video formats
Most tools handle standard formats like MP4, MOV, and AVI without a hitch. However, if you are working with more niche formats (like MKV or high-end RAW files), some basic online editors might ask you to convert the file first.
-
Always keep a copy of the original file.
Edits are quick, but you can't restore audio once it's gone and the project is closed. Test on a duplicate if you're unsure.
4 easy methods to delete audio from video
Different projects require different tools. Here are four good ways to strip audio from video, from quick online options to professional desktop workflows.
Method 1: How to delete audio from a video online
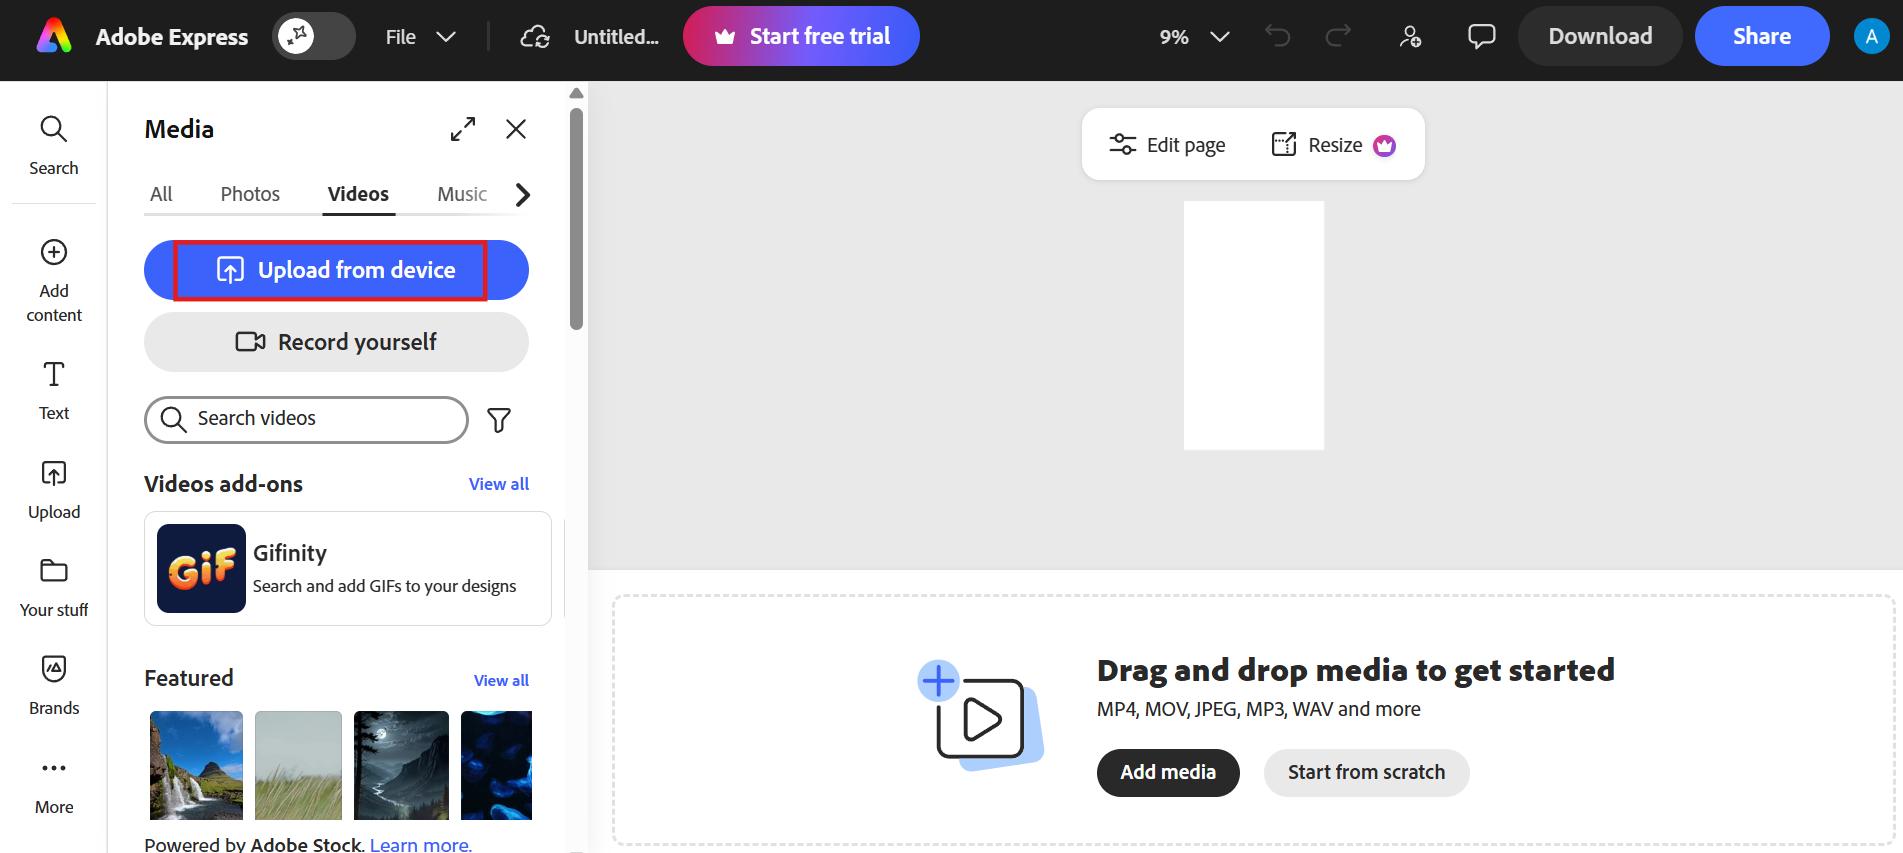
If you don't want to install software, an online editor is usually the fastest solution. Adobe Express offers an easy-to-use tool in your browser to remove audio in just a few clicks. It's easy enough for a beginner, it works on most modern browsers, and it supports up to one-hour-long videos, so it's perfect for quick edits from any computer.
Step 1: Upload your video
Launch Adobe Express and hit "Upload from device" ti import your clip (up to 1 hour long).
Step 2: Hit Mute
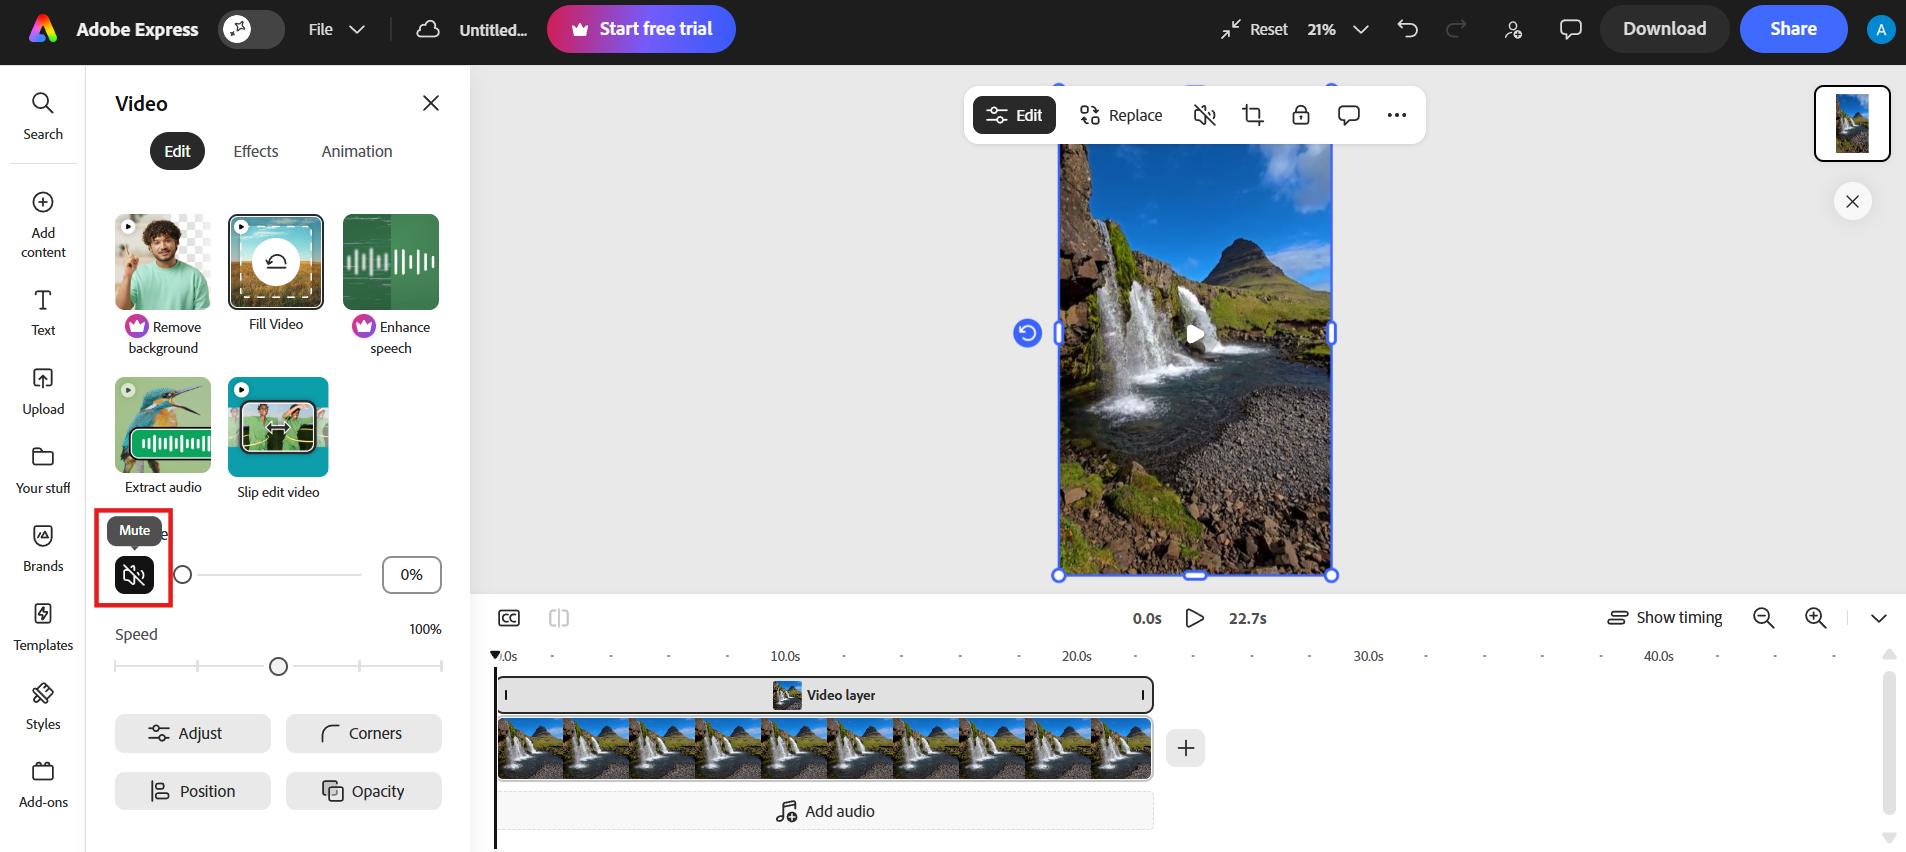
In the online editor, select your video and click "Mute." The audio is instantly stripped out.
Step 3: Download your video
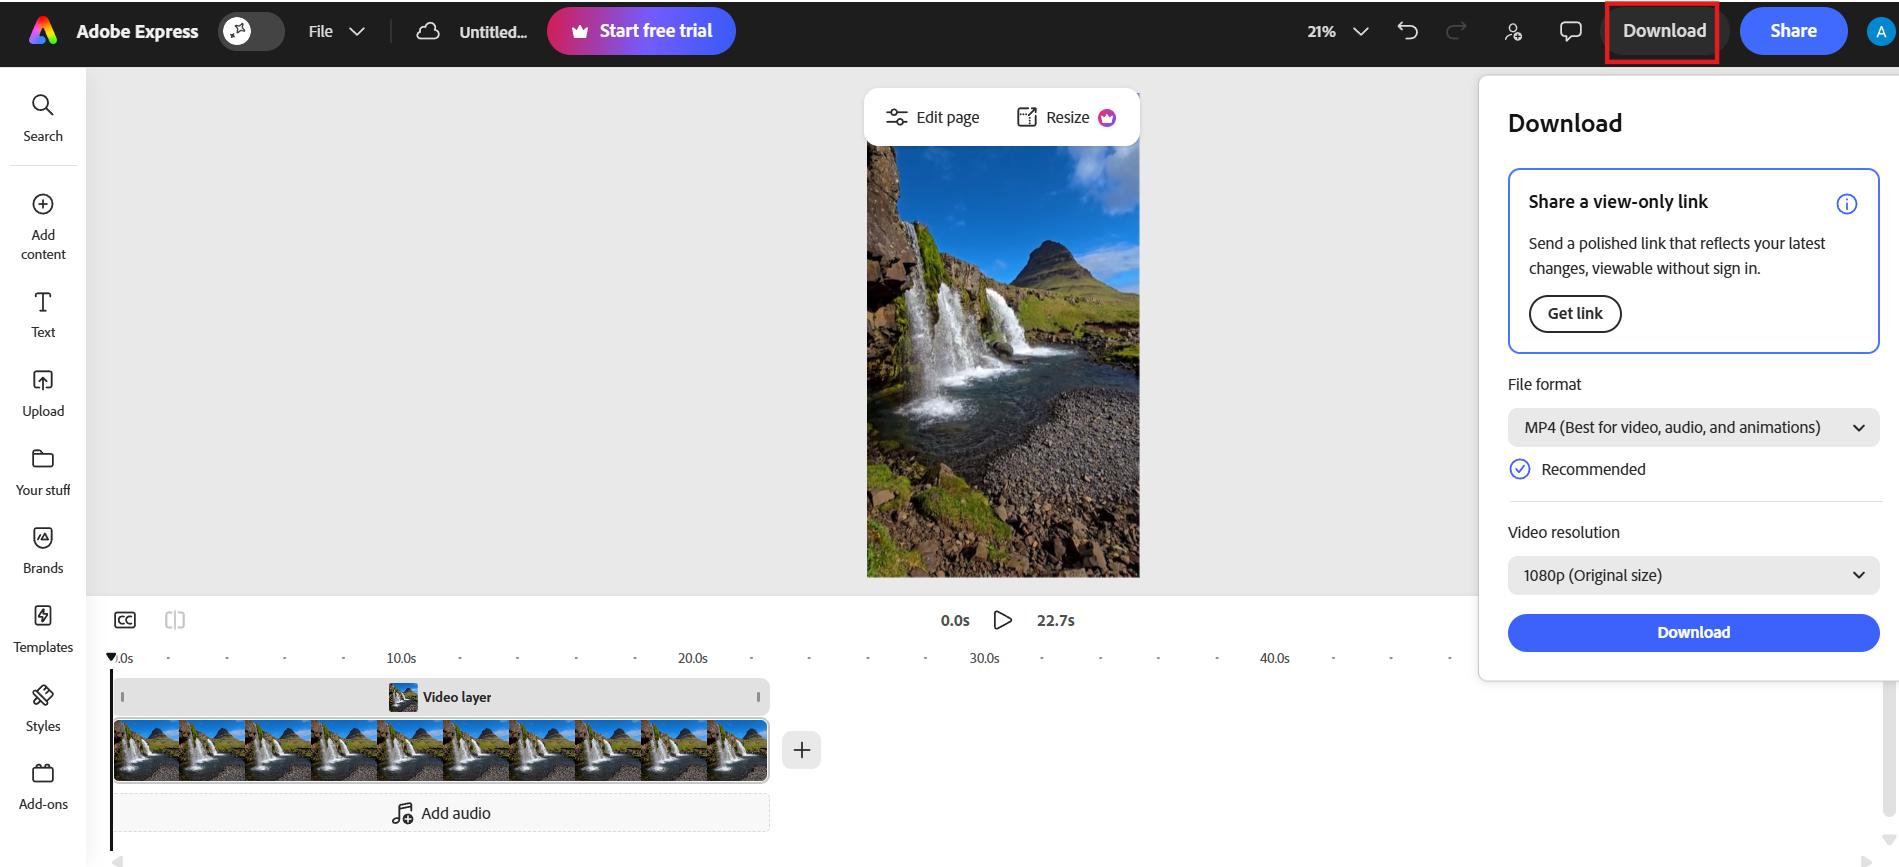
Preview the result, then download it as an MP4, ready to share or keep editing.
Method 2: How to delete audio from iPhone video
If your clip was recorded on an iPhone, you don't need any extra apps to strip out the sound. The built-in Photos app already has a mute feature tucked into its editing tools, so you can remove audio in just a few taps. This works well for quick social clips, silent b-rolls, or footage you plan to voice over later.
Step 1: Open the video in the Photos app
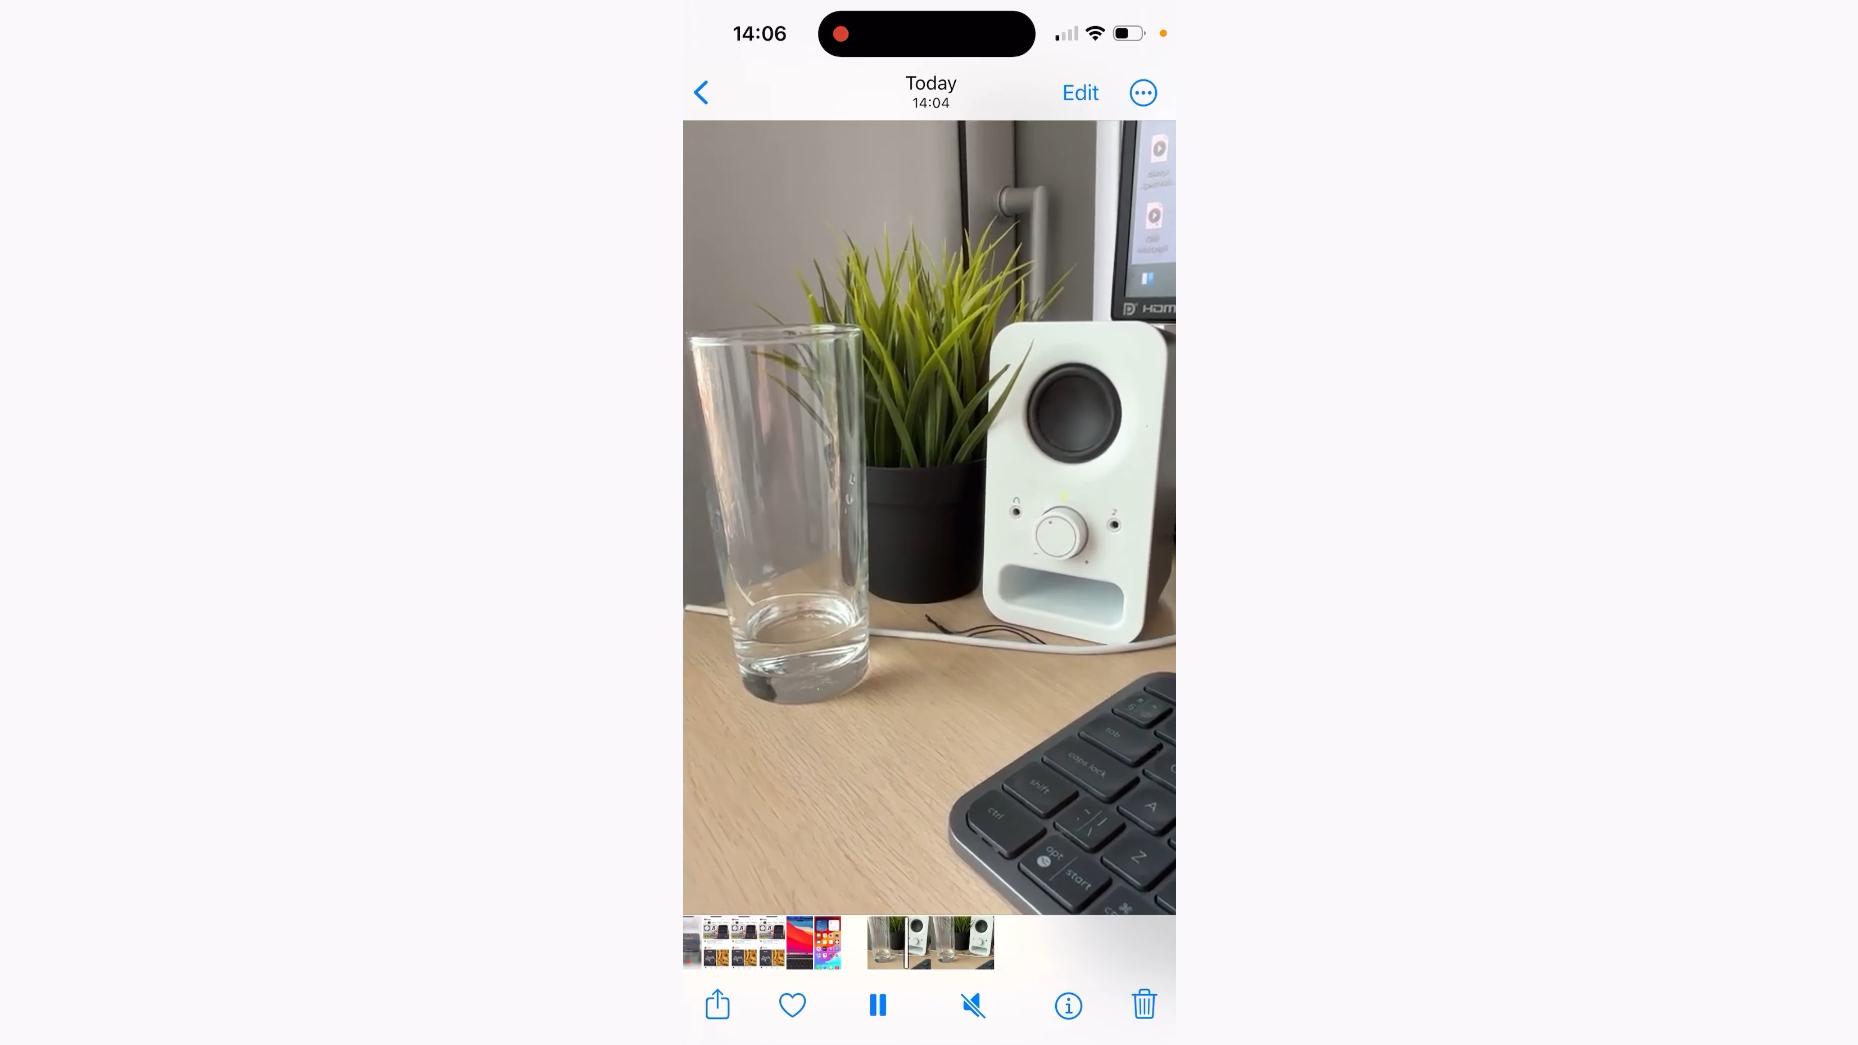
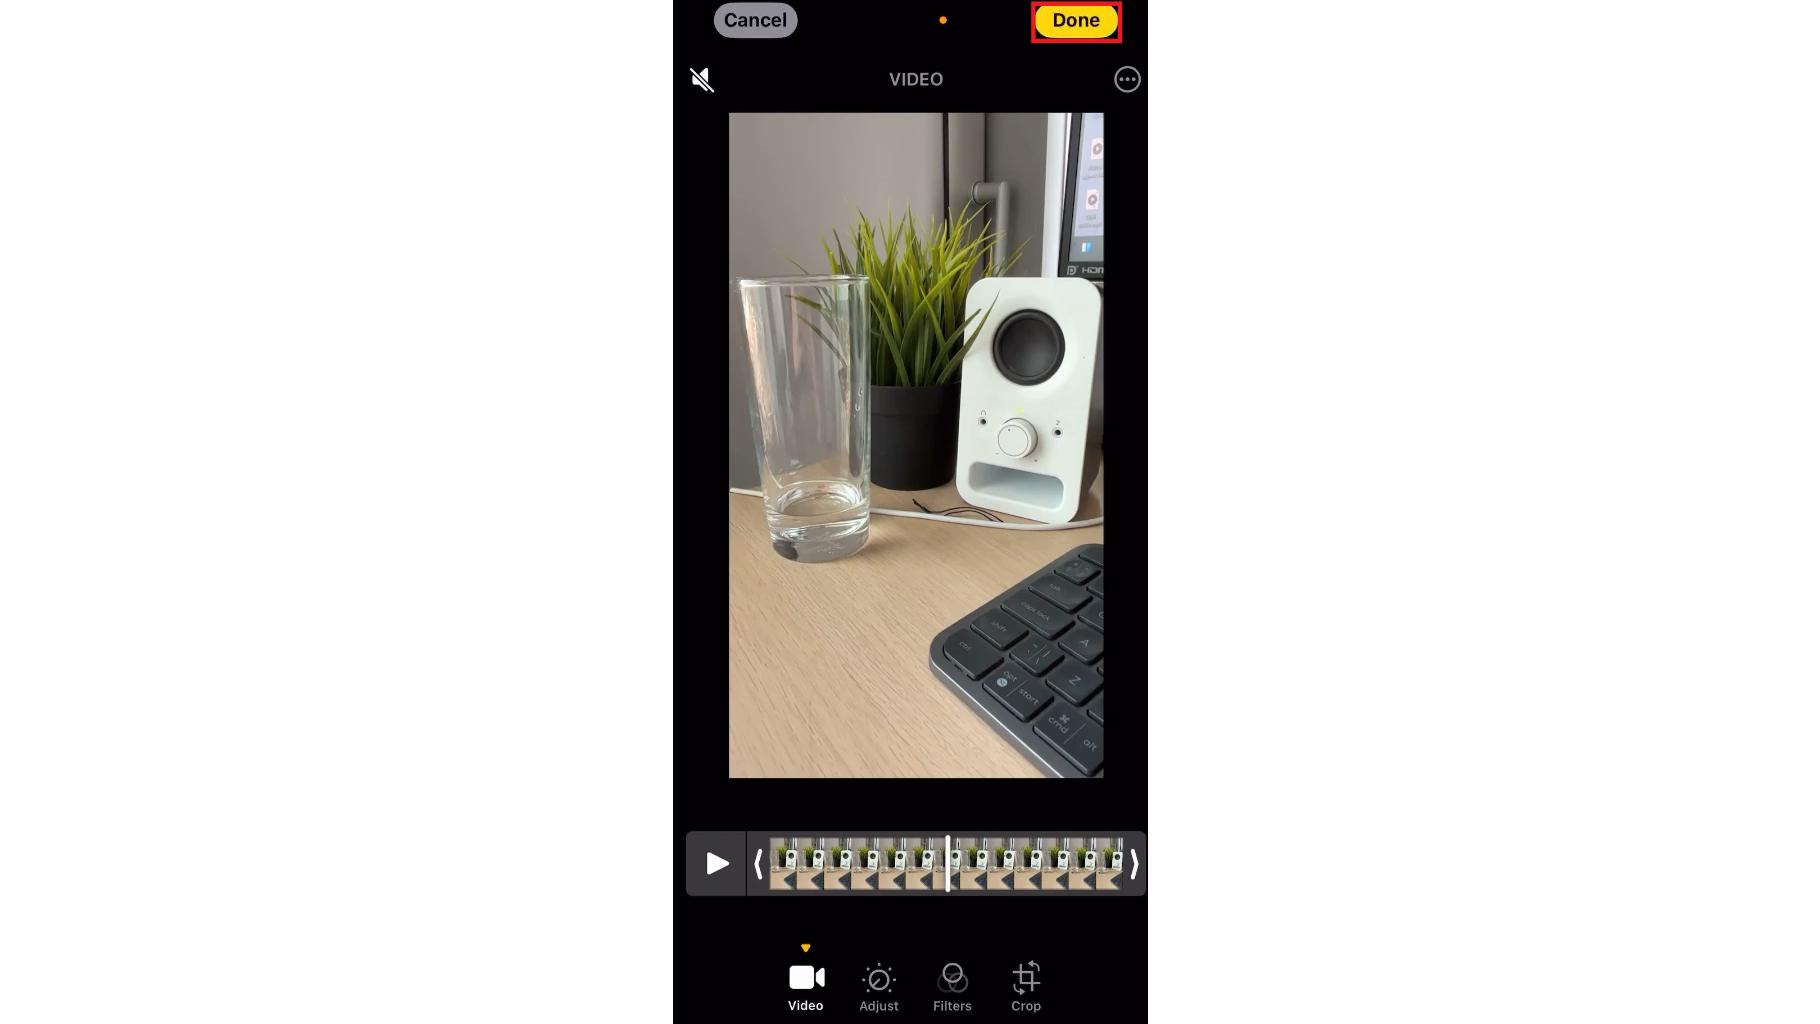
Open your Photos app on your iPhone and tap the video you want to edit. Tap "Edit" in the top-right corner to open the editing tools.
Step 2: Mute the audio
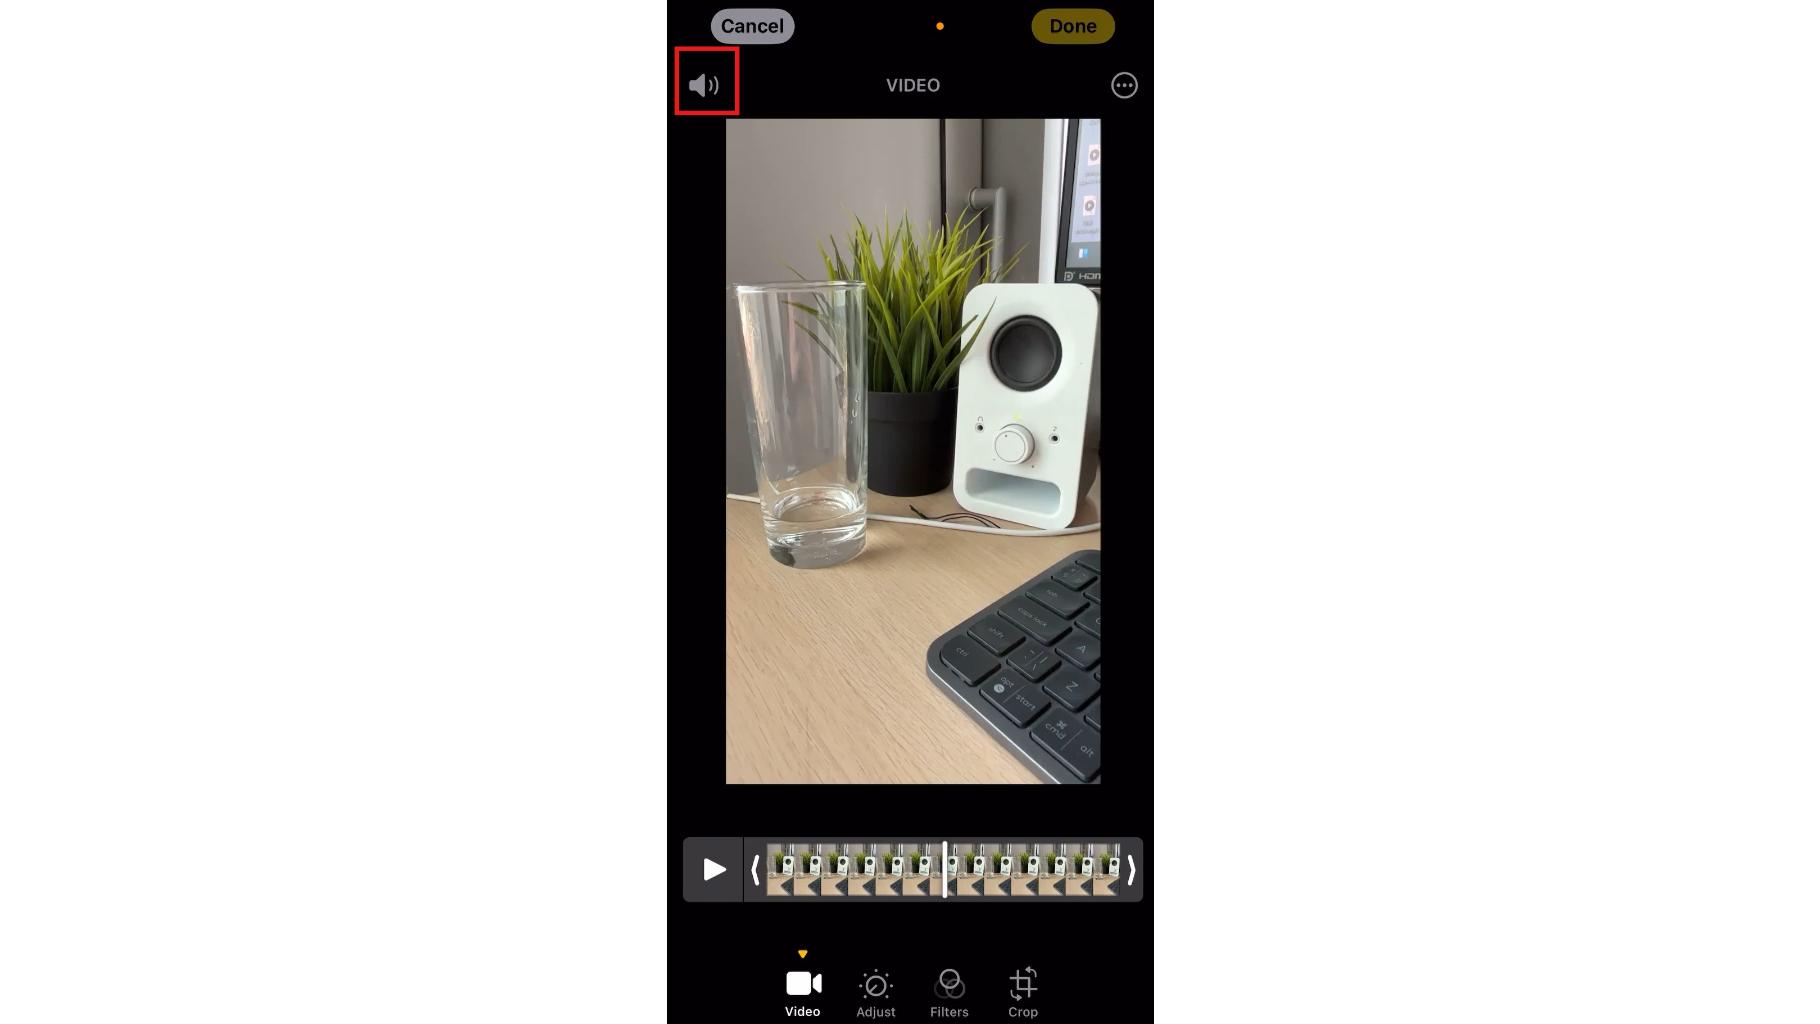
Tap the speaker icon in the top-left corner of the screen. When the icon is crossed out, the video's audio has been muted.
Step 3: Save the edited video
Tap "Done" to save your changes. The video will now play without sound. If you want to keep both versions, save a duplicate before editing the original.
Method 3: How to delete audio from video in Premiere
Premiere Pro offers more control over precise audio removal than most editors, making it a solid choice. Once your video is on the timeline, removing sound from a single clip or from an entire project is just a few clicks away. This is great for editors who want flexibility and accuracy.
Step 1: Import your video and add it to the timeline
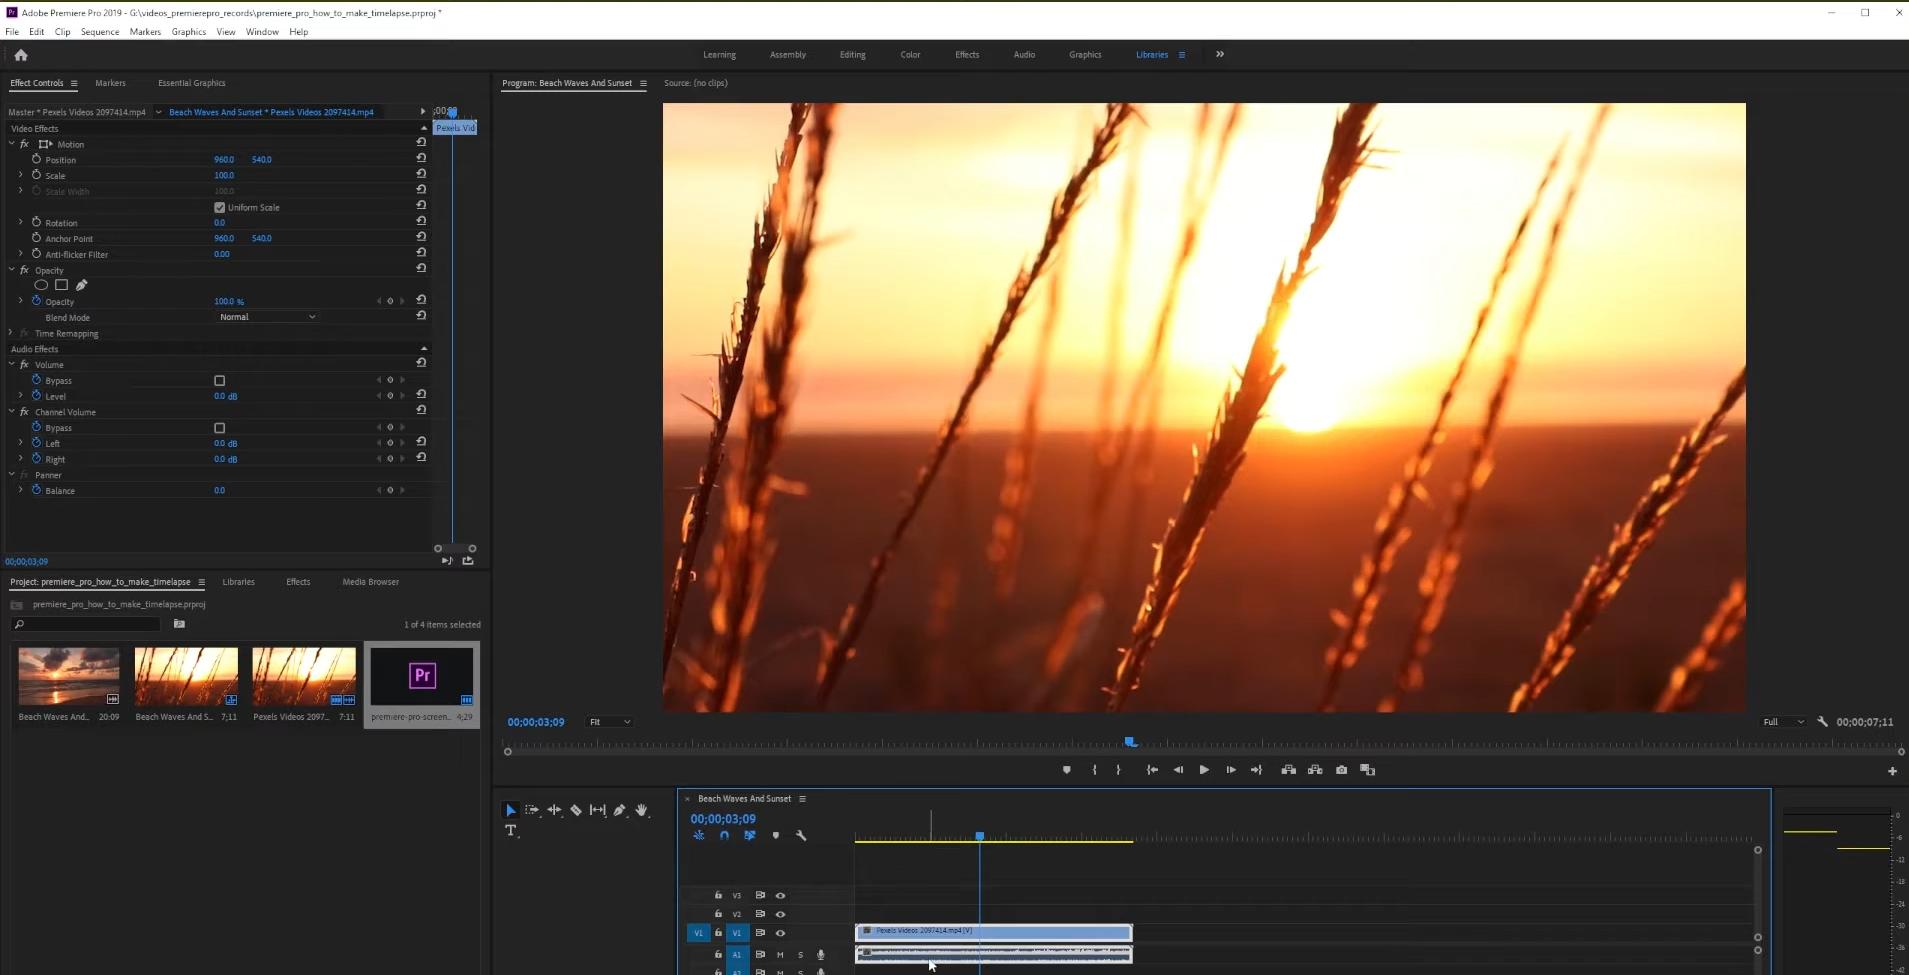
Open Premiere Pro, create or open a project, and import your video. Drag the clip to the timeline, and you will see the video and audio tracks.
Step 2: Remove the audio track
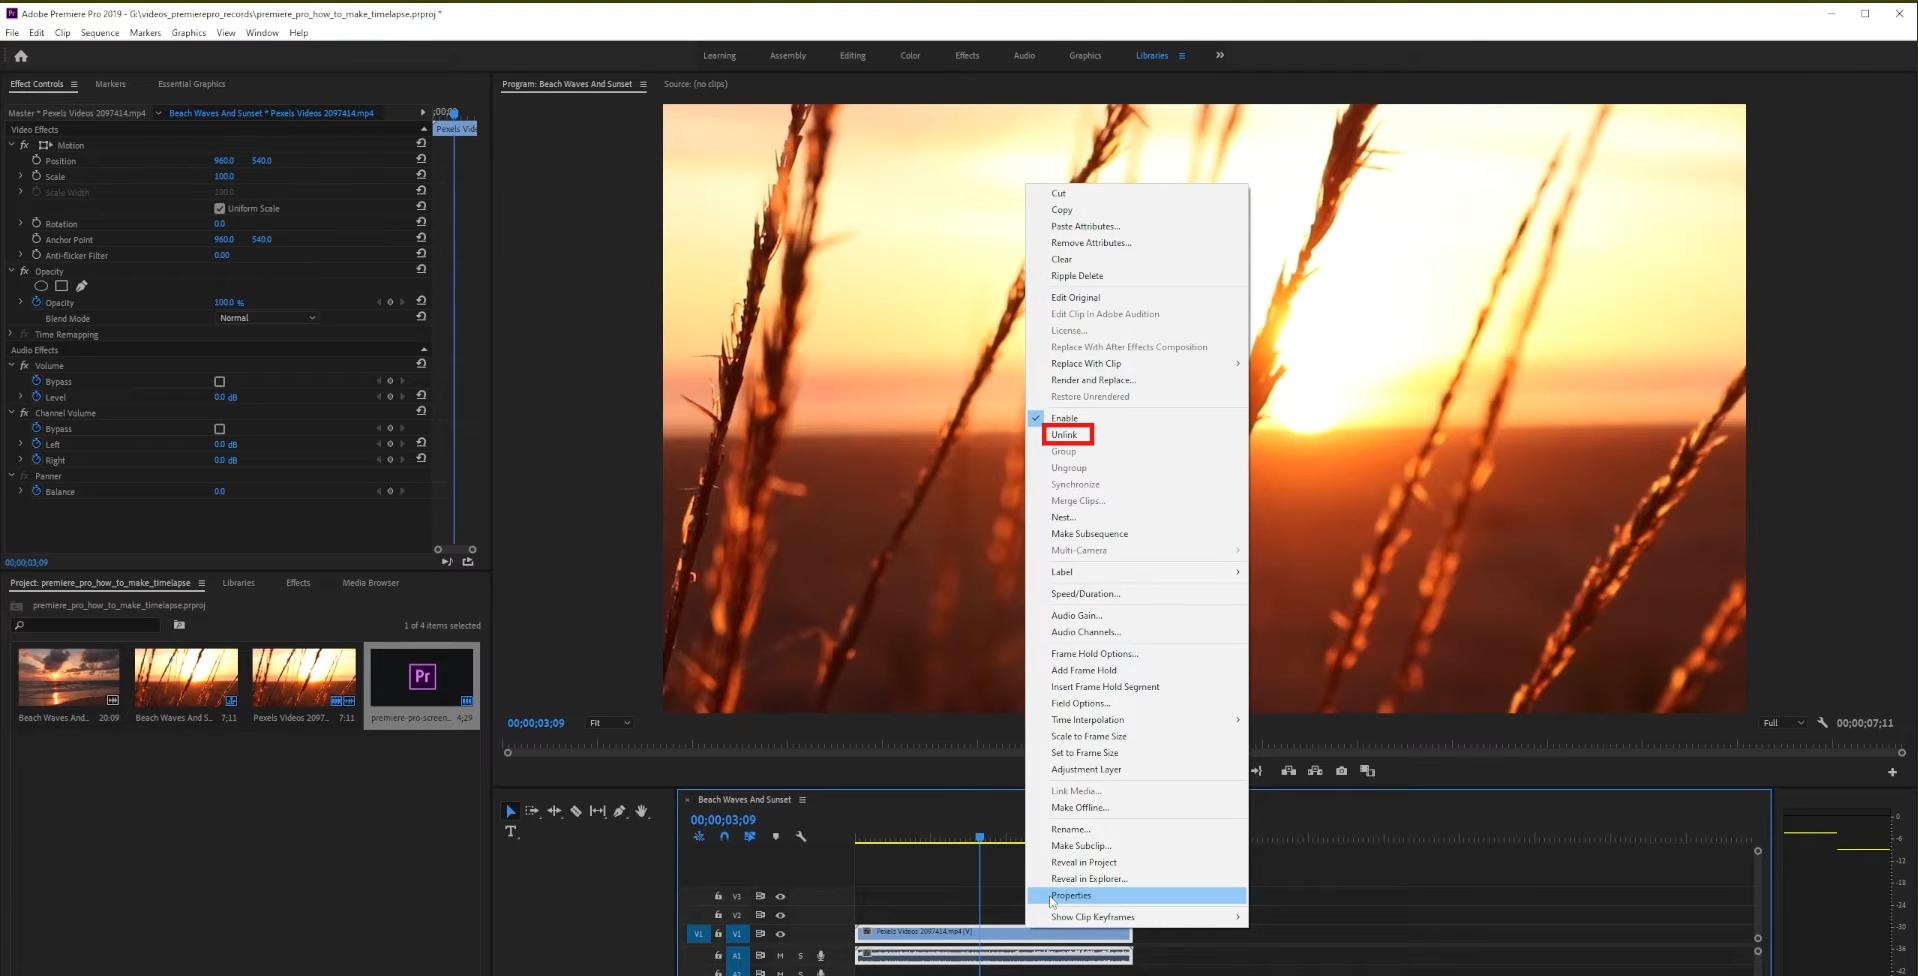
If the audio and video are linked, right-click the clip and choose "Unlink." Select the audio track, then press "Delete" or right-click and choose "Clear" to remove it from the timeline.
Pro tip: Before exporting, play back the timeline to confirm you deleted only the audio track and not the video clip. With linked clips, it is easy to accidentally select both. If the video still looks correct in the timeline preview, you are safe to export.
Step 3: Export the video
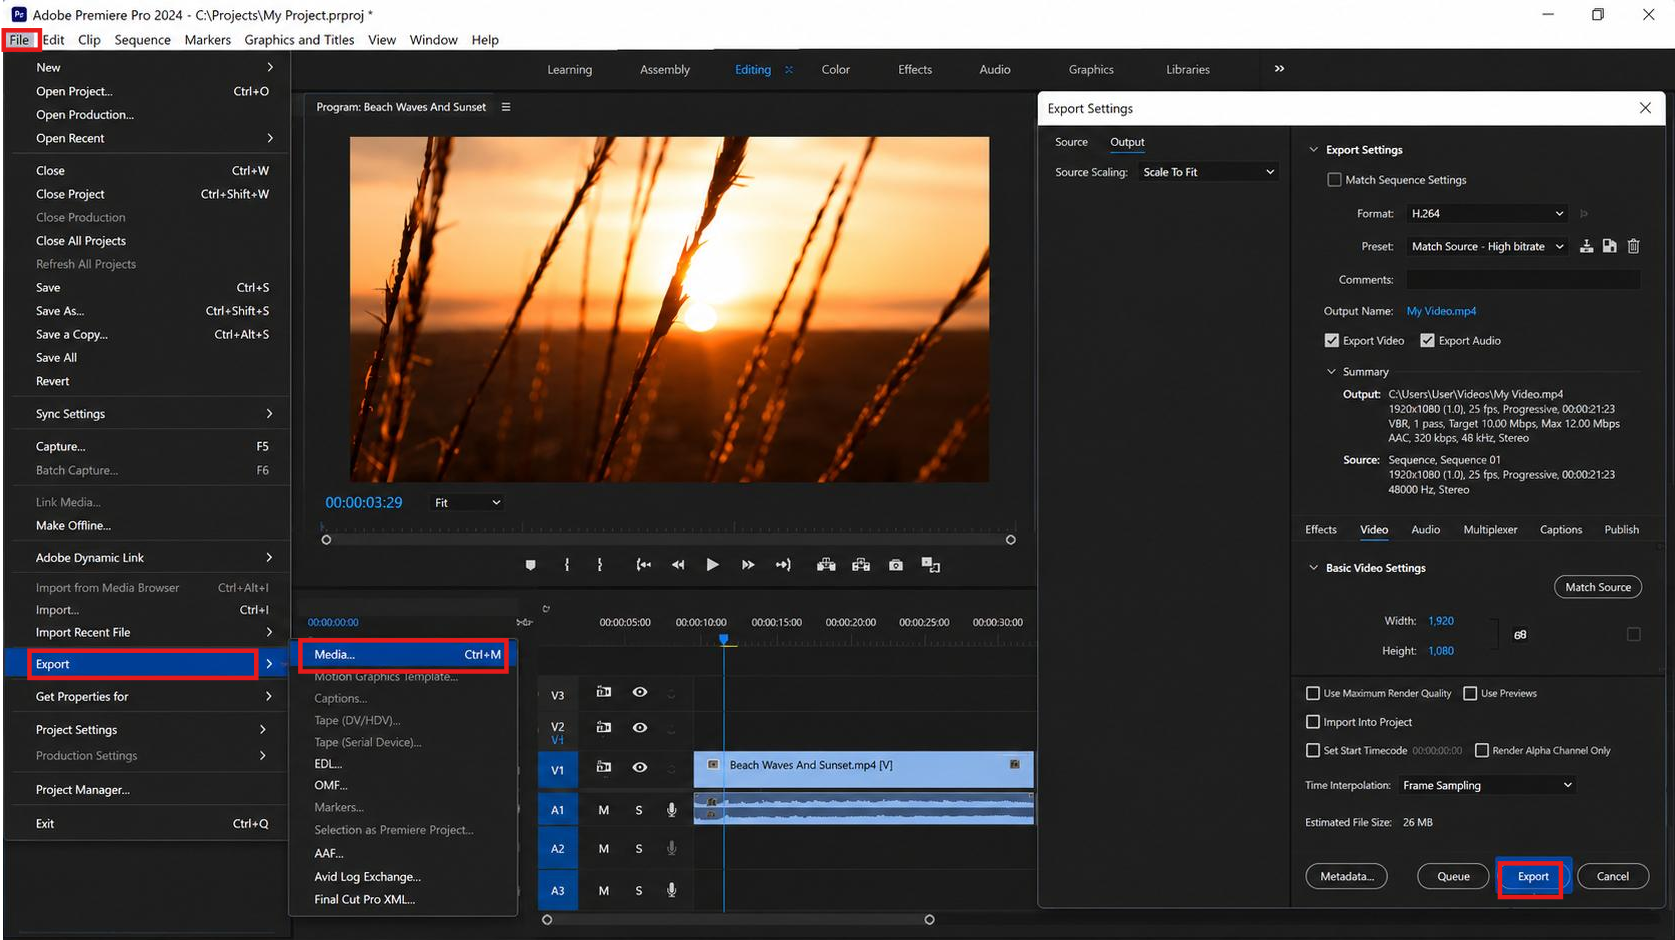
Go to File > Export > Media, choose your preferred export settings, and click "Export." Your final video will be saved without the original audio.
Method 4: How to delete an audio track from a video on desktop (Windows/Mac)
For desktop users who want more control than a quick web tool but don't need the complexity of professional software, Microsoft Clipchamp is the ideal middle ground. It comes pre-installed on Windows 11, requires no prior editing experience, and uses a clean drag-and-drop timeline that anyone can pick up in minutes. Mac users can access it through any modern browser with the same full functionality.
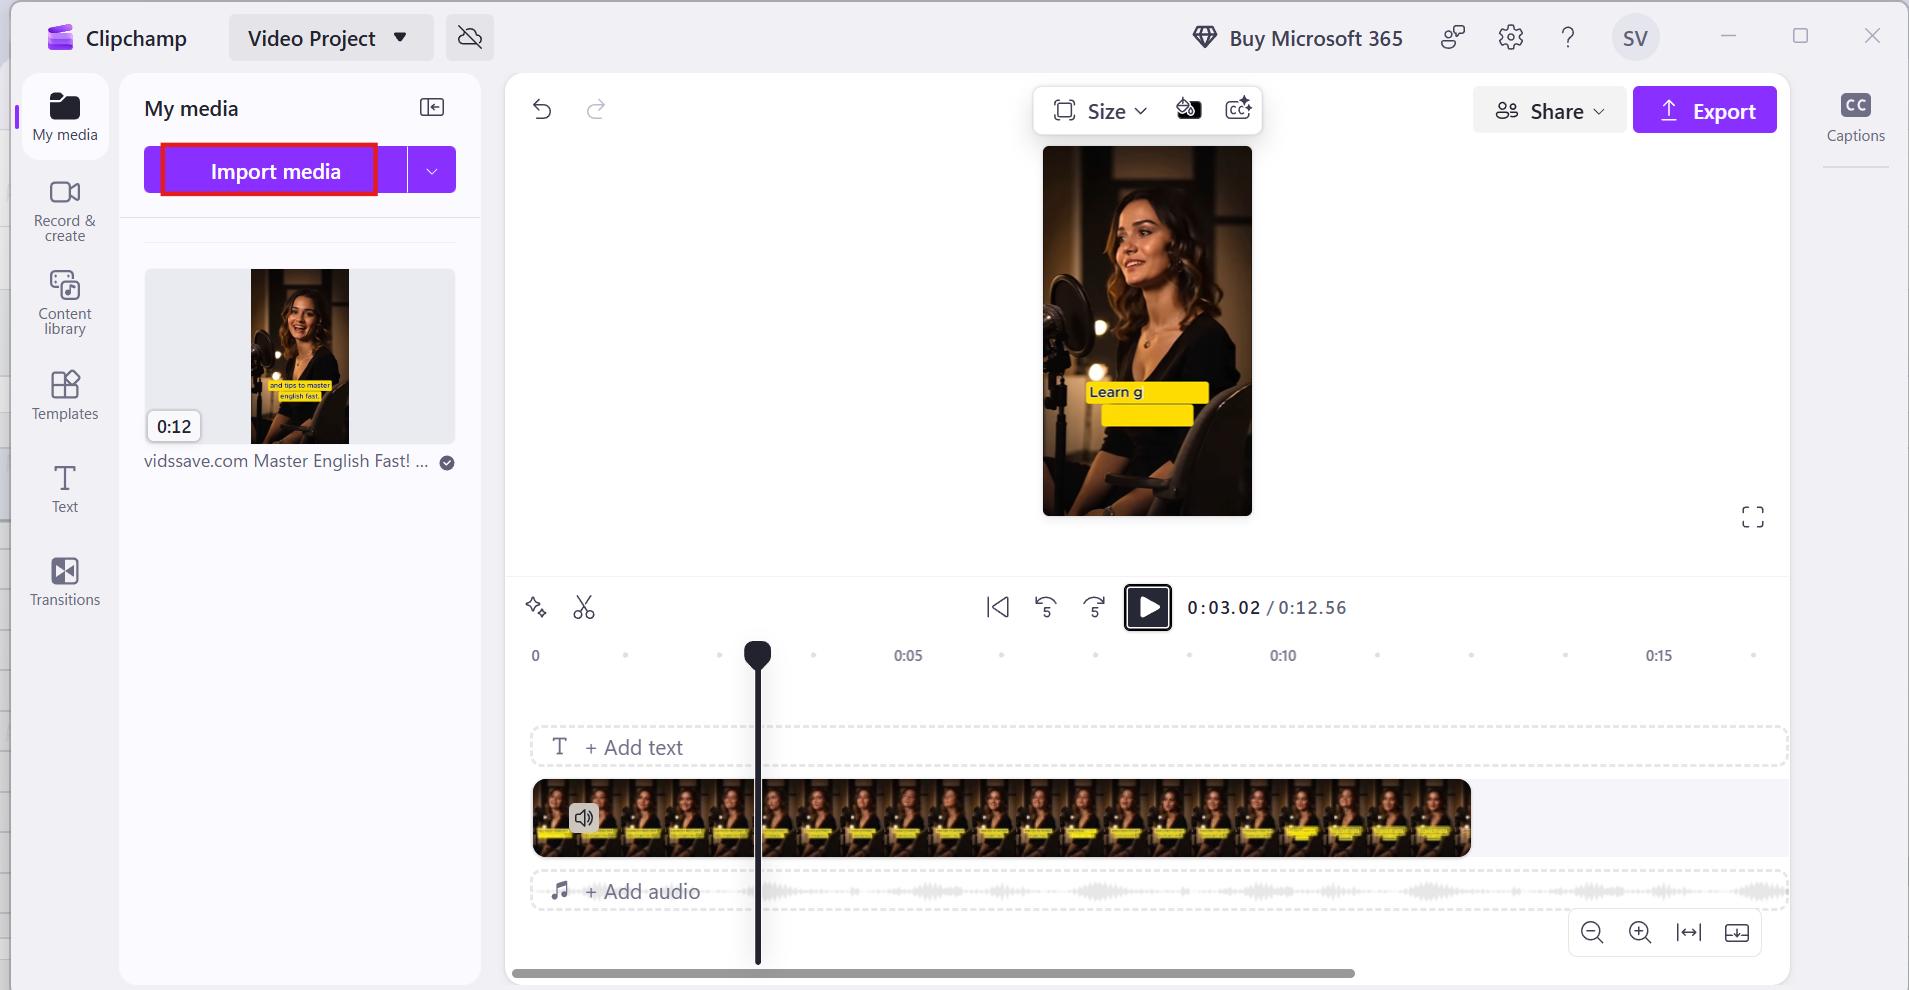
Step 1: Add your video to the timeline
Open the Clipchamp app, import the video you want to edit, and drag it to the editing timeline at the bottom of the screen. Make sure the clip is selected.
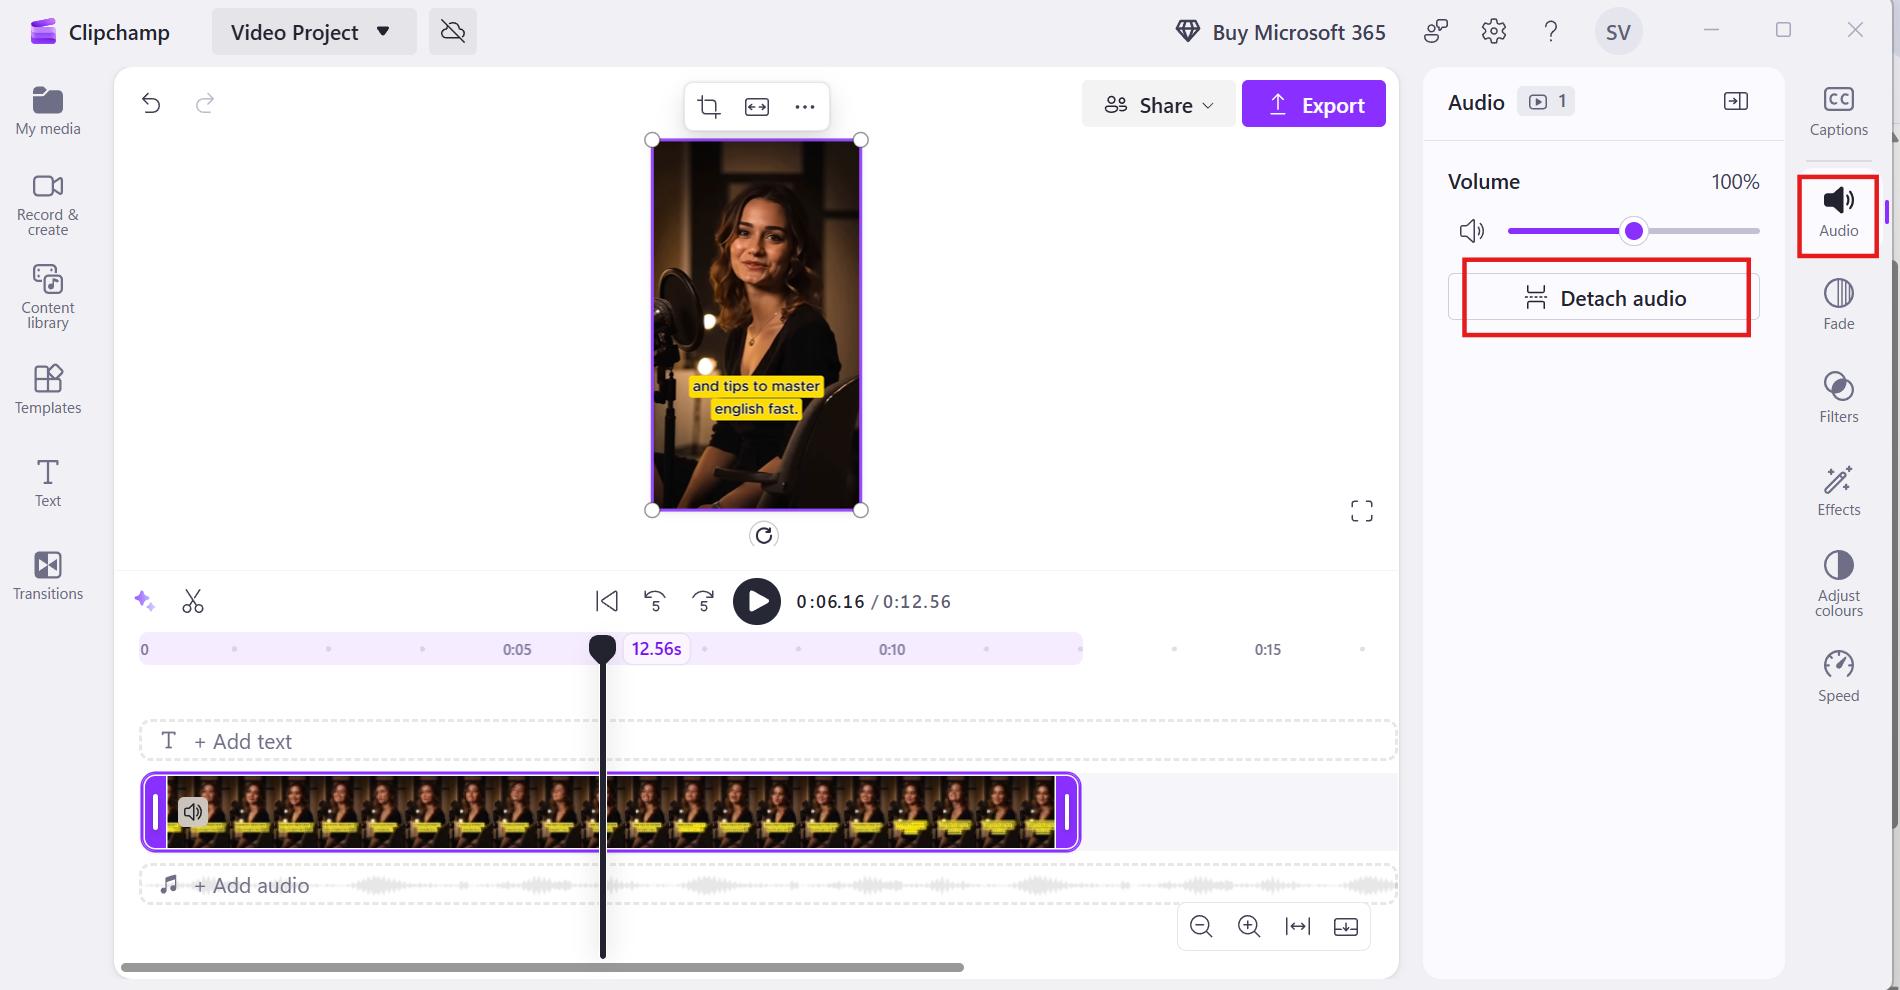
Step 2: Detach the audio
Right-click the clip on the timeline and select "Audio > Detach audio." This splits the sound into its own separate audio clip, sitting right below the video track.
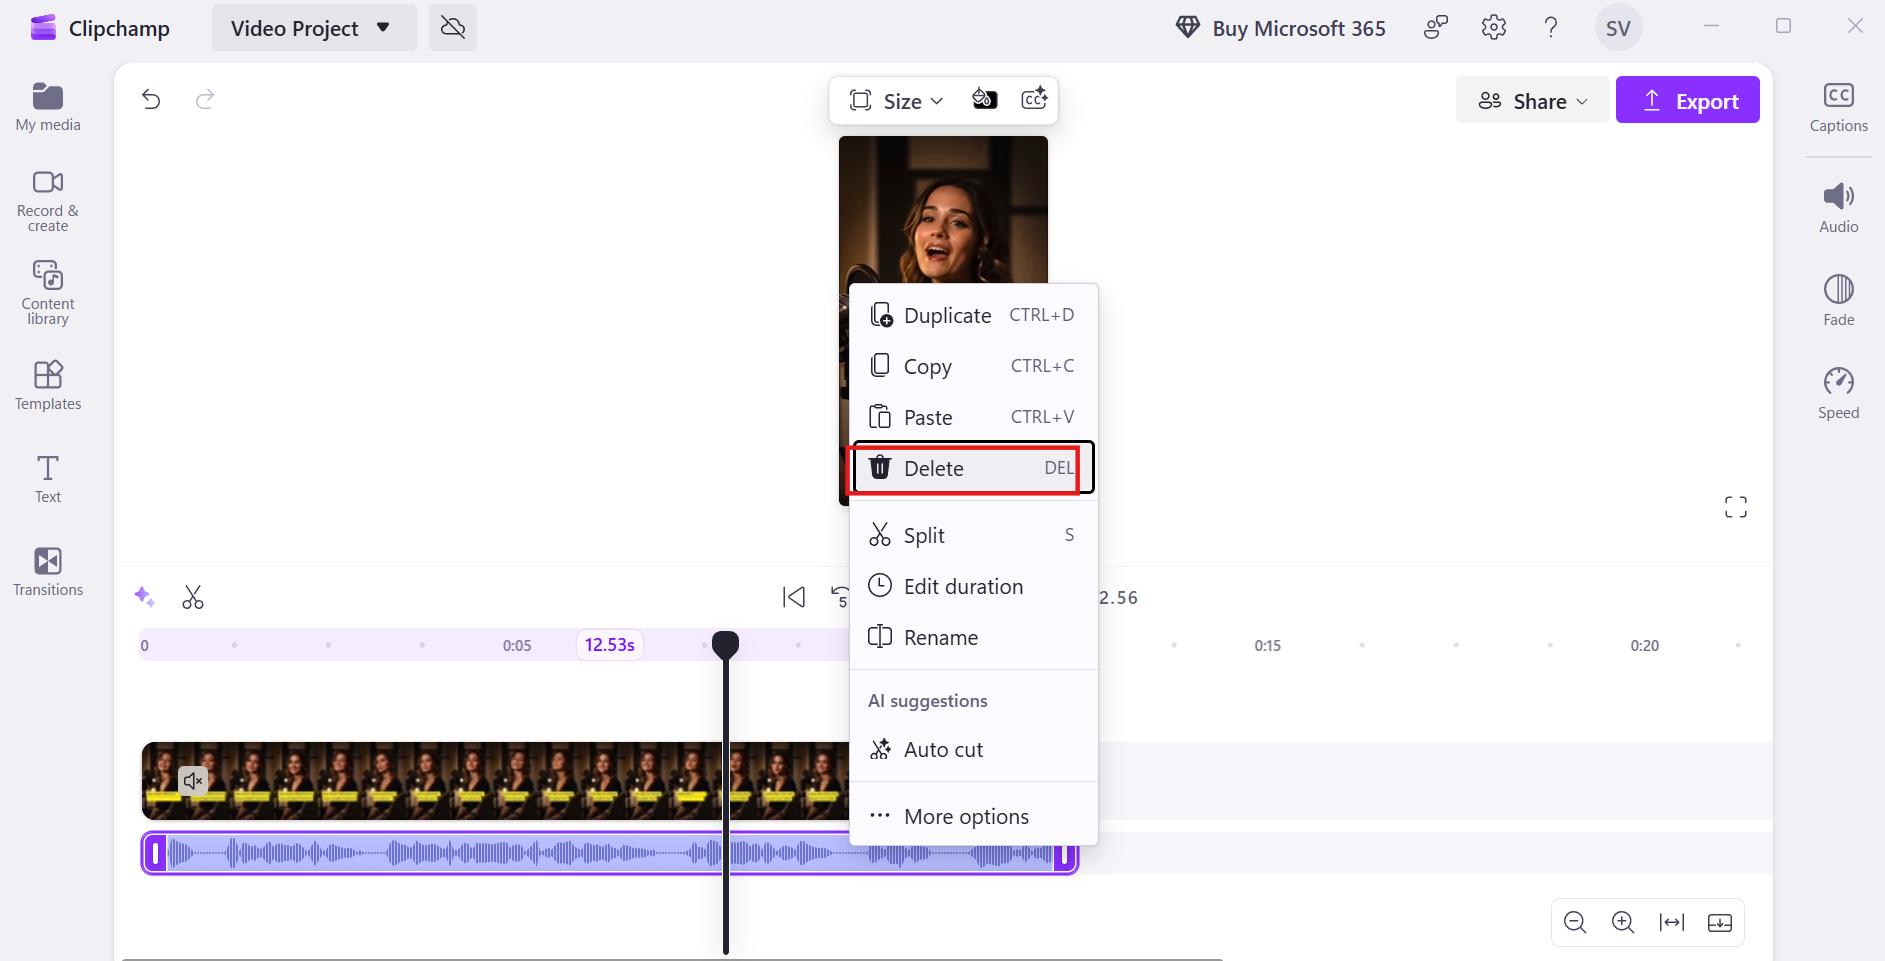
Step 3: Select and delete the audio clip
Click the detached audio clip so it's highlighted, then hit "Delete" (or click the delete button in the toolbar). The video stays exactly as it was, just without sound. Export when you're ready.
Which method should you choose?
The right method depends on your device, skill level, and how much control you need. Use this table to find the best fit for your situation:
|
Method |
Best for |
Skill level |
Speed |
|---|---|---|---|
|
Adobe Express (online) |
Quick edits, no software |
Beginner |
Very fast |
|
iPhone Photos app |
Mobile clips on the go |
Beginner |
Instant |
|
Adobe Premiere Pro |
Precise editing, long projects |
Advanced |
Moderate |
|
Microsoft Clipchamp |
Desktop editing without pro software |
Beginner–intermediate |
Fast |
|
Vmake Labs (noise removal) |
Keep speech, remove background noise |
Beginner |
Very fast |
If you just need silence, any of the first four methods will work. If you want to keep your voice or dialogue but remove distracting background noise, Vmake Labs is the only option here built specifically for that.
Bonus: When to remove background noise instead of deleting audio
Sometimes, deleting the entire audio track isn't the best solution. If your video contains clear speech but also picks up wind, traffic, crowd chatter, or other distracting sounds, removing only the background noise can preserve the natural audio.
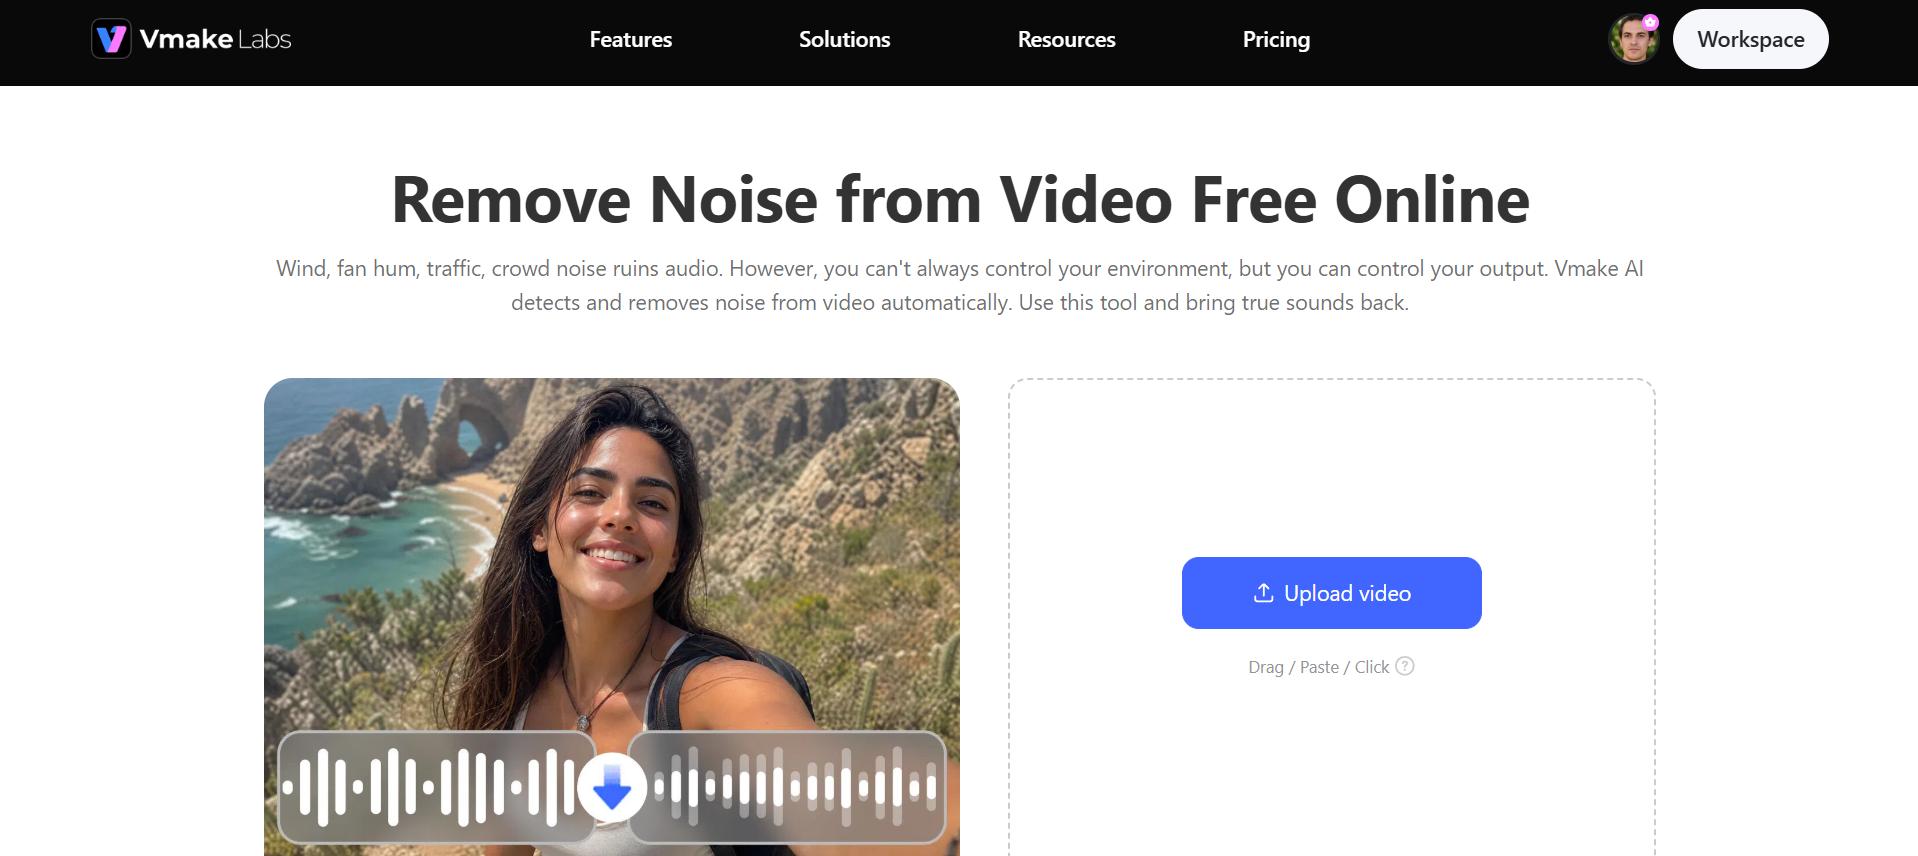
That's where Vmake Labs AI-powered noise remover comes in. It isolates speech and strips away background noise, so you keep the parts of the audio that actually matter without losing your voice. This makes it ideal for interviews, tutorials, vlogs, meetings, and other videos where the original speech is worth keeping instead of muting everything.
Key features
-
Automatic AI noise detection & removal: Vmake Labs intelligently identifies unwanted background sounds and removes them automatically, saving you hours of manual editing while preserving the natural flow of your video.
-
Speech-focused processing: This feature prioritizes human speech over everything else in the audio track. Instead of blindly stripping all sound, it distinguishes voices from background noise, keeping dialogue clear and completely distraction-free.
-
Works on multiple noise types: Whether it's wind noise, traffic, static, hum, or room echo, the tool reliably recognizes a wide range of noise types. That means you don't need different tools for different recording environments.
-
High-quality output: Vmake Labs enhances audio without noticeably affecting video quality, delivering clean, natural-sounding results that are ready for social media, presentations, tutorials, or professional content creation.
Step-by-step guide
Step 1: Upload your video
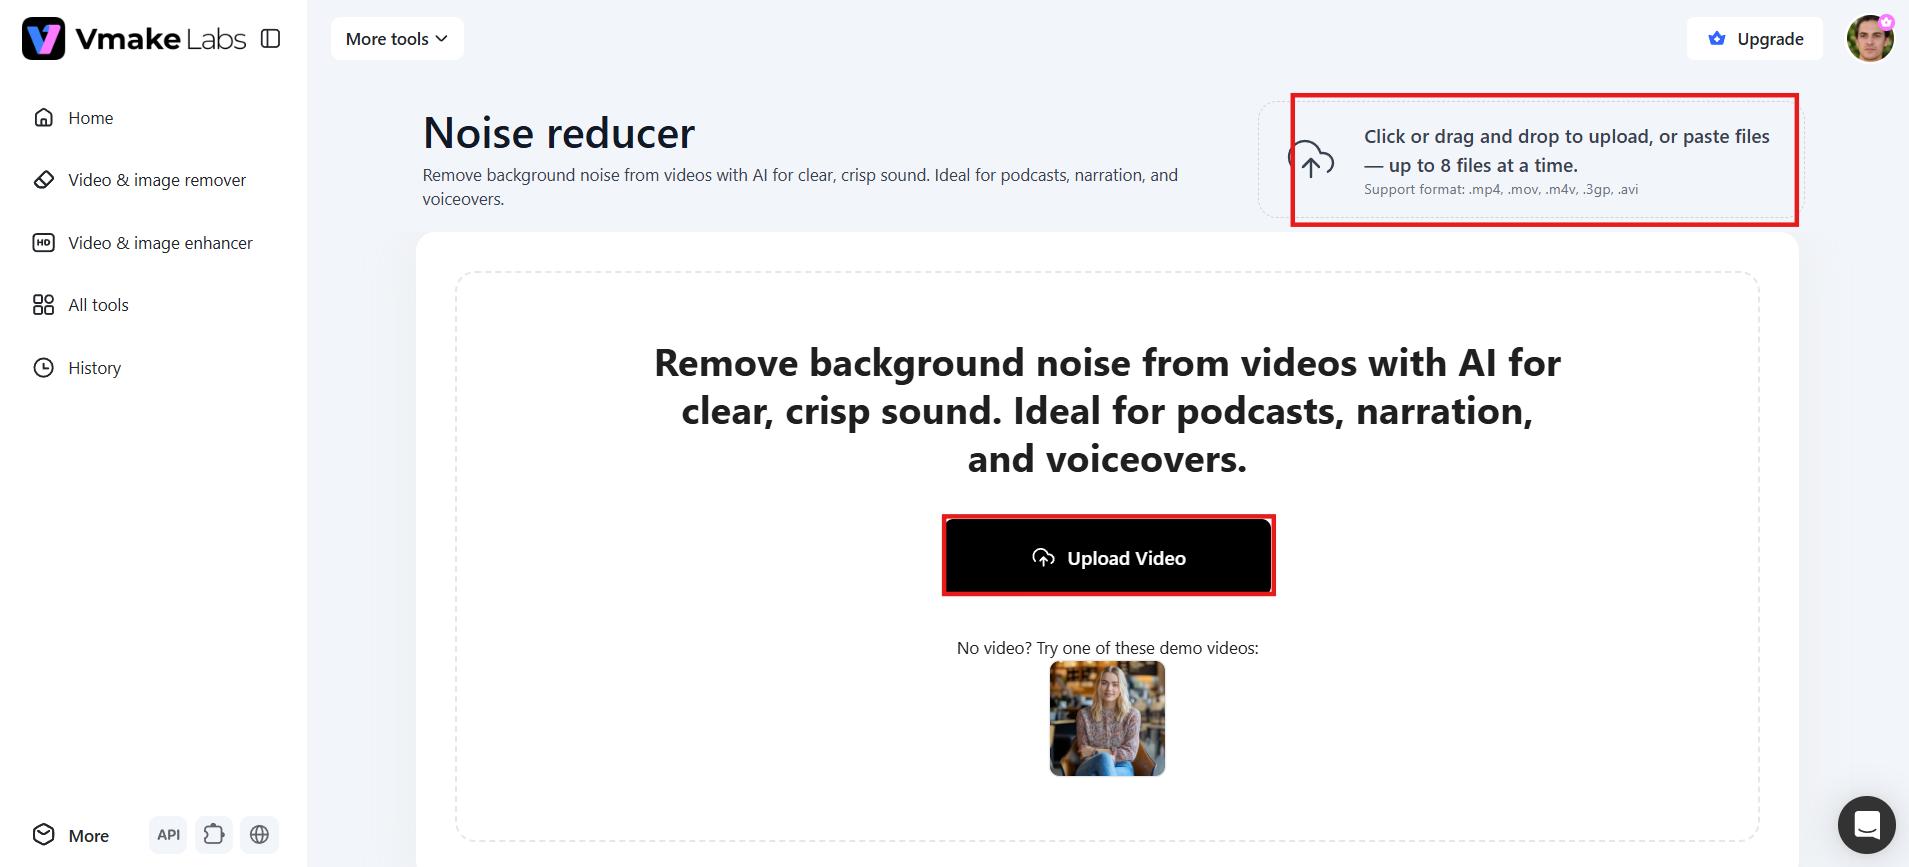
From the Vmake Labs dashboard, click All tools in the sidebar, then select Noise reducer. On the tool page, click Upload Video (or drag and drop your clip) to get started. It supports MP4, MOV, M4V, 3GP, and AVI files, up to 8 at a time.
Step 2: AI removes background noise
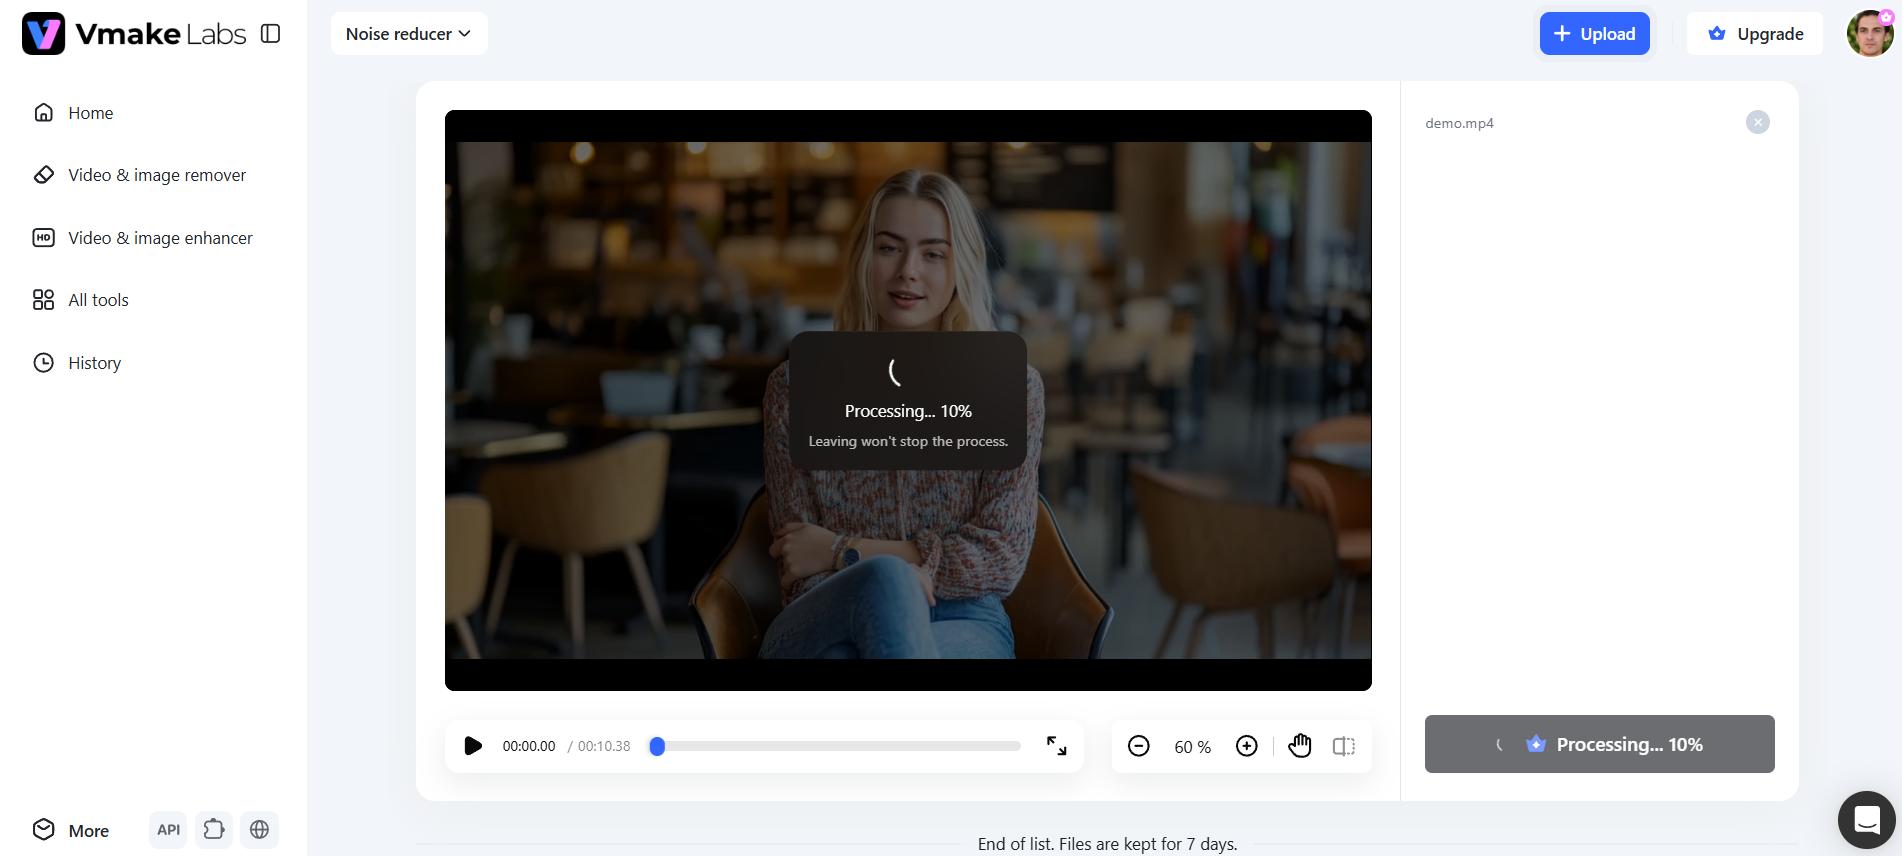
After uploading your video, click Apply to start the processing. The AI scans the audio track and separates speech from unwanted noise, automatically cleaning it up. It generally only takes a minute or two to process, depending on the length of your clip.
Step 3: Download your clean video
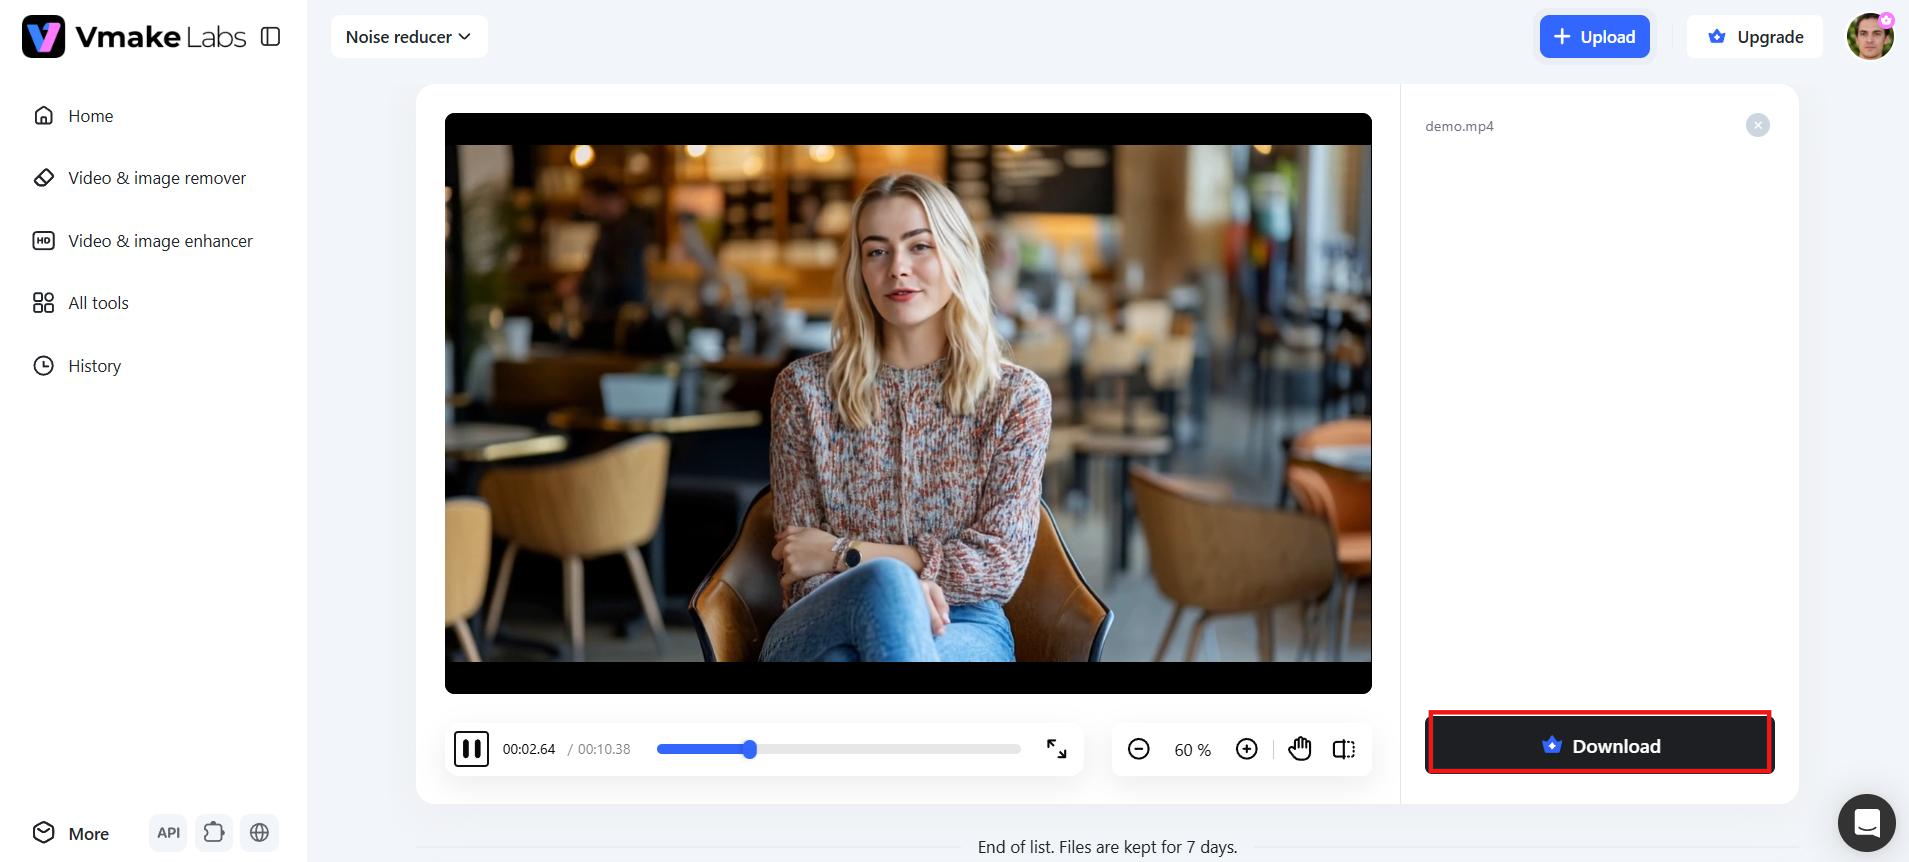
Once processing is done, preview the result to check the audio quality. If it sounds right, click Download to save the clean version to your device, ready to share or drop into your editing project.
Common issues when deleting audio from videos
Even with the right method, a few common problems can pop up during audio removal. Here's how to troubleshoot them.
-
Audio still plays after export: This usually happens when you only mute the track instead of deleting it. Double-check that the audio track is fully removed or unlinked before exporting the final video.
-
Unsupported file formats: Some tools only accept specific video formats like MP4 or MOV. If your file uses a less common format, convert it first before uploading again.
-
Export takes too long: Longer clips or higher-resolution videos naturally take more time to process. Closing other apps or lowering export quality can help speed things up faster.
-
Video loses synchronization: Deleting or trimming audio incorrectly can cause audio and video to fall out of sync. Keep linked tracks aligned and preview the final export before sharing.
Conclusion
Removing audio from a video doesn't have to be complicated. Whether you're on an iPhone, working in Premiere Pro, or just need a fast online fix, there's a method here that fits. And if the issue is really just background noise rather than the audio as a whole, tools like Vmake Labs can clean things up without losing your voiceover or dialogue. Pick the method that matches your workflow, keep a backup of the original file, and you'll have clean audio (or no audio at all) in a few minutes.
FAQs
Does removing audio reduce video quality?
Not at all. Audio and video exist as separate streams within a file. Stripping the audio leaves the visual pixels and frame rate completely untouched, preserving your original video quality perfectly.
What's the difference between muting and deleting audio from a video?
Muting simply turns the volume to zero while keeping the audio data hidden inside the file. Deleting completely discards the sound stream, permanently clearing the track and slightly shrinking the overall file size.
Can I remove only part of the audio from a video?
Yes. Most desktop editors let you split the audio track and delete only specific sections while keeping the rest intact. This is useful for removing unwanted comments, noises, or copyrighted music.
What video formats support audio removal?
MP4, MOV, and AVI are supported by nearly every tool mentioned here, including Vmake Labs's noise reducer, which also accepts M4V and 3GP files. Less common formats may still need converting first before uploading again.
Will removing audio fix copyright issues from background music?
Removing copyrighted music from a video before publishing can help avoid future copyright claims. If you want to keep spoken dialogue, Vmake Labs lets you remove background noise while preserving voices instead of deleting the entire audio track.

You May Be Interested
How to Remove Background Noise from Audio: Step-by-Step Guide

How to Download Audio from Instagram: Quick Guide for 2025
How to Transcribe Audio to Text: Efficient Guide
How to Transcribe Audio Recording to Text in Minutes