Drone Photography Tips: A Complete Guide for Better Aerial Photos
Master drone photography with practical tips for composition, camera settings, lighting, and creative shoots, with Vmake Labs to help improve the clarity and details of your aerial photos.

Drones can take pictures from angles that are hard to get on the ground. Great aerial photos require thought in planning and composition, lighting, and camera settings. Here are some tips for beginners in drone photography, plus ideas for real estate, couples, maternity, and creative shoots.
What makes a great drone photo?
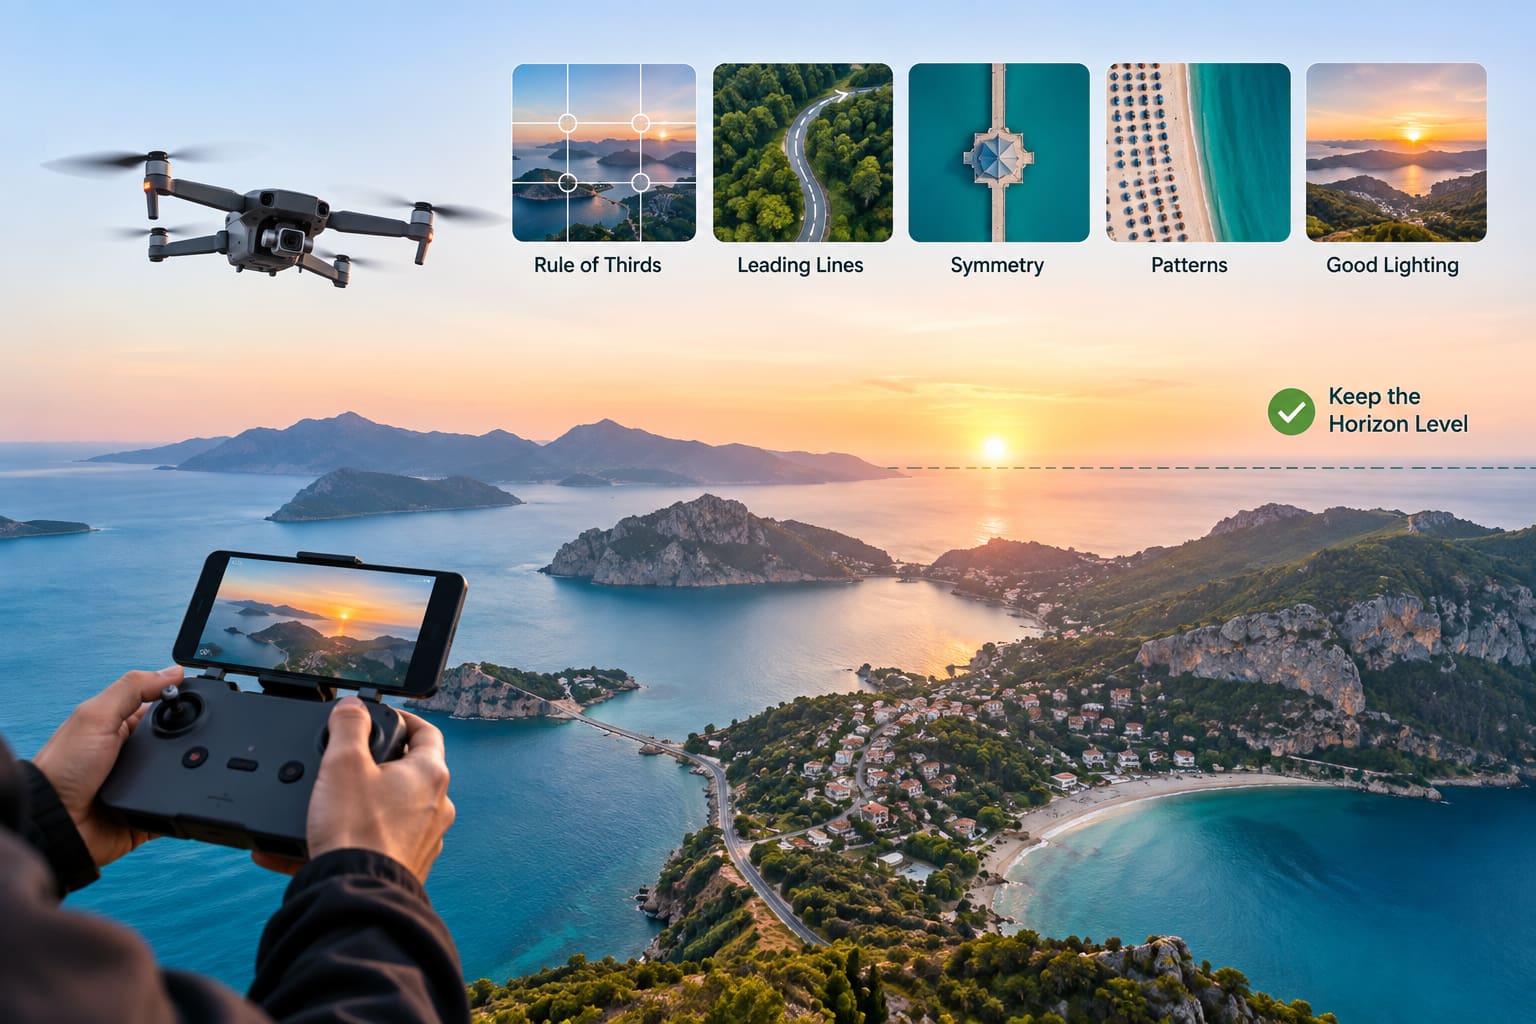
A good drone photo starts with a clear idea of what you want the image to show. Before flying, plan your shot and consider where the subject should sit in the frame. Then choose an altitude and perspective that makes the subject easy to understand. Composition techniques such as the rule of thirds, leading lines, symmetry, and patterns can help organize the frame, while favorable lighting can add shape and depth to the scene. Keep an eye on the horizon as well, especially when photographing landscapes or properties, because a tilted horizon can distract you from an otherwise well-composed image.
10 drone photography tips for beginners
1. Shoot in RAW when possible
Use RAW If your drone can take RAW images, use it when you're going to edit the photos later on. RAW files have more information about an image than compressed formats. This means you have more control over things like exposure and color in post-processing. This can be especially helpful if you have a bright sky and darker ground in an aerial scene.
2. Keep ISO low
A low ISO will help you get cleaner images with less visible noise. This means you can adjust your other camera settings to the lowest useful ISO for the lighting conditions to get the exposure you want. This is especially helpful for aerial scenes with large areas of sky, water, or other smooth surfaces where image noise can start to show.
3. Choose the right shutter speed
Shutter speed affects how motion is captured in your drone photos. Faster shutter speeds can help reduce blur when the drone is moving, or when your subject has movement, while slower settings may work when the drone and scene remain stable. After altering the shutter speed, check your images to see if the subject and fine details are still sharp.
4. Adjust exposure carefully
Bright skies can make exposure difficult because the camera has to capture the sky and the ground. Before you take the final shot, review your exposure and look for areas that are getting too bright. Use any exposure warnings or the histogram your drone provides to help you judge if your settings are keeping important details within a usable range.
5. Experiment with altitude
The photo is not always ideal at the highest possible altitude. Try the same subject at different heights and see how the composition changes. A higher vantage point can show patterns or the relationship of a subject to its surroundings. A lower position can increase the prominence of a building, person, or feature of a landscape in the frame.
6. Try different camera angles
Changing the camera angle can completely alter the appearance of an aerial photo. A straight-down view can turn roads, buildings, fields, and people into graphic shapes, while a tilted camera can reveal depth and show more of the surrounding environment. When the location and flight conditions allow it, capture both approaches, so you have more than one interpretation of the scene.
7. Look for patterns and symmetry
Patterns that are difficult to see from the ground are much easier to see from the air. Repetition can be created in the frame by rows of trees, rooftops, roads, fields, pools, and architectural features. Symmetrical scenes can also be strong compositions if you place the drone carefully around a central point or structure.
8. Use leading lines
Look for roads, paths, rivers, shorelines, fences, and building edges that lead the eye naturally. Position the drone so that these lines lead to the main subject and do not cross the image aimlessly. Leading lines can also add depth from wider aerial shots and provide the viewer a natural path through the composition.
9. Keep the horizon straight
Aerial photo with a straight horizon feels balanced, especially if the frame has lots of sky or distant landscape. Check the horizon before taking a sequence and adjust drone position if necessary. Small problems with alignment can be fixed in editing, but it is better to shoot with a correct horizon, so you have more flexibility when cropping the final image.
10. Capture multiple versions of each shot
When you have a good composition, take a few versions; don't stay with one frame. Move the drone a bit, change the altitude, change the camera angle, or move the subject in the frame. Small changes can make a difference to the final image, and taking a few options gives you more scope when choosing the best photo later.
Real estate drone photography tips and creative couple shoot ideas
Drone photography works particularly well when the surrounding environment is part of the story. Real estate photographers can use aerial views to show a property and its location. In contrast, couples and maternity photographers can use the extra distance to create wider compositions that include the landscape.
Real estate drone photography tips
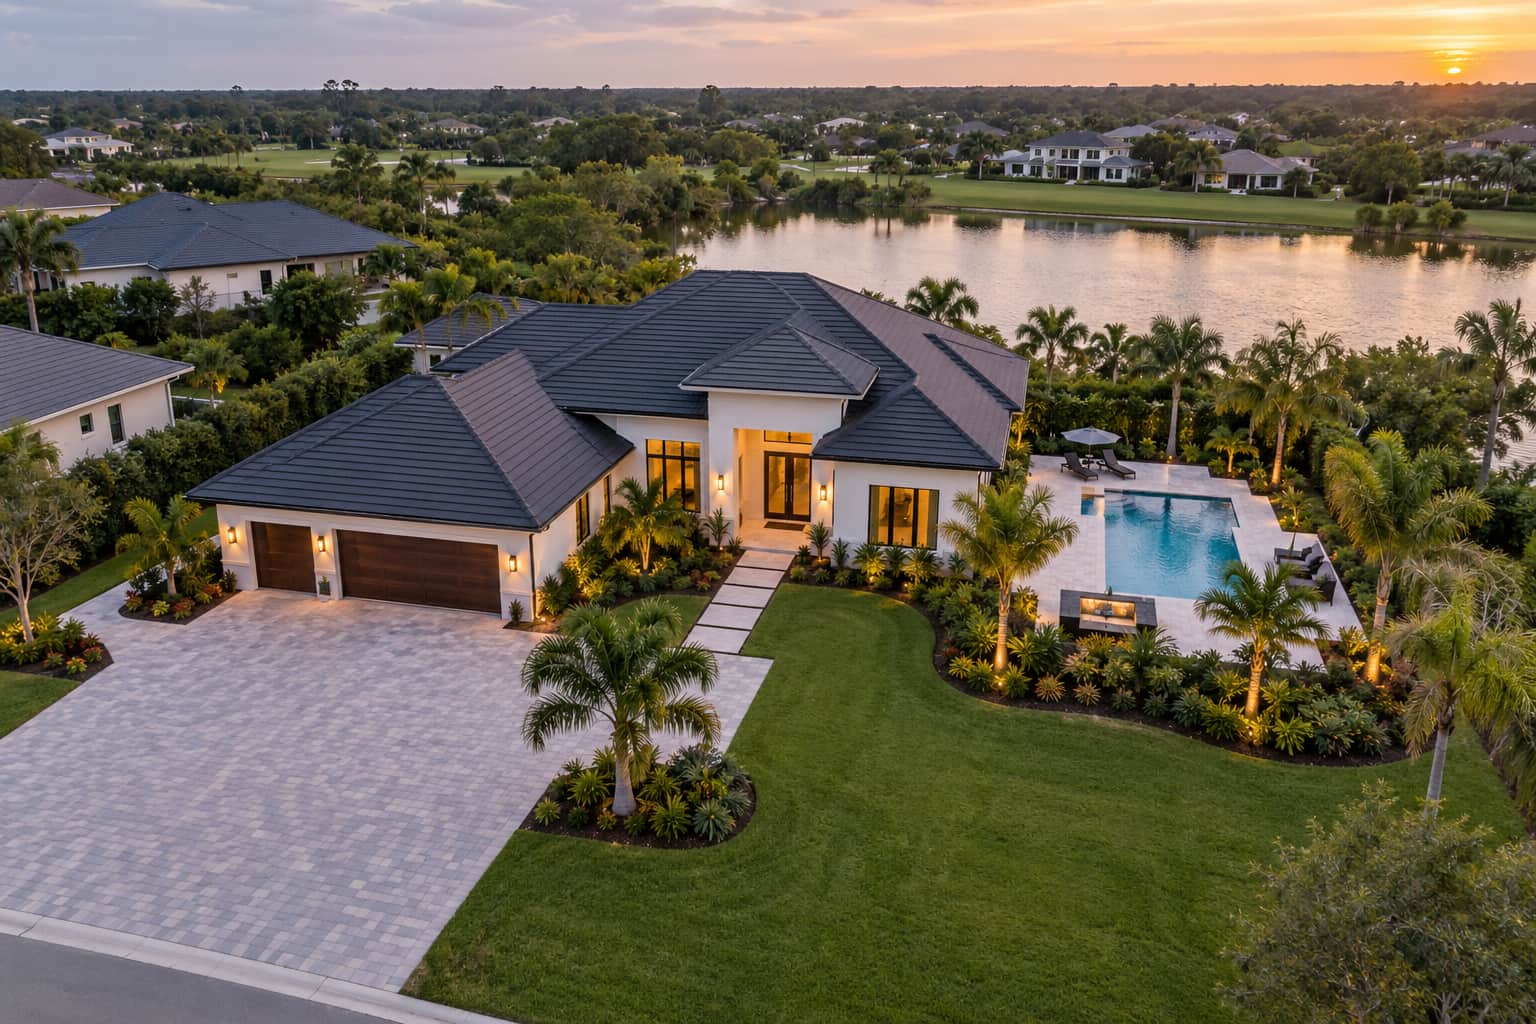
Real estate aerial photos should give viewers a useful understanding of the property rather than showing the building from the air without context. Capture the property from front, diagonal, overhead, and wider neighborhood perspectives so viewers can see its layout and relationship to the surrounding area. Include exterior features such as gardens, pools, driveways, patios, or other amenities when they help communicate what the property offers. A wider composition can also show nearby roads, open spaces, or neighboring properties and give the viewer a better sense of the property's scale and location.
Couple photo shoot ideas
A drone can help a couple's session by adding variety and incorporating the environment into the photograph. Frame the couple in a larger setting, a beach or other open landscape, to highlight the environment. A top-down composition can achieve a different look by incorporating the couple's position and the landscape into the design. Symmetrical locations such as paths or architectural spaces also work well as an alternative. Sunset silhouettes are effective when the couple's outline is distinct against the brighter sky. Environmental portraits are also an option that can keep the couple as the main subject, but still provide enough of the location to establish where the photograph was taken.
Couple maternity shoot ideas
If you are looking for couple maternity shoot ideas, select a location where the background landscape gives context but does not overtake the subjects. A wide shot of the couple moving outdoors can give a natural feel of movement, whilst a top-down composition can place them in an interesting landscape or path. Golden-hour silhouettes are a great way to create a simple, recognizable outline of the couple. Wide environmental portraits are another way to show the couple in a scenic outdoor environment, while still keeping the focus on their interaction.
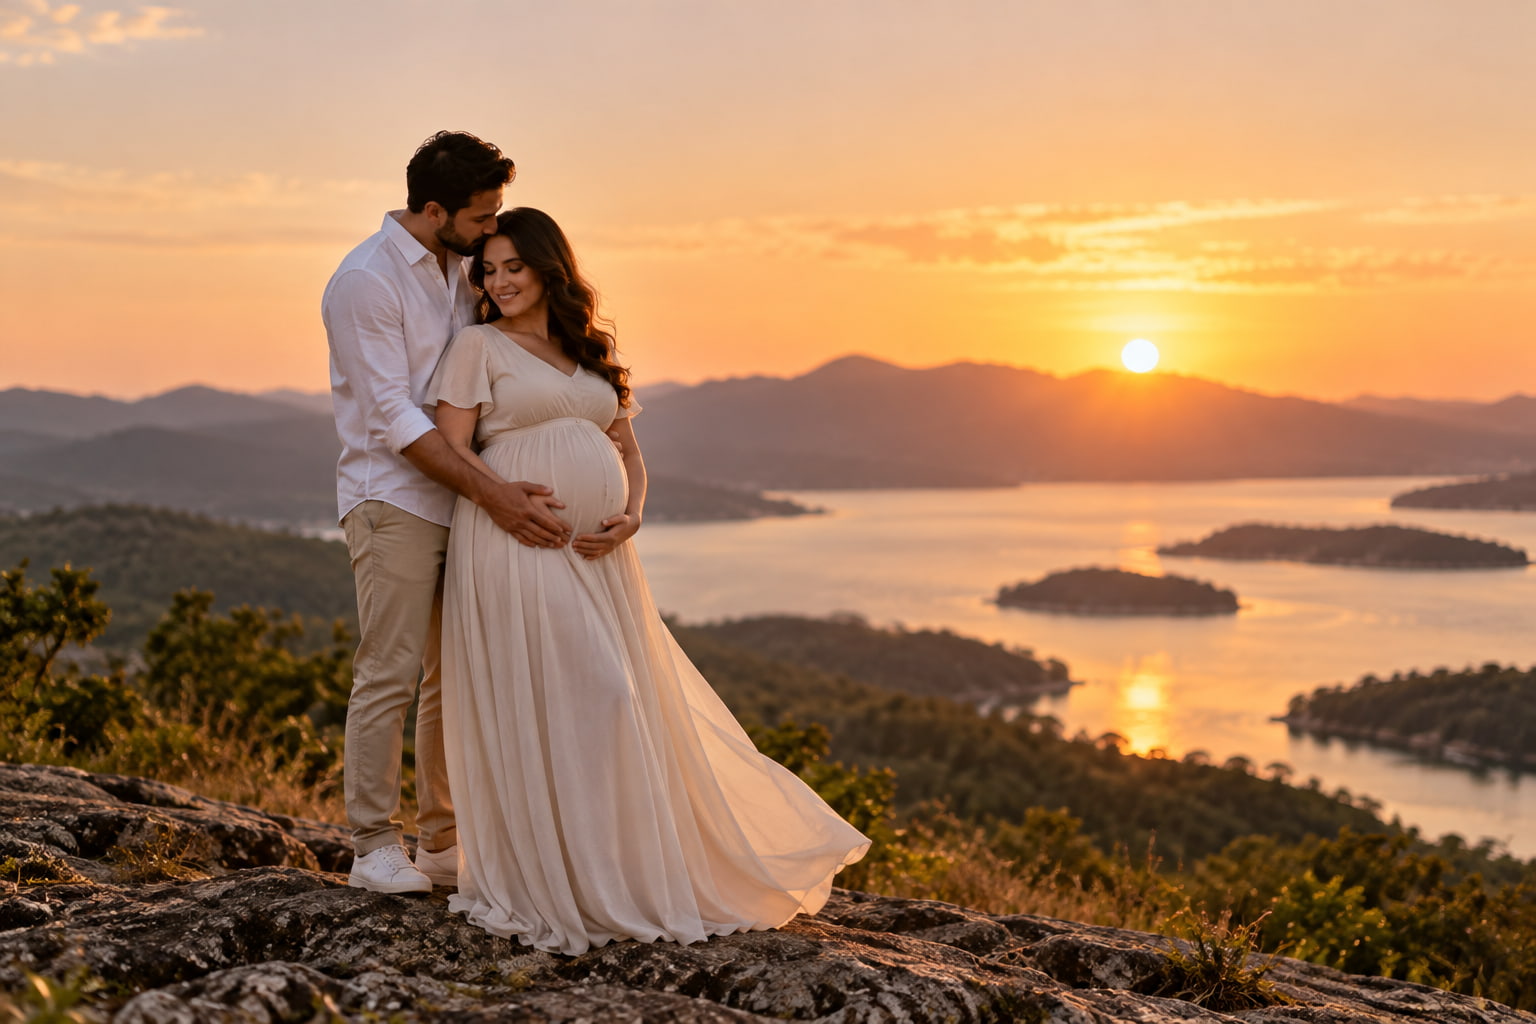
Drone photography tips 2026: Shooting and editing techniques
The best drone photography tips in 2026 still depend on how deliberately you use the camera's ability to change perspective. Instead of photographing every location from the same height and angle, explore the scene and look for views that reveal something different.
Experiment with different perspectives
Looking from a height can show scale and how elements relate to each other over a landscape. Lowering the camera can give a building or subject visual mass. The ordinary place can be a pattern of shapes and lines, if built from the top down. Views taken at an angle can also help guide the frame. Try different perspectives within the same flight and notice how each changes the relationship between subject and environment.
Photograph more than landscapes
Landscapes are an obvious use for a drone, but aerial photography can also work for real estate, travel, architecture, events, couples, maternity sessions, and commercial photography. The useful question is what the aerial viewpoint adds to the image. A property may become easier to understand when photographed with its surroundings, while an event can benefit from a wider view of the venue. A couple's portrait can also take on a different character when the location becomes part of the composition.
Edit for a consistent look
After the shoot, edit your images with the final use in mind. Start by correcting exposure and white balance, then adjusting contrast and color to create the look you want. Straightening and cropping can improve composition when the original framing needs a small correction.
If a drone photo looks slightly soft after shooting or cropping, an image sharpener can help emphasize fine details and make the image appear clearer. For images affected by mild softness or blur, you can also unblur image details with an appropriate enhancement tool. These adjustments should be subtle so that buildings, landscapes, people, and other subjects continue to look natural.
Enhance drone images with Vmake Labs
After capturing and editing your aerial photos, Vmake Labs can help improve their clarity and visible details with its Image Enhancer. Upload a drone photo, enhance the image, and preview the result before downloading it for creative or marketing use. This gives you a straightforward way to work on an image after the flight without adding a complicated editing process.

Key features
-
Aerial photo enhancement: Enhance drone photos to have a cleaner, more polished look with improved clarity and detail. It can make aerial images look crisper and more polished before using them for creative or marketing purposes.
-
AI-powered image enhancement: Improve your uploaded drone images with AI, keeping key details from the original picture. This can help to improve the overall appearance but not change the core content of the image.
-
Preview before downloading: Preview the enhanced result versus your original image before saving it. This lets you see the changes and decide if the result works for your project.
-
Simple enhancement workflow: Upload your aerial photo, apply the enhancement, review the result, and download the finished image. The straightforward process makes it easy to improve drone photos without a complicated editing workflow.
How to enhance drone images with Vmake Labs
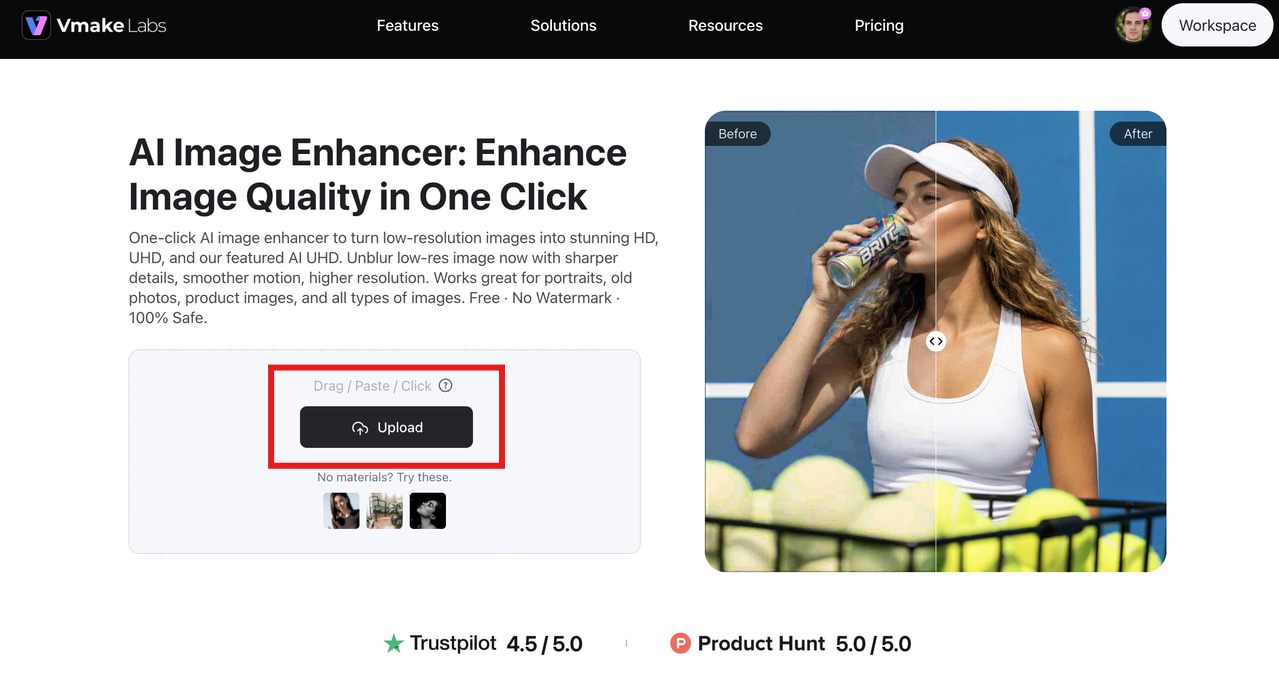
Step 1: Upload your aerial photo
Simply upload your drone photo to Vmake Labs' Image Enhancer. Select an image where you want clearer details or a more polished look.
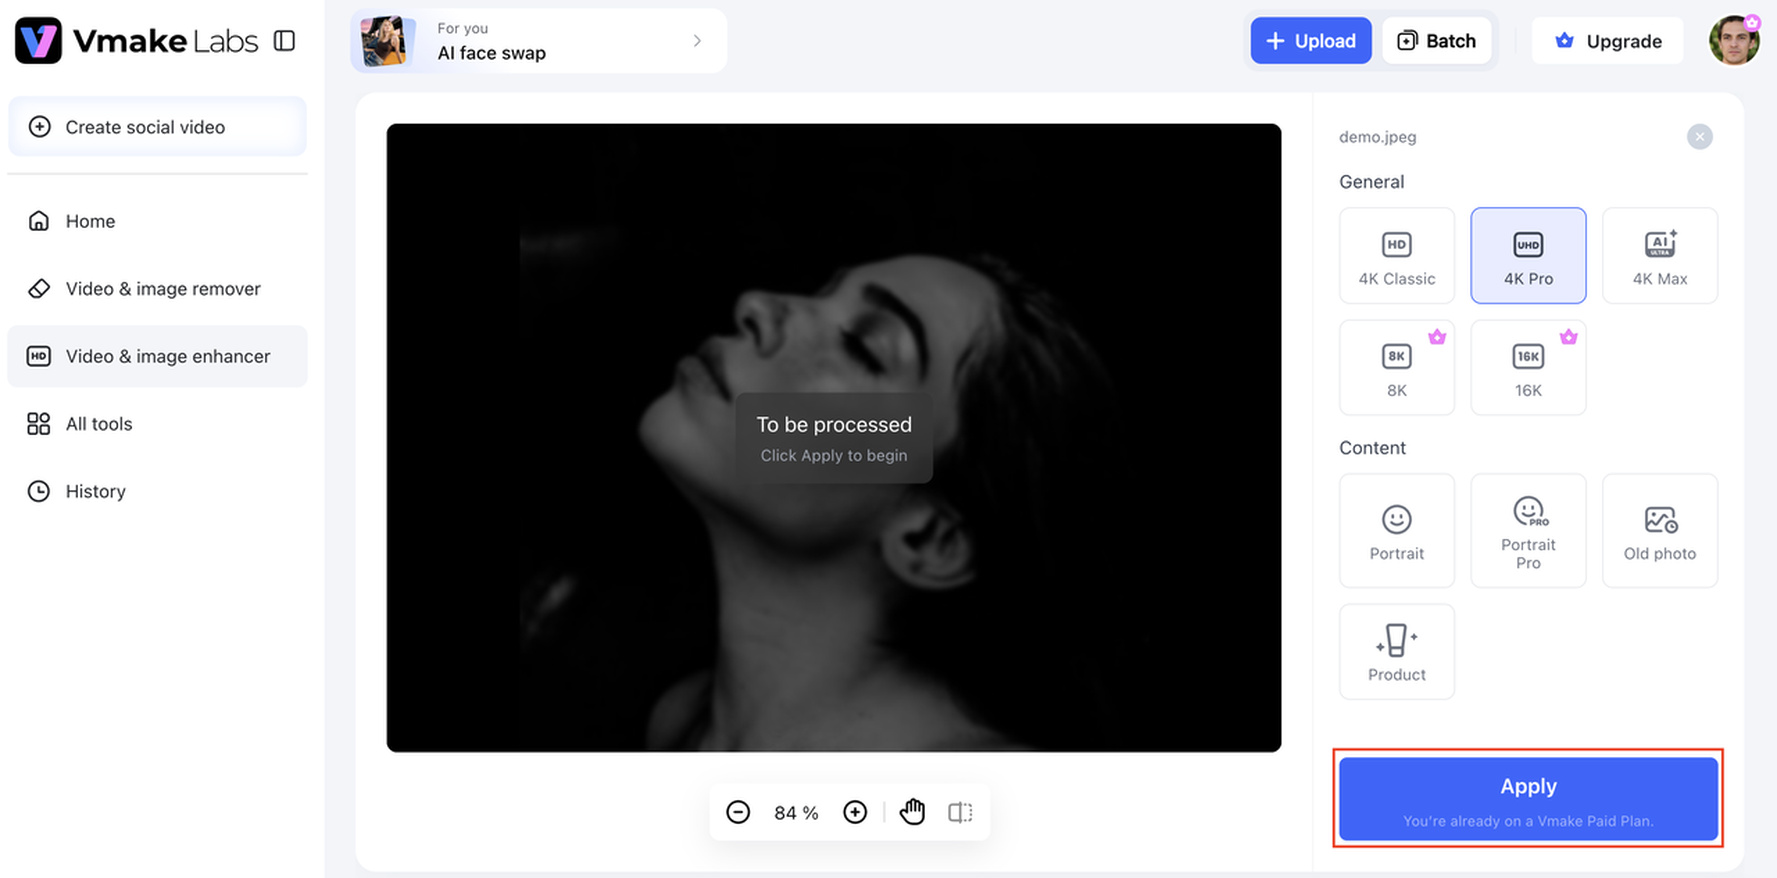
Step 2: Improve clarity and details
Apply image enhancement and check the result. Now compare the enhanced version with your original and see how the visible detail and overall clarity have improved.
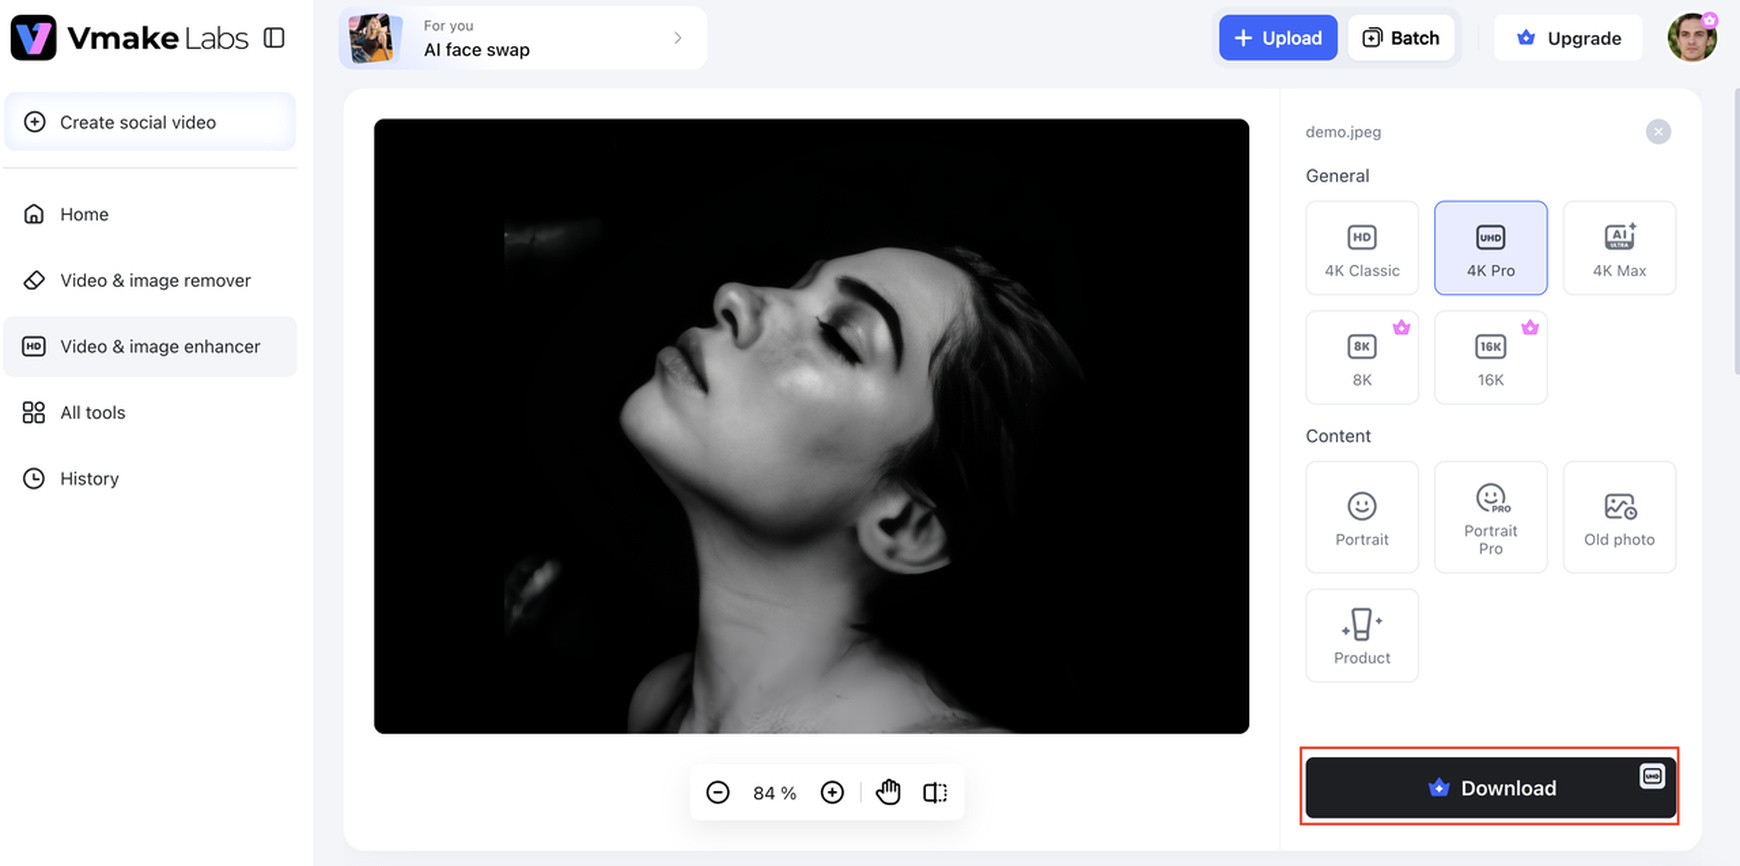
Step 3: Preview and download your image
Preview the enhanced aerial photo before saving it. If the result suits your project, download the finished image for creative, portfolio, real estate, or marketing use.
Conclusion
Good drone photos are the result of careful planning, composition, camera settings, lighting, and perspective. If possible, shoot in RAW, keep your ISO low, use an appropriate shutter speed, and take multiple versions of important shots. Meticulous post-shoot editing can make exposure, color, and composition flawless. Vmake Labs' Image Enhancer gives you a way to add some polish to your aerial images for creative or marketing purposes, bringing out more clarity and visible detail.
FAQs
What are the best drone photography tips for beginners?
Plan your composition before you fly and try different altitudes and angles instead of shooting everything from one vantage point. Use a low ISO, choose a shutter speed that helps keep your images sharp, and check your exposure before capturing the shot. Keep the horizon straight and take multiple photos of important scenes, so you have more options later. If your drone supports it, shooting in RAW can give you more flexibility during editing. After the shoot, tools such as Vmake Labs can also be useful for enhancing and refining aerial images before you publish or share them.
What camera settings should I use for drone photography?
No single combination of settings works for every aerial shot because lighting, movement, and the subject all affect exposure. In general, shoot RAW if your drone supports it, keep the ISO as low as practical, and choose a shutter speed that keeps the subject and camera movement sharp. Adjust exposure carefully as the lighting changes. Once you have captured your images, Vmake Labs can help with image enhancement and other post-production adjustments when you want to polish the final result.
What is the best time of day for drone photography?
It depends on the subject and the look you're going for. Early or late daylight can create softer light and longer shadows, while golden hour can be especially effective for silhouettes, landscapes, and environmental portraits. Check the lighting conditions at your location and choose a time that complements your composition. For creators preparing images for websites, listings, or social media, Vmake Labs can be another option for giving finished drone photos a cleaner, more polished appearance.
What are the best real estate drone photography tips?
Show the property from several useful viewpoints rather than relying on one aerial shot. Front, diagonal, overhead, and wider neighborhood views can help communicate the property's layout, exterior features, scale, and location. Choose compositions that give potential viewers information they cannot easily get from a ground-level photograph.
What are some creative couple photo shoot ideas with a drone?
Beach and open-landscape portraits, top-down compositions, symmetrical locations, sunset silhouettes, and environmental portraits can all work well. The goal is to use the aerial viewpoint to include the surroundings in a way that adds to the couple's photograph.
How can I make my drone photos look more professional?
First, make sure you have a strong composition, and then watch your exposure, light, angle, and horizon as you shoot. Get your exposure & white balance right in editing. Be careful when adjusting contrast & color. Crop or straighten if needed. If you want more clarity or visible detail for an image, you can also use Vmake Labs' Image Enhancer.
You May Be Interested

Airbrush Photo Restoration Review: Is It the Best Way to Fix Old Photos?

How to Take Better Travel Photos: Complete Photography Guide
Clean Up Pixelated Photo with AI: Enhance Photos Easily

How to Face Swap in Photoshop vs. AI Face Swap Tools
How to Fix Blurry Photos in 2026: Best Tools to Sharpen Blurry Images