Animation Storyboard: How to Create One Step by Step
Master animation storyboarding with practical tips on scenes, shots, panels, and visual planning. Explore better ways to develop animation concepts, references, and creative workflows with Vmake Labs.

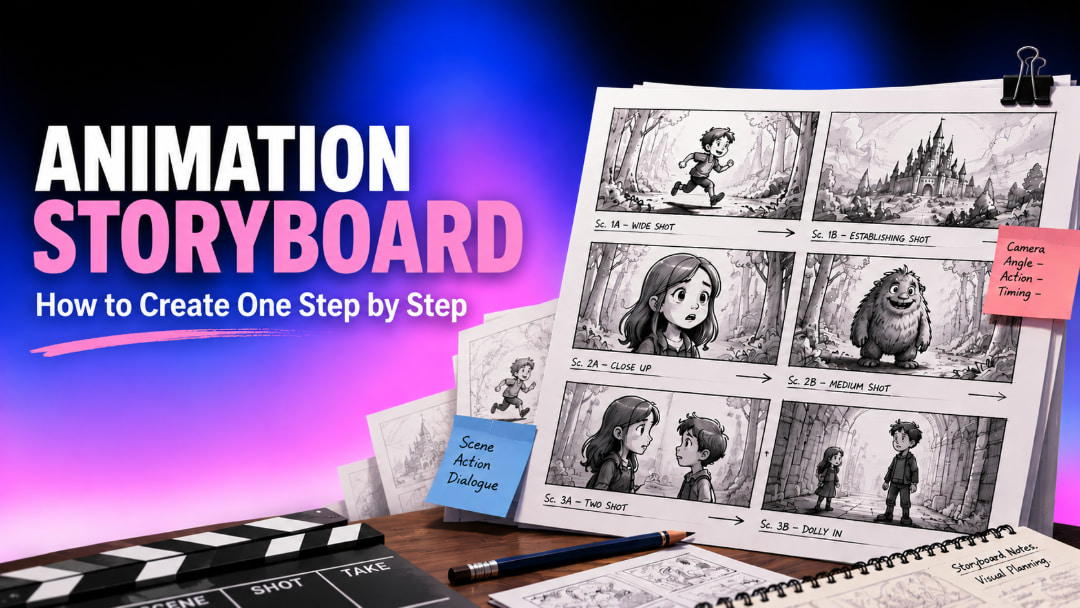
An animation storyboard turns a script or concept into a sequence of visual panels showing characters, actions, shots, and camera direction. It gives creators a clear view of how the story will unfold and helps them work out visual and production details before detailed animation begins.
What Is an Animation Storyboard?
An animation storyboard is a series of drawings or visual panels arranged in sequence to show how an animated story will unfold. Each panel represents an important moment or shot and can show character poses, expressions, actions, composition, dialogue, and camera direction.
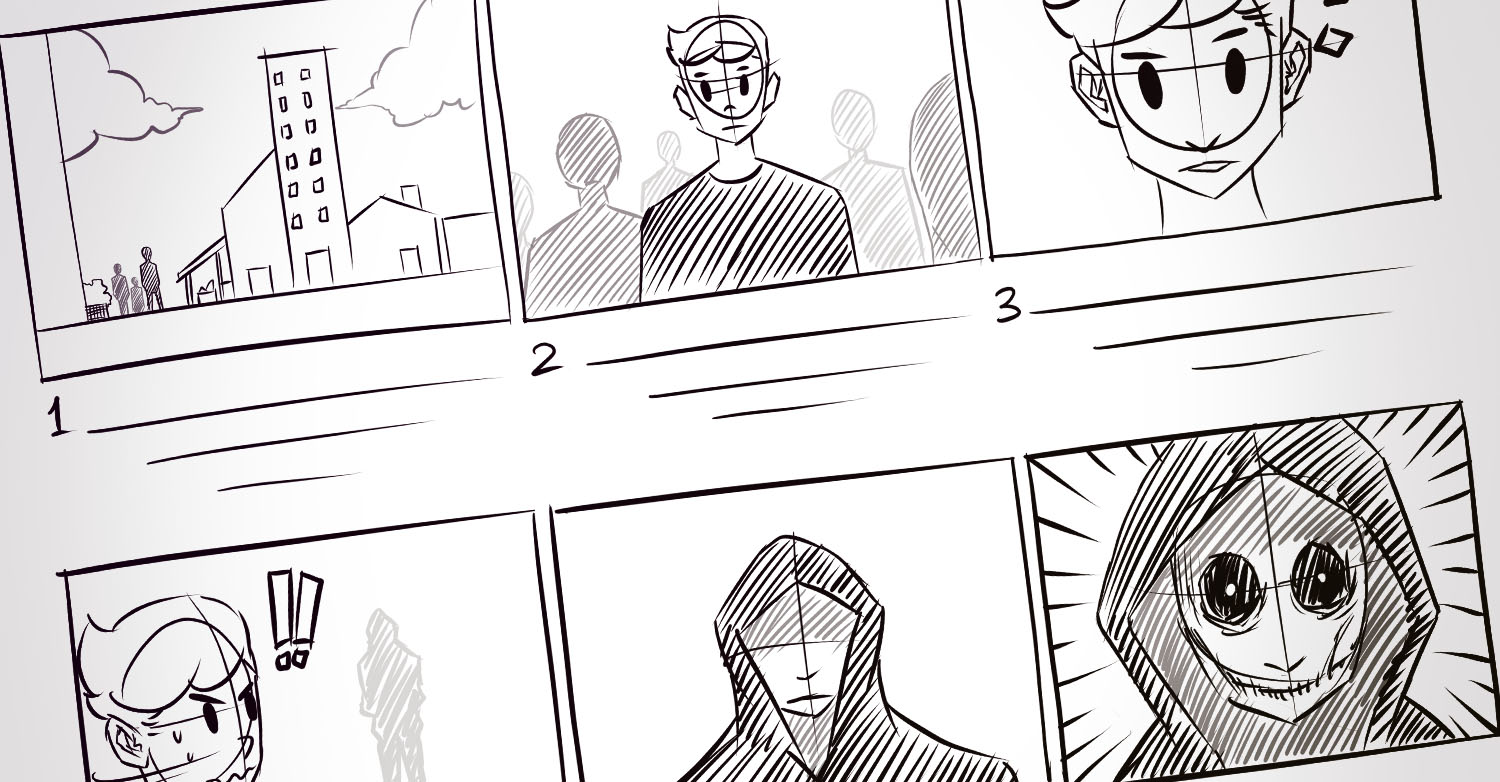
The storyboard is not the animation but the visual blueprint. This lets directors, storyboard artists, and animators review the story and visual flow without spending a lot of time on detailed production.
From Script to Storyboard: Role and Key Elements
When a script or story is complete, animation storyboarding takes the written ideas and transforms them into a sequence of visuals by identifying the main story beats, expanding them into shots and panels, and illustrating how the action, characters, and camera direction will come together.
-
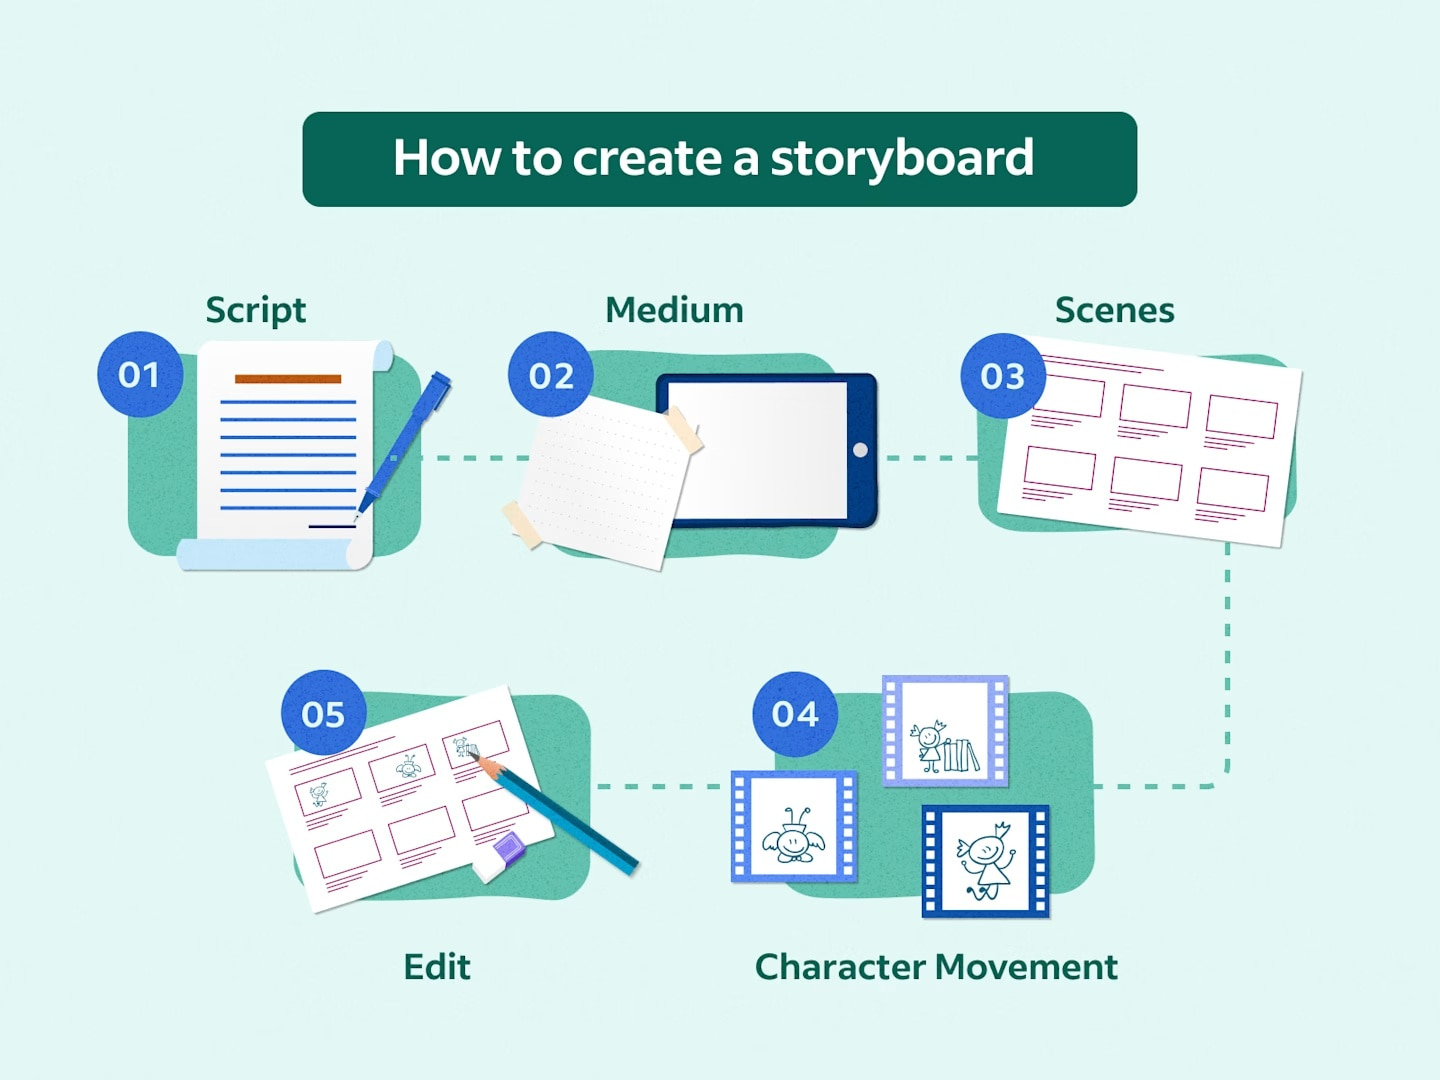
Turn Stories Into Visual Sequences: Read the script for the key story beats, character actions, and emotional moments. Break these down into scenes and shots, then arrange the panels in the order in which they will appear. Each drawing should express a clear idea, and multi-step actions can be broken into multiple panels.
-
What Each Panel Communicates: Once the main shots are identified, use each panel to show the important visual information for that moment. Include character poses, expressions, movement, important objects, composition, and the relationship between characters and their surroundings. Dialogue, captions, arrows, and other notes can clarify information that the drawing alone cannot show.
-
Add Shot and Production Details: Once you've figured out what each panel is showing, add details to help the production team understand how the shot should work. Include shot numbers, dialogue, action notes, camera angles, camera movement, and transitions as necessary. Camera arrows can be used to show pans or zooms, and notes can be used to describe character actions, timing, or other production needs.
-
Keep the Storyboard Clear: With the visual and production details in place, make sure the storyboard remains easy to follow. It does not need to look like finished artwork; rough thumbnails, simple sketches, or more developed drawings can all work depending on the project. Focus on communicating the story, action, composition, and camera direction rather than adding details that do not help explain the shot.
Planning an Animation Storyboard: From Scenes to Shots
When you have the ingredients, break down the storyboard into scenes and shots. It provides a visual flow to the sequence and makes it easy to follow character actions, camera movement, and transitions from one panel to the next.
-
Map the Key Shots: Decide which shots you need to communicate at each important moment. Think about what the audience needs to see, which character or object should be the focus, and whether an action should be shown across multiple panels. You can create quick thumbnail sketches to help you try different compositions and cut out unnecessary shots before developing the sequence further.
-
Establish the Visual Flow: Pick your shots to show where the characters are, what they're doing, and how the story is moving. Think about shot size, camera position, character movement, and transitions between panels. Keep screen direction and spatial relationships consistent as characters move through a scene.
-
Refine the Sequence: Read through the storyboard from start to finish and look for unclear actions, unnecessary panels, weak transitions, or pacing problems. Delete, move, or redraw panels as needed. Refining the sequence at this stage gives the team a chance to resolve visual and storytelling issues before detailed animation begins.
Create Storyboard Visual References With Vmake Labs
Once you know what each scene should communicate, visual references can help you explore characters, environments, compositions, and styles before developing storyboard panels. Vmake Labs Image Generator can turn written scene descriptions or reference images into visuals that can support this planning stage.
How to Create Storyboard Visual References With Vmake Labs
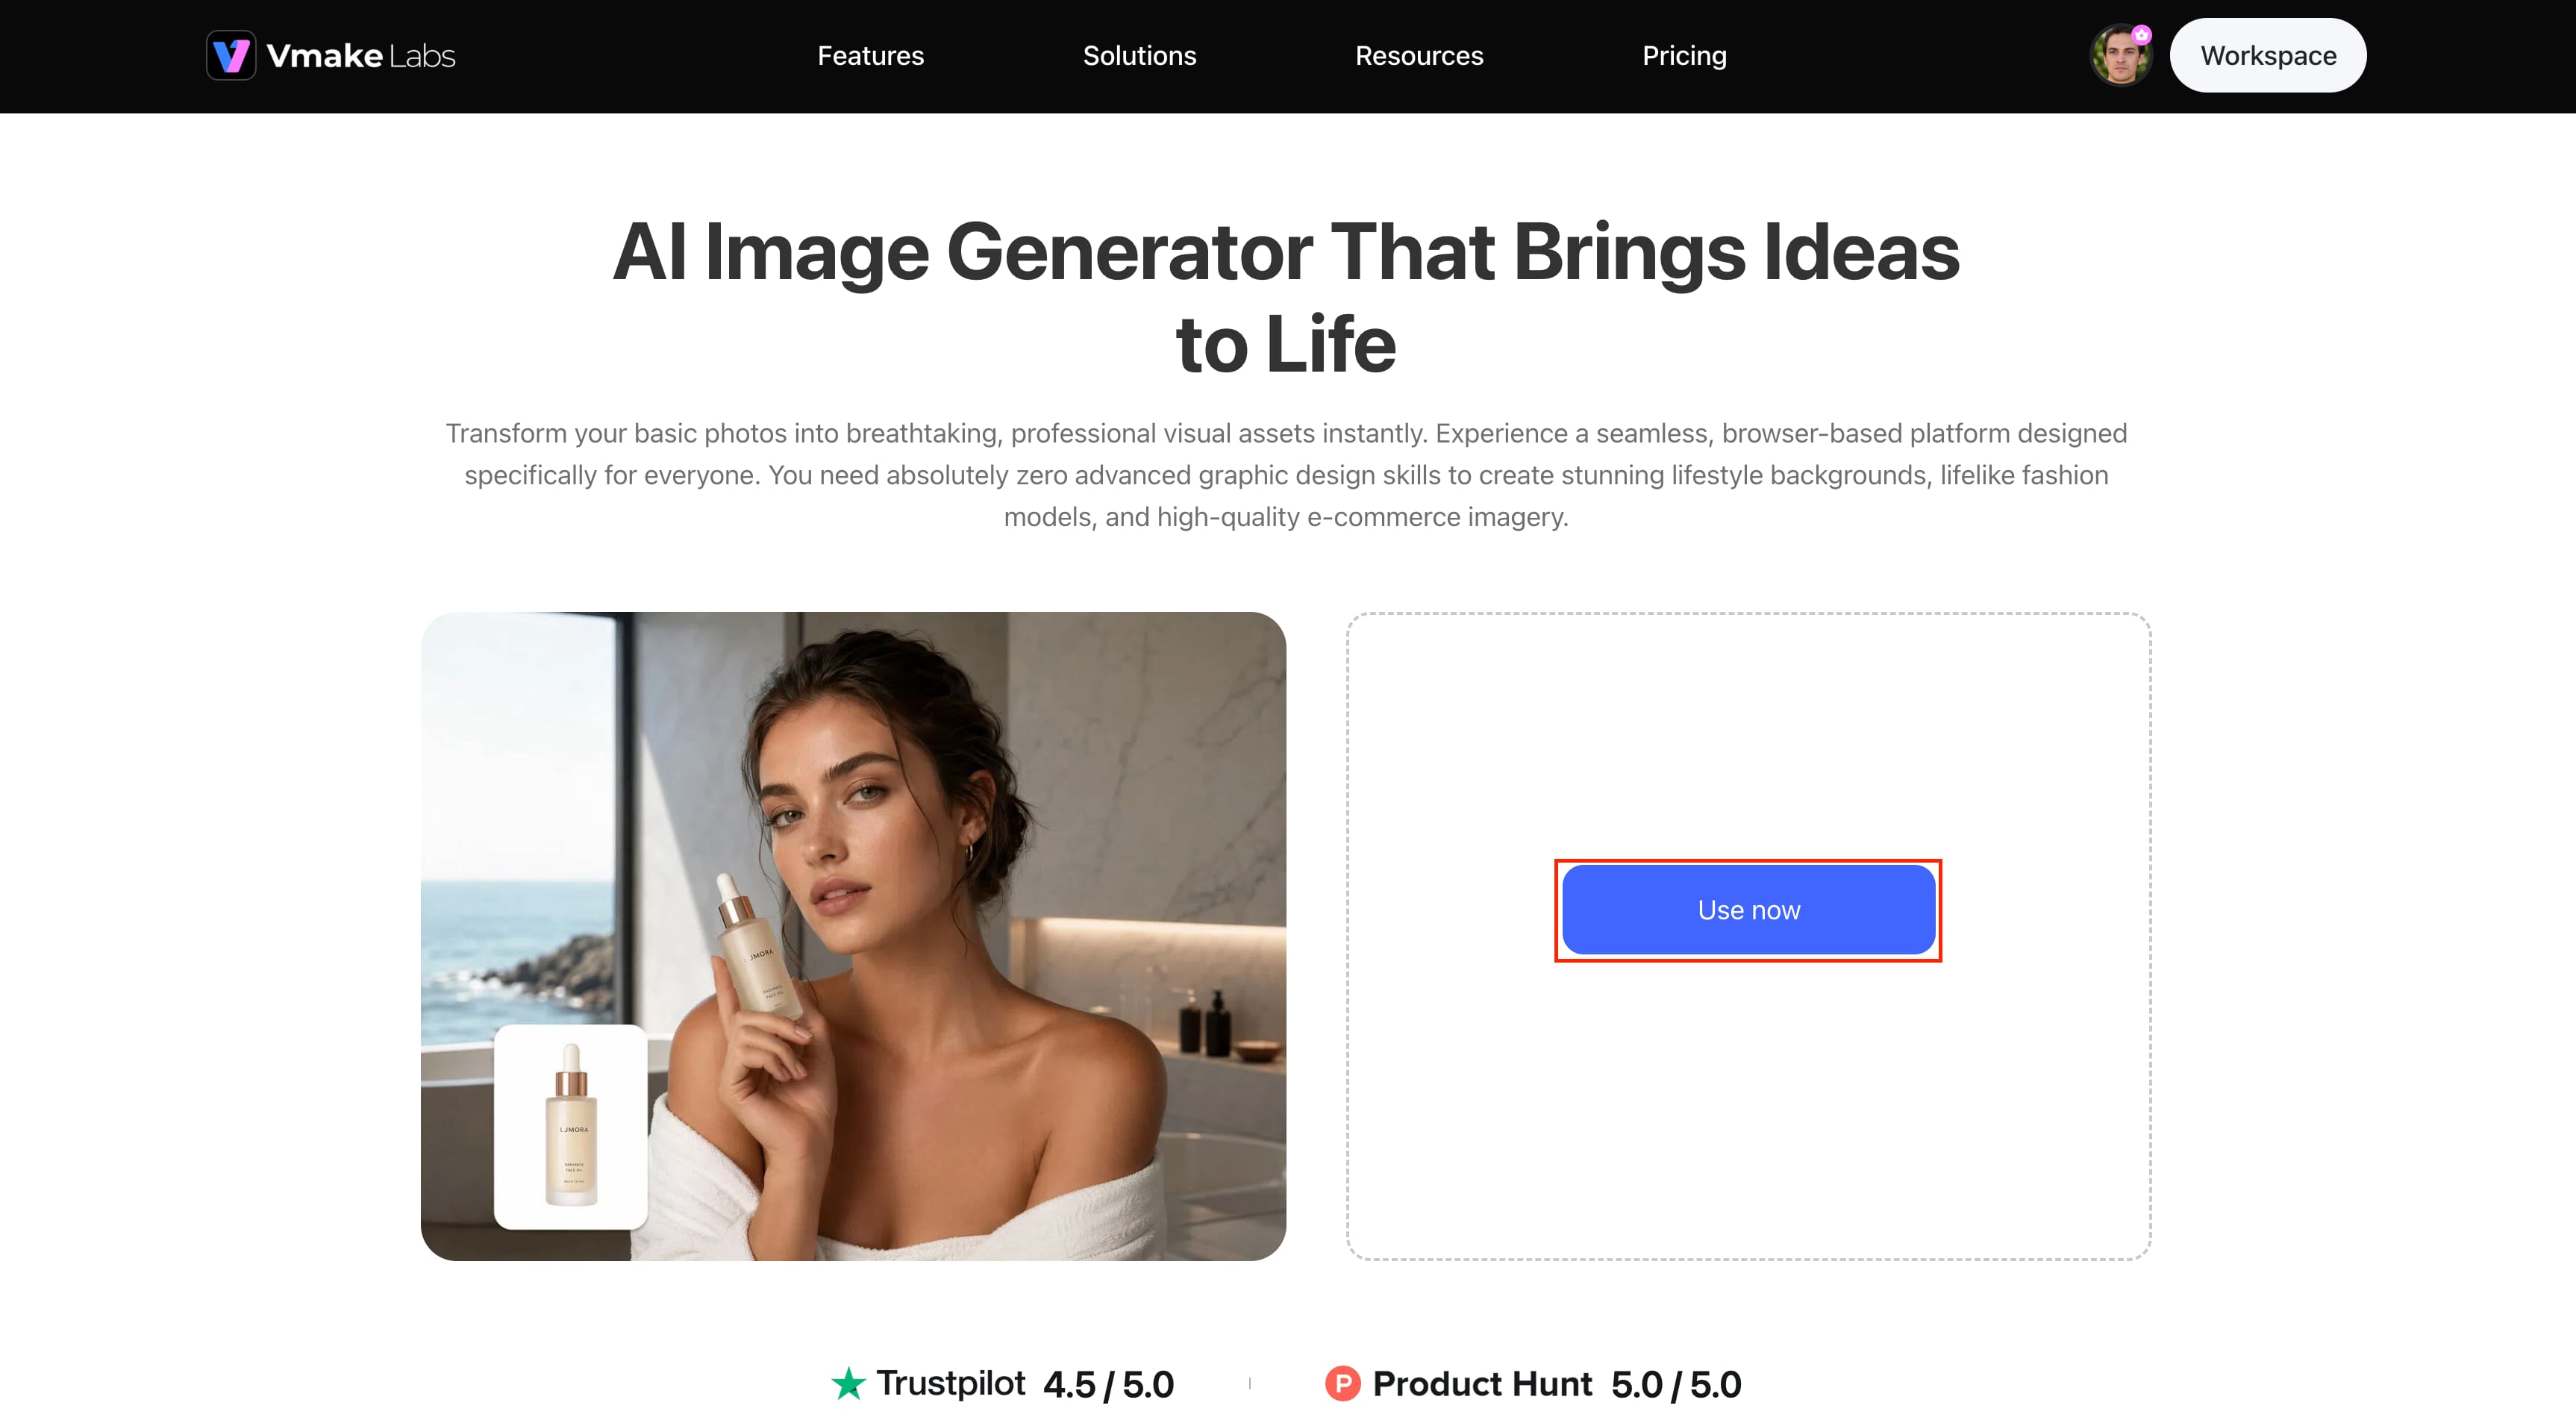
Step 1: Open Vmake Labs AI Image Generator
Open the Vmake Labs AI Image Generator and click Use now to access the image-generation workspace. Choose Text to Image to create a visual from a written storyboard idea, or Image to Image when working with a reference.
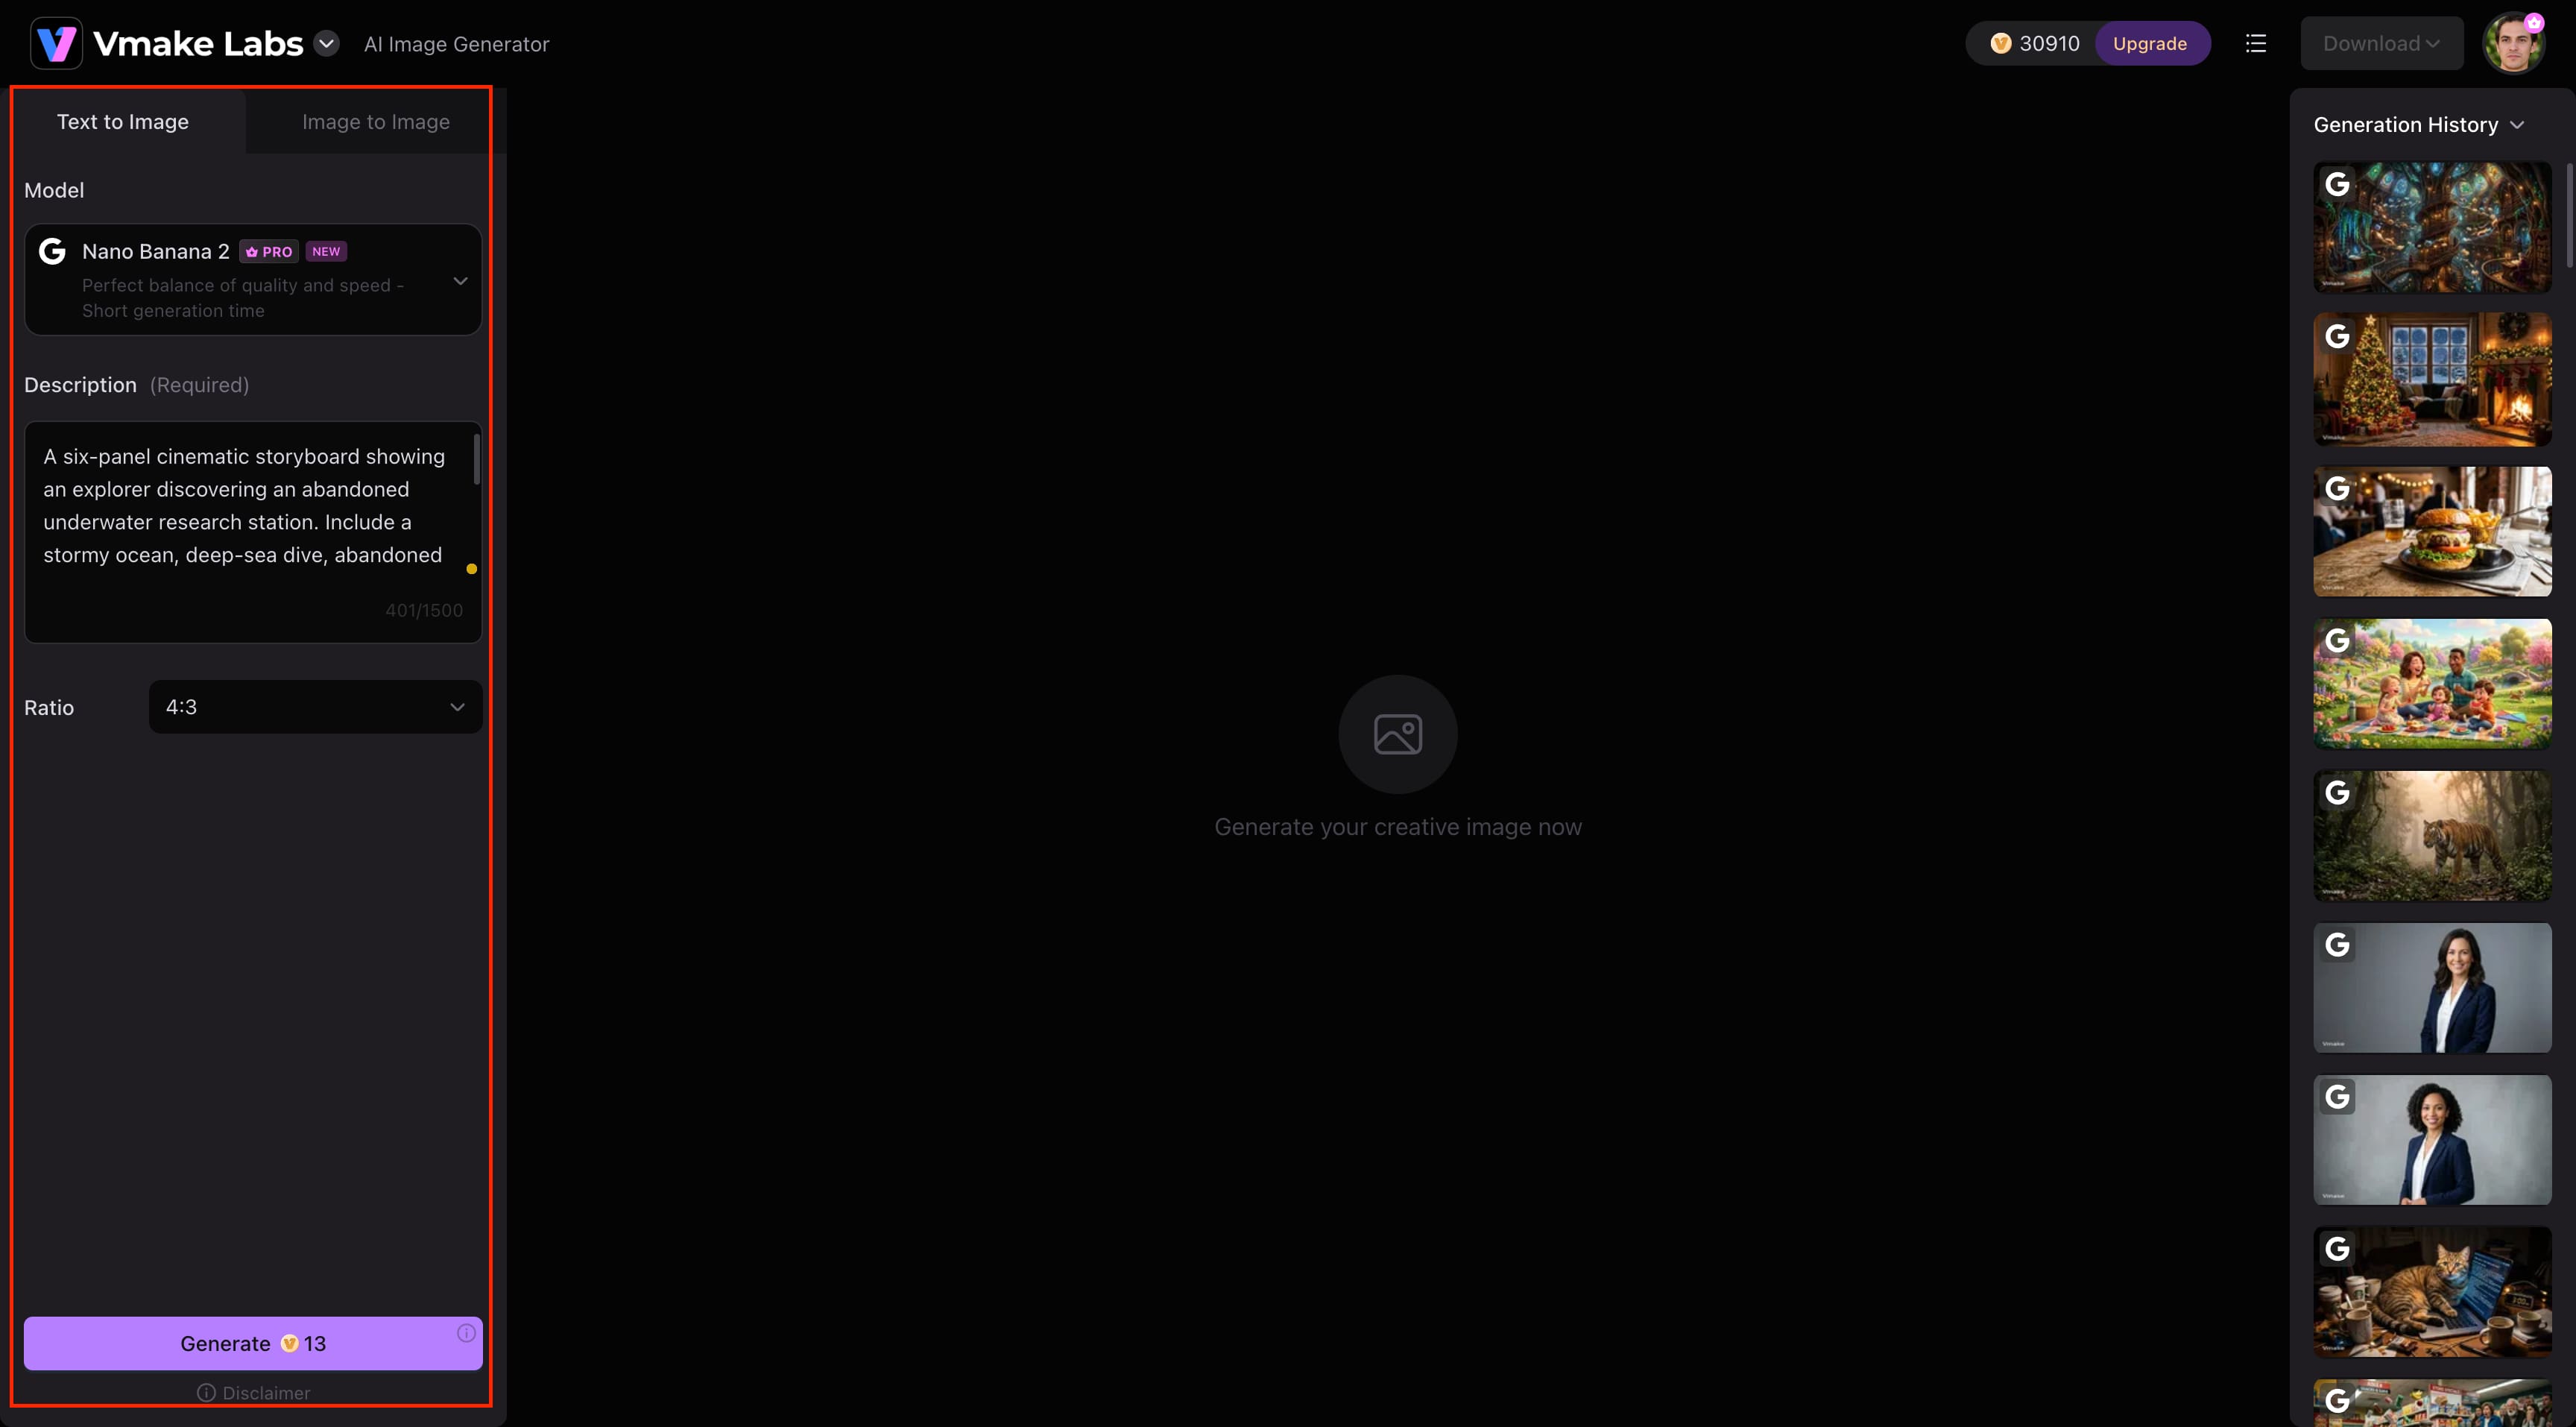
Step 2: Add Your Prompt or Reference
Enter a detailed prompt describing the storyboard scene, including the characters, setting, action, composition, and visual style. You can also upload a reference image when you want the generated visual to follow an existing character, object, or scene.
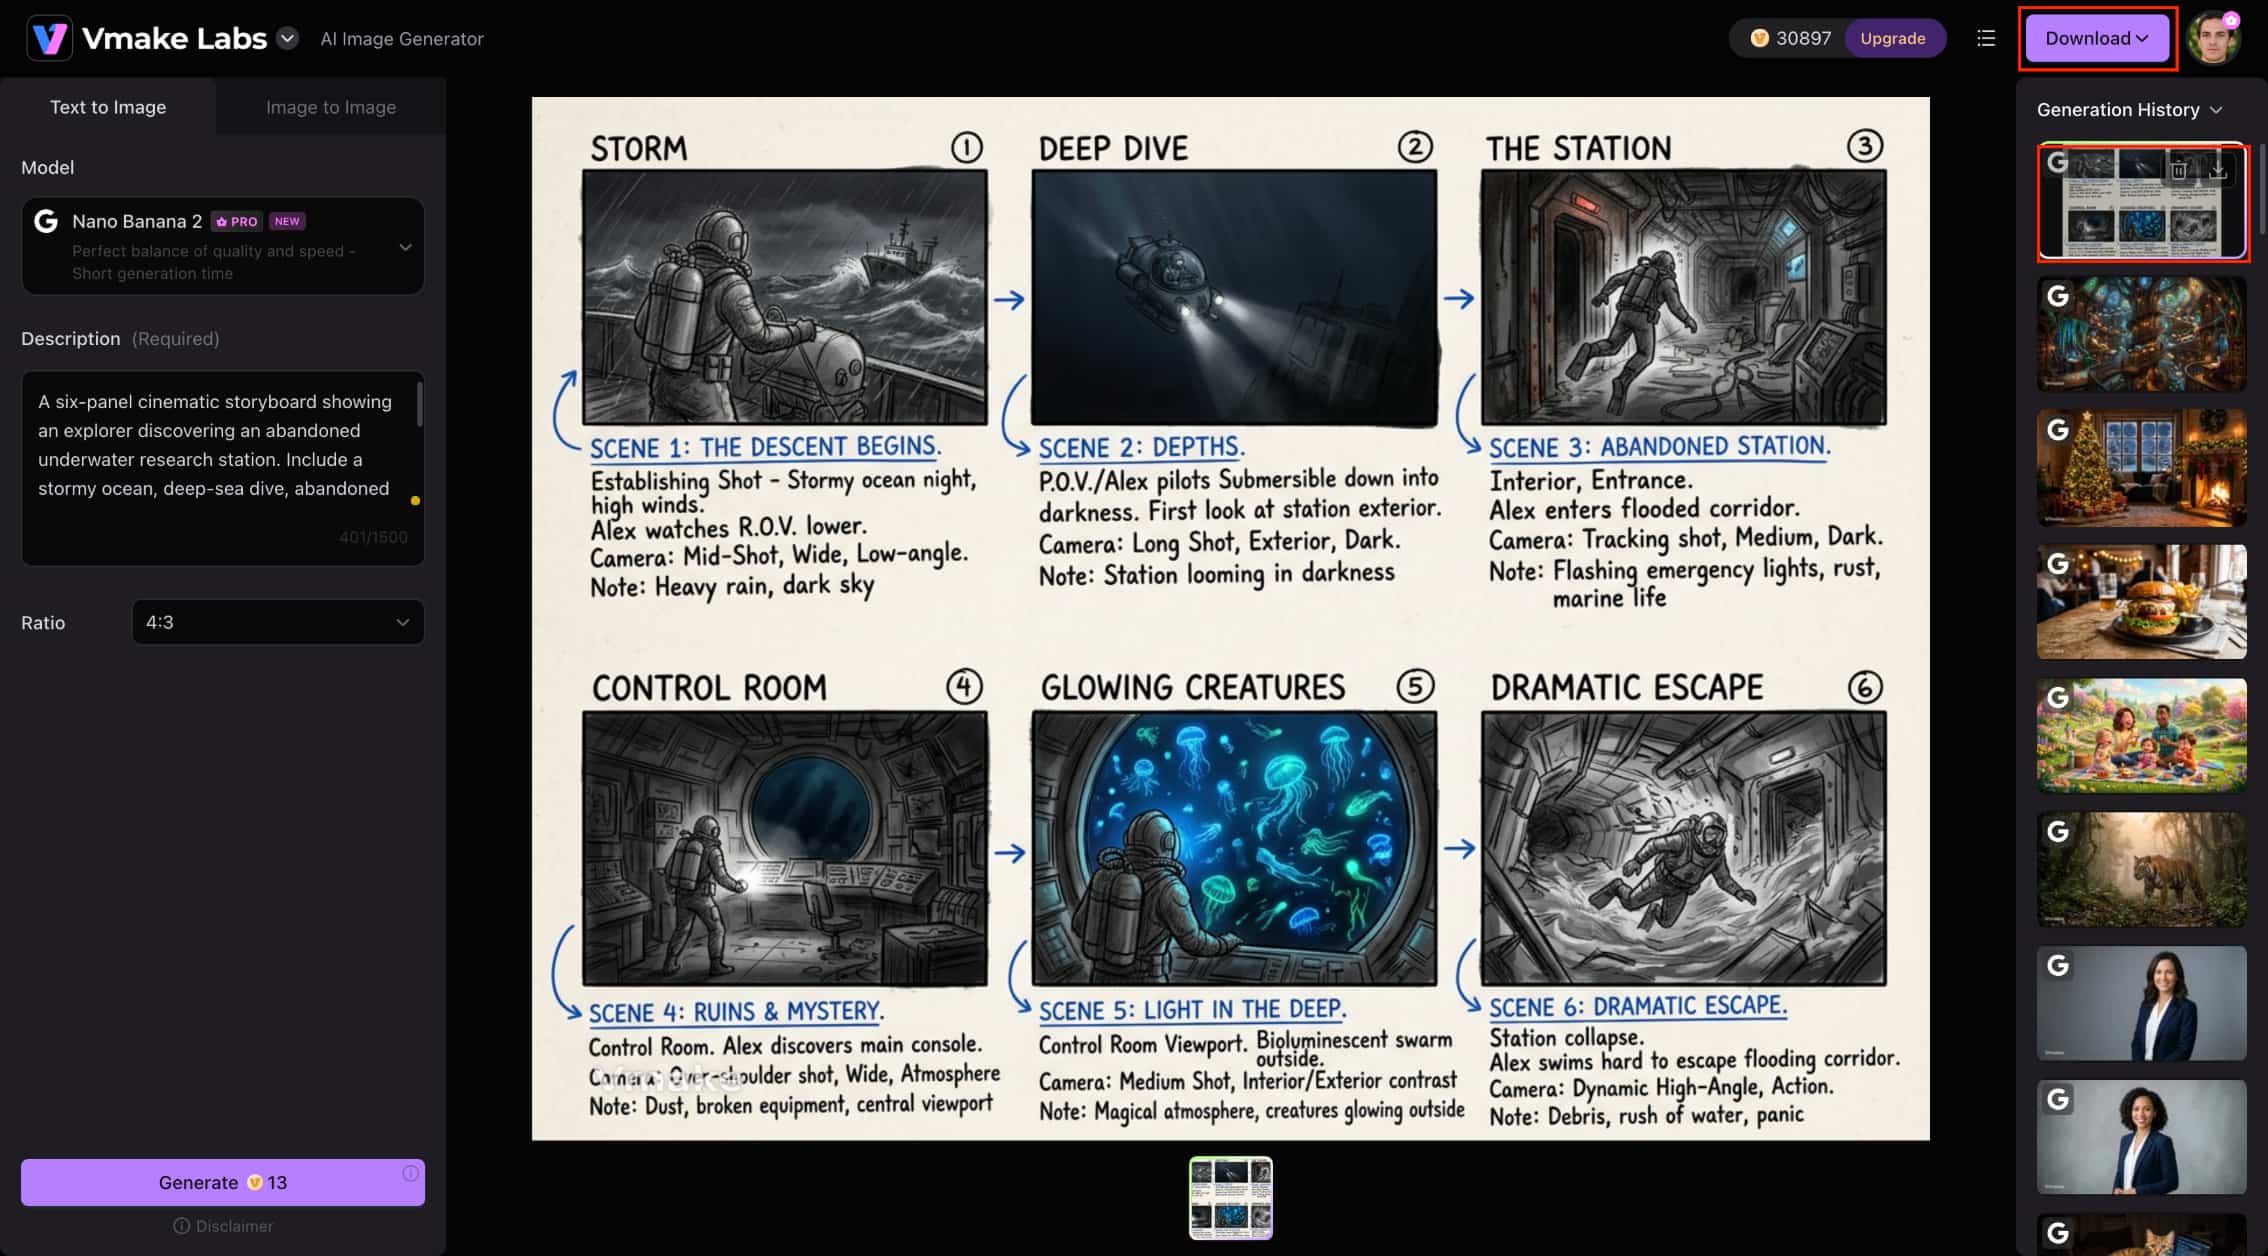
Step 3: Generate and Refine
Select an appropriate AI model and aspect ratio, then click Generate to create the visual reference. Review the result and refine your prompt, model, or settings to develop a visual that better matches your storyboard concept.
Vmake Labs Features for Storyboard Development
Vmake Labs offers a variety of image-generation options to help creators create visual references as they plan an animation storyboard. Create scenes from text, convert reference images, compare AI models, and adjust the image format to fit your storyboard idea.
-
Text-to-Image: Describe a character, environment, action, or composition and generate a visual reference from your prompt.
-
Image-to-Image: Upload 1–3 reference images and describe the changes you want to explore. This can help develop alternative visual treatments for characters, environments, or storyboard concepts while using an image enhancer to refine the visual reference.
-
AI Model Selection: Choose from built-in image-generation models such as Nano Banana 2, Nano Banana Pro, Nano Banana, Seedream 4.0, and GPT Image 1 to explore different interpretations of a scene.
-
Reference Image Support: Upload 1–3 reference images when you want the generated visual to follow an existing character, object, environment, or creative concept.
-
Aspect Ratio Selection: Choose an aspect ratio that fits the storyboard visual or the format in which you plan to present your visual references.
Animation Storyboard Examples and Tips
Different scenes require different visual approaches. Looking at common animation storyboard situations can help you understand how panels communicate character performance, action, dialogue, and camera movement.
Animation Storyboard Examples
-
Character-focused scene: Show a character's posture, facial expression, and reaction during important moments. An AI cartoon generator can also help explore character styles and expressions when creating visual references. Clear poses show how the character is feeling and make it easier to understand the intended performance.
-
Action sequence: Break an action into its important stages rather than trying to represent the entire movement on one panel. Showing preparation, movement, impact, and reaction can make the sequence easier to follow.
-
Dialogue scene: Use panels to show who is speaking, how characters respond, and how the camera frames the conversation. Dialogue and performance notes can provide additional context where necessary.
-
Camera movement sequence: Use successive panels and camera arrows to show movements such as pans, tilts, or zooms. This helps communicate how the camera should interact with the characters and environment.
Tips for Better Storyboards
-
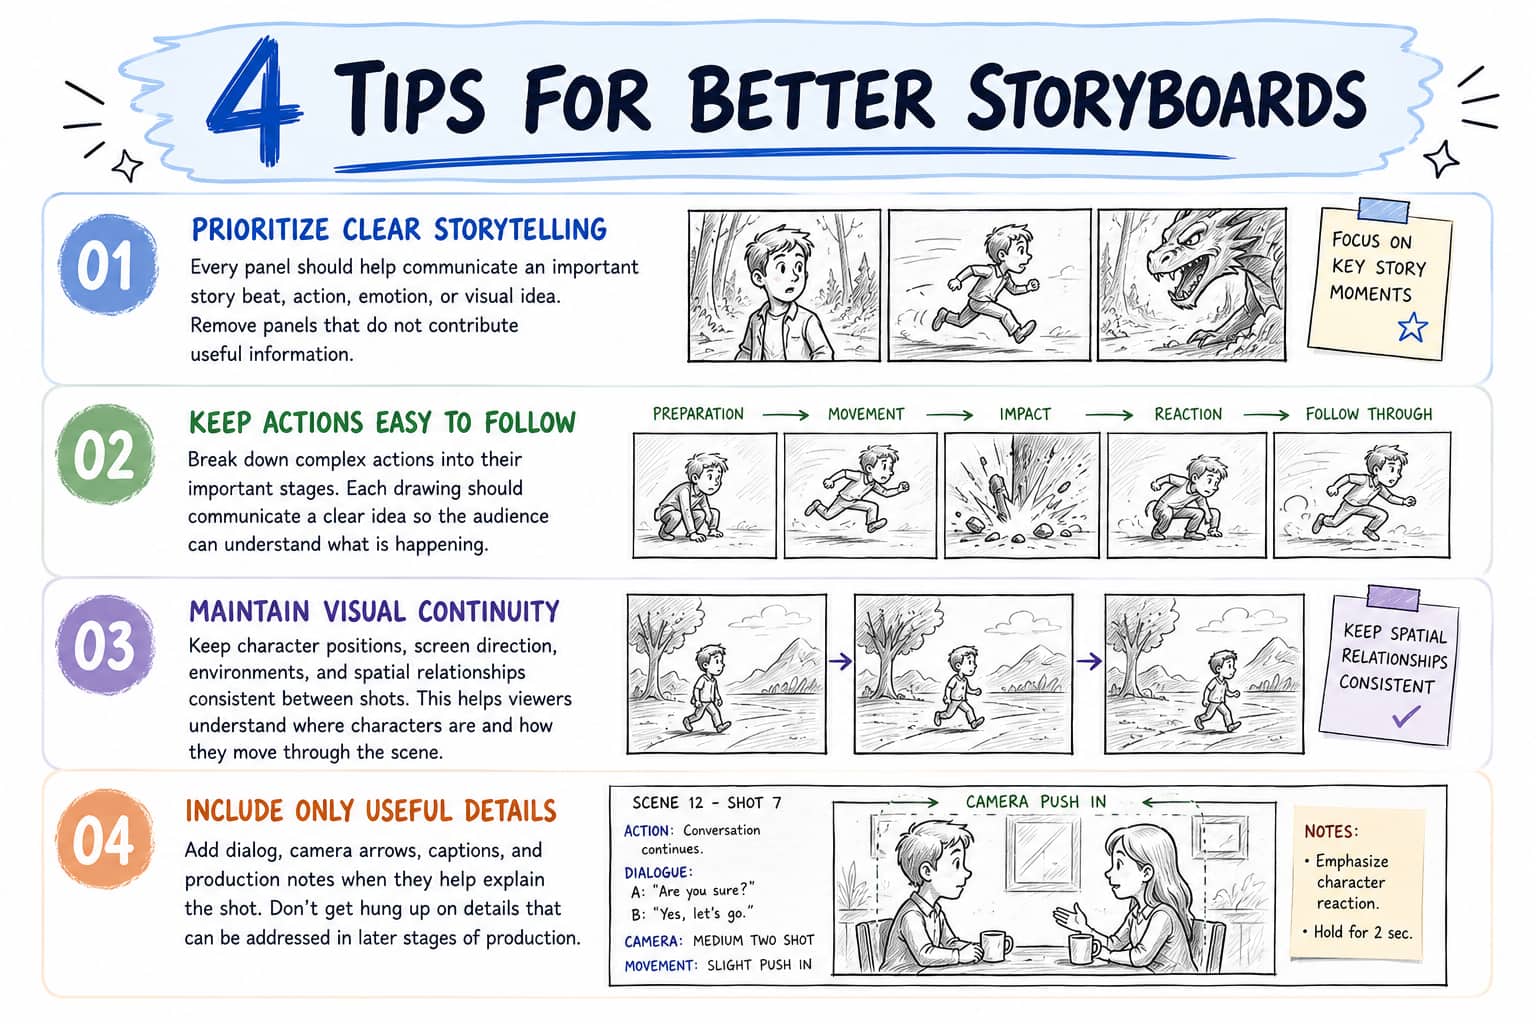
Prioritise clear storytelling: Every panel should help communicate an important story beat, action, emotion, or visual idea. Remove panels that do not contribute useful information.
-
Keep actions easy to follow: Give complex actions enough panels to show their important stages. Each drawing should communicate a clear idea so the audience can understand what is happening.
-
Maintain visual continuity: Keep character positions, screen direction, environments, and spatial relationships consistent between shots. This helps viewers understand where characters are and how they move through the scene.
-
Include only useful details: Add dialog, camera arrows, captions, and production notes when they help explain the shot. Don't get hung up on details that can be addressed in later stages of production.
Conclusion
A storyboard for an animation translates a script or idea into a clear visual progression that helps guide the production process. Breaking scenes into shots and visualizing character actions helps creators communicate ideas clearly. Planning camera movements and the sequence early also helps identify problems before detailed animation begins. Storyboards don't have to be finished artwork; their main purpose is to make the story and visual direction clear. During planning, visual reference tools such as Vmake Labs can help you explore characters, settings, and compositions.
FAQs
How many panels should an animation storyboard have?
There is no fixed number of panels for every animation storyboard. The required number depends on the story, length, complexity, and number of shots. Use enough panels to communicate each important action and transition clearly without adding unnecessary drawings.
Do animation storyboards need to be detailed drawings?
No. Storyboards can range from rough thumbnail sketches and simple drawings to more detailed artwork. The level of detail depends on the project, but clear storytelling and legible actions are usually more important than polished artwork.
Who creates an animation storyboard?
An animation storyboard is usually made by a storyboard artist, sometimes in collaboration with a director or other creative leaders. The storyboard artist takes the script or story and creates a series of visual panels. These panels show the shots, what the characters are doing, how the shots are composed, and where the camera is positioned.
What is the difference between a storyboard and a shot list?
A storyboard employs visual panels to show what individual shots will look like and how they will flow, while a shot list is essentially a written list of the shots needed for production. A storyboard can have shot numbers and notes about the production, but is primarily used to communicate visually.
Can animation storyboards be changed during production?
Yes. Storyboards can be revised when the story, pacing, creative direction, or production requirements change. Reviewing and updating the storyboard allows teams to address visual and storytelling issues before more detailed animation work is completed. If you need to explore visual references during this process, Vmake Labs Image Generator can help develop concepts for characters, settings, and compositions before refining them into storyboard panels.
You May Be Interested

Best AI Animation Generators for Creating Images and Videos

How to Make a Video Animation: Creative Best Practices
Pixar-Level Animation Seedance 2.0: Complete Creator Guide