How to Change Video Resolution Without Losing Quality: Best tools
 Ken DawsonMay 25, 2026
When you change video resolution, it affects the file size, appearance, and performance of your content across different platforms. Never worry about this again. The guide provides comprehensive information on HD and SD video formats, enabling users to make better decisions without sacrificing video quality or operational efficiency.
What is video resolution, and best ways to change video resolution
Video resolution refers to the number of pixels in each frame of a video, typically measured by its width and height, and is often 1280×720. The resolution of a video determines its strength because the audience requires specific visual qualities to view its content.
When you change the resolution of the video, it enables users to find the optimal combination of quality, performance, and device compatibility that will ensure their content appears visually appealing on all platforms.
Best ways to change video resolution without losing quality
Changing video resolution requires specific equipment and system settings to achieve the desired result. If you're wondering how to change video resolution, following a few best practices can help you maintain clarity and performance.
-
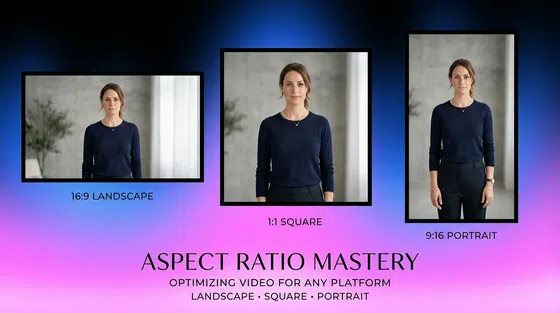
Maintain aspect ratio: You need to keep the original aspect ratio to prevent your video from showing stretched or distorted images.
-
Use the correct bitrate and codec: Your video quality depends on the amount of data used for rendering, which is determined by the selected bitrate.
-
Avoid unnecessary upscaling: Upscaling low-resolution videos produces blurry visuals because it doesn't deliver genuinely new visual content.
How to change video resolution in 3 methods
Using an AI online tool
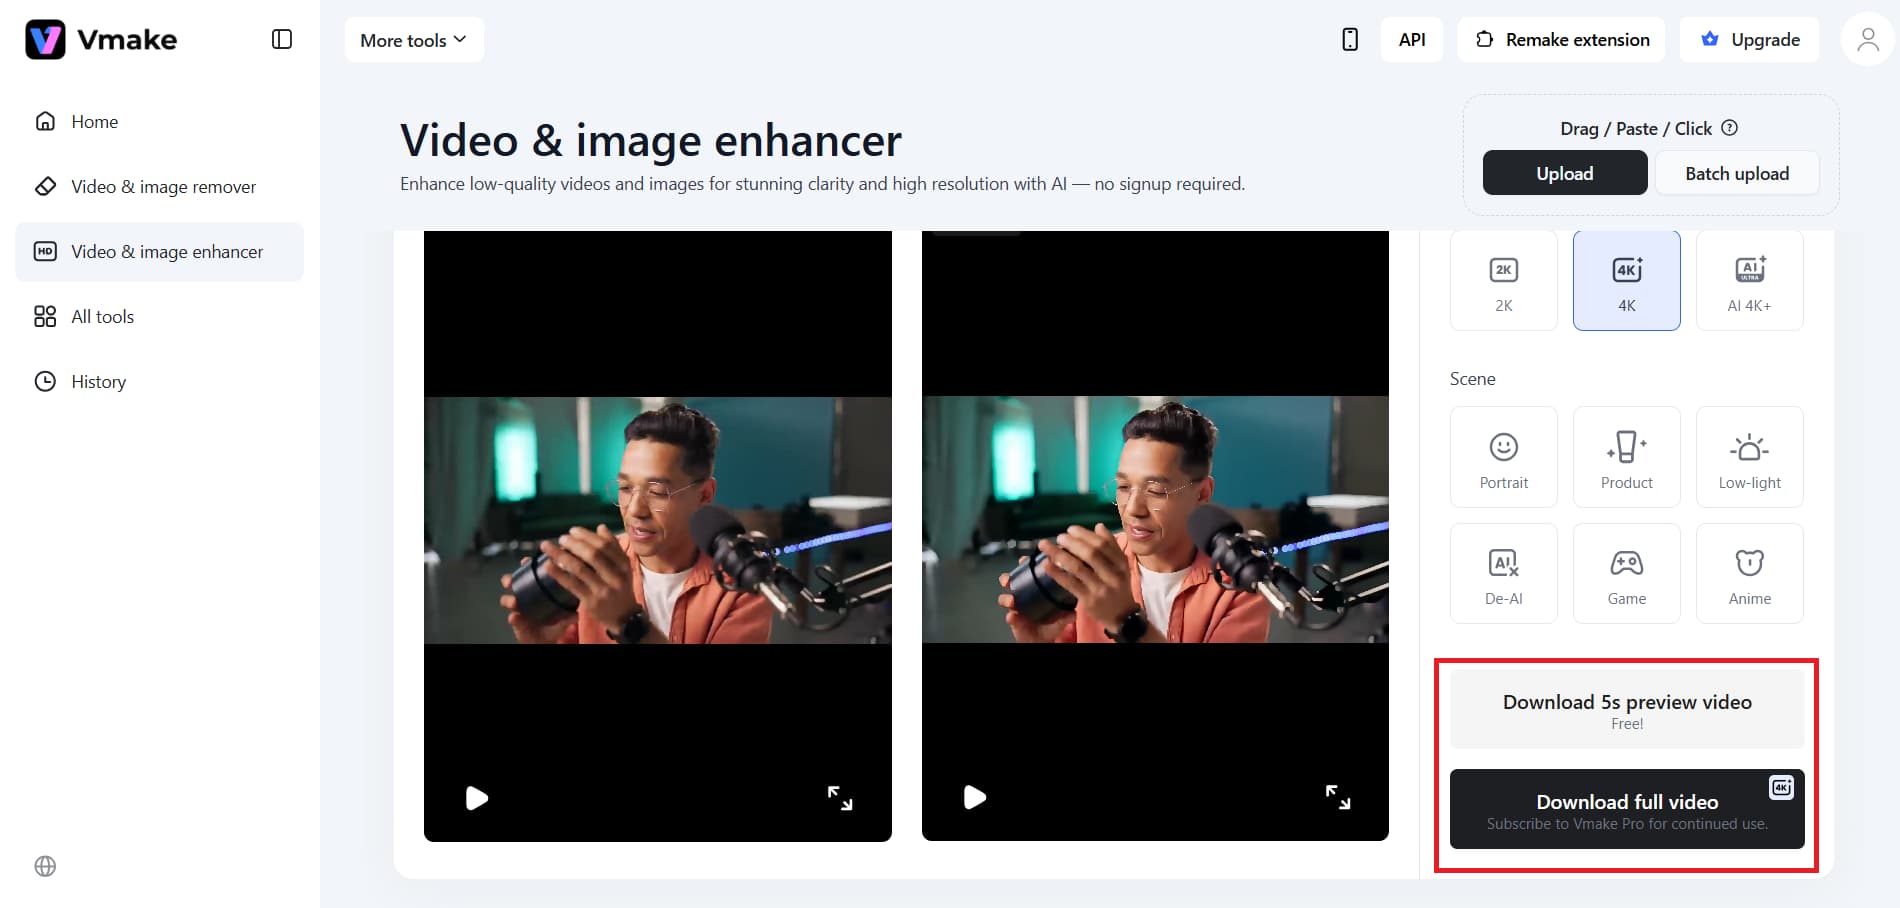
Vmake is a powerful AI-driven tool designed to help users quickly and efficiently change video resolution without compromising quality. Vmake provides an easy way to handle video resolution changes: its video enhancer uses sophisticated AI algorithms to maintain visual clarity, sharpness, and all minute details during video resizing, making the tool suitable for both novice users and experienced professionals.
Step-by-step guide:
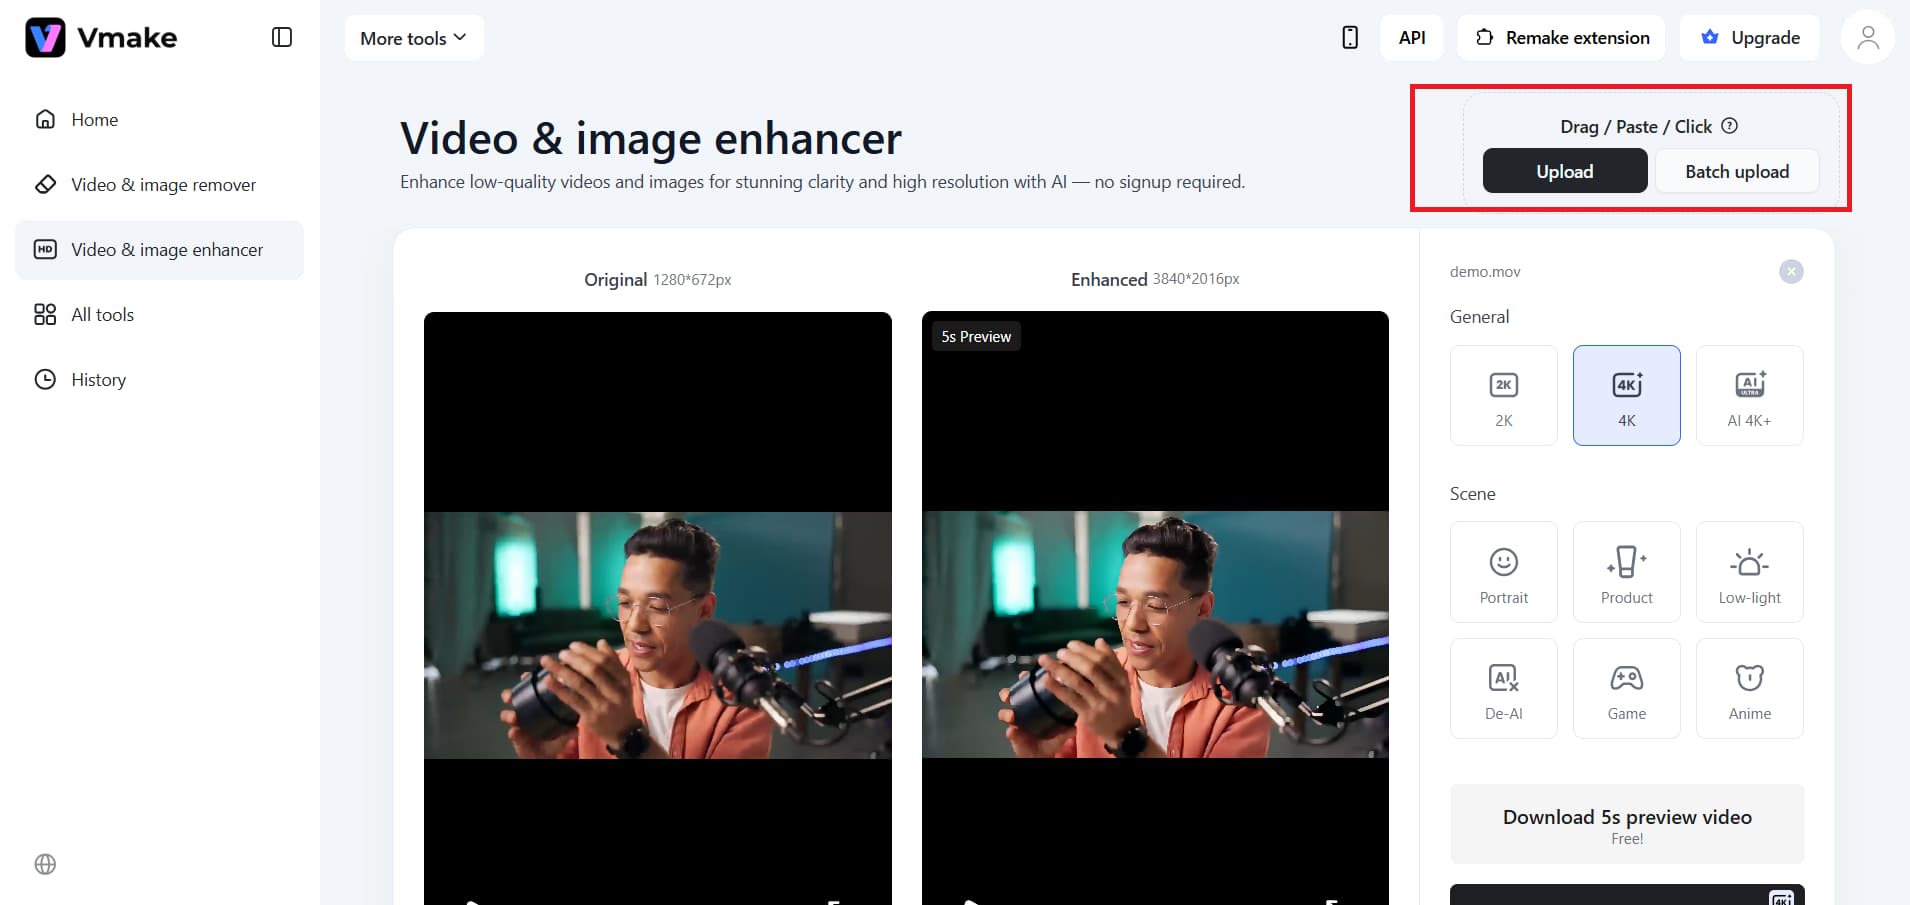
Step 1: Upload your video
Click the upload option, then select the video file you want to edit. Vmake supports multiple formats, making it quick and hassle-free.
Fix stretched videos instantly with Vmake now!
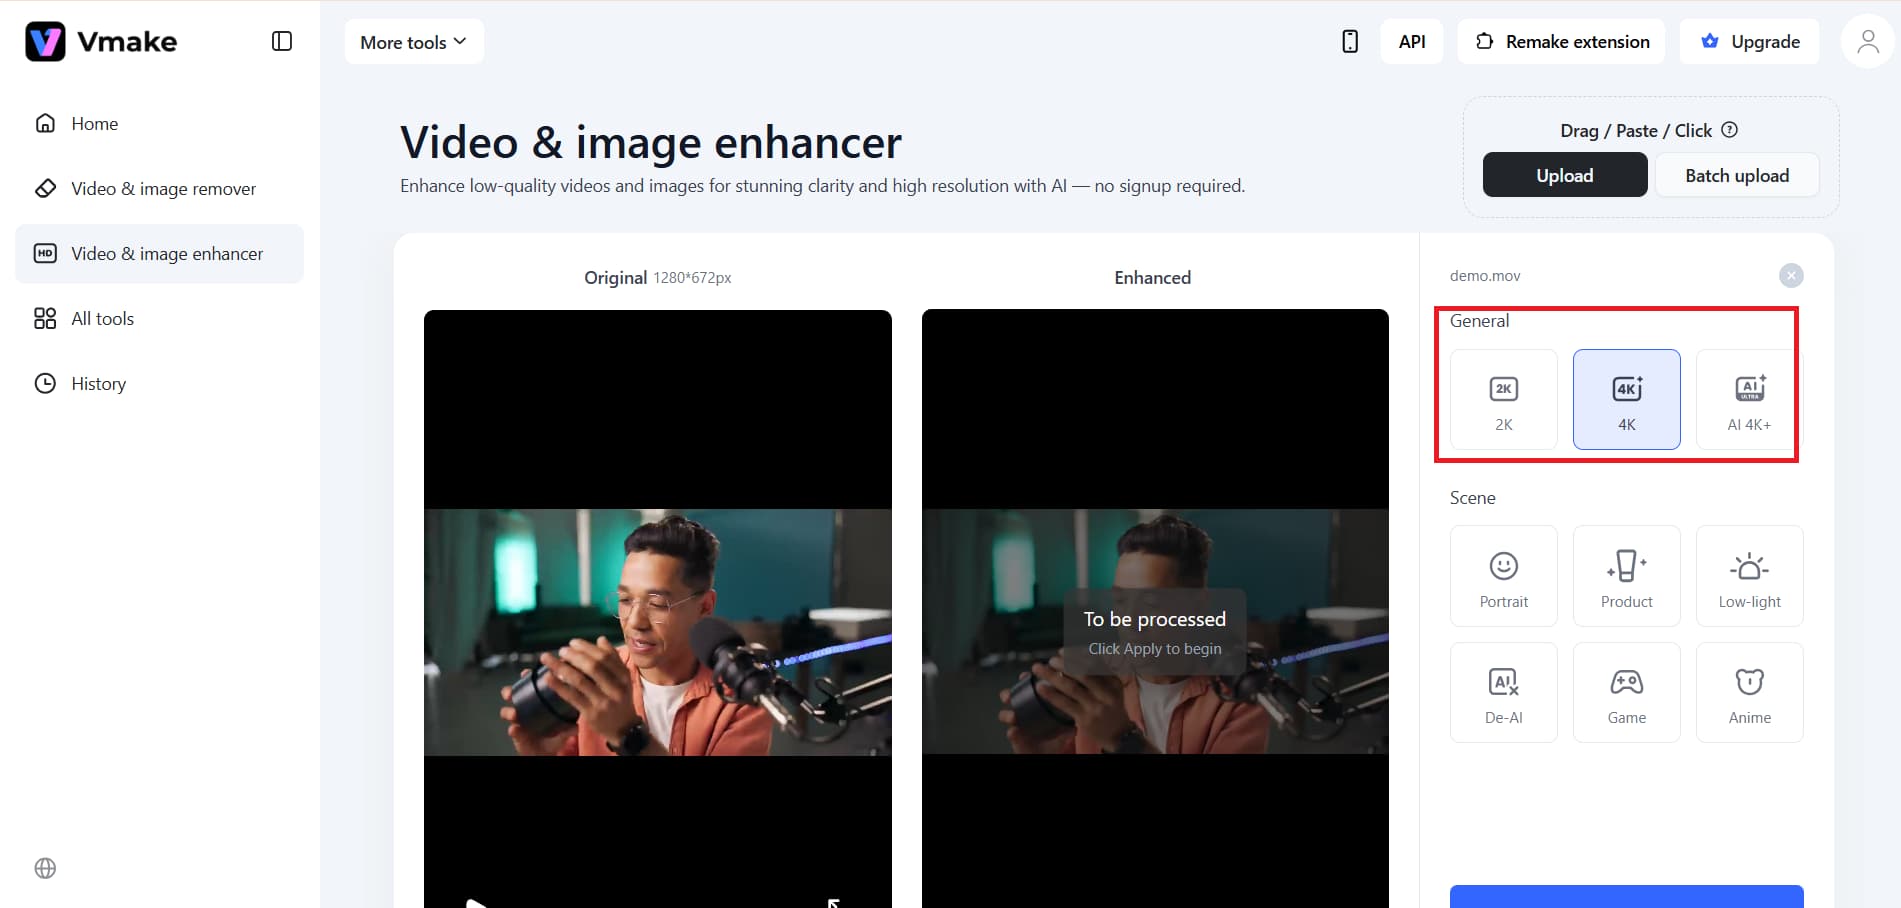
Step 2: Choose the desired resolution
Select the resolution you want, such as 2k, 4k, or AI 4k+. You can upscale or downscale based on your needs while maintaining clarity and detail.
Step 3: Process and download
Apply the changes and let Vmake enhancer process your video. Once completed, download the final file in high quality, ready to use anywhere.
Key features:
-
AI-powered resolution enhancement: Vmake uses AI to increase video resolution using advanced AI video processing algorithms that preserve video quality across all size changes. The system automatically enhances image sharpness while reducing blur and pixelation during resolution changes.
-
User-friendly interface: The platform provides a straightforward design that enables new users to easily navigate the system and perform video editing tasks. Users can change video resolution without technical skills.
-
Multiple resolution options: Vmake provides its users with various resolution options, including 4K, to meet their different requirements. The system provides users with three options that allow them to improve their video quality.
-
Quick cloud-based processing: Vmake works online and doesn't need any software to be installed. It also doesn't use a lot of system resources. The system uses cloud technology to process videos, which lets it give results very quickly.
Pros:
-
Easy to use for beginners: Vmake provides a user-friendly interface that enables all users to perform video editing tasks. Users can change video resolution without any technical knowledge. This makes it a great option for beginners and non-editors.
-
AI support for high-quality output: AI-powered technology helps keep things clear and sharp when the resolution changes. The system makes the content look better overall by reducing pixelation. After you resize your videos, they will still look professional.
-
No installation required: Vmake is a cloud-based tool that works directly in your browser. The system enables you to work without downloading or installing any bulky programs. The system frees up disk space while enabling you to work on any device.
Cons:
-
Limited features in the free version: The free version has specific resolution and file size limits, as well as limited export options. The system restricts access to advanced functions, which are only available through paid subscription plans. Users with larger projects will experience difficulties because their work requires multiple locations to be active simultaneously.
-
Depends on internet speed: Vmake's performance depends on your internet connection, as it operates as an online application. Users with slow networks will experience longer delays when uploading and processing their large video files. The system will reduce operational productivity when handling high-resolution media files.
Using desktop software
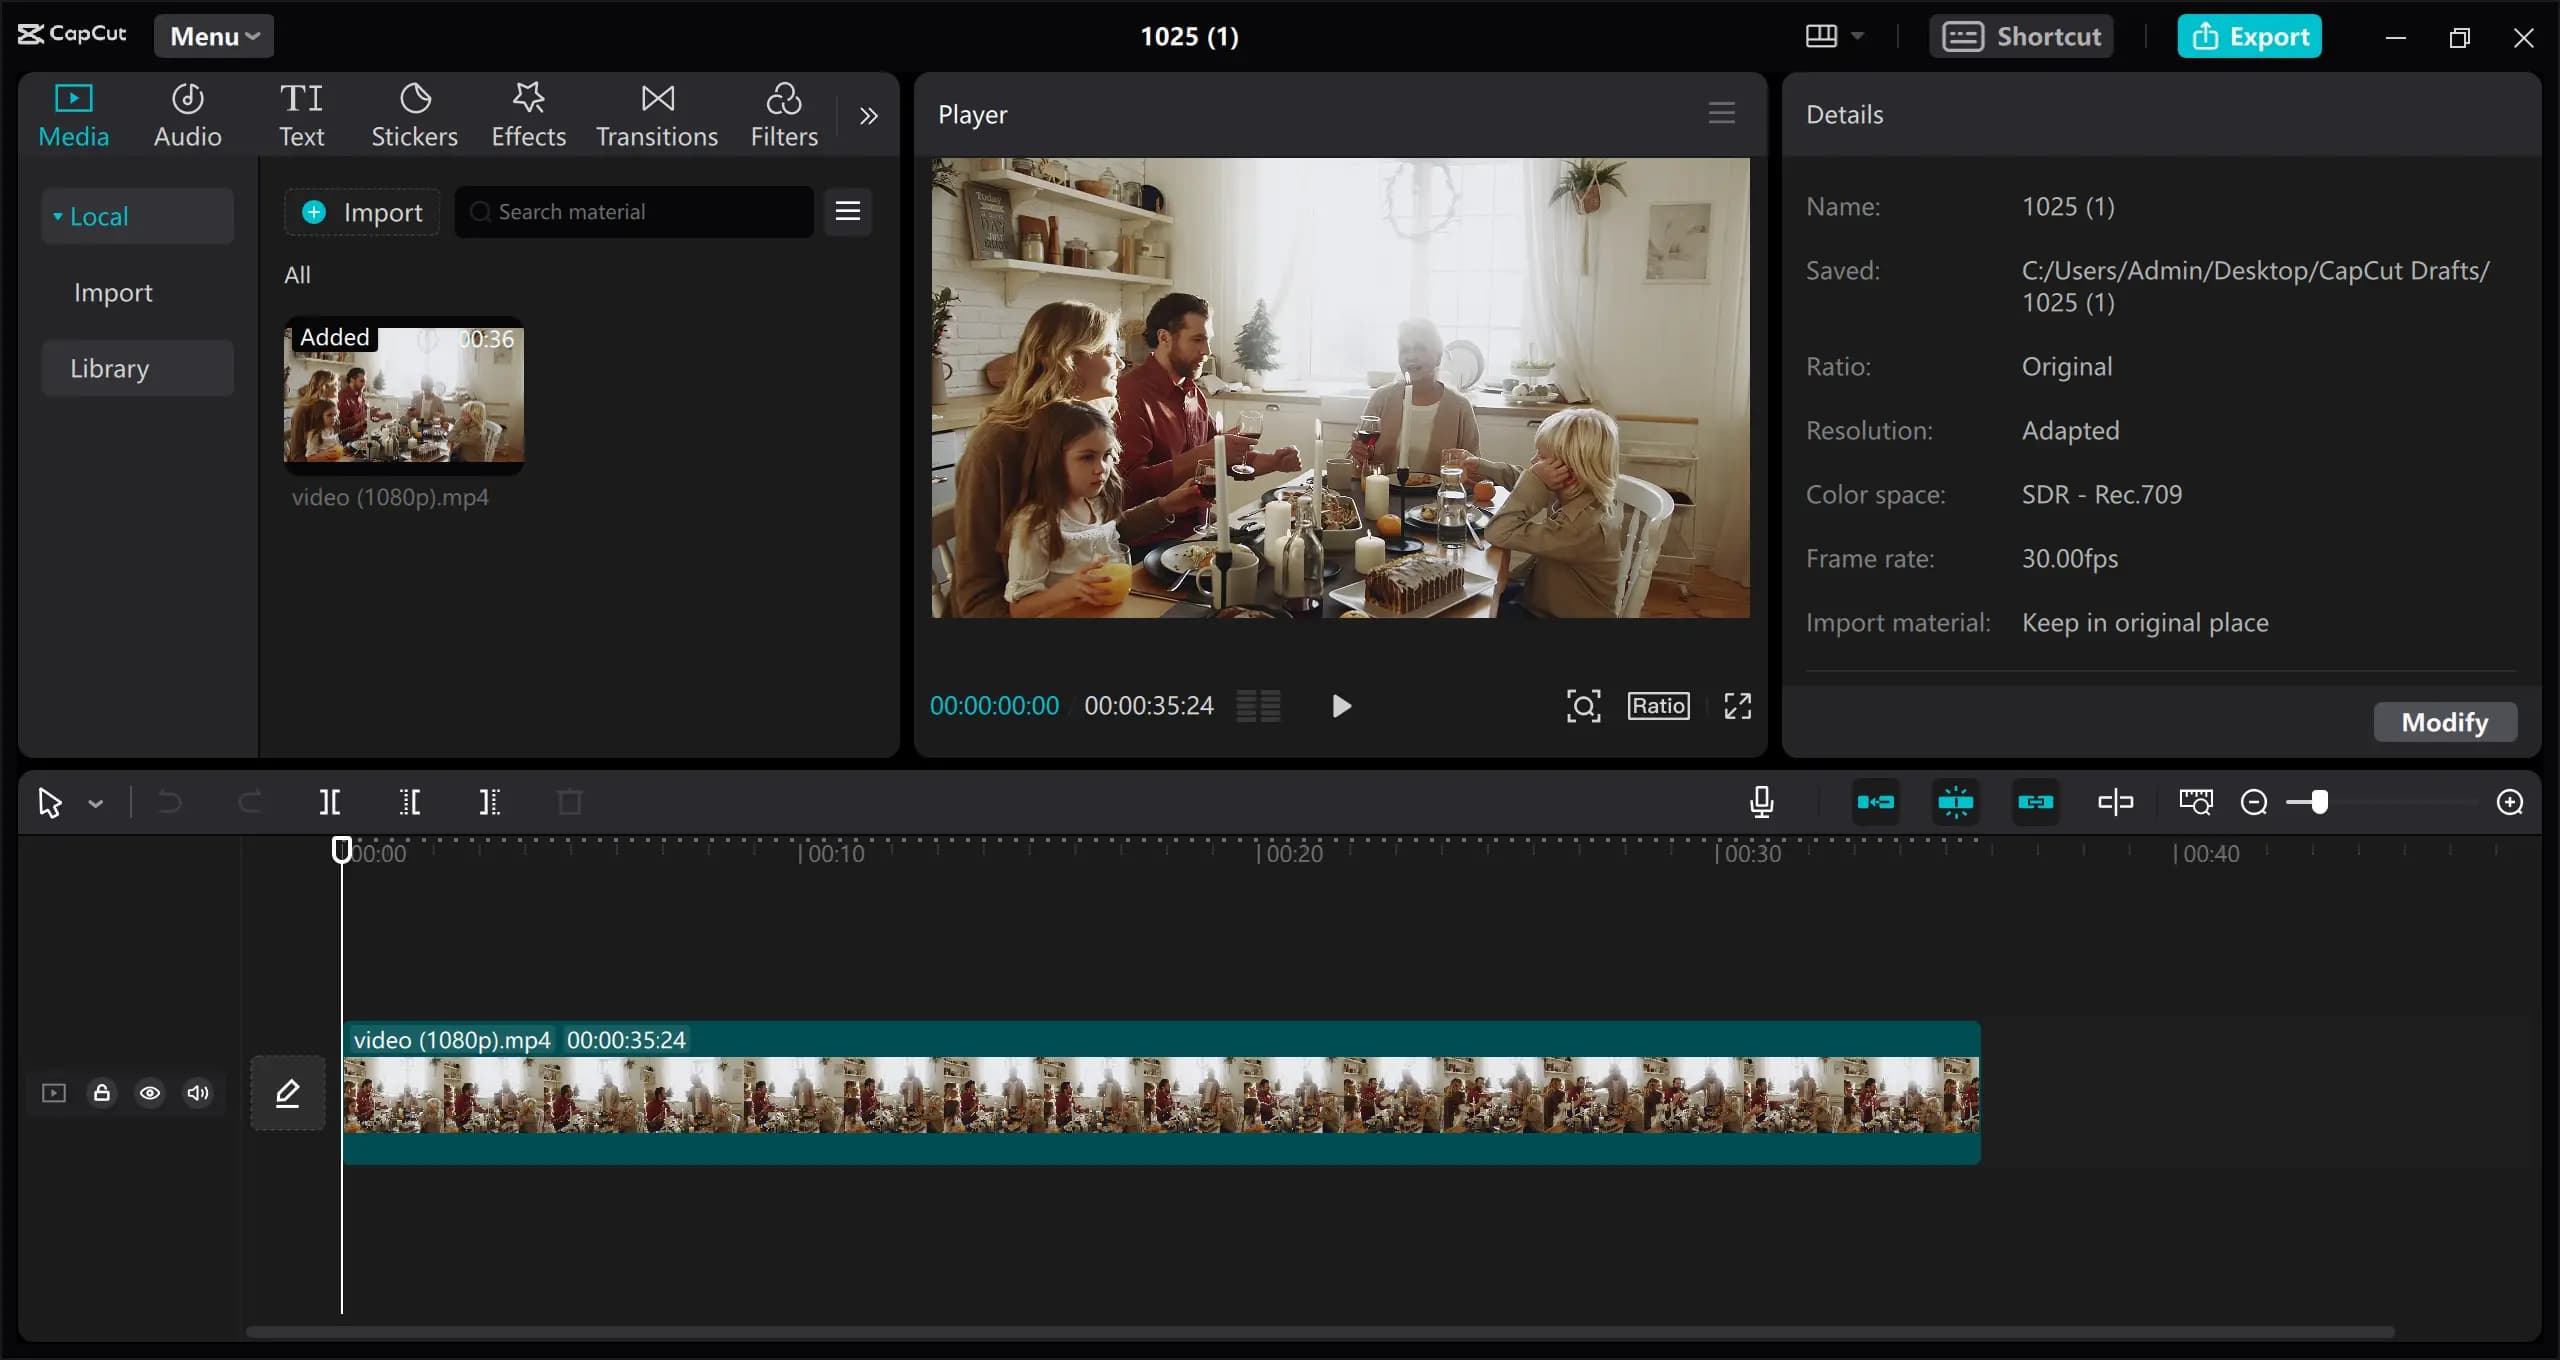
CapCut Desktop tends to start as a simple tool for making fast social media edits, but a lot of people end up using it for larger video projects too. One thing it does really well is video resizing, especially when you need to adjust video resolution without digging through confusing export menus. It lets you resize videos for platforms like TikTok, YouTube, Instagram, or even custom dimensions with very little effort. You also get features like AI-powered enhancements, filters, subtitles, and frame controls, which can help clean up footage after resizing.
Step-by-step guide:
Step 1: Start a new project on the CapCut desktop
Open CapCut Desktop and create a fresh project from the main screen. After that, drag your video file into the media section to begin editing and resizing it.
Step 2: Change the resolution and aspect ratio
Head over to the canvas or export options and pick the resolution you want, whether that’s 720p, 1080p, or 4K. You can also adjust the aspect ratio for platforms like TikTok, Instagram, or YouTube. In some cases, you may need to reposition the video slightly, so everything fits properly.
Step 3: Export the finished video
After reviewing your edits, export the project using the quality settings you prefer. CapCut usually renders videos pretty quickly, though larger or longer projects may take longer on lower-powered systems.
Key features:
-
Built-in resolution presets: CapCut Desktop includes ready-made resolution and aspect ratio settings for popular platforms, so you can quickly format videos for TikTok, YouTube, Instagram, and more without having to figure out dimensions yourself.
-
AI enhancement features: The editor also offers AI tools like sharpening, background removal, and automatic captions. These features can make resized videos look cleaner, especially when the source footage lacks detail.
-
Timeline editing system: CapCut uses a multi-layer timeline that gives you more control compared to many online video editors. You can add transitions, overlays, text, sound effects, and trim clips with decent flexibility.
-
High-quality export settings: The program supports exporting in different resolutions and frame rates, including full 4K output. You can also adjust bitrate and file format settings if you want more control over video quality.
Using a mobile tool
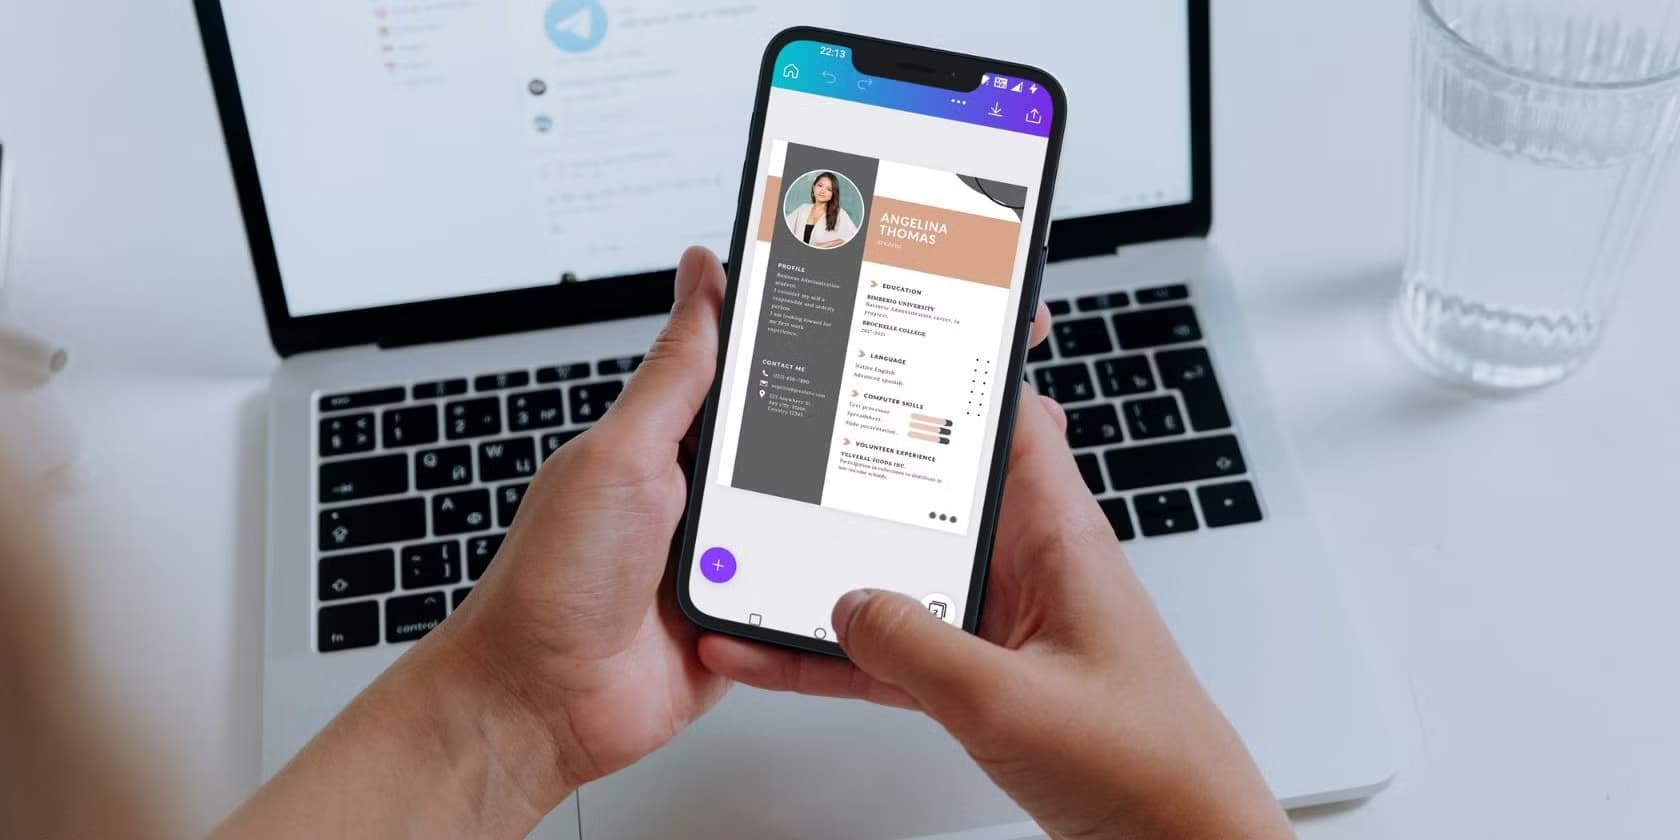
Canva's mobile app makes it surprisingly easy to change video resolution on the go if you're creating content for social media. It's built for simplicity, so you don't need any editing experience to resize videos or change formats. Find instant presets for Instagram, TikTok, YouTube and more, so you can easily resize your video to the correct dimensions. The app also includes basic editing tools that allow you to trim, resize, add text or improve the visuals. It's a great choice for creators who want fast, polished results right from their phone.
Step-by-step guide:
Step 1: Sign up for Canva and start a video project
Open the Canva app and tap on "Create a design" or "Video." Select a preset size or begin with a custom layout.
Step 2: Upload your video and resize it
Upload your video, then either resize it or choose a preset for a platform like Instagram or YouTube. Resize to fit as necessary.
Step 3: Export and save
When you're finished, tap export and choose the quality you want. Download the video directly on your device for easy sharing.
Key features:
-
Pre-built resolution presets: Canva provides preset sizes for different platforms, enabling you to resize quickly and accurately. And you don't have to manually enter the dimensions. This is ideal for social media content.
-
Drag-and-drop editing: The app uses a simple drag-and-drop interface that's easy to navigate. You can quickly adjust elements as you resize your video. This keeps the editing process smooth.
-
Built-in design tools: You can add text, animations, filters, and graphics while editing your video. This allows you to enhance content without switching apps. It's an all-in-one solution for quick edits.
-
Mobile-friendly workflow: Everything is optimized for mobile use, so you can edit anytime, anywhere. The app runs smoothly on most smartphones. This makes it ideal for creators who work on the go.
When should you change video resolution?
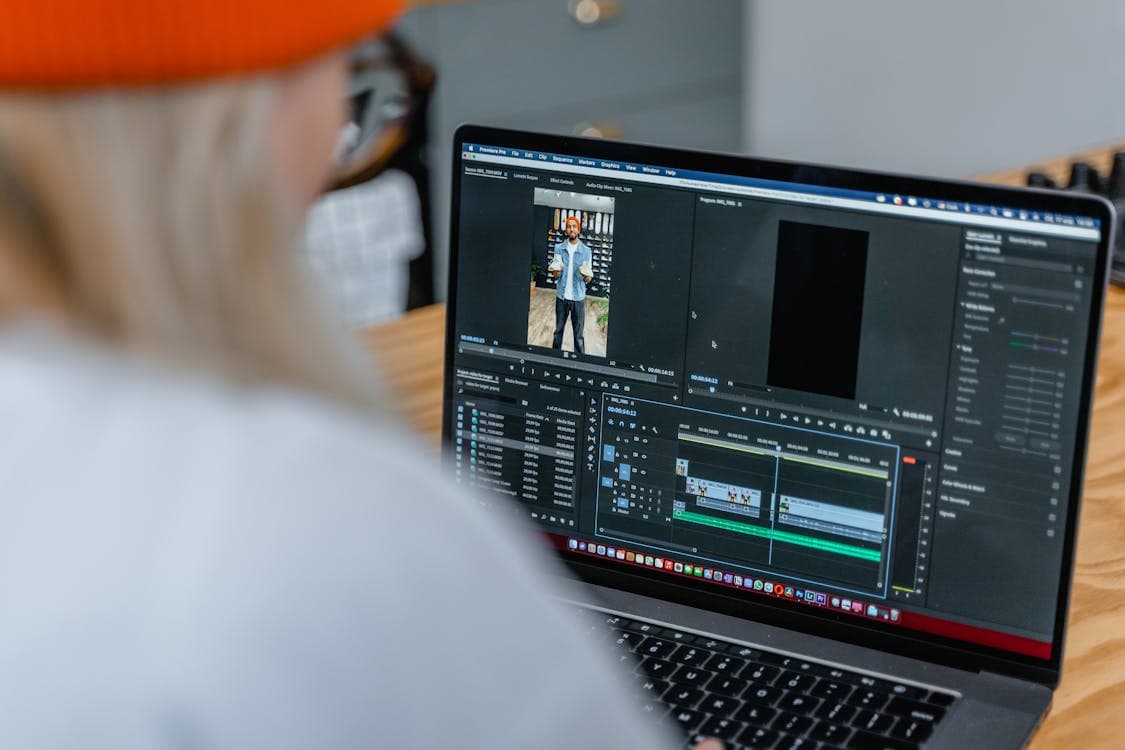
To make sure that content looks its best on all platforms and devices, you need to change the video resolution. The solution lets you find the right balance between file size, quality, and performance that you want.
-
Social media optimization: Different platforms require specific resolutions and aspect ratios for the best viewing experience. Your video needs adjustments to achieve better audience engagement as well as extended viewership.
-
Save space on your computer: You can lower the resolution of a file. This saves a lot of space while keeping most of the original quality. The solution makes it easy for users to store, upload, and share videos.
-
Making a video device-compatible: Most older and newer devices still can't play high-resolution videos. Changing the resolution lets users watch videos smoothly on devices that show content on screens of different sizes.
Real user challenges and practical fixes
The process of resizing videos often leads to common problems users encounter when trying to change video resolution. The correct solutions need to be applied to these challenges to maintain quality and prevent user dissatisfaction.
-
Issues like wrong dimensions or stretched video: Incorrect video dimensions cause users to experience stretched or squished video content when they attempt to resize their videos. The problem occurs because users change the width and height dimensions without controlling their relationship with each other. The solution requires users to lock their aspect ratio when selecting preset resolutions as their default.
-
Fixing problems with aspect ratio: Problems with aspect ratio cause black bars and missing video content because they make the video display wrong. To display correctly, the aspect ratio of the original video must match that of the target format. Depending on the platform's needs, the best thing to do is to crop, pad, or resize proportionally.
-
Picking the right resolution for platforms: Users need to follow the resolution and format rules set by each platform in order to get the best playback results. Two problems happen when the settings are wrong. Users should pick resolutions that the platform agrees with. This means 1080×1920 for vertical videos and 1920×1080 for horizontal videos.
Conclusion
Actual and efficient methods help handle changes in video resolution without compromising final quality. It is imperative to note that certain factors, such as aspect ratio, bitrate, and codec selection, will support and enable the maintenance of visual clarity. When you need to improve videos for social media, storage, and device compatibility, you must select the appropriate optimization method. The current user-friendly tools enable beginners to produce professional-quality results with simple operations.
The process needs to be simplified, so we need to find a better solution. Vmake provides a solution that enables users to quickly change video resolution while preserving the original video quality.
FAQs
Can changing video resolution reduce file size?
Yes. Lowering video resolution reduces the amount of visual data, which decreases file size and makes uploads faster. This is useful for sharing videos on social media or saving storage space. With Vmake, you can quickly adjust resolution settings while maintaining clear video quality for smoother playback across different devices and platforms.
Which video resolution is best for different platforms?
Each platform has recommended video dimensions and aspect ratios. TikTok commonly uses 1080 × 1920 vertical video, while YouTube typically performs best with 1920 × 1080 horizontal resolution. Using the correct format improves viewing experience and platform compatibility. Vmake automatically supports platform-friendly resolutions, helping creators prepare videos correctly without manual resizing.
How long does it take to change video resolution?
The time required depends on video length, original quality and internet speed. Short clips process quickly, while large high-resolution videos may take longer to convert. Cloud-based tools can also influence processing speed. Vmake streamlines the workflow with fast AI-powered processing, making it easier to change video resolution efficiently for both short-form and long-form content.
Can I batch change video resolution for multiple videos?
Yes. Some video tools support batch processing, allowing creators to change resolution for multiple files simultaneously. This saves time when handling large content libraries or preparing videos for different platforms. Vmake supports efficient multi-video workflows, helping creators process several videos faster while maintaining consistent output quality across every exported file.
Will changing the video resolution affect audio quality?
Changing video resolution mainly affects visual quality, not audio. However, improper export or re-encoding settings can reduce audio bitrate and impact sound clarity. It is important to review both video and audio settings before exporting. Vmake helps preserve balanced audio and video quality during resolution changes, ensuring professional-looking and clear-sounding final content.
Can I increase video resolution without losing quality?
Yes, AI-powered tools can upscale lower-resolution videos while improving sharpness and visual clarity. Traditional resizing often stretches footage and reduces detail, but AI enhancement helps recover textures and cleaner edges. Vmake uses advanced video enhancement technology to upscale content smoothly, making older or low-quality footage look clearer for modern social media and high-resolution displays.
You May Be Interested
What is 480p Resolution and How to Enhance 480p Quality
2026 Wink Video Enhancer Review: Pros, Cons, and Alternatives