
How to Remove Green Screen in DaVinci Resolve 20 Like a Pro
Achieve flawless edges! Learn how to remove green screen in DaVinci Resolve 20. Follow our step-by-step guide to key and fine-tune your footage. Also, learn how Vmake’s video background remover does it in one-click.

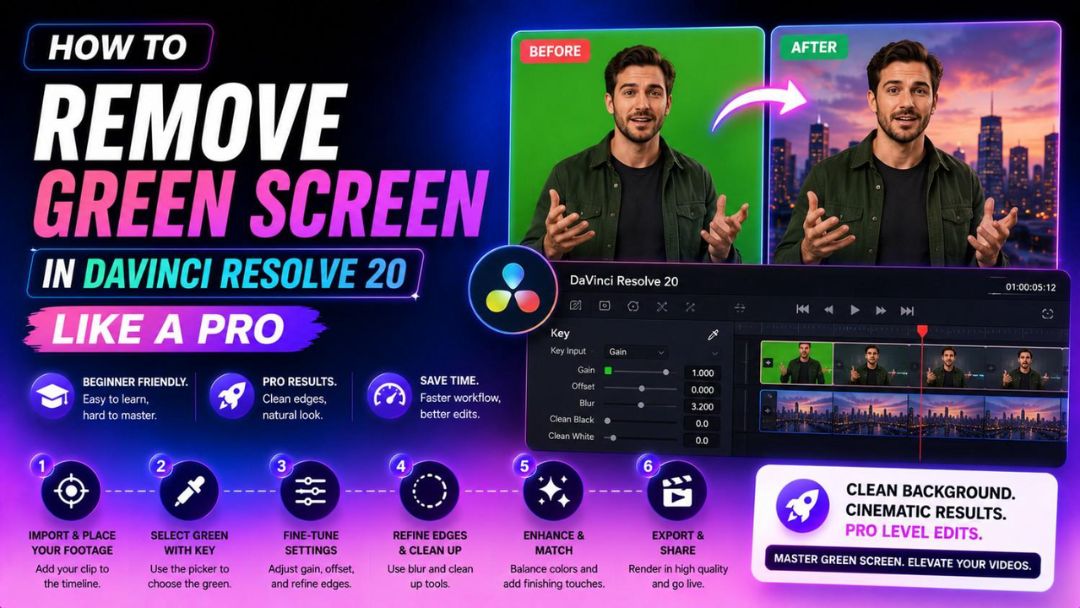
Removing a green screen is an essential skill that instantly elevates the production value of your projects. By replacing a simple solid background with a customized scene, you can teleport your subjects anywhere in the world. Whether you are using industry-standard tools or modern AI solutions, this guide will show you how to achieve perfect results.
What is a green screen?
A green screen is a vibrant, solid-colored backdrop used behind a subject during filming to assist in post-production background replacement. By capturing a scene against a color that is far removed from human skin tones, editors can easily isolate and remove the color, replacing it with any digital environment imaginable.

Benefits of using a green screen in video production
-
Limitless creative environments: Place your actors in any setting, from highly detailed office boardrooms to massive, imaginary fantasy landscapes.
-
Significant cost savings: Eliminate the massive expenses associated with on-location shooting, travel logistics, set construction, and outdoor permits.
-
Total environmental control: Prevent unpredictable issues like fluctuating weather, poor outdoor acoustics, or changing natural sunlight from ruining your shoot.
-
Believable VFX compositing: Provide a clean, consistent color backdrop that allows computer-generated imagery (CGI) to merge flawlessly with real-world actors.
Primary audiences of green screen technology
-
YouTubers: Replace ordinary backgrounds with creative sets, cinematic scenes, or branded visuals to produce engaging videos without expensive studios or multiple filming locations.
-
Online instructors: Create distraction-free lessons by adding virtual classrooms, presentations, or educational graphics that improve learner focus and make complex topics easier to explain.
-
Product marketers: Showcase products against clean or customized backgrounds, create polished promotional videos, and maintain consistent branding across campaigns and social media content.
-
Streamers: Build immersive live streams with custom backgrounds, gameplay overlays, or themed environments that enhance viewer engagement while keeping personal spaces private.
How to remove a green screen in DaVinci Resolve 20?
DaVinci Resolve 20 provides professional tools to remove green backdrops. The 3D Keyer on the Edit page is the fastest, most effective way to achieve a clean key without complicated nodes.
Step 1: Import your media
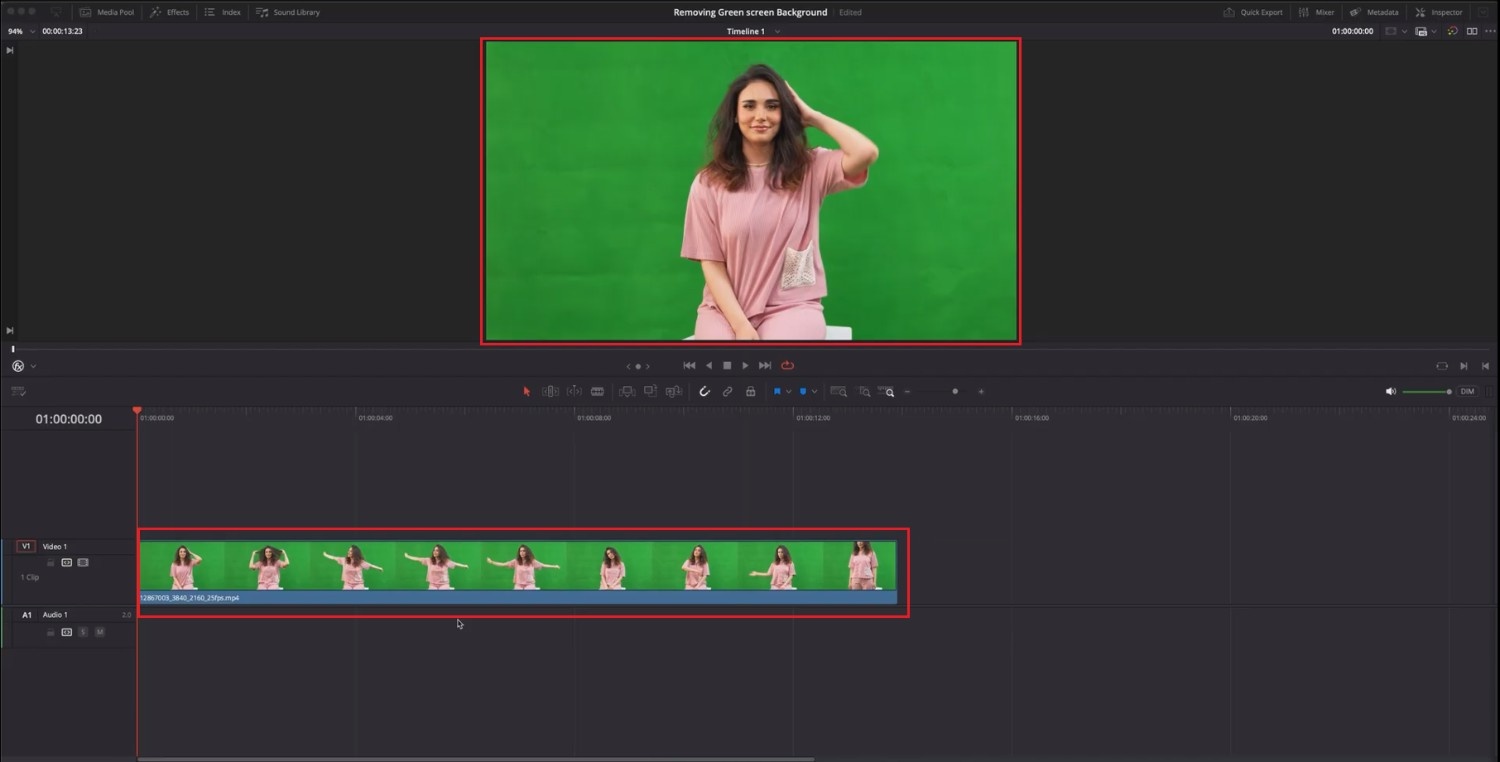
Start by first downloading and installing DaVinci Resolve 20 on your computer system (Windows or Mac). After installation, launch it and then import your video (with green screen) into the interface.
Step 2: Select the "3D Keyer" function
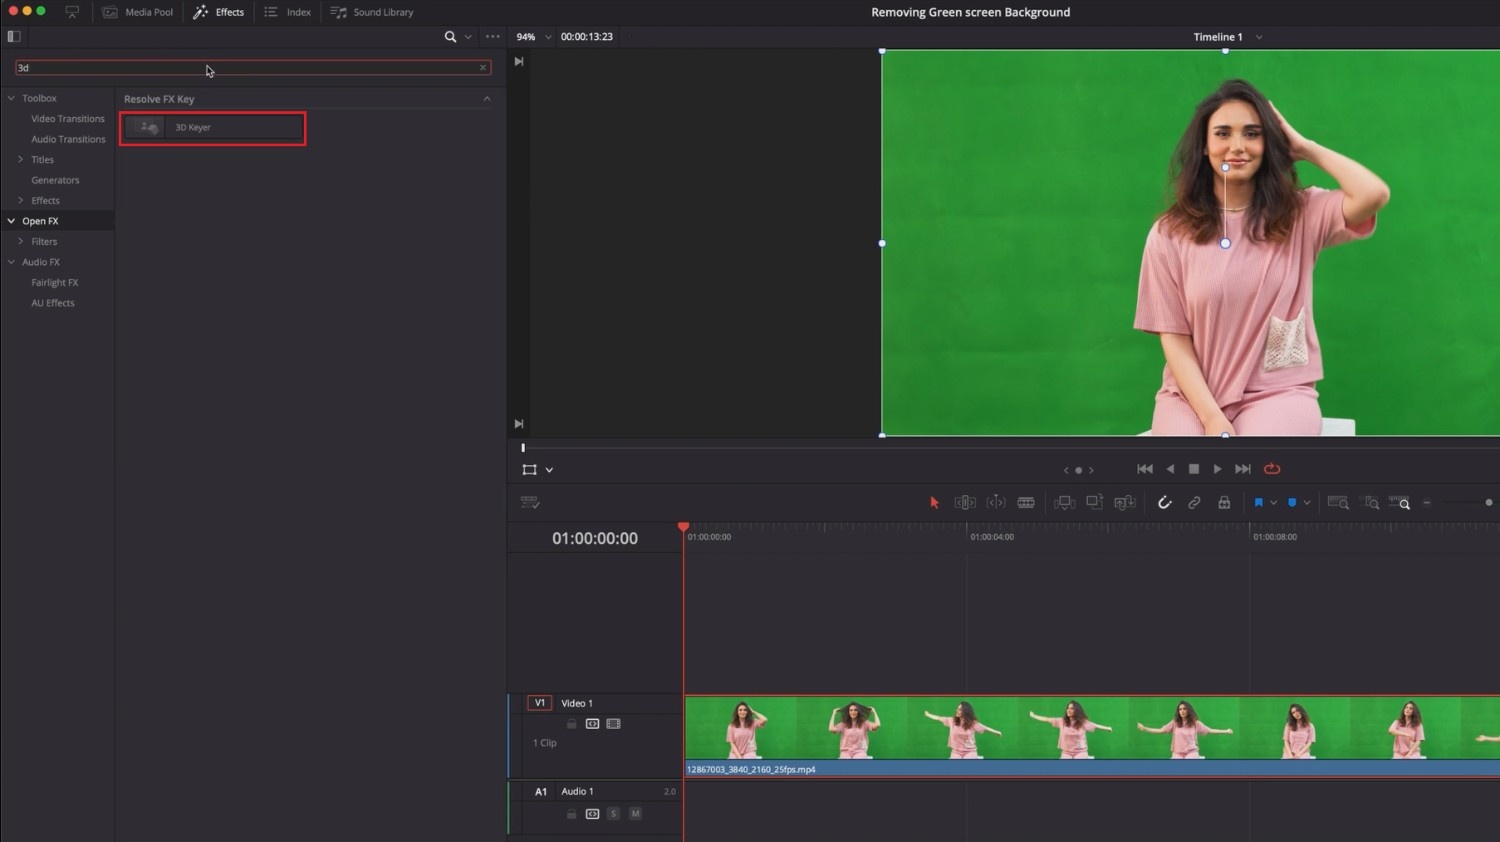
After importing your media, head over to "Effects > Open FX > Resolve FX Key > 3D Keyer". Then, select and drag it onto the current timeline. The will activate the option to remove the green screen.
Step 3: Draw over the subject to remove the green screen
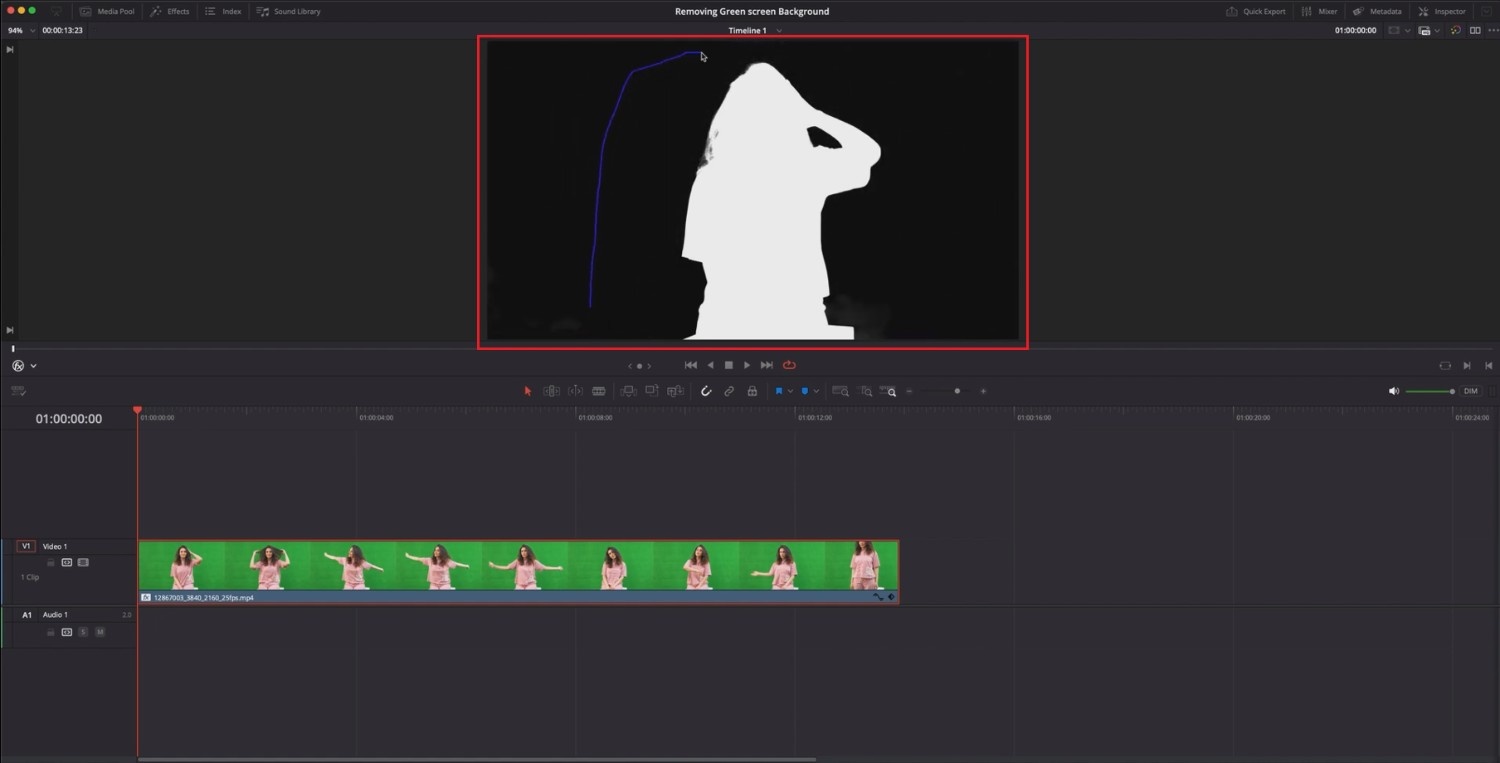
Next, you need to select the "Open FX Overlay" from the timeline options and then proceed to draw over the subject in front of the green screen background. This will allow you to keep the subject while removing the green screen background, behind the subject.
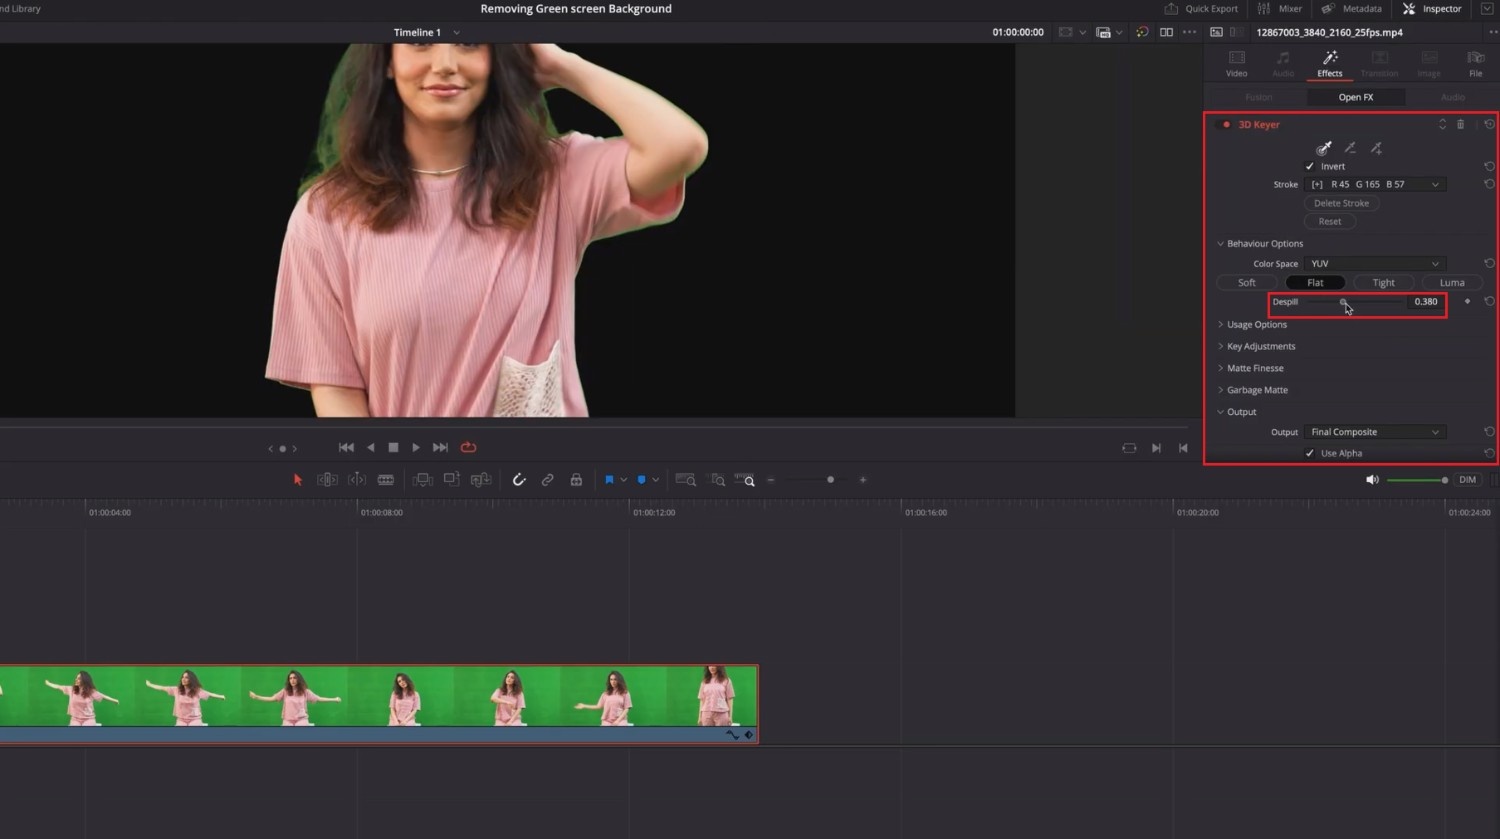
Step 4: Change the "Despill" settings
After that, you need to select the "Inspector" option on the right-hand side of your screen, and under "3D Keyer", increase the "Despill" slider to the maximum. The "Despill" option smoothens out the edges of the subject, so that it blends properly with the background, without any green glow around it.
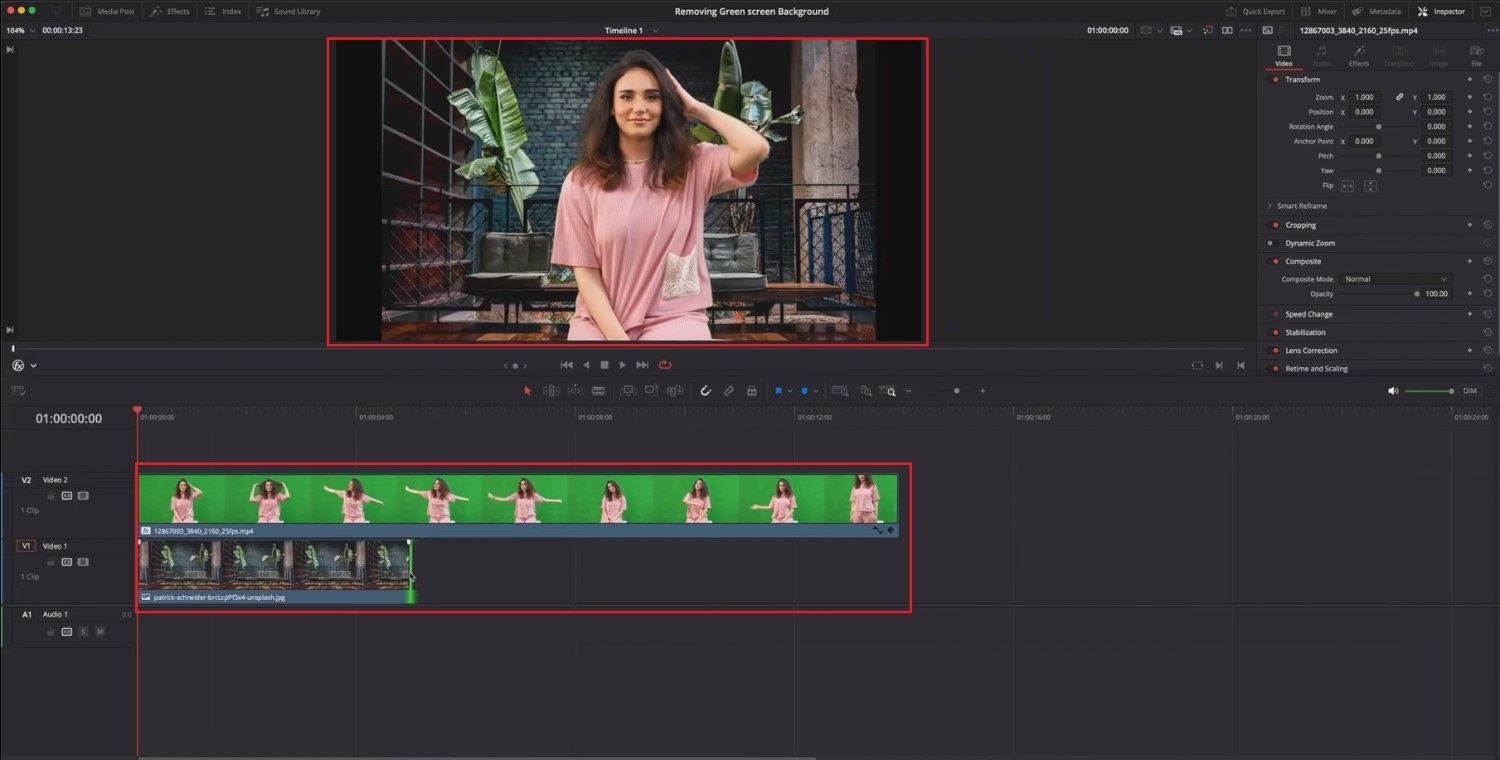
Step 5: Change to the new background
Lastly, you need to drag and drop your new video background image onto the timeline and then merge with the original video. The new background will then form your original video's background seamlessly.
Common green screen issues in DaVinci Resolve and how to fix them?
Even with powerful software, chroma keying can present unexpected visual bugs. Recognizing these typical issues allows you to correct your composite quickly using DaVinci's built-in parameters.
Issue 1: Green spill on the subject's edges
Light reflecting off the green screen often creates a subtle green outline on hair and clothes.
Solution: Fix this by navigating to the 3D Keyer’s Despill settings and increasing the Despill slider to neutralize the reflected green hue.
Issue 2: Edges looking jagged or low quality
Poorly lit edges can appear harsh or pixelated after keying.
Solution: To smooth them out, adjust the Blur Radius or use the Matte Finesse controls inside the Inspector to slightly erode and soften the edges of your subject.
Issue 3: Holes appearing inside the subject
If the subject wears a color similar to the background, parts of their body might key out.
Solution: Resolve this by lowering the White Clip threshold or using custom garbage masks to isolate and protect those specific regions.
While DaVinci Resolve 20 delivers elite tools, mastering them requires practice. If you need a faster, hassle-free alternative without complex settings, automated AI platforms offer an excellent, effortless solution.
How to remove video backgrounds with Vmake Labs?
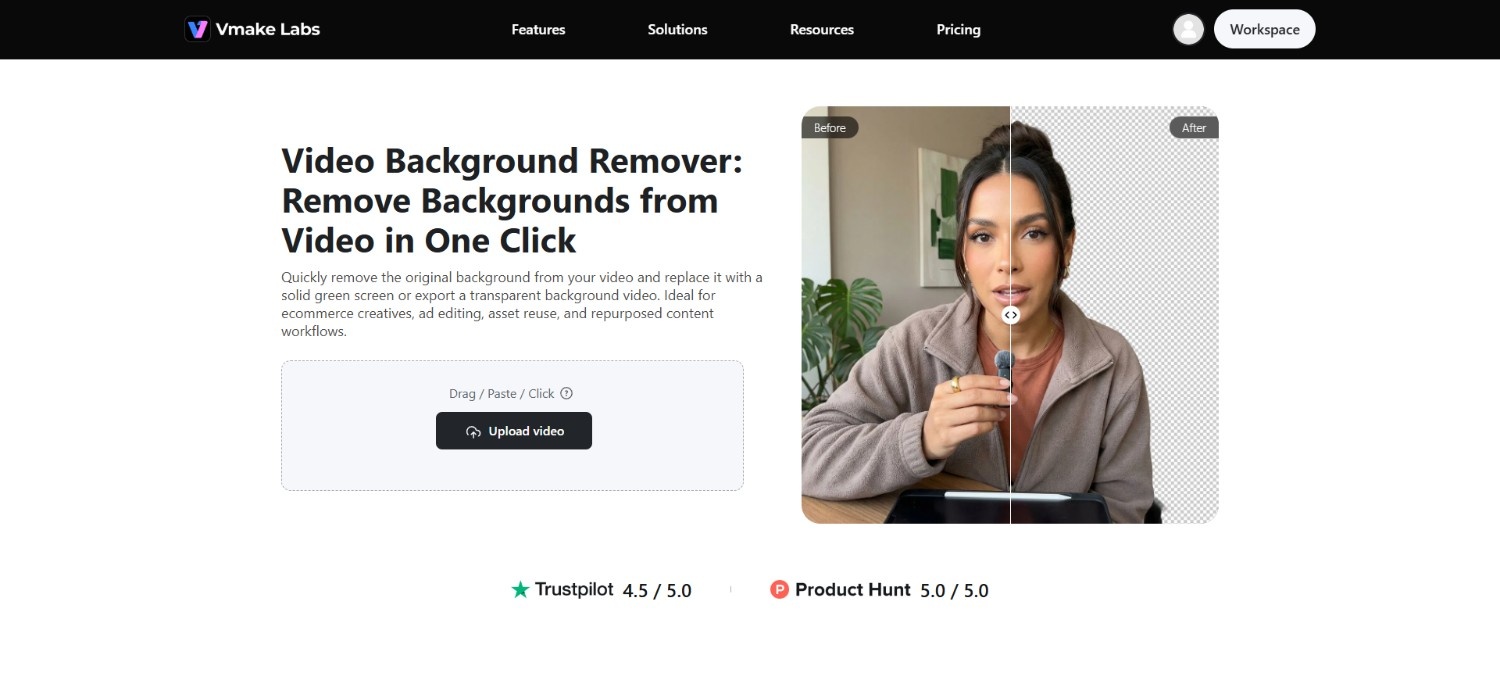
For creators seeking professional results without the learning curve of advanced editing software, Vmake Labs' video background remover tool is a brilliant option. Driven by advanced artificial intelligence, Vmake automatically detects subjects in your video and extracts them cleanly without requiring a green screen. It eliminates the need for expensive studio lighting, specialized backdrops, and hardware-intensive rendering. With Vmake Labs, high-quality background replacement becomes a swift, accessible task for anyone with an internet connection.
Key features of Vmake Labs AI video background remover
-
One-click automatic background removal (no green screen needed): Instantly strip away any background with a single click. Vmake Labs eliminate the need for a physical green backdrop, automatically isolating your subject from complex, real-world environments with ease.
-
Precision AI subject and edge detection: Advanced artificial intelligence identifies complex silhouettes, including fine details like hair and loose clothing, ensuring clean margins and preventing annoying visual artifacts around your main subject's borders.
-
Versatile custom background & color replacement: Swap out your old background for high-quality static images, vibrant solid colors, or dynamic video loops. This gives you absolute control over the mood and style of your final project.
-
High-Definition (HD) output support: Maintain the original sharpness and quality of your high-resolution files. Vmake Labs processes video smoothly, allowing you to export high-definition results that look professional on any visual display screen.
How to use Vmake Labs to remove backgrounds in 3 easy steps?
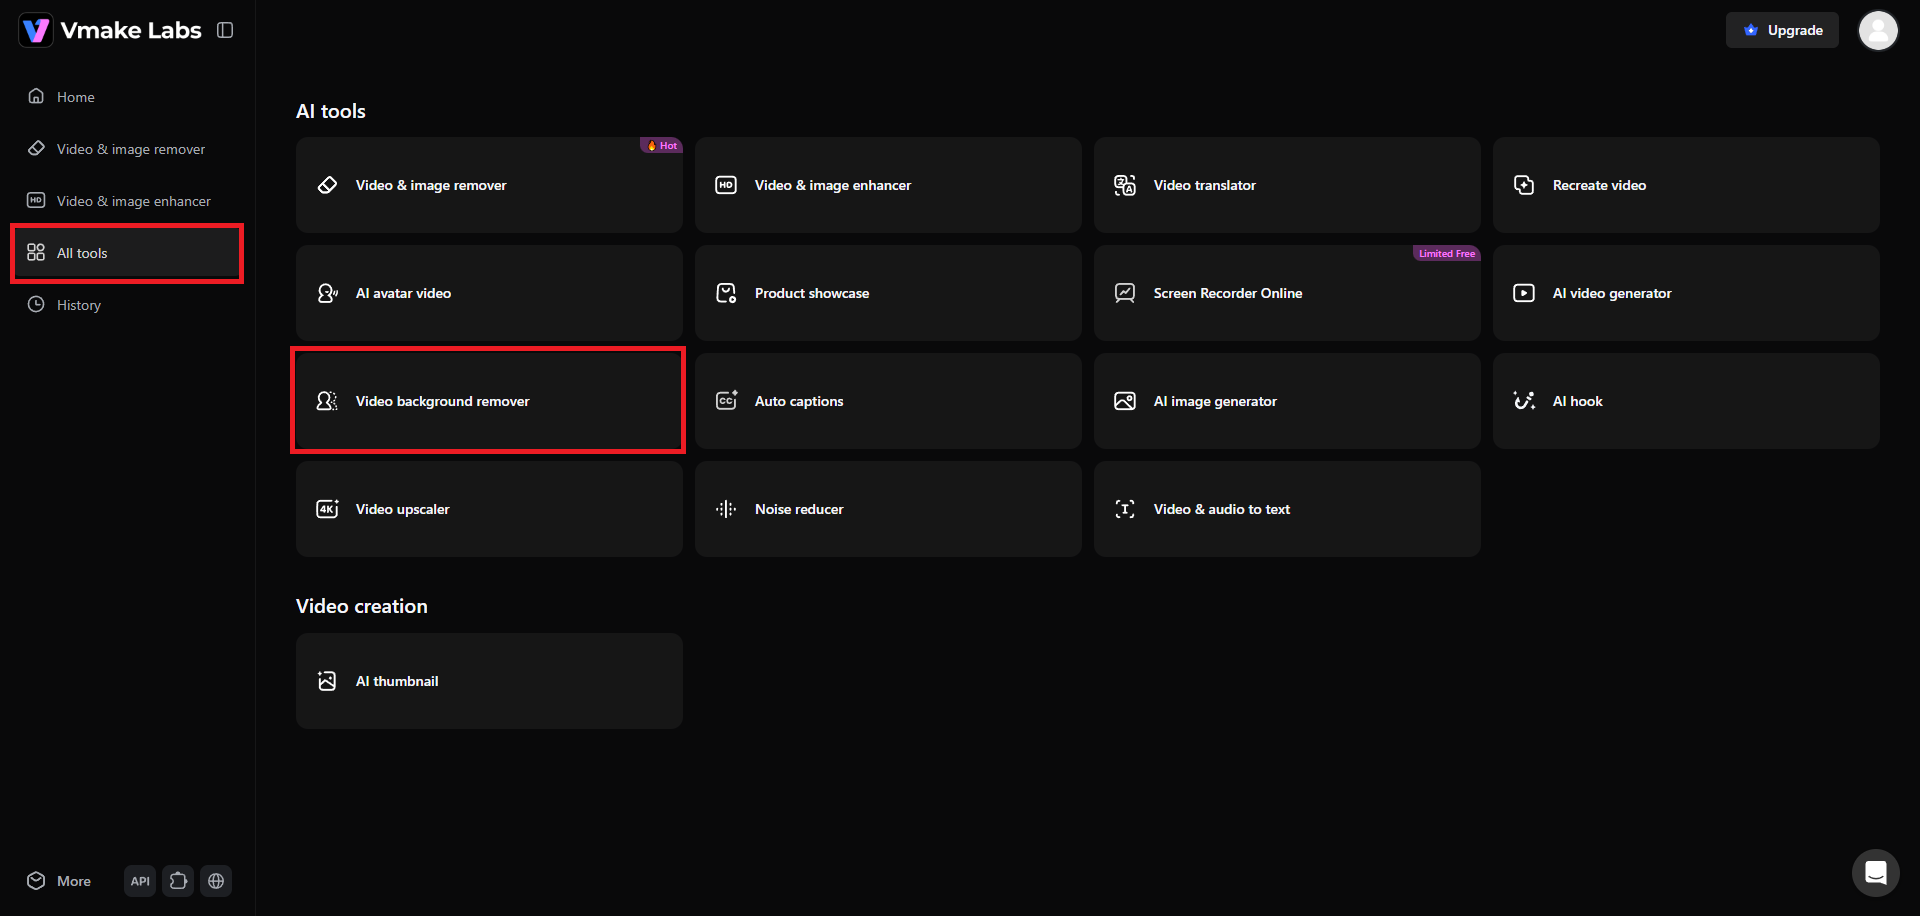
Step 1: Select the "Video background remover" tool
Kickstart your journey by first accessing your Vmake Labs account. Once you are logged in, visit the "All tools" section and from there, you need to select the "Video background remover" feature.
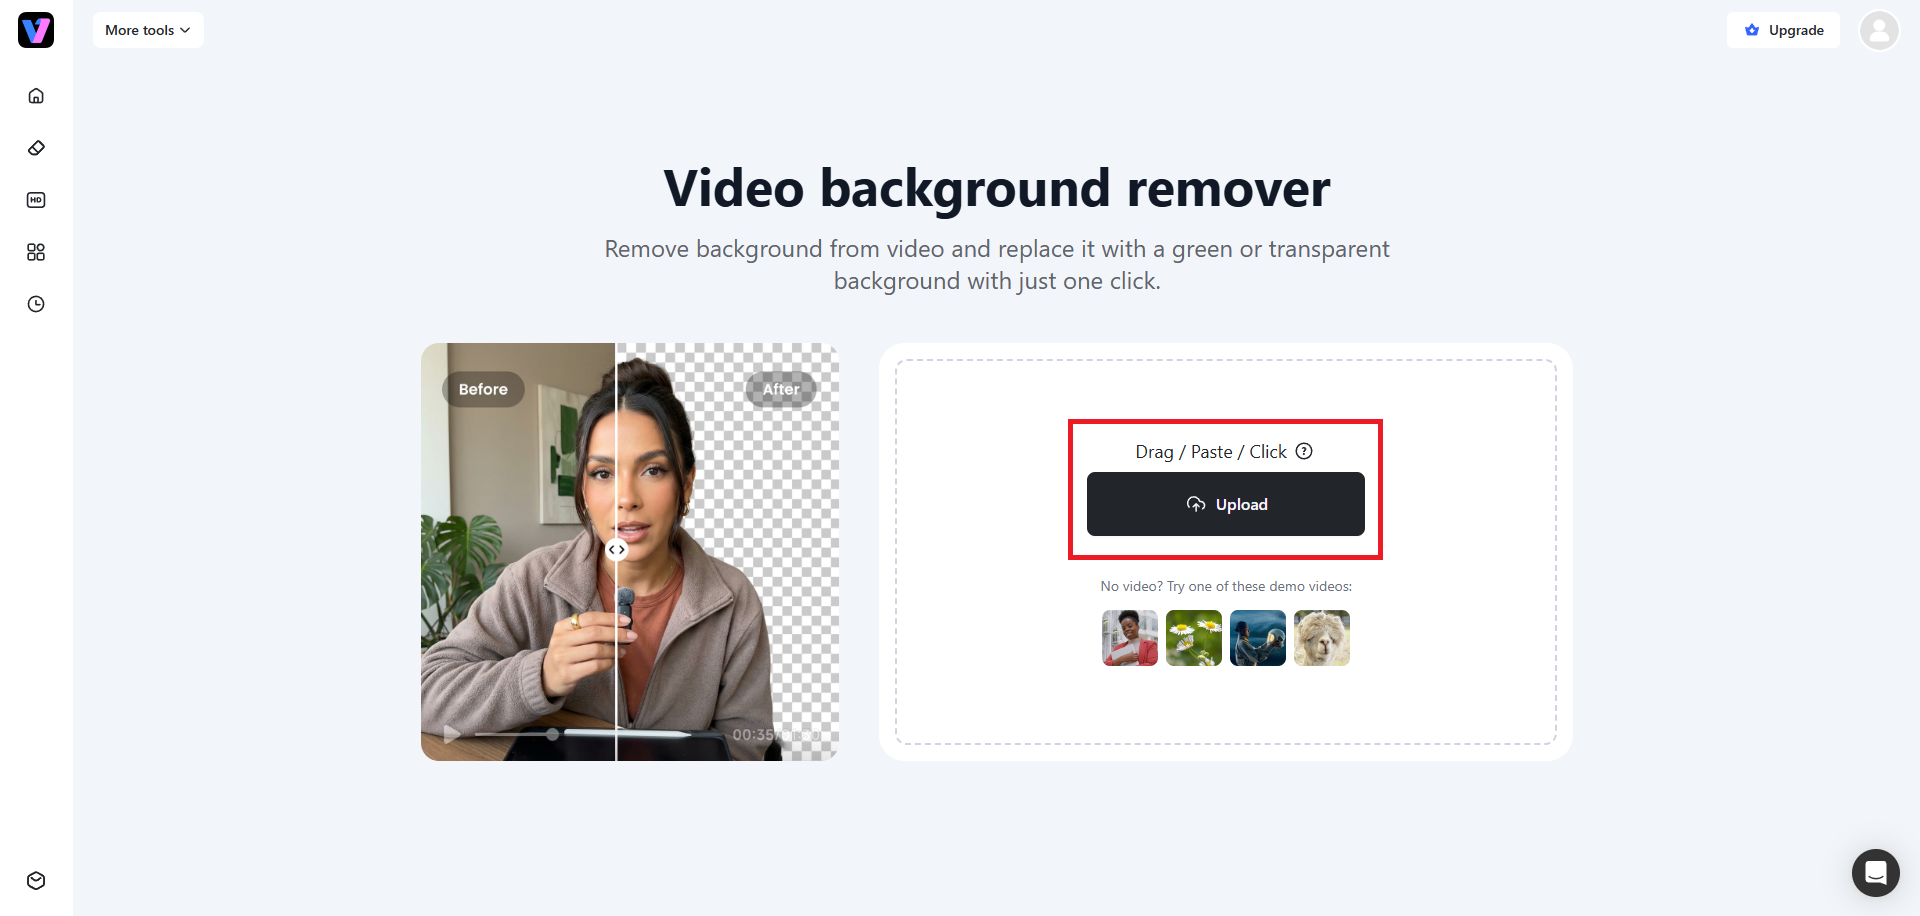
Step 2: Upload the video whose background you want to remove
In the next step, you need to upload your video file, especially the one whose background you want to remove. Simply click on "Upload", select your file, and you will be good to go.
Step 3: Remove background and export
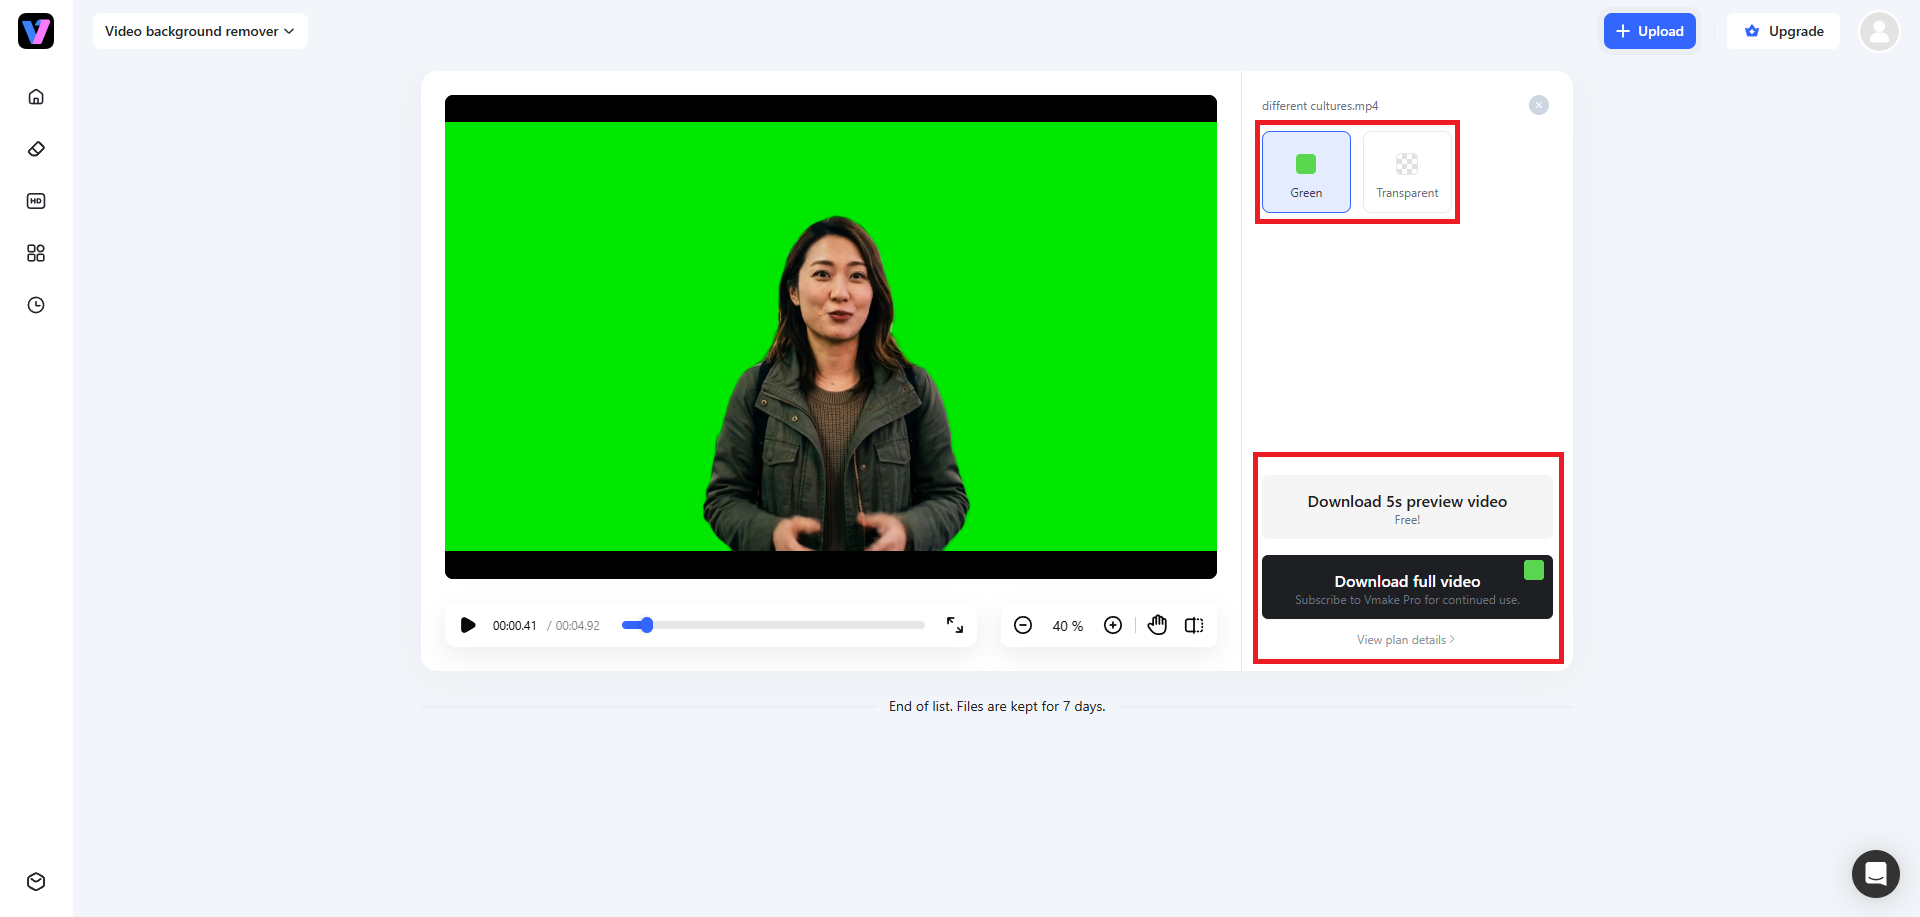
After uploading, Vmake Labs will start working on the video to remove its background. By default, the original background of the video will be replaced by a "Green" screen. However, you can also select the "Transparent" option as well. Once you are done removing the background, be sure to download the video for further usage.
Comparison of DaVinci vs AI
DaVinci Resolve 20 gives professionals detailed control over keying, edge cleanup, spill suppression, and compositing, making it ideal for complex productions. AI background removers are faster and easier for beginners, often requiring just one click. However, AI tools may struggle with fine hair, motion blur, and challenging lighting conditions where Resolve usually delivers cleaner, more accurate results.
|
Feature |
DaVinci Resolve 20 |
AI Background Removal |
|---|---|---|
|
Accuracy |
Excellent |
Good |
|
Fine hair detail |
Strong |
Variable |
|
Speed |
Moderate |
Very fast |
|
Ease of use |
Advanced |
Beginner-friendly |
|
Best for |
Professional video production |
Quick social media content |
Choose Resolve when
-
You need precise edge control
-
Hair detail must look natural
-
Lighting is uneven or difficult
-
The video is for professional or commercial use
Choose AI when
-
You need results in minutes
-
You are creating YouTube Shorts, Reels, or TikToks
-
You have a clean green screen setup
-
You want minimal editing effort
Tips to follow & mistakes to avoid when removing green screens
Achieving a Hollywood-level composite relies heavily on your raw production techniques. Implementing these four fundamental practices, as well as sidestepping these four common pitfalls during production, will ensure your post-editing pipeline remains smooth and pain-free.
|
Tip to Follow |
Mistake to Avoid |
|---|---|
|
Light separately: Illuminate the backdrop and subject independently for even color. |
Single light source: Using one light causes uneven shadows across the screen and subject. |
|
Keep your distance: Position talent 6–10 feet away to stop green light color spill. |
Standing too close: Being right against the screen creates harsh shadows and green borders. |
|
Smooth out wrinkles: Pull the fabric tight to eliminate dark spots from creases. |
Ignoring creases: Letting wrinkles remain forces editing software to work much harder. |
|
Match the scene: Align your lighting's direction and temperature with the virtual background. |
Mismatched environments: Lighting the subject neutrally when the background is a warm sunset. |
|
Check the wardrobe: Choose clothing colors that contrast sharply with the screen. |
Wearing green: Wearing green tints makes parts of your subject disappear during keying. |
|
Boost shutter speed: Shoot with higher shutter speeds to keep moving edges crisp. |
Low shutter speed: Excessive motion blur makes clean edge extraction impossible. |
Conclusion
Mastering DaVinci Resolve green screen removal allows you to create high-production composites for any project. By utilizing the built-in 3D Keyer and following proper filming techniques, you can easily elevate your narrative storytelling and social media content.
However, when time is of the essence or you lack a physical studio setup, AI tools like the Vmake Labs' video background remover offer an incredibly fast, highly precise alternative. Whichever path you choose, understanding the principles of clean background separation is key to producing professional, engaging, and visually stunning videos.
FAQs
Can I remove a green screen in the free version of DaVinci Resolve 20?
Yes, the powerful 3D Keyer and Delta Keyer effects are fully functional on the Edit and Fusion pages in the free version, allowing users to achieve professional chroma keys without upgrading.
Why is my green screen key leaving a green outline or glow around my subject?
This occurs due to light bouncing off the screen onto your subject. You can quickly fix this by raising the Despill slider in the 3D Keyer panel to neutralize the reflections.
Do I have to use a physical green screen to change my video's background?
No, modern web-based AI tools like Vmake can automatically detect and extract subjects from complex, real-world backgrounds without requiring any physical green backdrop or complex color keying setup.
How do I crop out unwanted objects around my green screen in DaVinci Resolve?
You can use the cropping parameters in the Inspector panel or draw a custom garbage matte around your subject to instantly hide studio lights, microphones, or the edges of your physical backdrop.
How do I fix uneven lighting on a green screen during post-production?
Utilize the positive and negative eyedroppers in the 3D Keyer to select multiple shaded green areas, then adjust the Matte Finesse controls to fill in any remaining gaps.

You May Be Interested
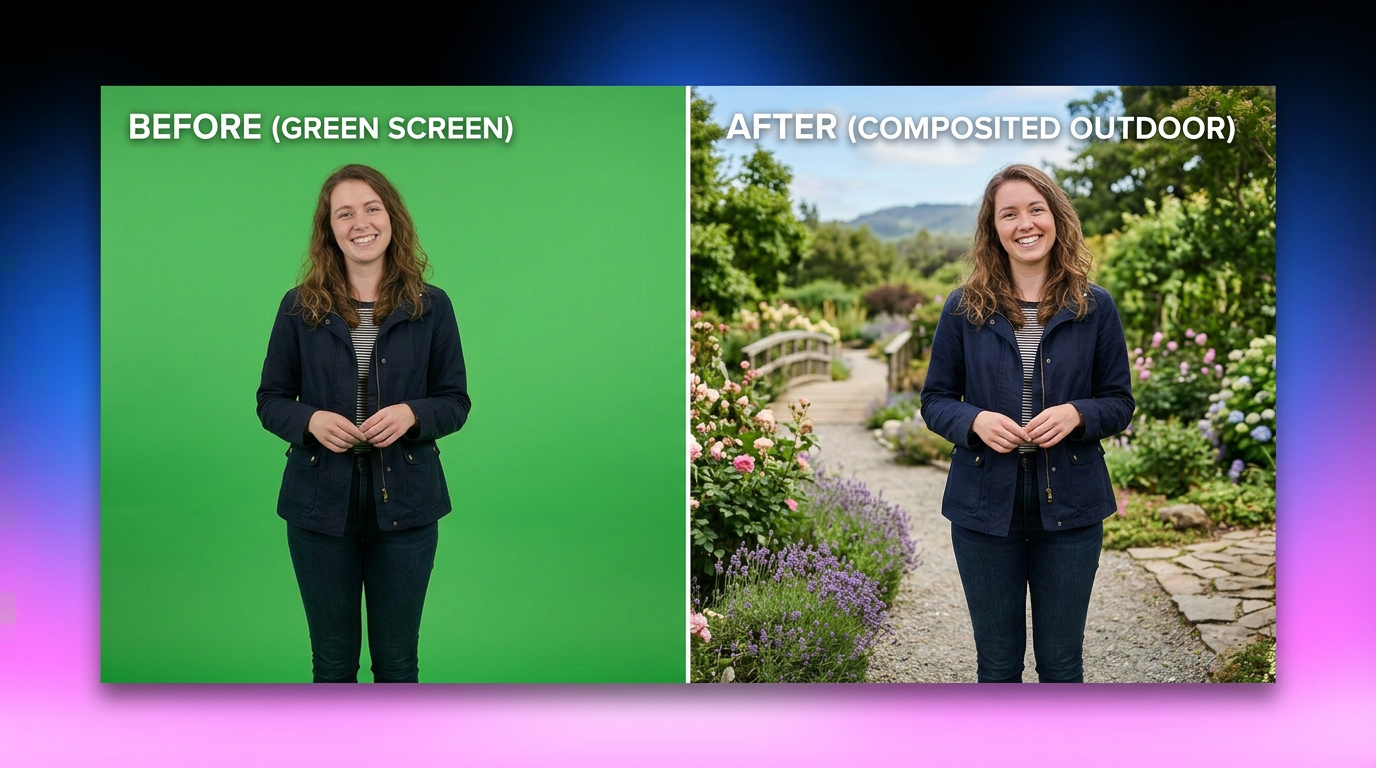
How to Remove Green Screen from Video: Best Methods and Tools in 2026

How to Edit Videos with Green Screen Backgrounds Easily

5 Tools to Make Best Green Screen Backgrounds for Every Video Style
