How to Remove Background Noise in Audacity: Remove Noise Like a Pro
Learn how to remove background noise in Audacity with simple, step-by-step techniques. Explore how to use Vmake Labs to transform noisy recordings into crystal-clear audio instantly.

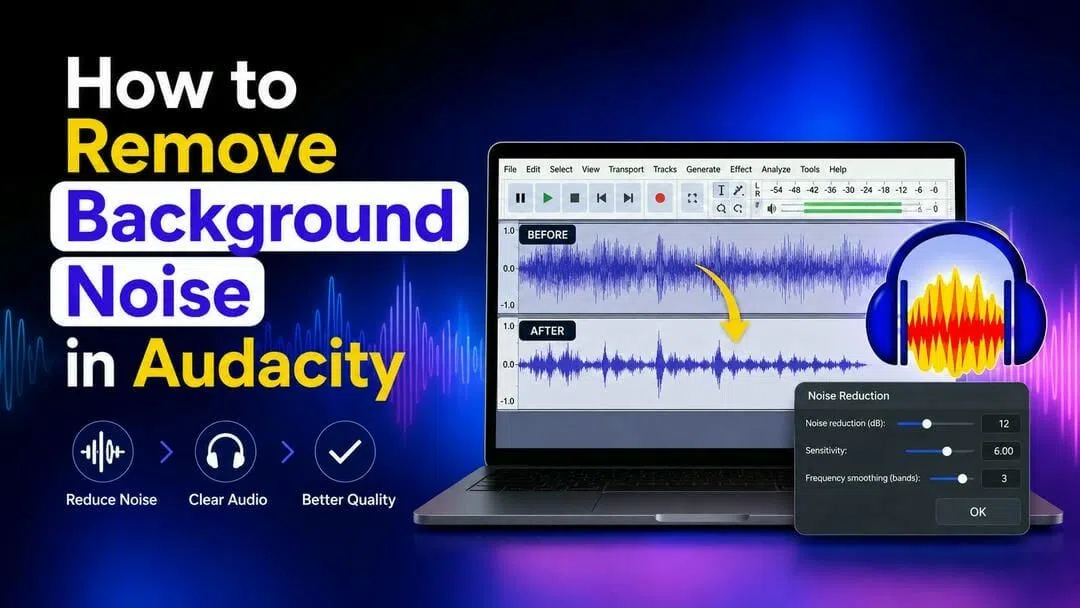
Nothing kills a recording faster than unwanted hiss or hum. The good news? Audacity can clean it up in minutes. Here's how to remove background noise in Audacity, plus a look at its pricing, benefits, and why Vmake Labs is worth considering as an alternative.
What causes background noise in audio recordings
-
Environmental noise
Microphones are incredibly sensitive, and honestly, they'll pick up just about anything they can get their hands on. It's rarely just your voice. You'll find everything from the low rumble of traffic outside to the steady hum of an air conditioner or a desk fan sneaking into the track.
-
Recording equipment noise
Sometimes the noise isn't even coming from your room; it's actually coming from inside the house, so to speak. Your gear itself can be the culprit. Microphones, audio interfaces, and cables all have their own inherent "self-noise," and if you're working with entry-level or lower-quality equipment, that usually translates into a constant, frustrating hiss in the background.
-
Room acoustics
If your recording space has a lot of bare walls, big windows, or hardwood floors, you're going to run into trouble. Sound bounces off those hard surfaces constantly, which creates all these tiny, immediate echoes and reflections. And that matters because those reflections don't just mess with your voice; they actually trap and amplify the background noise, too.
-
Electrical interference
Electronic interference is another major headache, usually showing up as a distinct hum, buzz, or static crackle. A lot of the time, this comes down to your immediate environment: things like nearby power lines, fluorescent lighting, or even the electromagnetic field from your computer screen can bleed into your audio. Hardware issues can cause the exact same problem.
Understanding Audacity background noise removal
Audacity's Noise Reduction filter is pretty powerful for removing background noise. Instead of just blindly guessing what to cut, it actually asks you to add a quick sample of the noise you want gone, like a patch of dead air where you can hear a hiss or a fan hum. It uses that sample to build what it calls a "noise profile." Once it knows exactly what you want to remove, it goes through the rest of your track and zeroes in on those specific frequencies, scrubbing them out while leaving your actual voice alone.
But here is the catch. You have to tweak the settings for noise reduction, sensitivity, and frequency smoothing to get it right. If you get heavy-handed with it, your audio will start sounding like you're underwater.
How to remove background noise on Audacity: Step-by-step guide
Cleaning up your background noise in Audacity is actually pretty straightforward once you get the hang of how the tool thinks. It just comes down to following a couple of quick steps to get the track sounding right.
Step 1: Get a noise sample
Before the software can remove anything, you have to show it exactly what you want gone. Look through your track and highlight a small, quiet section, maybe a second or two between sentences where you weren't talking, but the background hiss or fan hum kept running. This gives Audacity a clean shot at analyzing the noise pattern so it can build an accurate profile.
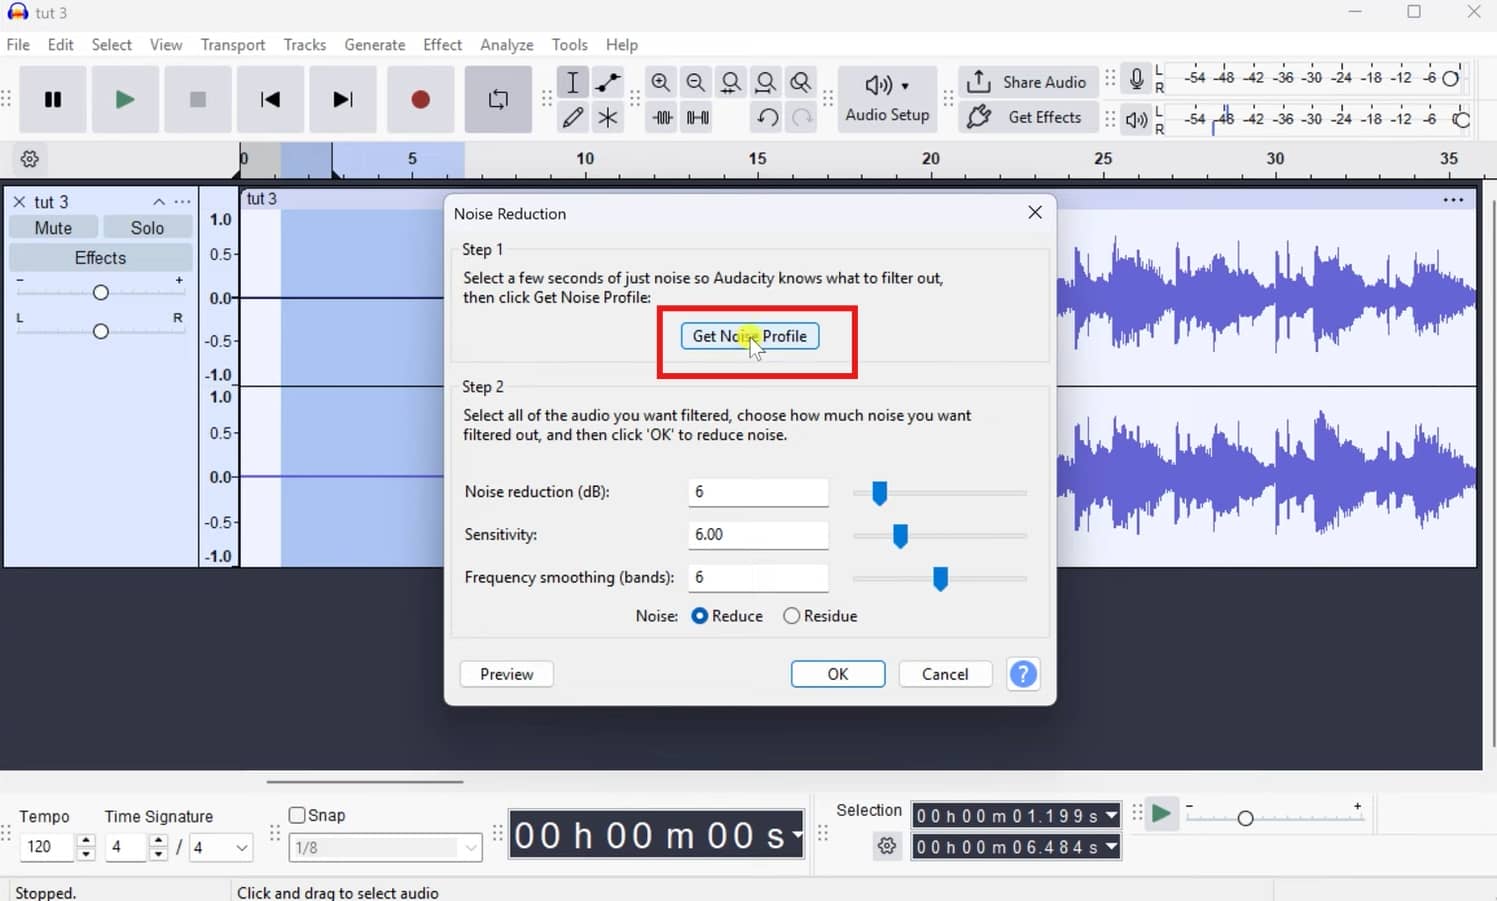
Step 2: Apply noise reduction filter
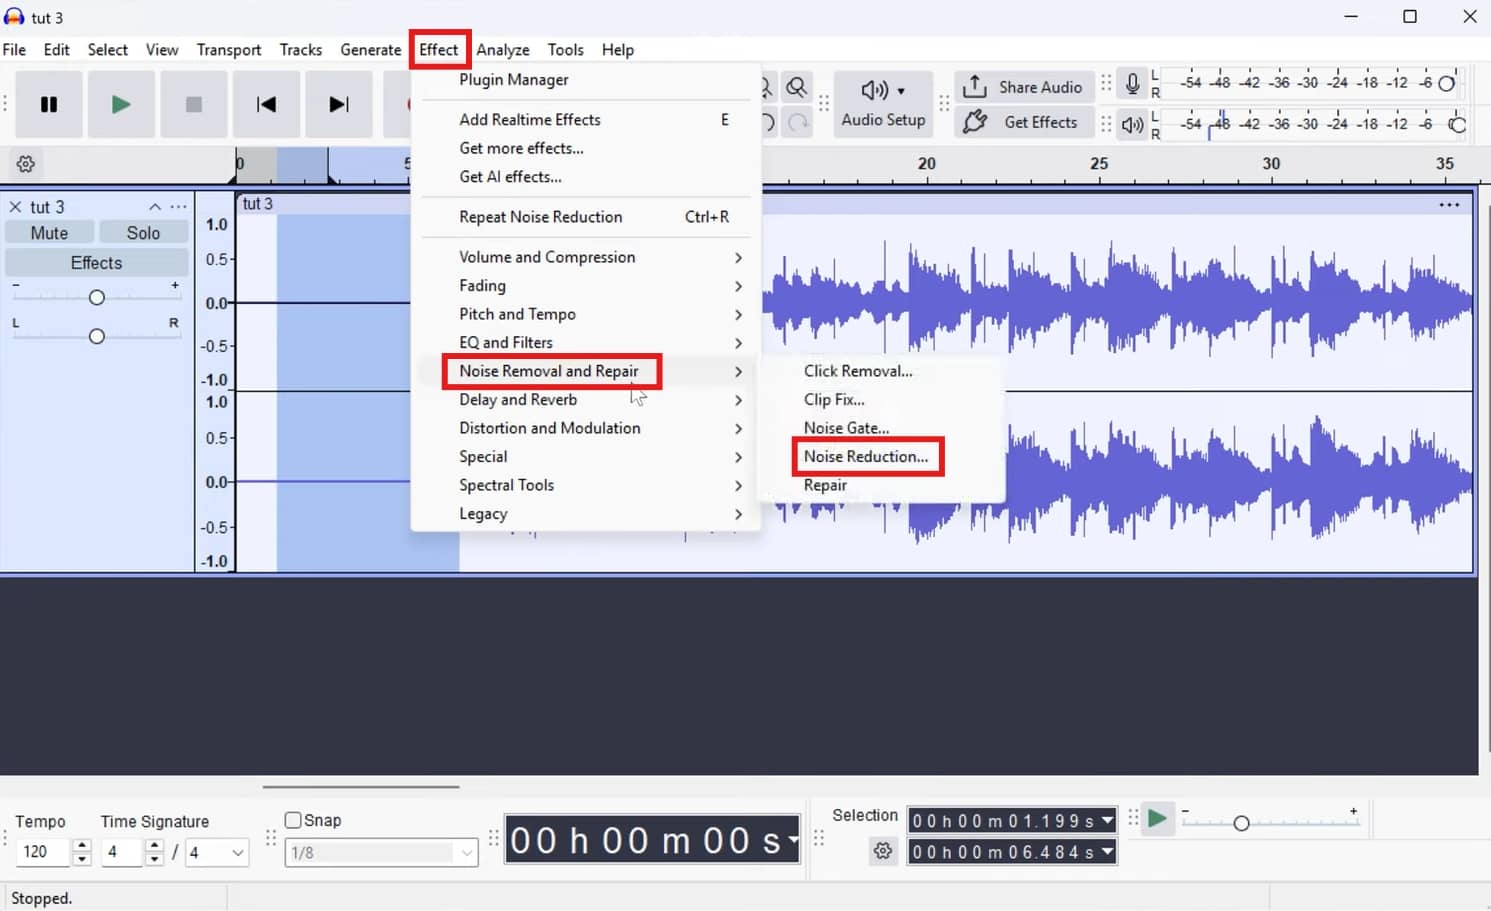
Once you have highlighted that quiet little patch of background noise, you need to actually lock it in. Go up to the top menu, click Effect, and then Noise Reduction. Select your entire audio track by double-clicking the track or hit Ctrl+A (Cmd+A on a Mac). Go right back into the same Noise Reduction menu. This time, you're going to actually apply it to the whole recording.
Step 3: Tweak the settings
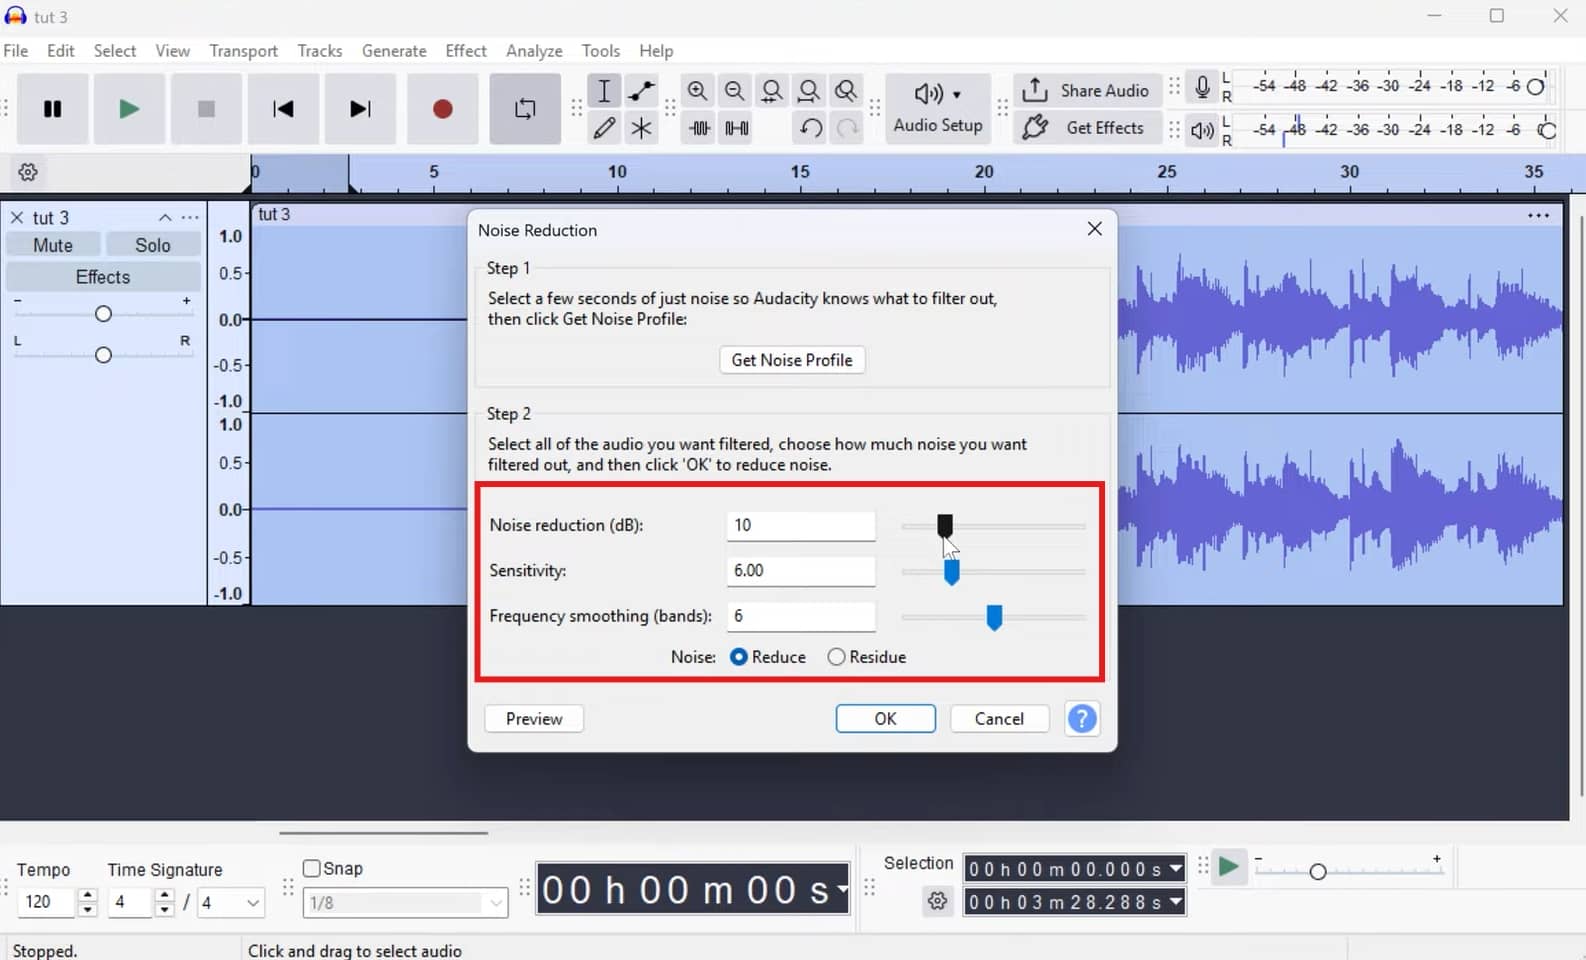
If you crank the Noise Reduction slider up too high right off the bat, you're going to instantly get those weird, metallic, robotic artifacts. It sounds awful. You'll also want to gently play with the Sensitivity and Frequency smoothing sliders.
A good starting point for voice recordings is:
-
Noise Reduction: 6–12 dB
-
Sensitivity: 4–6
-
Frequency Smoothing: 3–6 bands
Fine-tune these values depending on the recording, so the final edit still sounds completely natural.
Step 4: Export and share
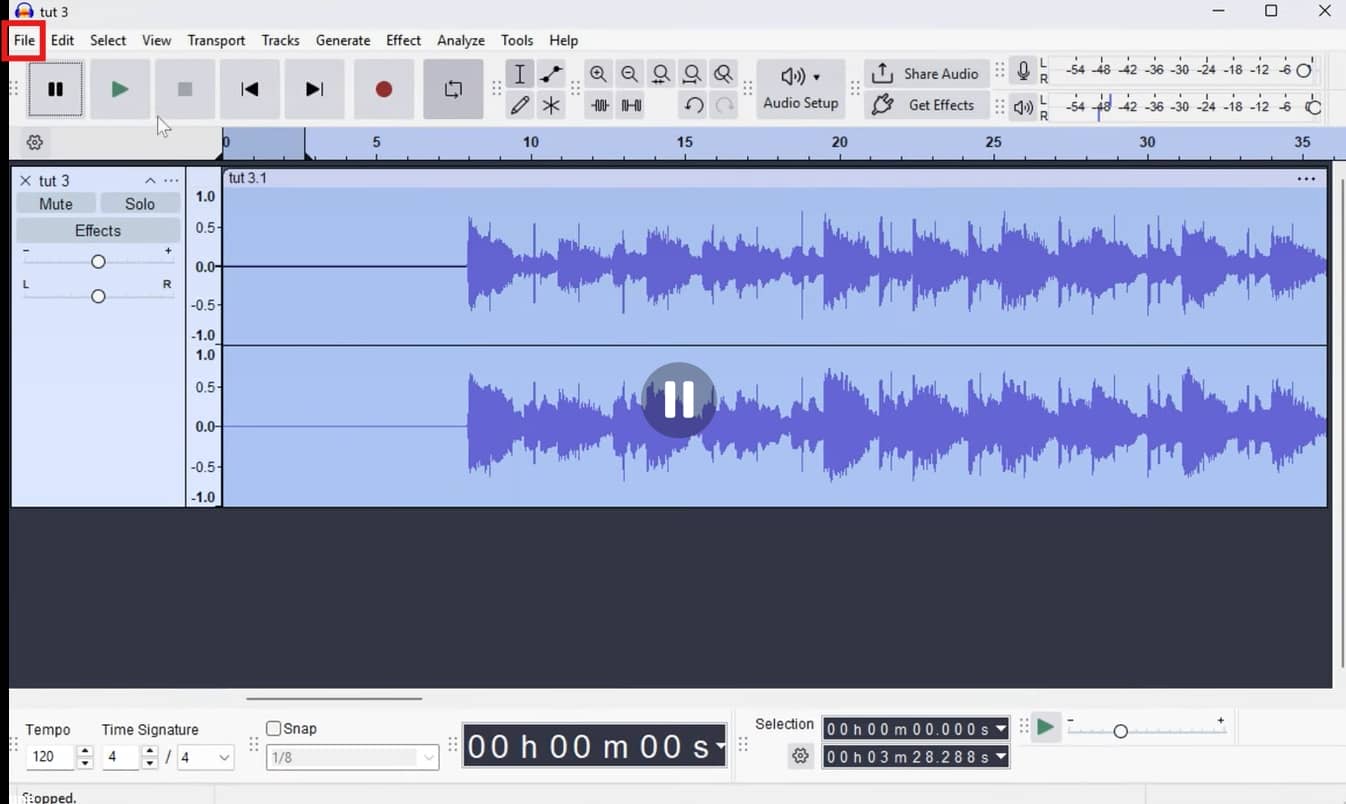
Before you go rushing to save it, take a minute to listen through the whole recording from start to finish. Head up to File, hit Export Audio, and pick whatever format you need.
Audacity Pros, Cons, and Pricing
Pricing
As the website declares, Audacity won't cost you a single dime. In 2026, it still has no subscription plan, a licensing fee, or a "pro" version down the line, as its core features are entirely free. You just head over to the official Audacity website, download it, and you have complete access to all the recording, editing, and noise reduction tools right out of the box.
Pros & cons
Audacity is a popular software people download when they get into audio. However, like any piece of software, it has its fair share of quirks and limitations. Now that you have learned about Audacity and how to remove the background noise, let's check out its pros and cons.
|
Pros |
Cons |
|---|---|
|
|
Can Audacity remove all kinds of background noises?
Audacity is great at tackling constant, predictable sounds. If you are trying to remove the noise of a computer fan, an AC unit, or that low-level static hiss from your microphone, it handles it beautifully. It can even rescue a track with some mild buzzing, assuming you can find a clean, quiet second of audio to feed the software as a sample.
However, if you are dealing with people talking over you, busy street traffic, or the general clatter of a crowded room, Audacity is going to struggle. Those sounds constantly change, and worse, they share the exact same frequencies as your own voice. If you try to force the software to cut them out entirely, it usually ends up chewing into your actual speech, leaving you with a track that sounds horribly warped, robotic, and completely unnatural.
That's where AI-powered cleanup tools, like Vmake Labs, actually earn their keep. Instead of just blindly slicing out specific frequencies, they are smart enough to look at the whole picture, identify the human voice, and literally separate it from the chaos around it.
Meet Vmake Labs: Easily remove background noise from videos with AI
Instead of forcing you to hunt down frequencies or mess around with manual audio sliders like you would in a traditional editor, Vmake Labs relies on an AI to do heavy lifting. Its AI background noise remover automatically separates the junk noise from the actual dialogue, isolating the human voice and bringing it forward. Vmake Labs is a straightforward option for anyone who just needs their video content to sound clear without having to learn an entire audio engineering setup.
Key features
-
Automatically detect unwanted noise
Vmake Labs harness the power of AI to scan the audio track and spot things like background chatter, wind, or annoying room rumble. It quietly suppresses them without any configuration, learning, or guesswork, and remove wind from video automatically.
-
Speech-focused audio enhancement
Instead of just dropping the overall volume, Vmake Labs focuses heavily on speech enhancement. It pulls the dialogue forward so it's sharp and easy to follow, while pushing the rest of the noise far into the background.
-
High-quality video export
After removing echo from video, Vmake Labs exports your video in high-quality, so you can download it without worrying about the file getting degraded. It keeps both the visual quality and the newly polished audio completely intact.
Step-by-step guide
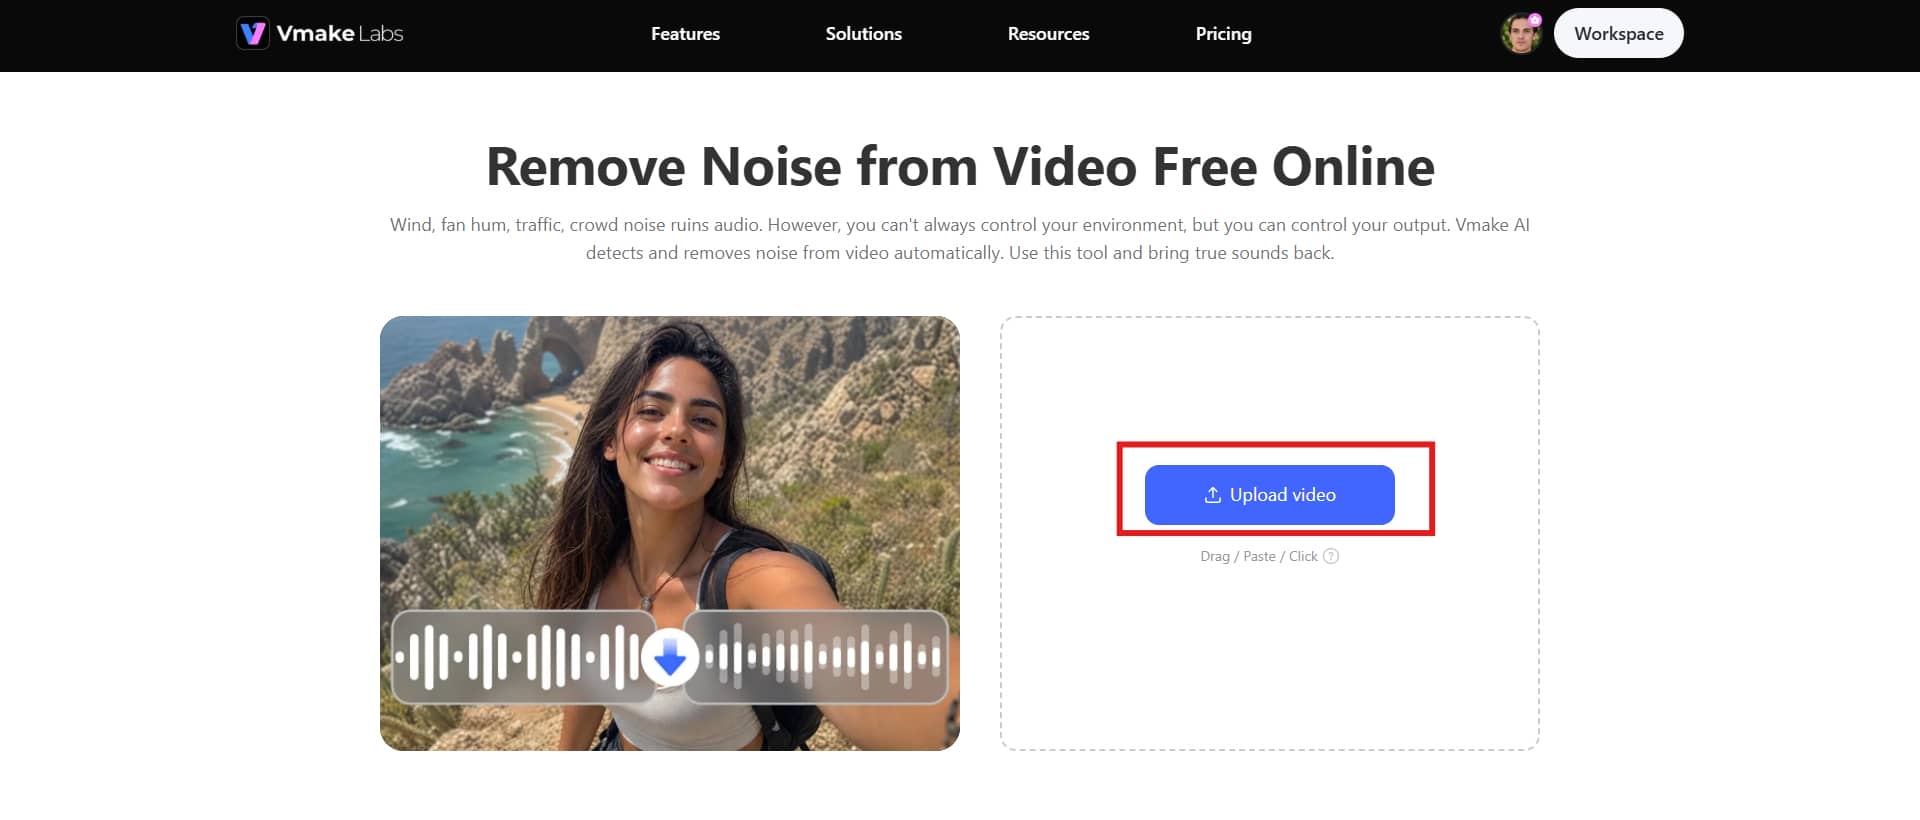
Step 1: Upload your video
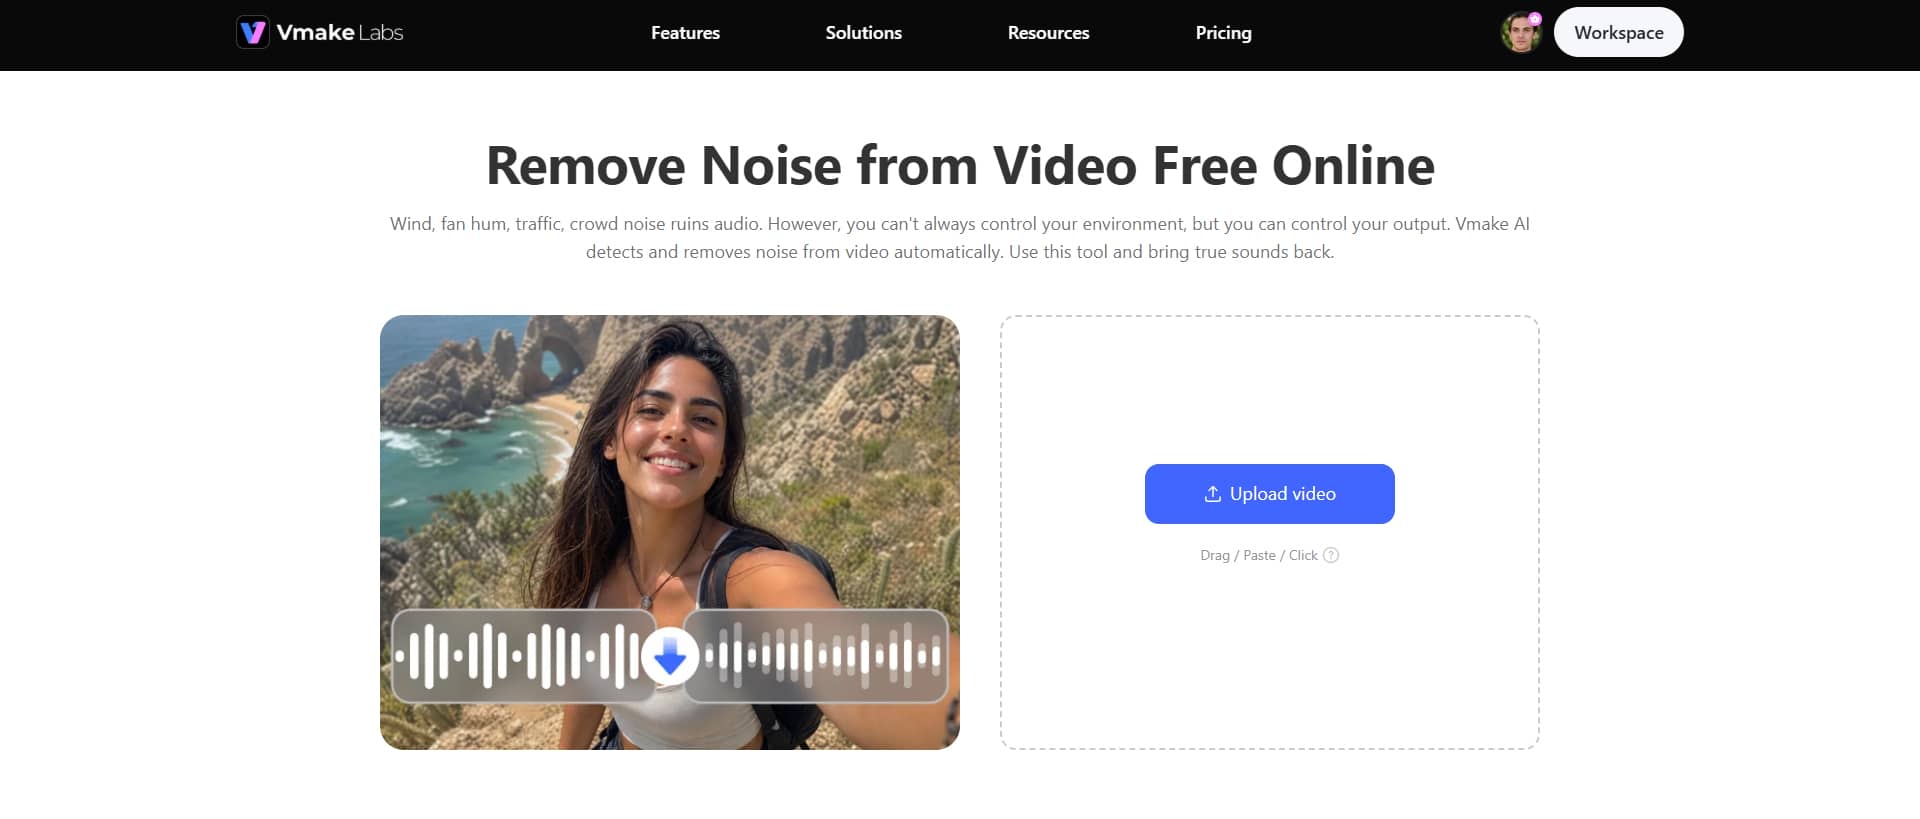
Head over to the Vmake Labs noise removal tool and just hit the "Upload video" button. Don't worry about converting anything beforehand, as the tool plays nice with plenty of different formats.
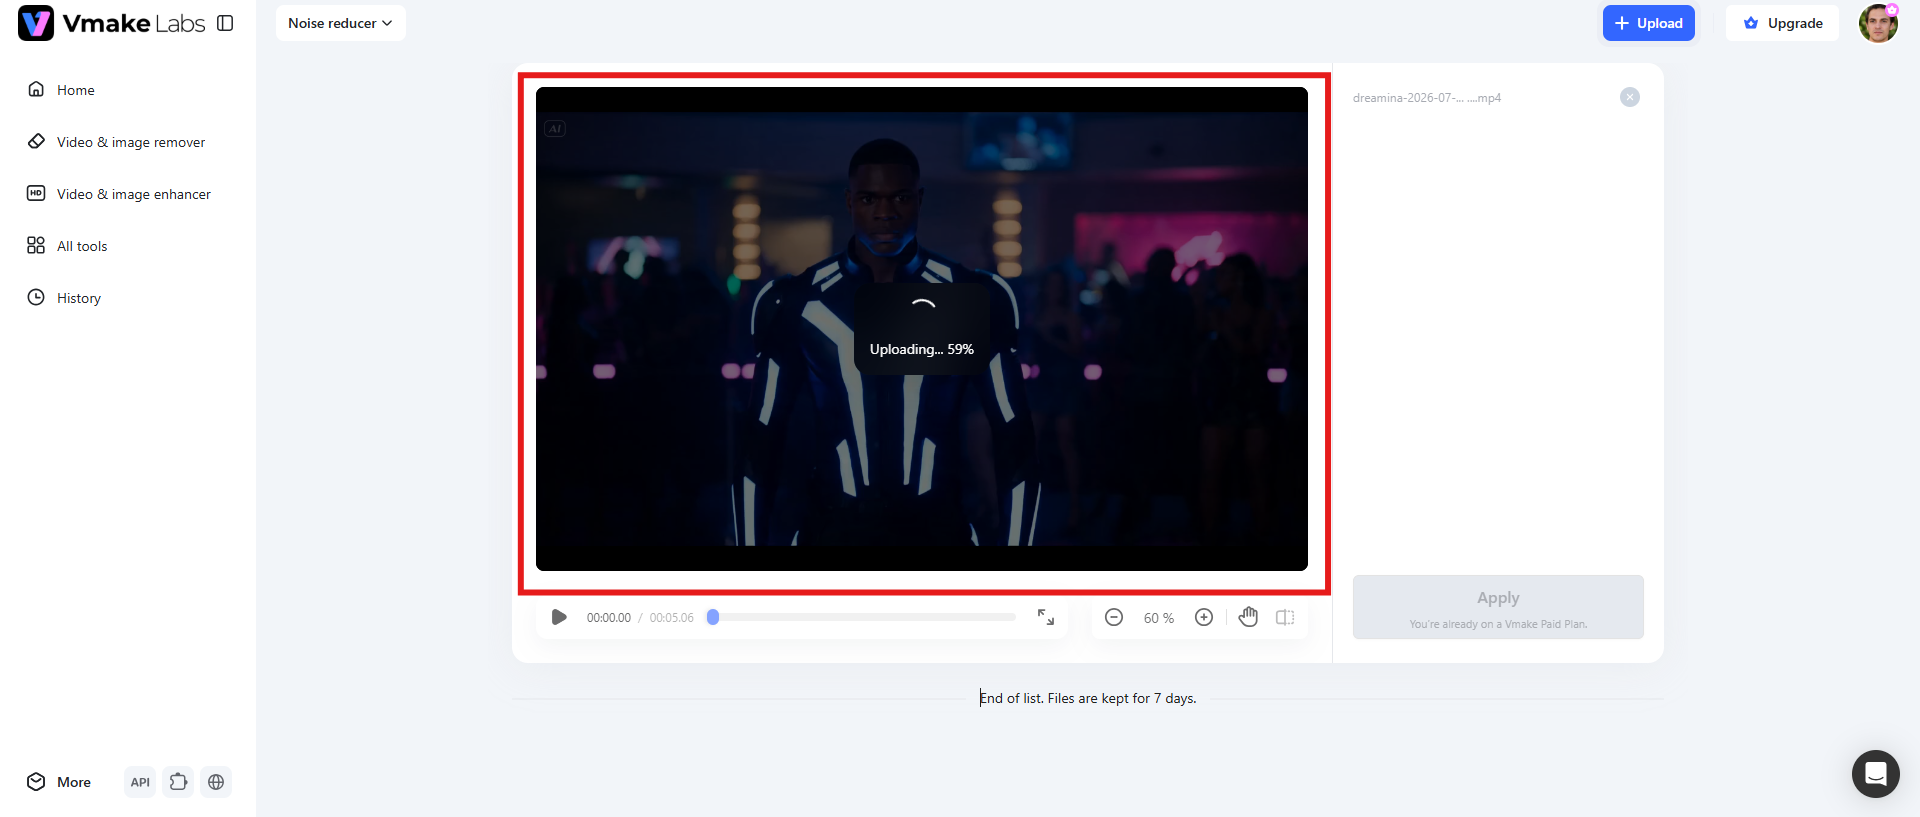
Step 2: AI removes background noise
The second your video hits the system, the automation takes over. It immediately starts scanning the audio to isolate whatever junk is burying your speech, whether that's a harsh gust of wind, a whirring desk fan, traffic rumble, or a noisy crowd.
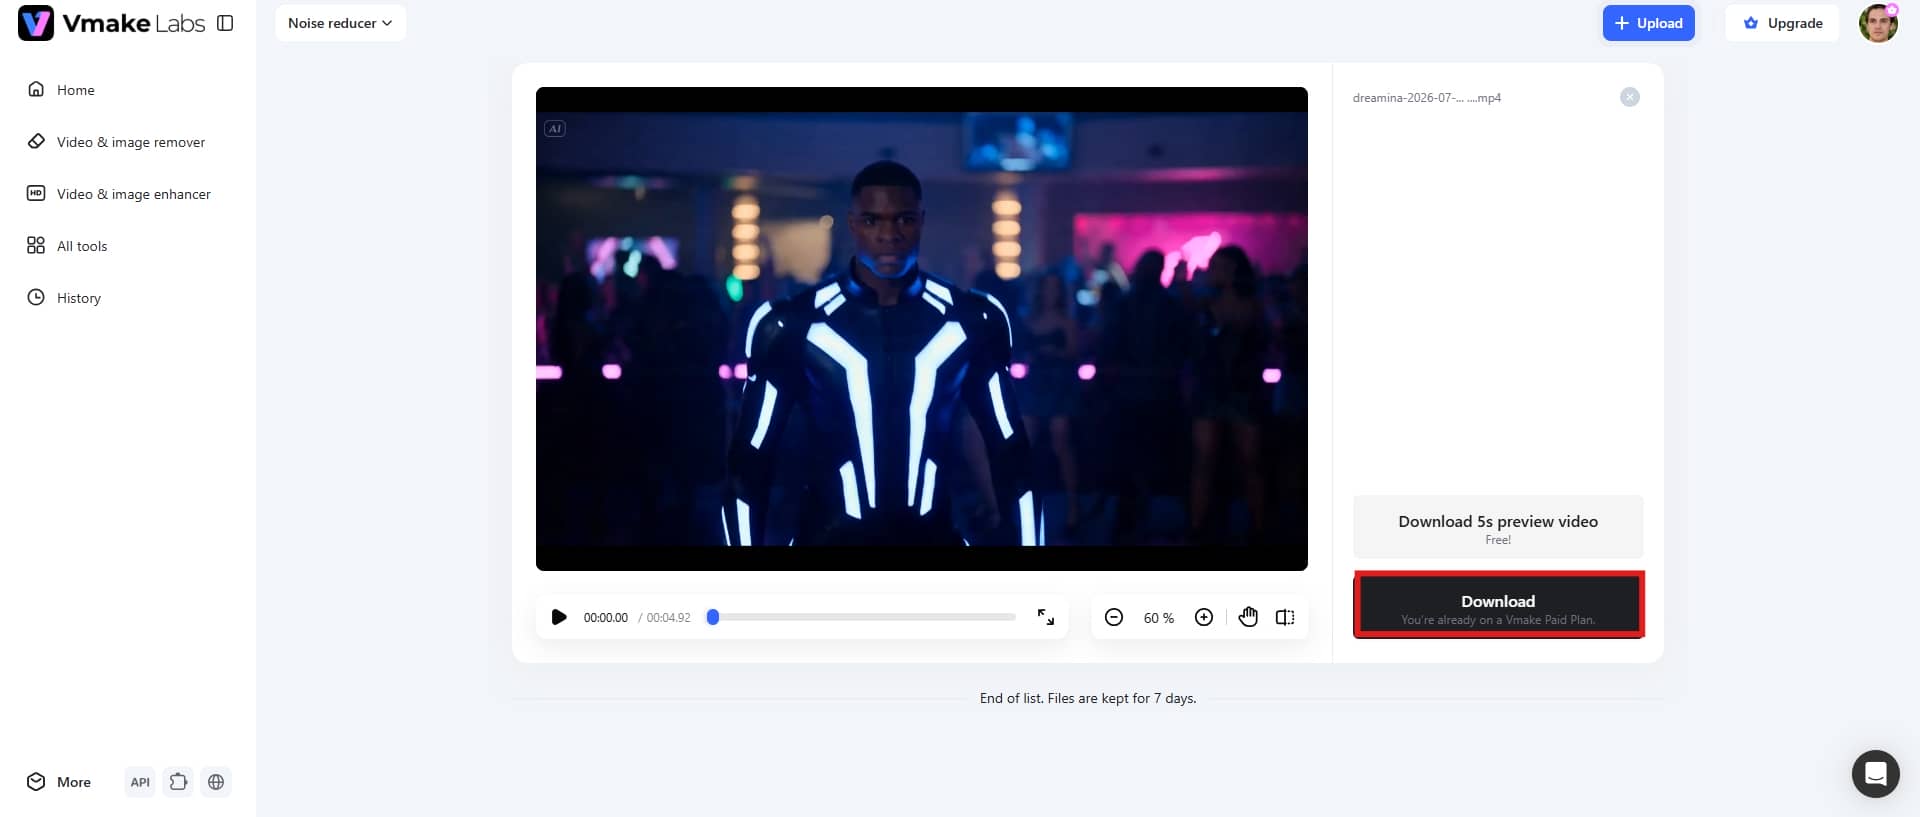
Step 3: Download your clean video
Before you wrap up, use the preview window to listen back and make sure the audio sounds right. If the speech is clear and you're happy with it, go ahead and hit the "Download" button to save the fresh, cleaned-up file.
Final checklist: Audacity vs Vmake Labs
Both Audacity and Vmake are fantastic at rescuing bad audio, but they are built for entirely different workflows. Audacity is a classic, old-school desktop editor. It gives you a massive sandbox with deep, manual control over every little frequency and noise reduction setting. Vmake Labs, on the other hand, is basically a one-click rescue button for video. It leans heavily on AI to automatically strip out the garbage noise from your clips, requiring almost zero manual effort on your part.
Choosing between them just comes down to whether you want total creative control over an audio track, or if you just need a video's dialogue cleaned up as fast as humanly possible.
|
Features |
Vmake Labs |
Audacity |
|---|---|---|
|
Primary purpose |
AI-powered video audio enhancement |
Audio recording and editing |
|
Ease of use |
Beginner-friendly with automated processing |
It has a moderate learning curve. |
|
Noise removal |
Automatic AI noise detection and removal |
Manual noise reduction filter |
|
Editing control |
Minimal manual adjustments required |
Extensive manual controls |
|
Pricing |
Free plan available, and subscription starts from $9.99/mo |
Free, open-source tool with no subscription plans or license fee. |
When to choose Vmake Labs instead of Audacity?
Go with Vmake if you are chasing speed and convenience over deep, frame-by-frame manual control.
-
Quick video cleanup: You can strip out background noise in just a few clicks. There are no confusing, intimidating sliders to mess with.
-
Social media videos: It is perfect for cleaning up audio on TikToks, Instagram Reels, or YouTube Shorts right before you hit publish.
-
Product demos: It keeps your walkthroughs clear by knocking down distracting room reflections or background hums, so the viewer actually focuses on what you're showing.
-
Tutorials: It sharply enhances educational videos and screen recordings. That matters because if people can't understand the instructor, they just click away.
-
Marketing videos: Vmake Labs helps you polish up promotional clips. Clear speech instantly makes a promo look more professional, which keeps people watching long enough to actually hear your message.
Conclusion
Removing background noise in Audacity really just boils down to a simple, repeatable routine: grab a noise sample, run the filter across the track, tweak your sliders, and export the file. But here's the catch: no two recordings are ever identical. You shouldn't hesitate to play around with noise reduction, sensitivity, and frequency smoothing settings. If you are dealing with video files, though, or if you just don't have the patience for manual editing, Audacity might not be the right move. That is where a tool like Vmake AI makes a lot more sense. It handles the cleanup entirely on autopilot by identifying the chaotic background noise once you upload the video and pulling the speech forward.
Audacity is an excellent choice when you need precise control over audio editing, such as cleaning up podcasts, voiceovers, interviews, or other audio-only recordings. On the other hand, if you're working with videos and want a faster, more automated solution, Vmake is the better option. Its AI-powered noise removal can quickly detect and reduce background noise while enhancing speech
FAQs
Can Audacity remove background noise without affecting voice quality?
Audacity can absolutely clean up your background noise without wrecking your voice, but you have to tread lightly. The secret to making it work is getting a totally clean noise profile to start with, and then keeping your actual reduction settings pretty conservative. However, if you push the software too hard, it immediately starts introducing those weird, metallic artifacts.
What are the best Noise Reduction settings in Audacity for voice recordings?
There is no magic, one-size-fits-all number that works for every piece of audio. The general recommended setting is your noise reduction between 6 and 12 dB, leaving sensitivity somewhere around 4 to 6, and keeping your frequency smoothing bands between 3 and 6. You will definitely need to nudge those numbers up or down depending on how loud or obnoxious your specific background noise is.
Why does my voice sound robotic after using Noise Reduction?
If your voice starts sounding like a weird, metallic robot, it is because you pushed your Noise Reduction settings way too hard. To fix it, you'll want to back off the reduction slider, lower the sensitivity, or dial down the frequency smoothing a bit. It's all about finding a balance that preserves the natural tone of your voice.
Is Audacity better than AI tools for removing background noise?
Honestly, it just depends on what you're trying to get out of it. If you're the type who likes to tweak every tiny detail, Audacity is great. It gives you that exact manual control over the frequencies. But if you're dealing with video, or if you're up against manual effort, lean toward an AI tool like Vmake. It handles those overlapping sounds on autopilot with barely any effort on your part.
Can background noise be removed completely?
Not always, to be honest. If you are dealing with a steady, predictable drone, like a desk fan, a humming AC unit, or a bit of basic microphone hiss, the software can usually knock that down significantly. But here's the thing: if your background noise involves people talking over you, loud traffic slamming outside, or sudden, random spikes in sound, you aren't going to get it out completely.
Does background noise affect podcasts and videos?
It absolutely does. Bad background noise forces your audience to strain just to understand what you're saying, which ruins the vibe of a video or podcast almost instantly. It's incredibly distracting. When your audio is clean, everything shifts. The whole project feels more professional, people stay hooked for longer, and your message actually lands the way you intended without any static getting in the way.

You May Be Interested

[2026] How to Blur Background in Zoom: Desktop & Mobile
[2026 Updated] Ultimate Guide to OBS Background Removal
How to Remove People from Background: Fast AI Tools
How to Remove Background Noise from Video: Best AI Tools in 2026

How to Remove Background from a Video: Guide to Professional Edits