How to Animate a Photo Using AI: Step-by-Step Guide
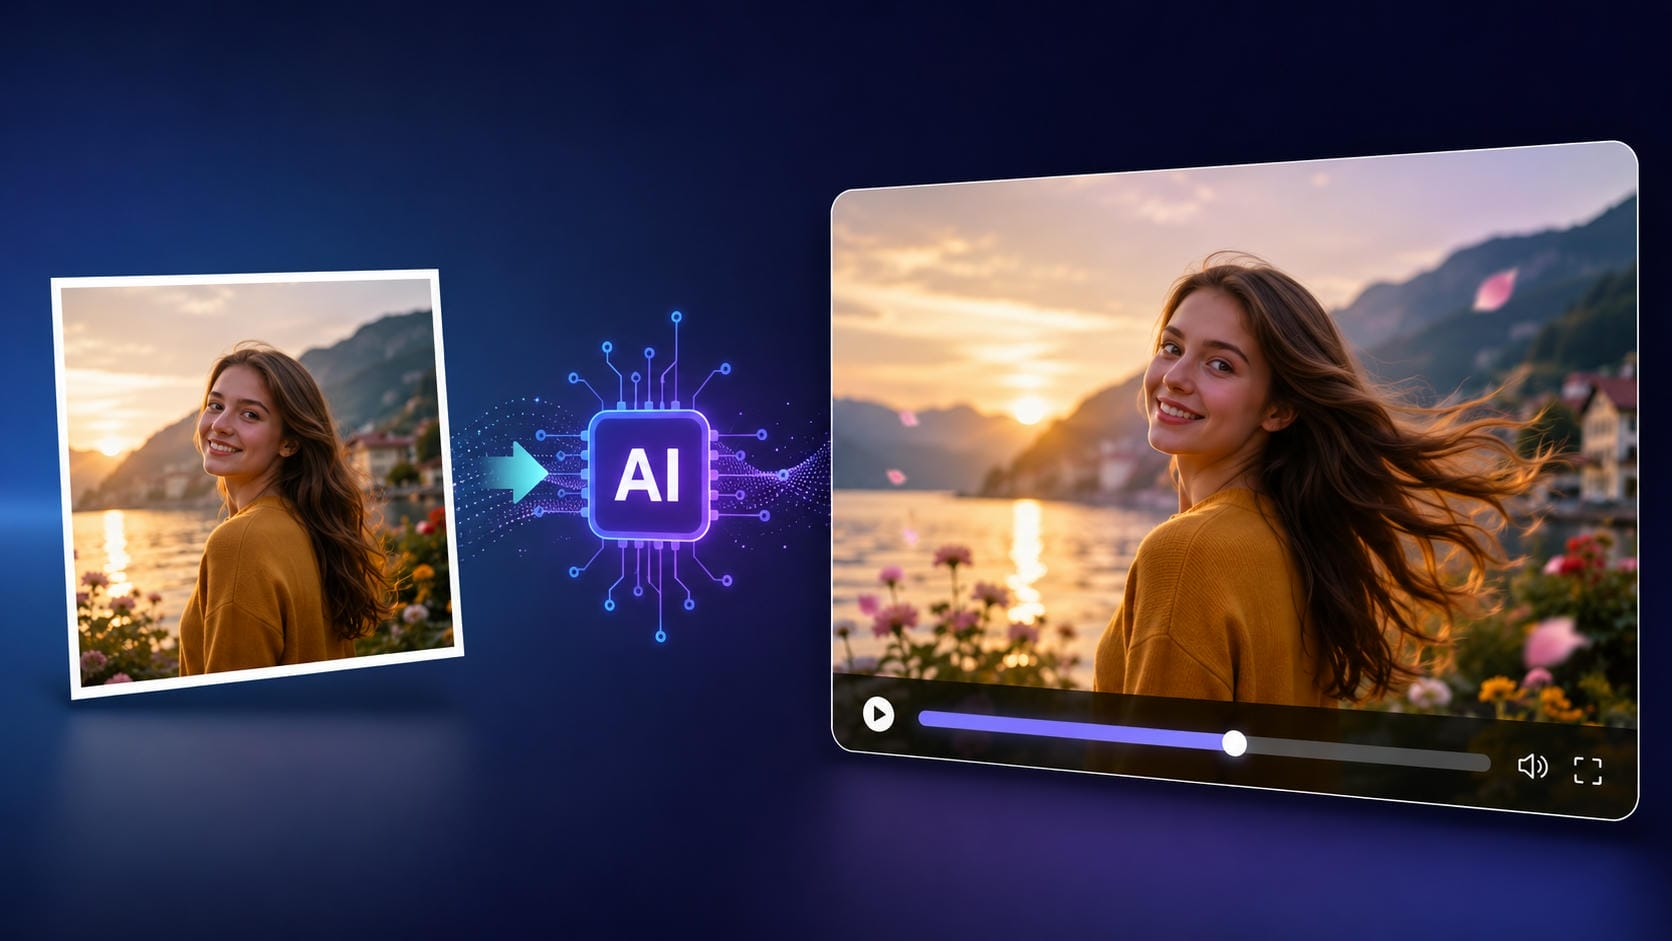
Want to transform your flat, boring images into dynamic videos? Learning how to animate a still photo is easier than ever. See how easy it is to breathe movement into any image with Vmake AI.


Still photos capture a moment. But sometimes a moment deserves more than a freeze frame. With Vmake AI, you can now add realistic motion to any image in minutes, no technical skills required. This guide shows you exactly how to animate a photo and get results worth sharing.
Why do People Choose AI to Animate a Photo?
At its core, animating a photo means adding realistic or stylized movement to elements within a static image, transforming it into a short video clip. Traditional animation is the process of hand-drawing or editing each frame. It’s meticulous work, with a need for technical skill and lots of time. Even digital approaches rely on software like After Effects, where you manually mask layers, keyframe positions, and render out video. Achievable, but not casual.
AI approaches this differently. Instead of asking you to define motion frame by frame, AI models analyze the visual content of an image: depth cues, edges, textures, and facial landmarks. They generate plausible motion from that. It is not just moving pixels, but inferring what the scene contains, and how it would realistically move.
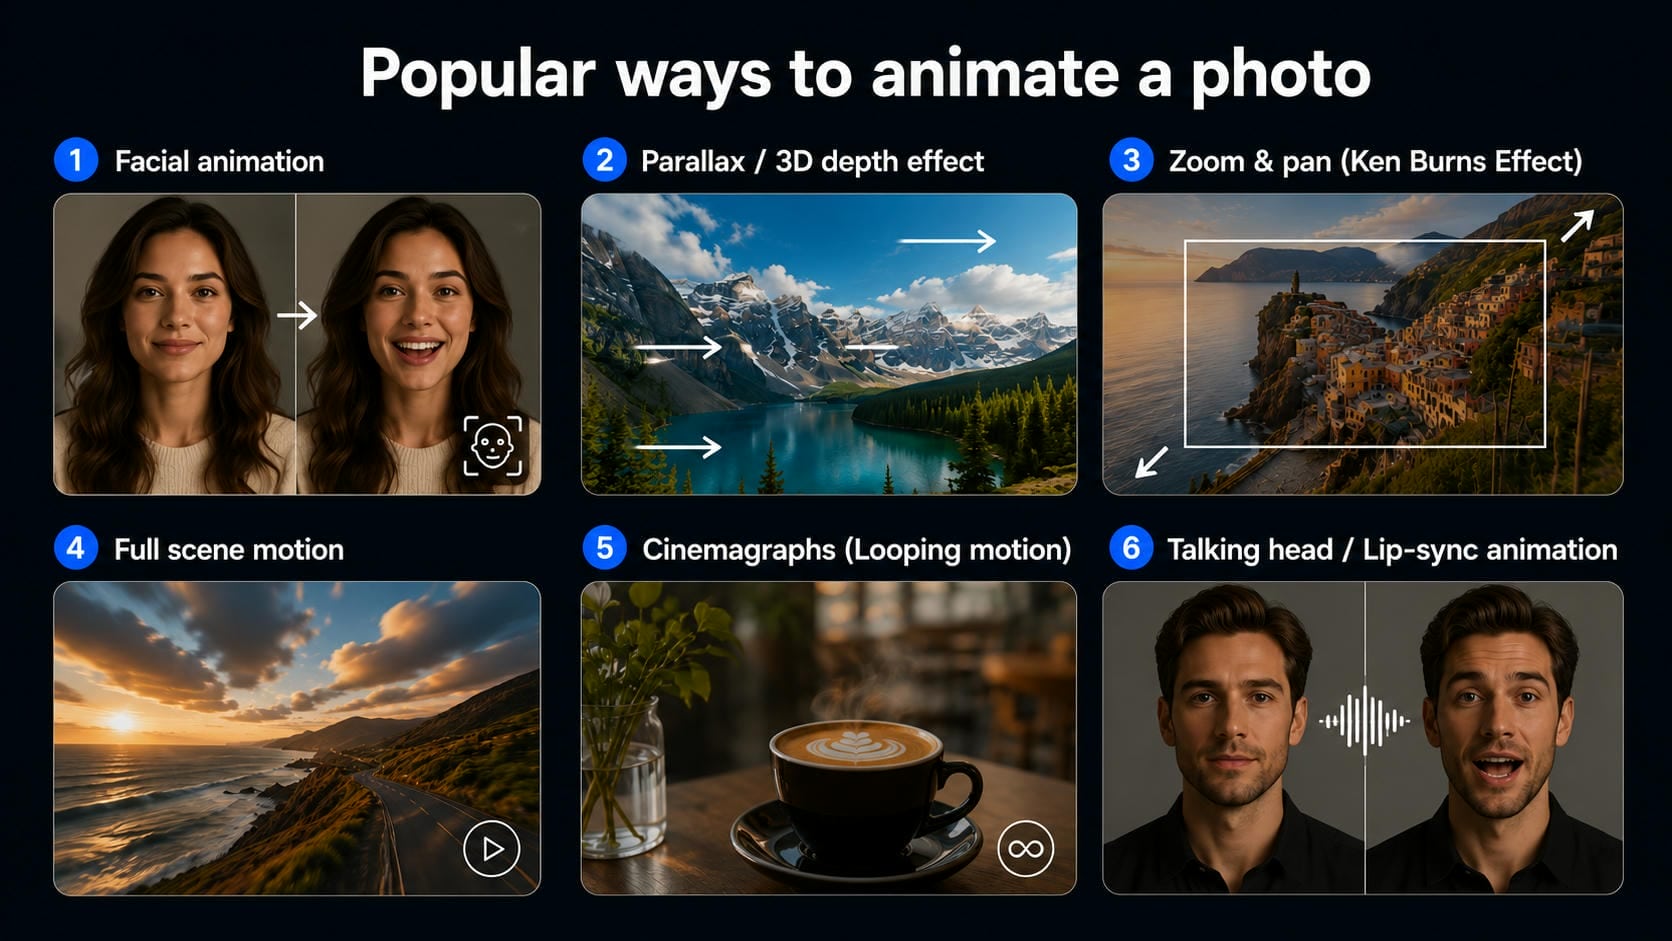
Popular ways to animate a photo
If you're interested in learning how to animate a photo with AI, there are several styles to choose from. Each method creates a different look, from subtle facial movements to full scene animation. Here are some of the most popular options.
-
Facial animation: Facial animation gives selfies and portraits subtle movement, bringing them to life. AI can add blinking, smiling, eye movement, and gentle head turns. Perfect for profile pictures, vintage family photos, and social media posts with a slightly more personal feel.
-
Parallax/3D depth effect: Parallax animation is the technique of separating foreground from background into layers to give a sense of depth. As the virtual camera moves, parts of the image move at different rates. It adds more depth and a cinematic feel to landscapes, travel photography, and artwork.
-
Zoom & pan (Ken Burns Effect): The Ken Burns effect adds slow zooming and panning movements to a still image. Even without moving objects, the scene feels more dynamic and engaging. This technique is commonly used in slideshows, documentaries, and storytelling videos to create a smooth cinematic style.
-
Full scene motion: Wind through trees, water flowing, clouds drifting across a sky. This works best in nature and landscape shots where organic movement fits naturally. The key is keeping it believable rather than overdone.
-
Cinemagraphs (Looping motion): Cinemagraphs combine a still image with a repeated movement that plays in a seamless loop. For example, steam coming off a cup or waves gently lapping on a beach can make for a striking effect. These animations are quite common in ads and social media posts.
-
Talking head/Lip-sync animation: Talking head animation turns a photo into a speaking video. AI synchronizes mouth movements with audio, making the person appear to talk naturally. This style is popular for digital avatars, educational videos, presentations, and content designed for social platforms.
How to animate a photo in three popular AI video generators
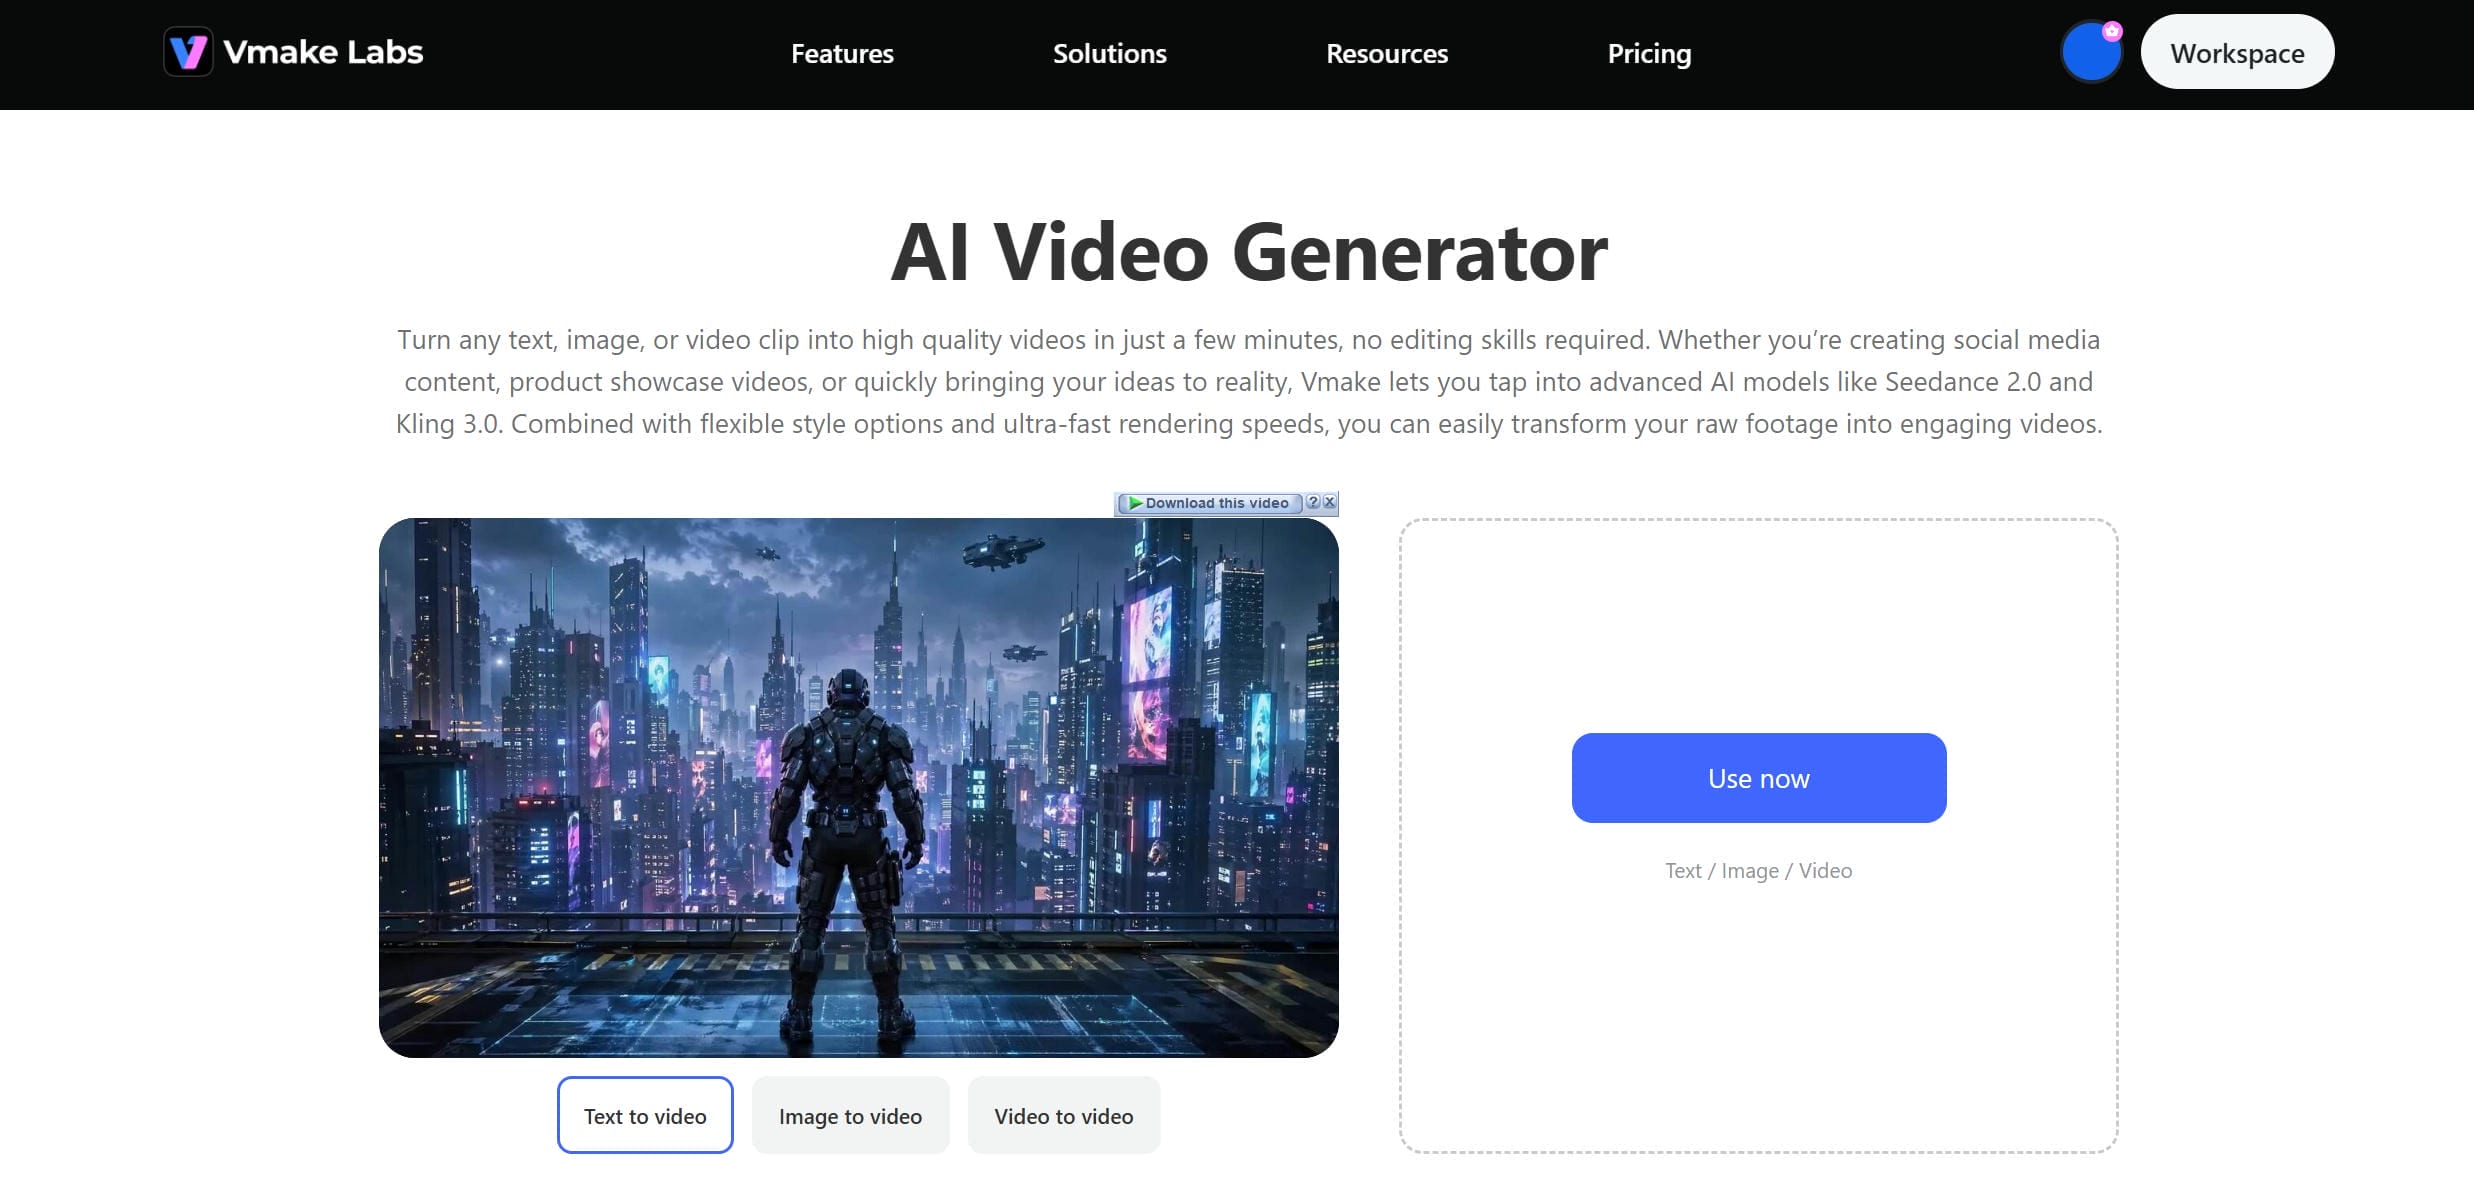
Using Vmake AI video generator
Vmake AI video generator makes animating still photos simple and effective. It supports dedicated image-to-video generation powered by multiple advanced models like Kling 3.0 and Seedance 2.0. No advanced editing skills are needed. Just upload your photo, describe the motion you want, and let the AI handle the rest.
Steps to animate a still photo using Vmake AI
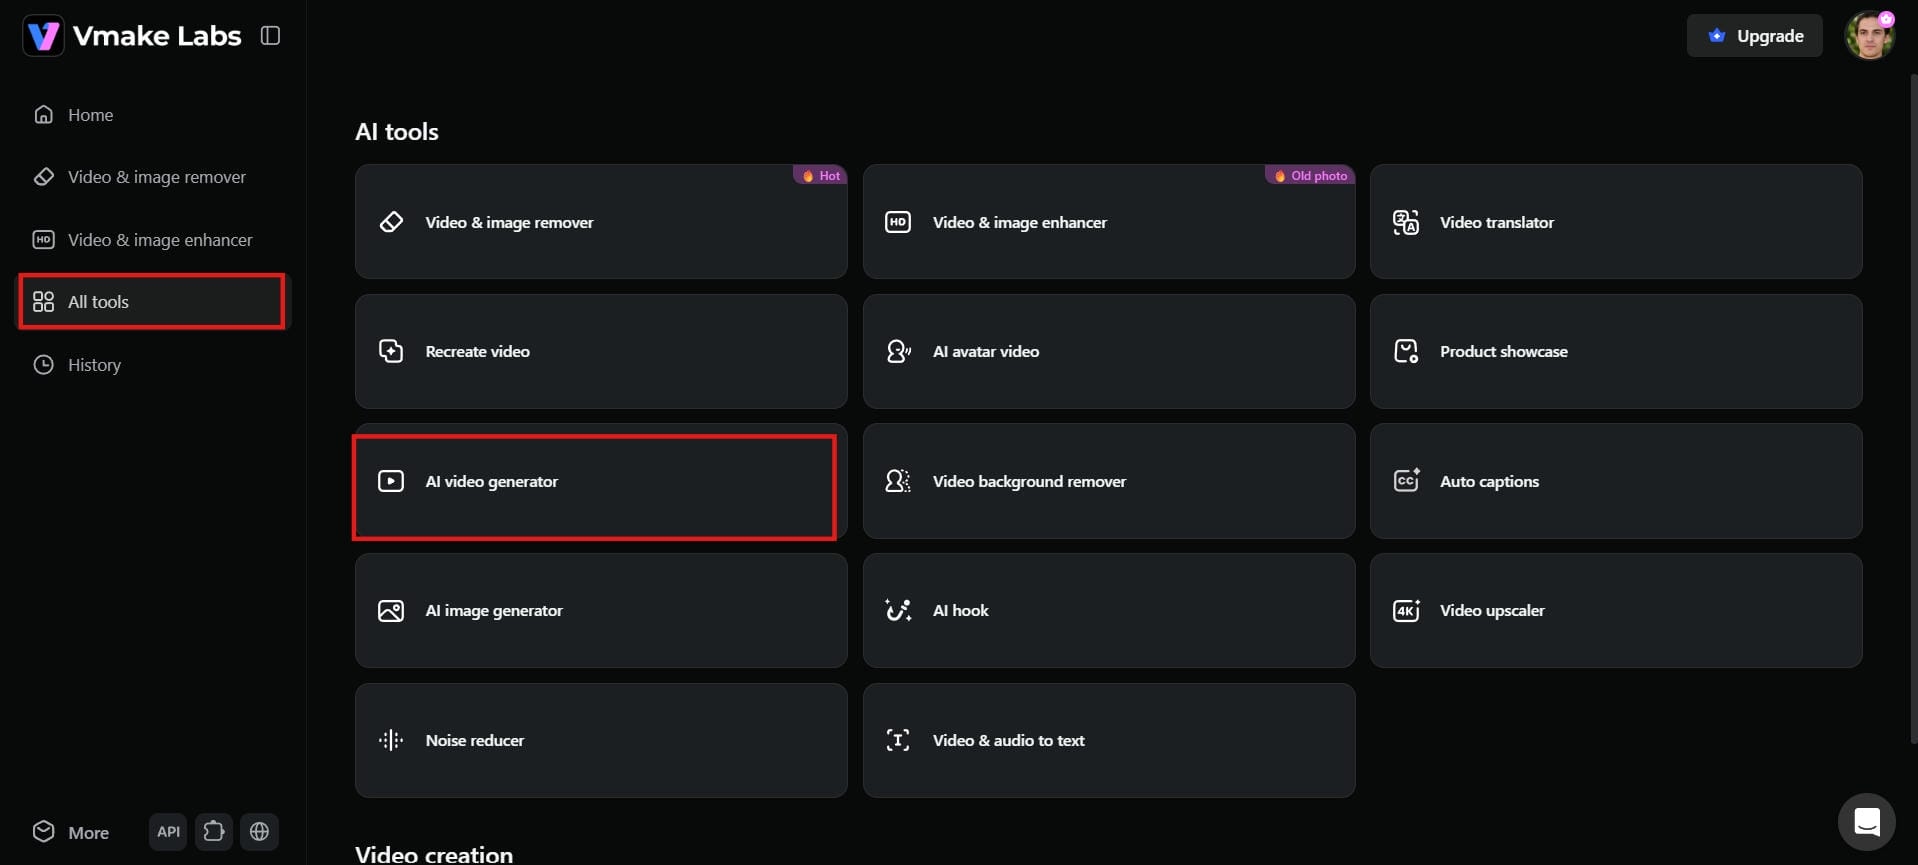
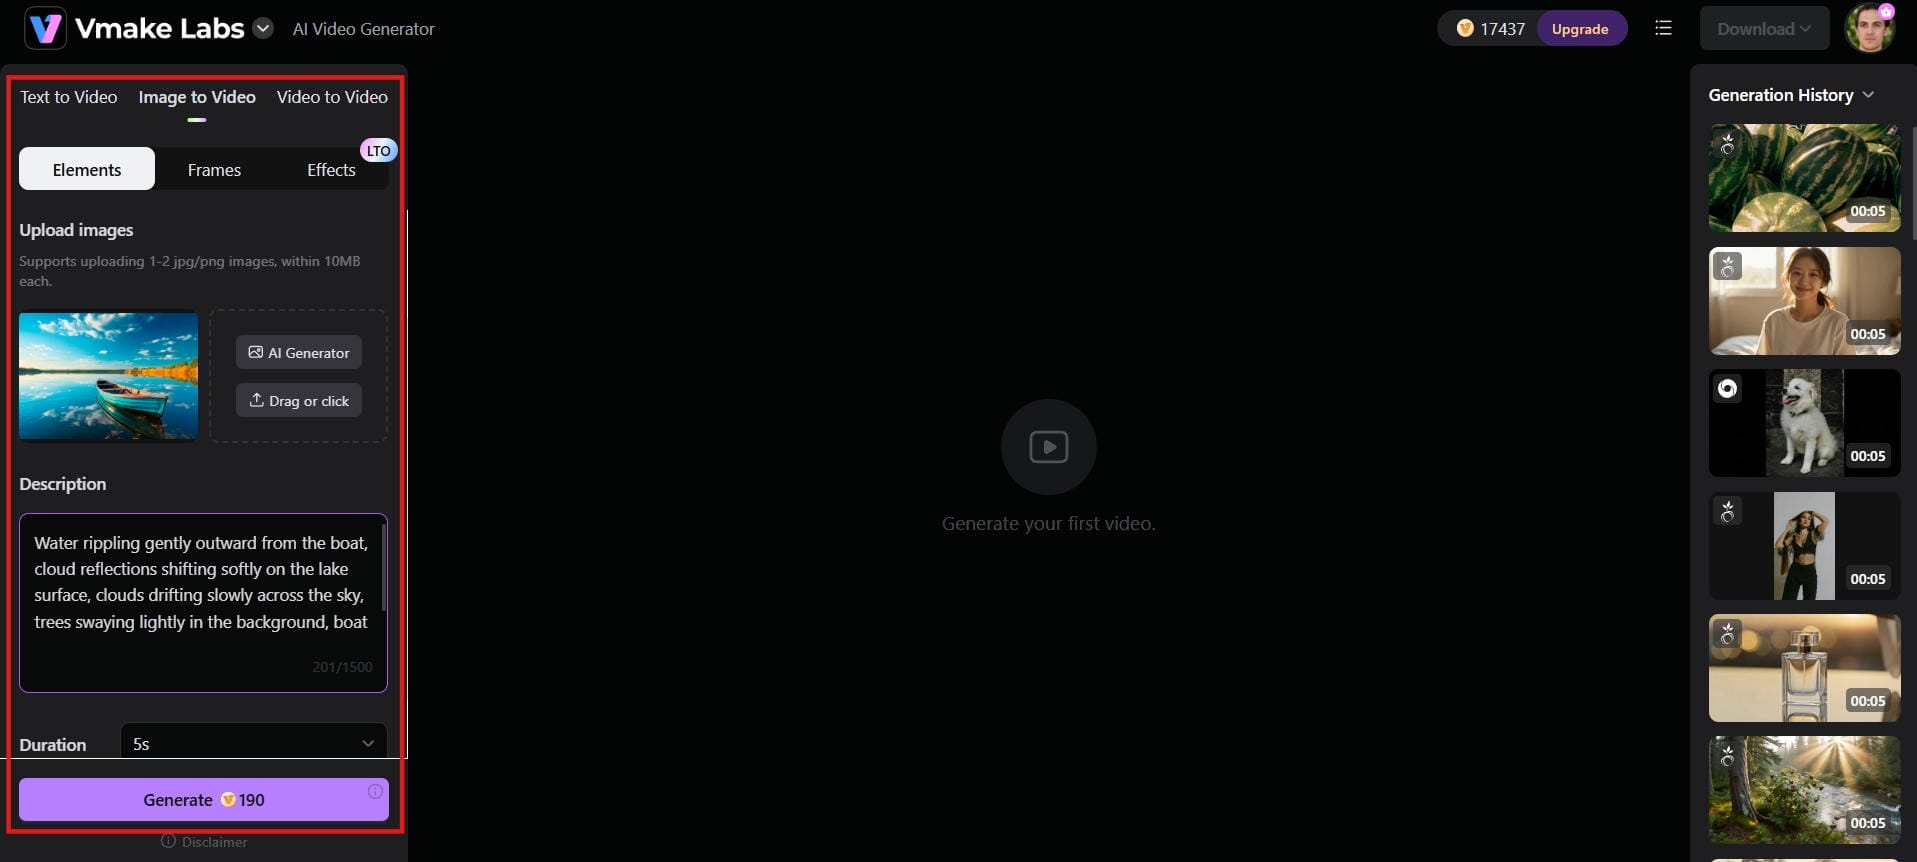
Step 1: Access the AI video generator and upload a photo
From the left sidebar, click "All tools" and select "AI video generator." Once inside, click the "Image to Video" tab at the top. Click on the Upload images area (supports 1-2 JPG/PNG files, max 10MB each) and upload your photo. For best results, use a high-resolution image with clear lighting and a distinct subject.
Step 2: Describe and adjust settings
Type a prompt describing how you want the image to move. Be specific rather than vague. "Slow zoom toward the face with gentle hair movement" works better than just "animate." Choose your preferred AI model, aspect ratio, and video duration.
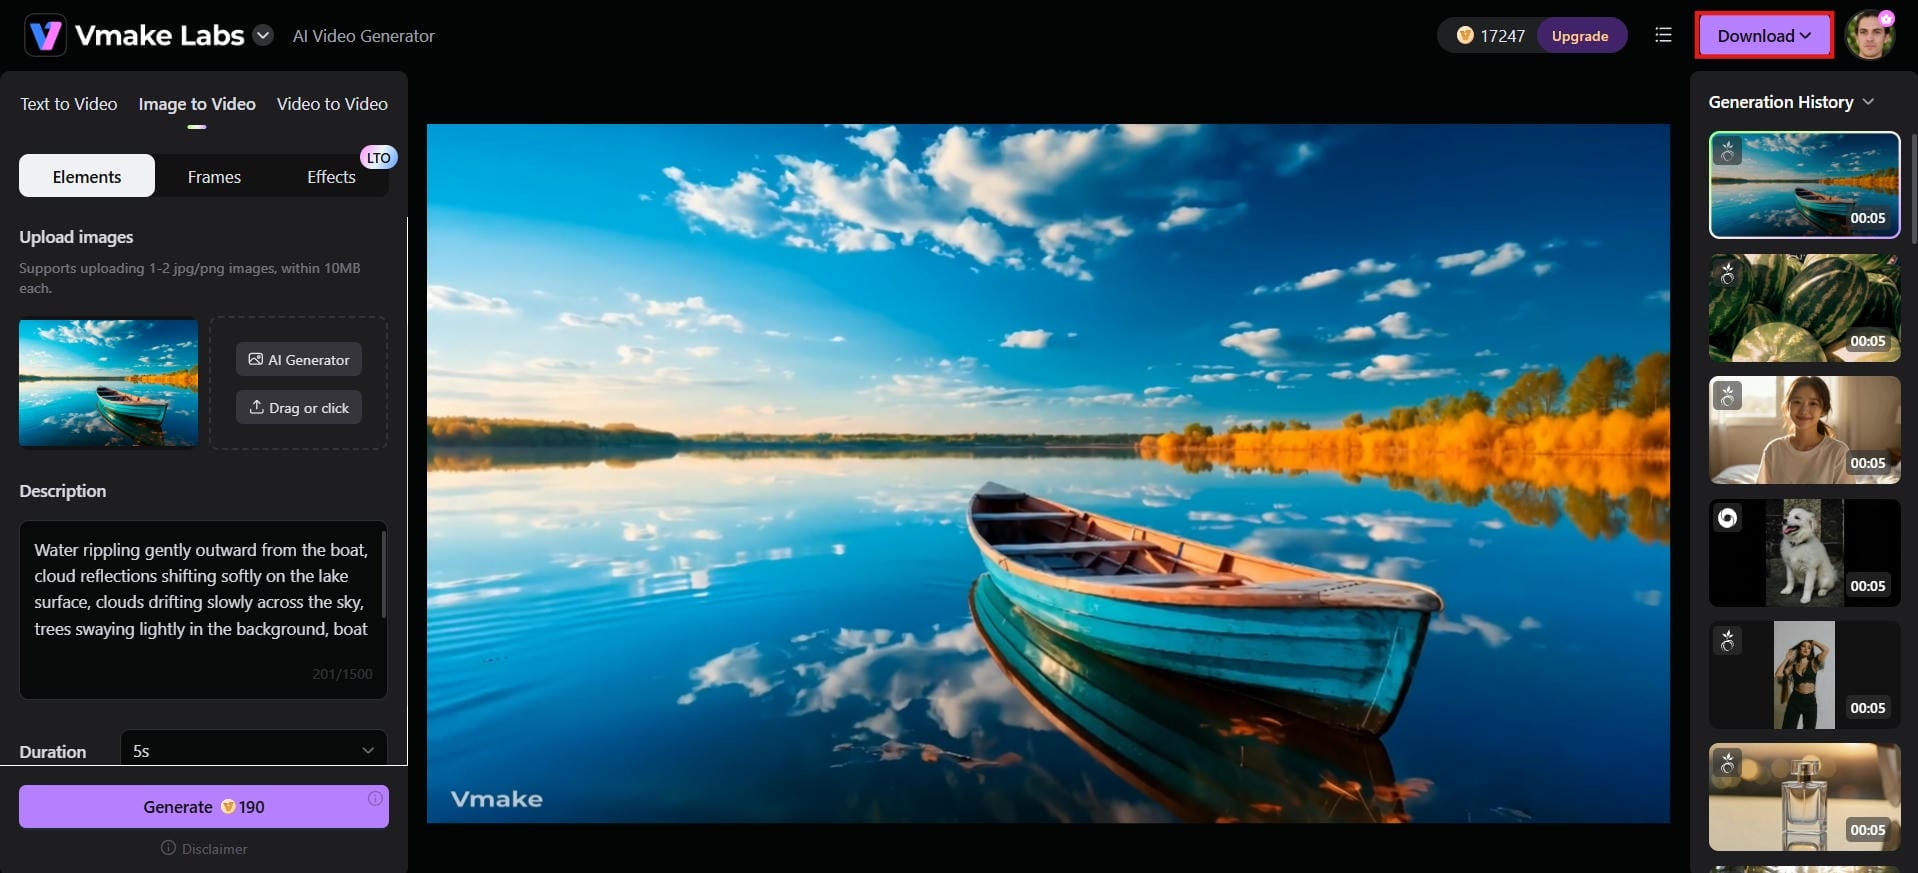
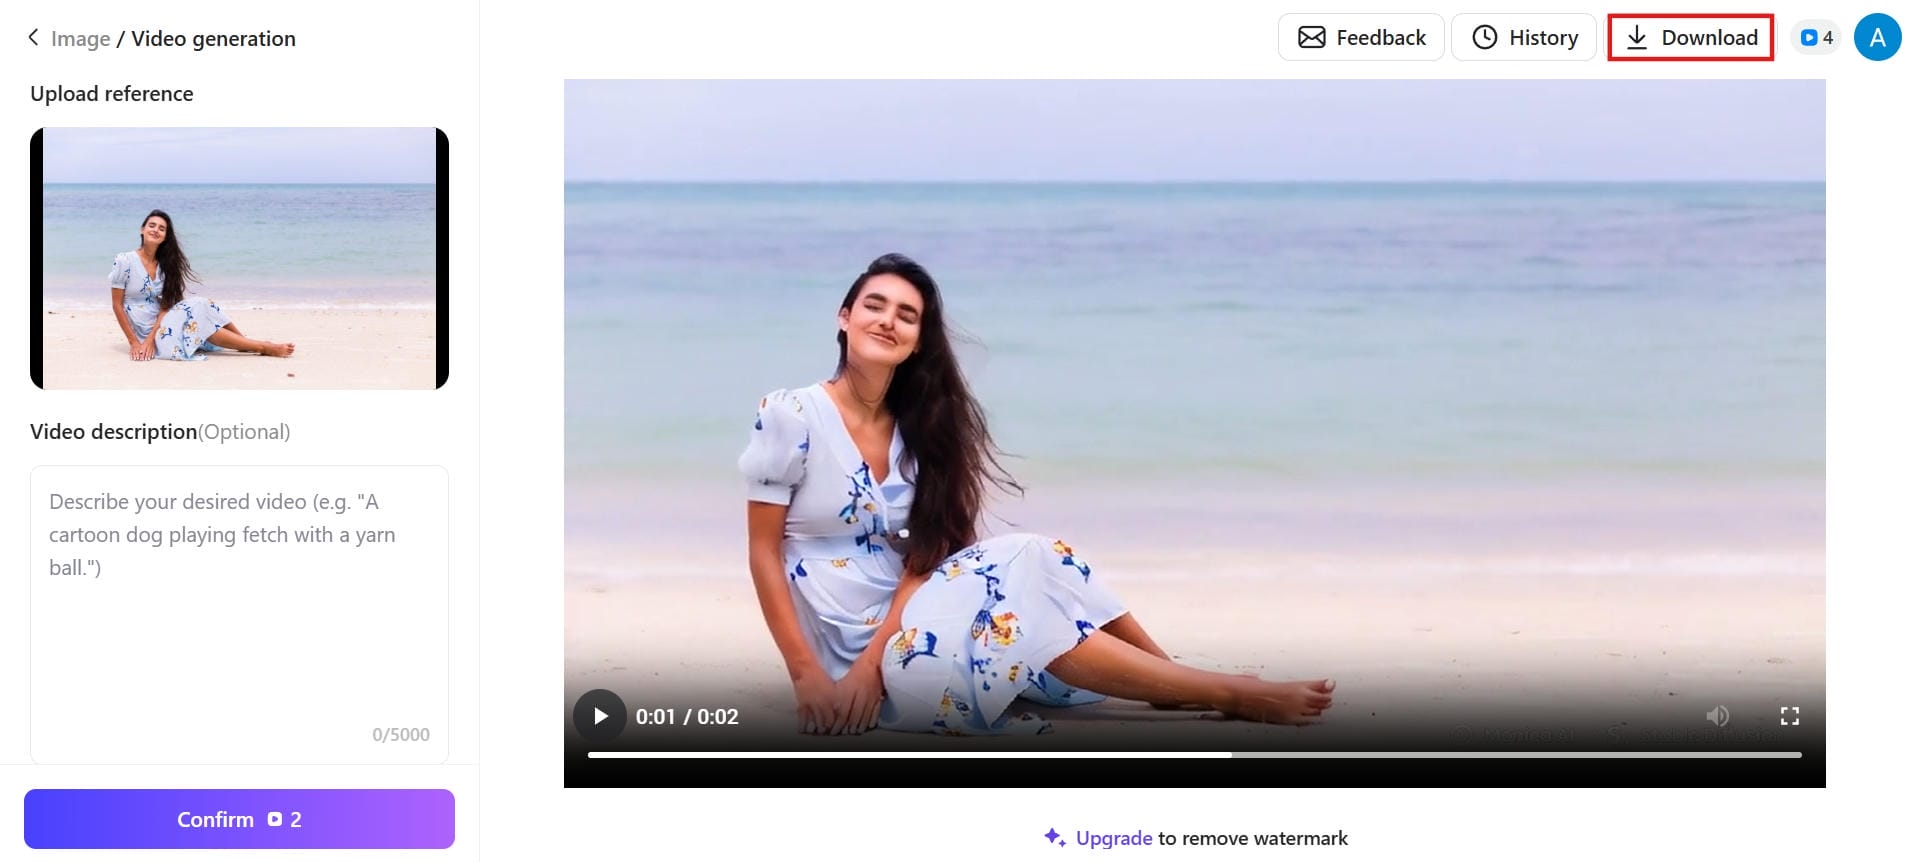
Step 3: Generate and download
Hit "Generate" and let the AI process your image. Preview the result before downloading. If the motion doesn't look right, adjust the prompt and regenerate. Once satisfied, click "Download" to save the video to your device.
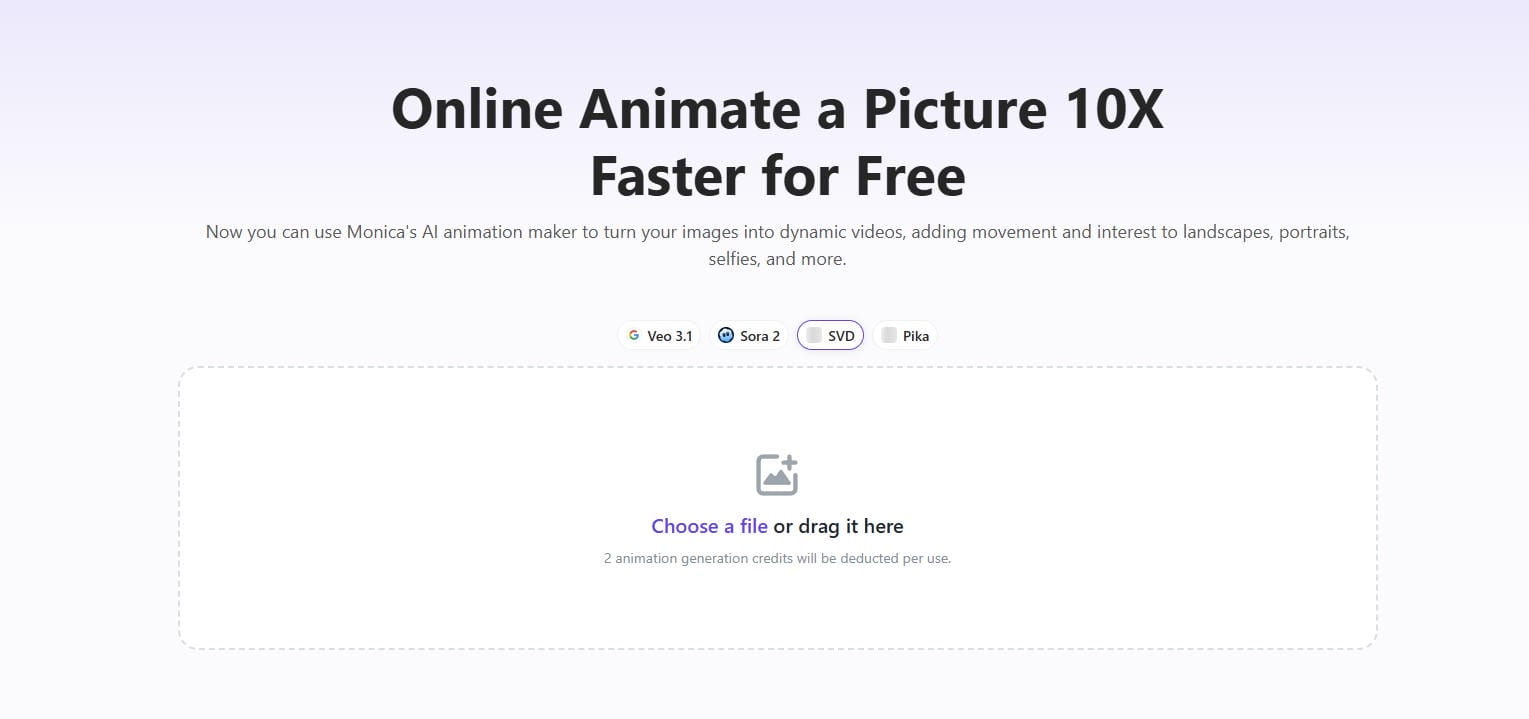
Using Monica's animation tool
Monica's AI animation tool lets you quickly turn static photos into dynamic videos. It adds realistic movement to portraits, selfies, landscapes, product shots, and more. It is perfect for social media, marketing, or personal projects. The process is simple, fast, and beginner-friendly, often completing in seconds with just a few clicks.
Steps to animate photos using Monica
Step 1: Upload image
Go to the Monica image animation tool, and upload your chosen image. You can either click to select a file or simply drag and drop it into the upload area. Monica accepts JPG, JPEG, or PNG files up to 10MB and 2048x2048 pixels in resolution.

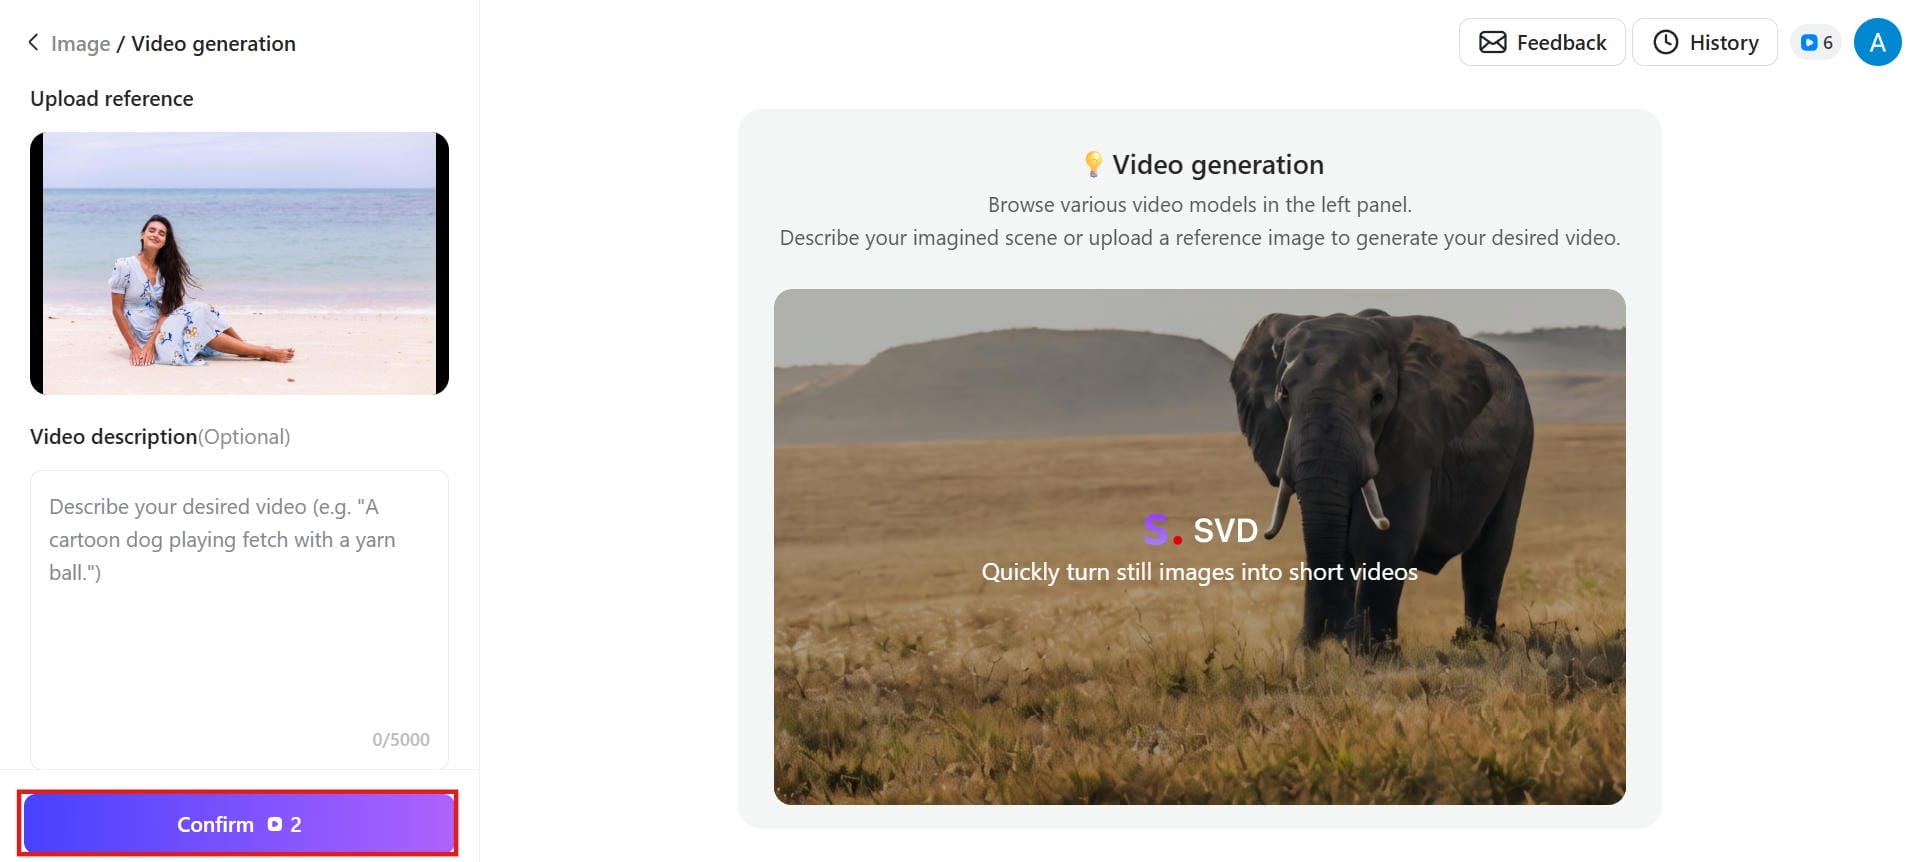
Step 2: Convert
Once your image is uploaded, simply click the "Confirm" button. Monica's AI animation engine automatically analyzes your photo and generates a short, dynamic video, adding natural movement to people, objects, or scenery.
Step 3: Download video
After the animation is generated, preview the result to make sure you're happy with it. Then save your newly animated photo as an MP4 video file, ready to share or use elsewhere.
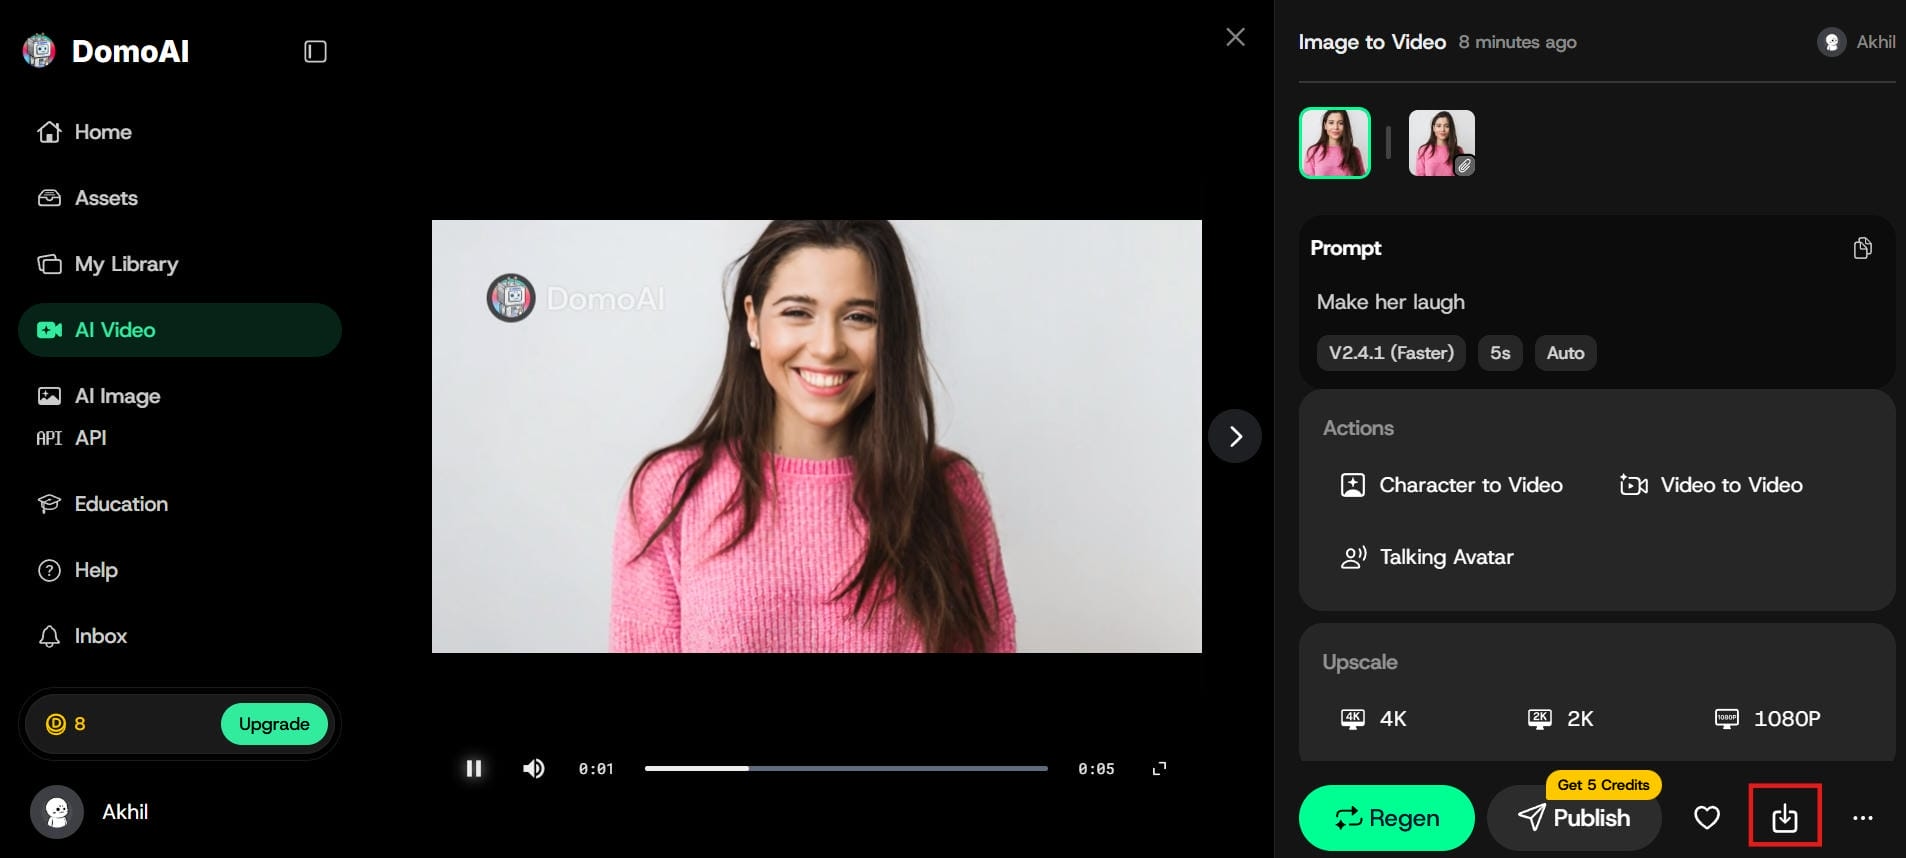
Using DomoAI motion generation
DomoAI is a powerhouse for advanced AI motion generation, specifically engineered to transform static photos into fluid, hyper-realistic video. Driven by cutting-edge motion synthesis models like DomoAI 2.4.1, it injects natural physics, complex character kinematics, and sweeping camera tracking into everyday images.
Steps to animate a photo with Domo AI
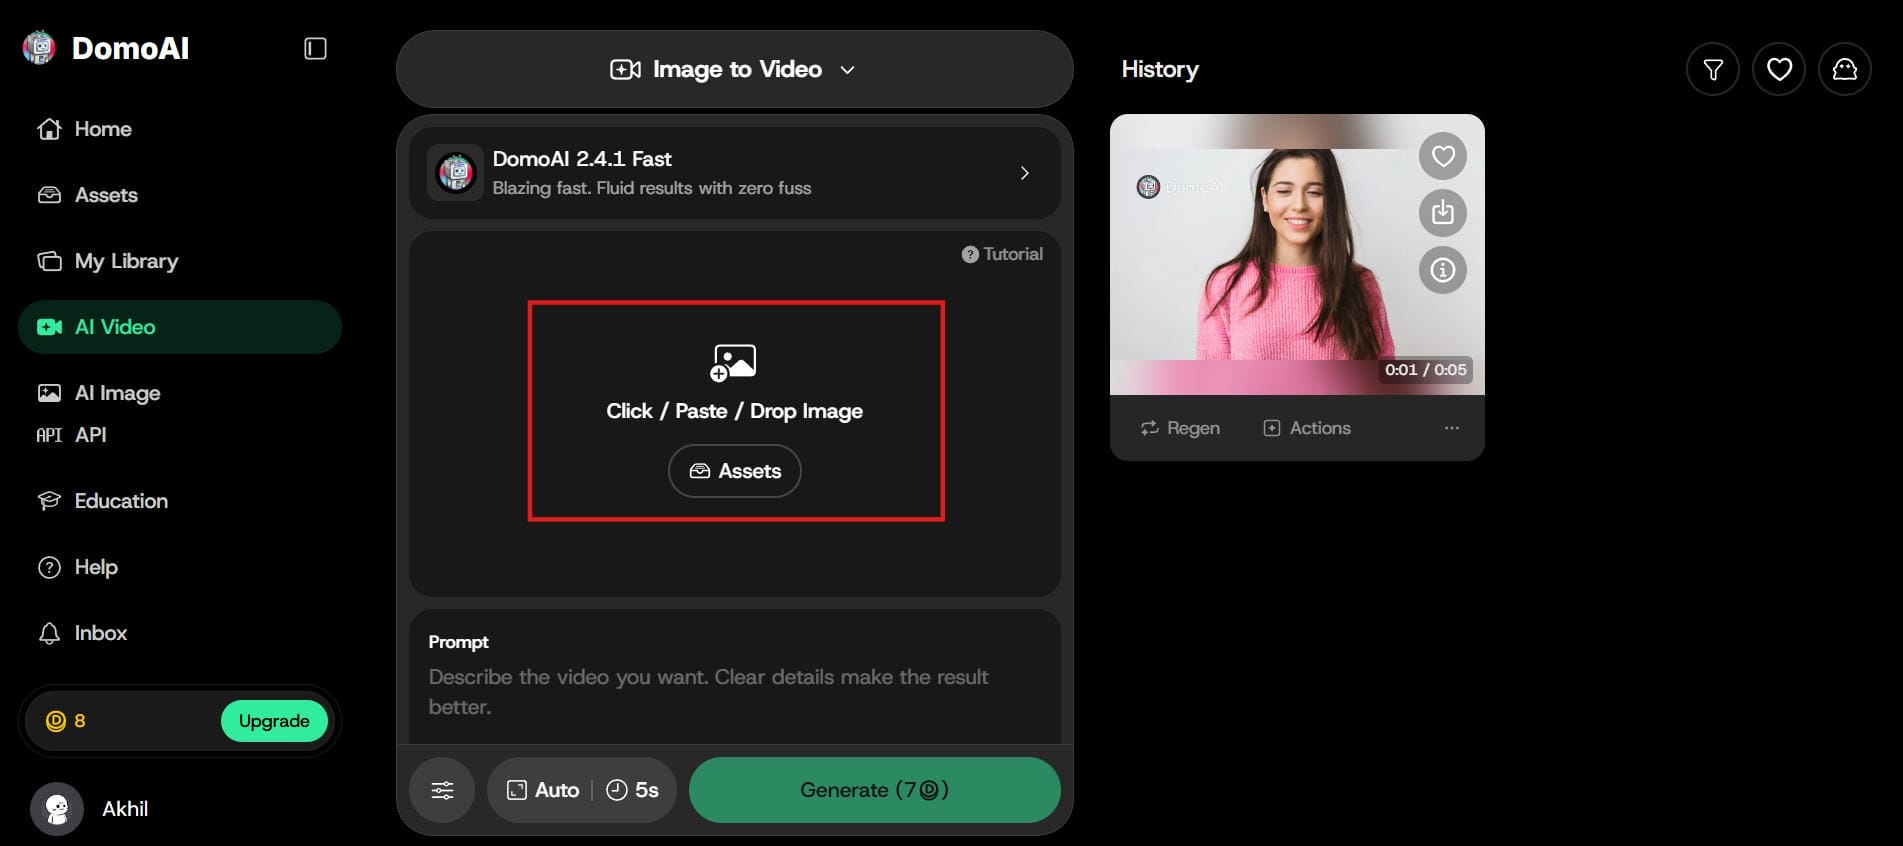
Step 1: Upload your image
Visit the DomoAI Animate page. Click or drag and drop your photo to upload. The tool supports common formats like JPG, PNG, and HEIC. You can start with portraits, landscapes, product shots, or old family pictures.
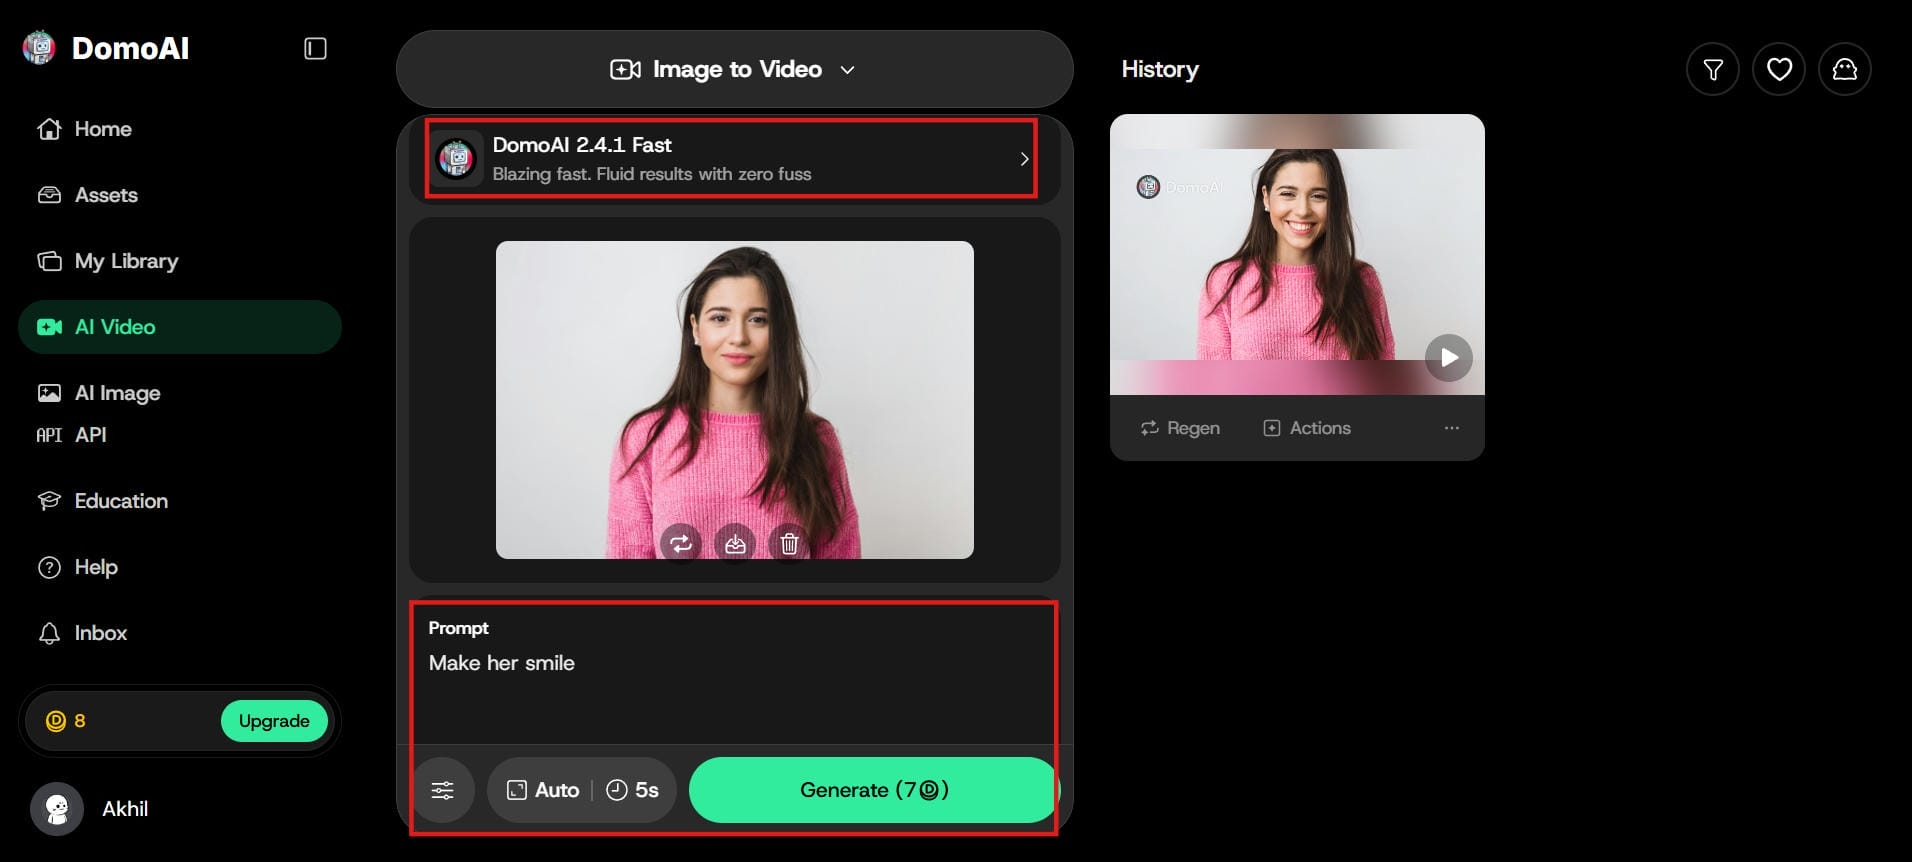
Step 2: Customize with prompt
Add a text prompt to guide the animation (e.g., "gentle smile and head turn" or "wind blowing hair"). Adjust settings like duration, motion style, or model (V2.4 Advanced or Faster) for better results.
Step 3: Generate & download
Click the Generate button and watch your photo come to life. Once processing is complete, preview the video, then download the high-quality MP4 file. Share it directly on social media or other platforms.
Tips to get the best results when you animate a photo with AI
The quality of your animation depends heavily on what you put in. Follow these tips to get cleaner, more natural-looking results every time.
-
Use high-quality images: Begin with the sharpest, most in-focus version of your photo. Blurry or heavily compressed images result in rough, inconsistent animations. Before you begin working on an old photo, enlarge it using an AI upscaler.
-
Choose photos with a clear subject: Cluttered compositions confuse AI motion models. A portrait on a clean background, a landscape with clear depth, or a product on a solid surface all give the AI clearer information to work with.
-
Keep motion natural: Subtle animations are almost always better than dramatic ones. A soft blink, a slow push of the camera, or a gentle drifting of clouds reads as polished. Overdone movement looks fake and draws attention to itself.
-
Write detailed prompts: Your prompt is a brief for a motion designer. "Slow zoom toward face with gentle hair movement" gives much more specific results than simply typing "animate." Specific language provides the AI with more information to work with.
-
Choose the right animation style: Match the type of animation to what is in the picture. Facial animation works best for portraits, while full scene motion suits landscapes. Applying the wrong style to the wrong image will almost always produce poor results.
-
Review and refine results: Preview your animation before downloading. Look for edge artifacts, unnatural deformations, or inconsistent motion. If something looks off, adjust the prompt and regenerate it. Spending an extra minute here can make a noticeable difference in quality.
Conclusion
Animating a photo used to mean hiring a specialist or spending hours in complex software. AI has changed that completely. Today, anyone can turn a still image into a compelling, natural-looking video in minutes. The process is straightforward: start with a good photo, pick the right animation style, write a clear prompt, and let the AI do the heavy lifting. Tools like Vmake AI make the whole thing accessible without sacrificing output quality. Whether you're creating content for social media, refreshing brand assets, or simply bringing a meaningful photo to life, photo animation is now a practical option for everyone.
FAQs
How to animate a photo using AI?
To animate a photo using AI, simply upload your image to Vmake AI's image-to-video tool, write a clear prompt describing the motion, adjust settings, and hit generate. Vmake makes the whole process quick and easy, turning your still photo into a short moving video in minutes.
Can I animate a photo for free?
Yes. Vmake AI offers free credits to get started, so you can test the tool before committing to a paid plan. Free tiers typically cover basic animations at standard quality. Higher-resolution exports and advanced features like lip-sync are available on paid plans.
How long does it take to animate a photo using AI?
It normally takes only seconds or a few minutes to produce your AI photo animations, depending on the input image and parameters. Vmake enables users to instantly transform static images to animated videos without requiring days of complex editing and human manipulation.
What file formats are supported for input and output?
Vmake AI accepts JPG and PNG files up to 10MB per image for input. Output is delivered as an MP4 video file, which works across all major platforms and social media channels without any additional conversion needed.
How do I write a good prompt to animate a photo?
Be specific about what should move and how. Instead of "animate," try "slow zoom toward the subject with gentle hair movement." Vmake AI interprets plain language well, so the more detail you provide, the more targeted and natural your animation will look.
How do you animate photos while preserving original detail?
Start by uploading a high-resolution image to give the neural network enough pixel data. Then, utilize the advanced upscaling and processing models within Vmake AI to ensure the newly generated video frames maintain the sharpness, textures, and clarity of your original shot.

You May Be Interested

Best Free and Paid AI Animation Generators in 2025
Best AI Photo Enhancer Tools in 2026 (Free & Online): Improve Image Quality Instantly

A Guide: How to Remove Watermark from a Photo: Simple Solutions That Work
