What is Color Grading: Master the Art of Visual Storytelling in 2026
 Ken Dawson2026-05-20 11:00
Color grading adds that emotional and dramatic feel to films and images. Color grading establishes mood and visual consistency through color and contrast adjustments. In this tutorial, you'll discover what color grading is and how it differs from color correction, the essential methods any novice should know, and the best tools to use in 2026.
What is Color grading?
Color is a vital storytelling tool that dictates the mood and emotional impact of a visual. By adjusting elements like brightness, contrast, saturation, and tone, creators can transform the viewer's experience.
Key Effects
-
Emotional Direction: Warm tones evoke coziness or nostalgia, while cool tones can create suspense and intrigue.
-
Visual Polish: Consistent color adjustments lead to a professional, high-end aesthetic across films, ads, or social media.
-
Narrative Focus: Strategic styling directs the audience's attention and reinforces the underlying story.
Color correction vs. Color grading: What's the difference?
A lot of people think that color correction and color grading are the same thing, yet they actually serve two very different objectives in the editing process. One is solving technical problems, the other is developing a visual mood and style.
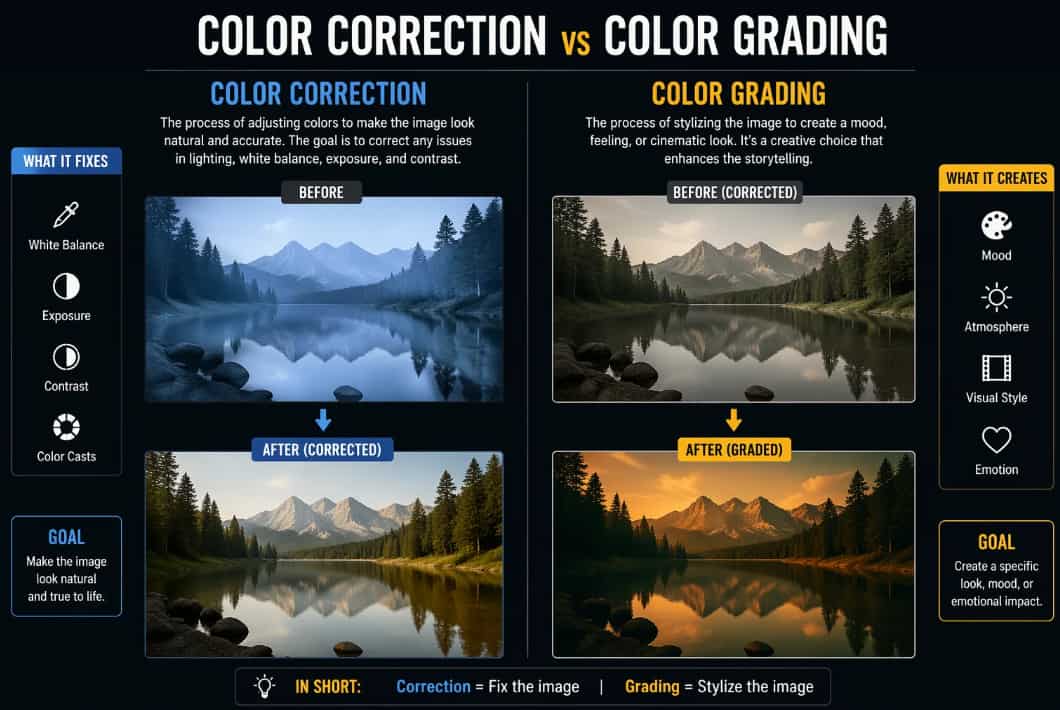
Color correction:
The technical stage before any artistic styling is the color correction. It is focused on resolving footage faults to give it a natural, balanced look. This covers exposure adjustments, white balance correction, repairing dull or uneven colors, and matching shots under varied lighting conditions. The goal is straightforward: ensure the film is clean, realistic, and consistent.
Color grading:
Color grading is the art of editing. It's how you bring a certain atmosphere, style, and cinematic-ness to your visuals. It's all about manipulating colors, contrast, shadows, highlights, and tones to convey the feeling you want. That's what makes a scene feel warm and emotional, dark and dramatic, gentle and dreamy, even daring and futuristic.
|
Points of difference |
Color correction |
Color grading |
|---|---|---|
|
Purpose |
This process is all about correcting problems in the film, such as poor lighting, incorrect white balance, or color imbalance. The key goal is to make everything look clean, natural, and real. |
This is the creative stage where you determine the mood and style of the images. Adds emotion, personality, and cinematic atmosphere to enhance the plot. |
|
Order in workflow |
Always done first, since the footage has to be balanced and technically accurate before you do any creative work. |
Then comes rectification. The base footage has been corrected and is ready to be styled. |
|
Logic vs Emotion |
More technical, more about getting precise exposure, tones, and true-to-life colors. |
More creative and emotive is how the scenario should seem to the viewer. |
|
Consistency vs Identity |
Ensure all clips look the same, even if captured in different settings or with different cameras. |
Creates a unique visual identity and cinematic style of the project. |
|
Who notices it |
Usually, it's invisible because it makes everything seem normal and balanced. |
It is more often felt than seen, and it sets the mood and emotional effect of the situation. |
What is the importance of color grading?
-
Sets the mood instantly: Colors affect emotions quite strongly. Warm colors can make a situation feel cozy and emotive, whereas cooler colors can generate tension, grief, or mystery in an instant.
-
Unifies every shot: Videos and photographs are taken in varied lighting circumstances, so they may look uneven. The color grading helps bring everything together and gives the project a clean, professional image.
-
It's a storytelling tool: Colors may affect how an audience feels about a scene, a character, or a moment without saying a word. Writers utilize a variety of tones and styles to heighten emotion and impact in their works.
-
Builds a visual identity: Consistent color styles assist creators, brands, and films to stand out. There are renowned movies and content creators whose particular visual look you recognize instantly.
-
Works for both video and photography: Color grading is used in films, photography, commercials, fashion shoots, YouTube videos, and social media content. It makes graphics look cleaner, cinematic, and more appealing in all formats.
Best color grading software in 2026
-
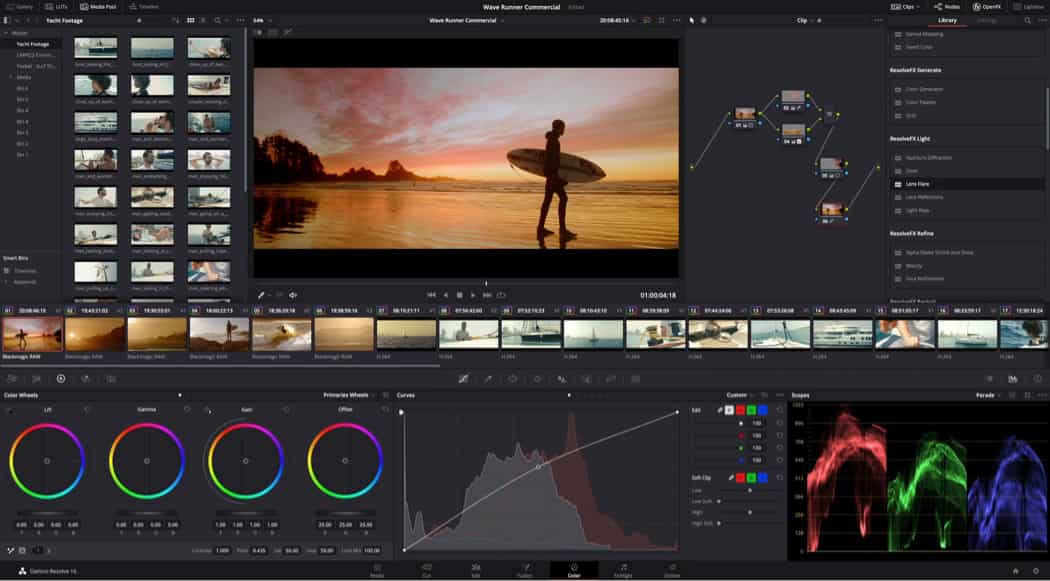
DaVinci Resolve color grading
When it comes to professional color grading, DaVinci Resolve is usually the first name that springs to mind. Originally a high-end color grading tool for film production, it is now a complete editing platform, including video editing, audio, visual effects, and finishing capabilities all in one location.
What makes Resolve different from other NLEs is the node-based process. Nodes organize modifications in a clearer, more flexible method, rather than stacking edits layer on top of layer. When creators get the hang of it, the workflow is really strong and efficient. It also has a free version that many creators adore. And you gain access to professional features that are more than enough for YouTube videos, short movies, advertisements, and social media content, even if you're not paying.
-
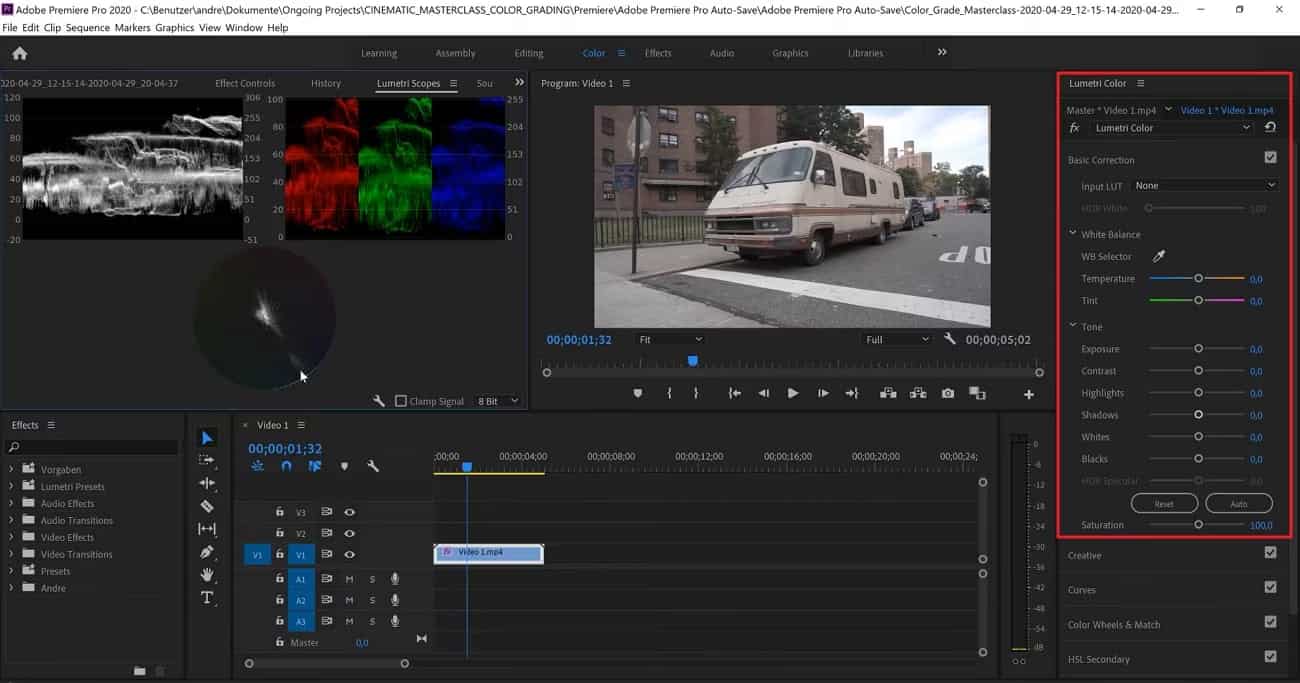
Adobe Premiere Pro color grading
Adobe Premiere Pro remains one of the most widely used editing platforms among creators in 2026. Its Lumetri Color panel is integrated and easy for new users to use for color tweaks, while still offering enough detail to satisfy advanced editors. Editors can easily tweak contrast, highlights, shadows, saturation, curves, and color wheels without leaving the primary editing timeline. Premiere Pro also integrates well with other Adobe products, such as Photoshop, After Effects, and Lightroom, making the workflow highly convenient for content creators and creative teams.
Adobe has also upgraded its color management system in recent versions, helping developers achieve more realistic, consistent colors across multiple devices and media. If you are already within the Adobe environment, Premiere Pro feels comfortable, speedy, and very efficient.
-
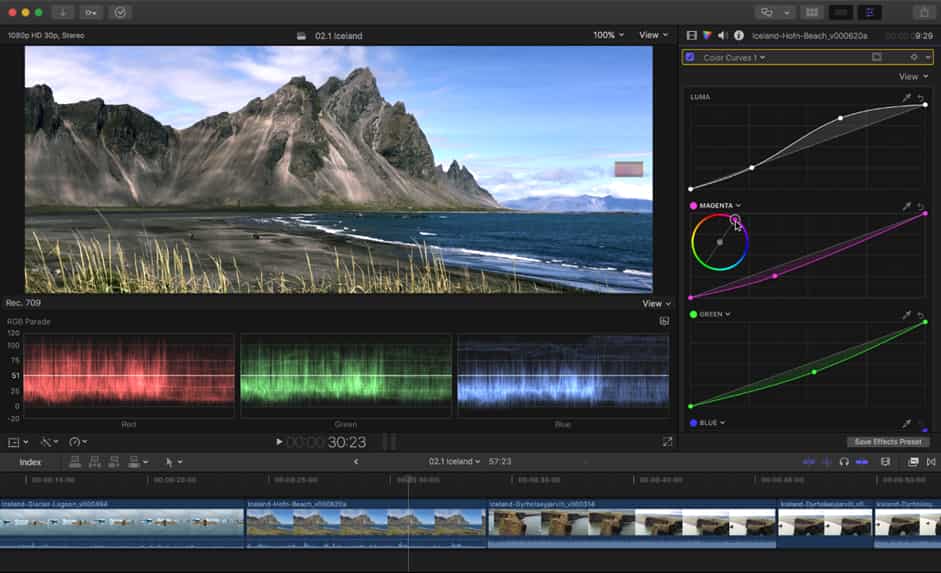
Final Cut Pro color grading
A favorite for Mac users looking for fast, smooth, and easy editing is Final Cut Pro. It has built-in tools like color wheels, curves, and the color board, so you can easily create beautiful cinematic graphics without unnecessarily complicated operations. Its greatest advantage is performance. Final Cut Pro is particularly optimized for Apple hardware, especially current MacBooks and Apple Silicon systems, which makes editing and rendering exceptionally quick.
This is really handy for YouTubers, Vloggers, and Content Creators working on tight timeframes. It won't have the same advanced grading versatility as DaVinci Resolve, but it is much easier to understand and still delivers professional-looking results for most creators.
-
Other notable options
-
Adobe Lightroom: Lightroom is one of the most popular programs for photographers seeking to create clean, cinematic, professional-looking photos. Its simple but powerful color modification features make it a great choice for portraiture, vacation photography, fashion photos, and social media content.
-
Capture One: Capture One has great color management and a professional photography workflow. Many commercial and studio photographers like it as it provides finer control over tones, details, and image consistency.
-
Photoshop: For detailed visual editing and inventive color work, Photoshop still reigns supreme. With adjustment layers, masks, and selective editing tools, designers may change colors and give pictures and digital art a highly customized look.
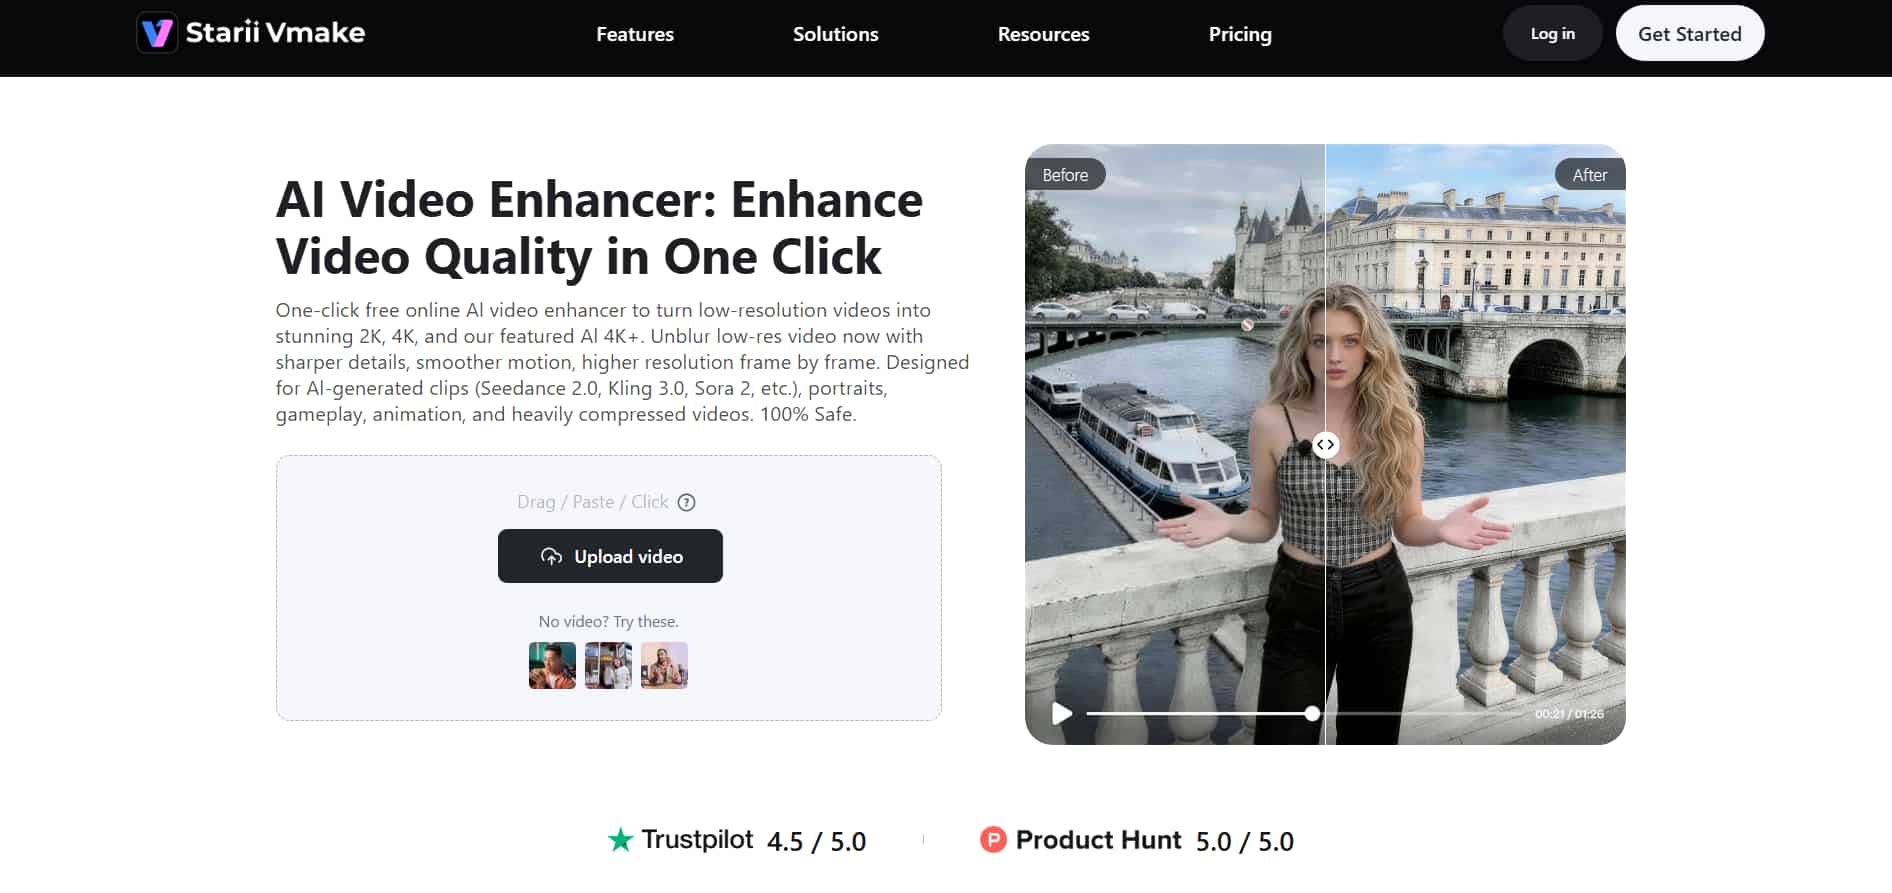
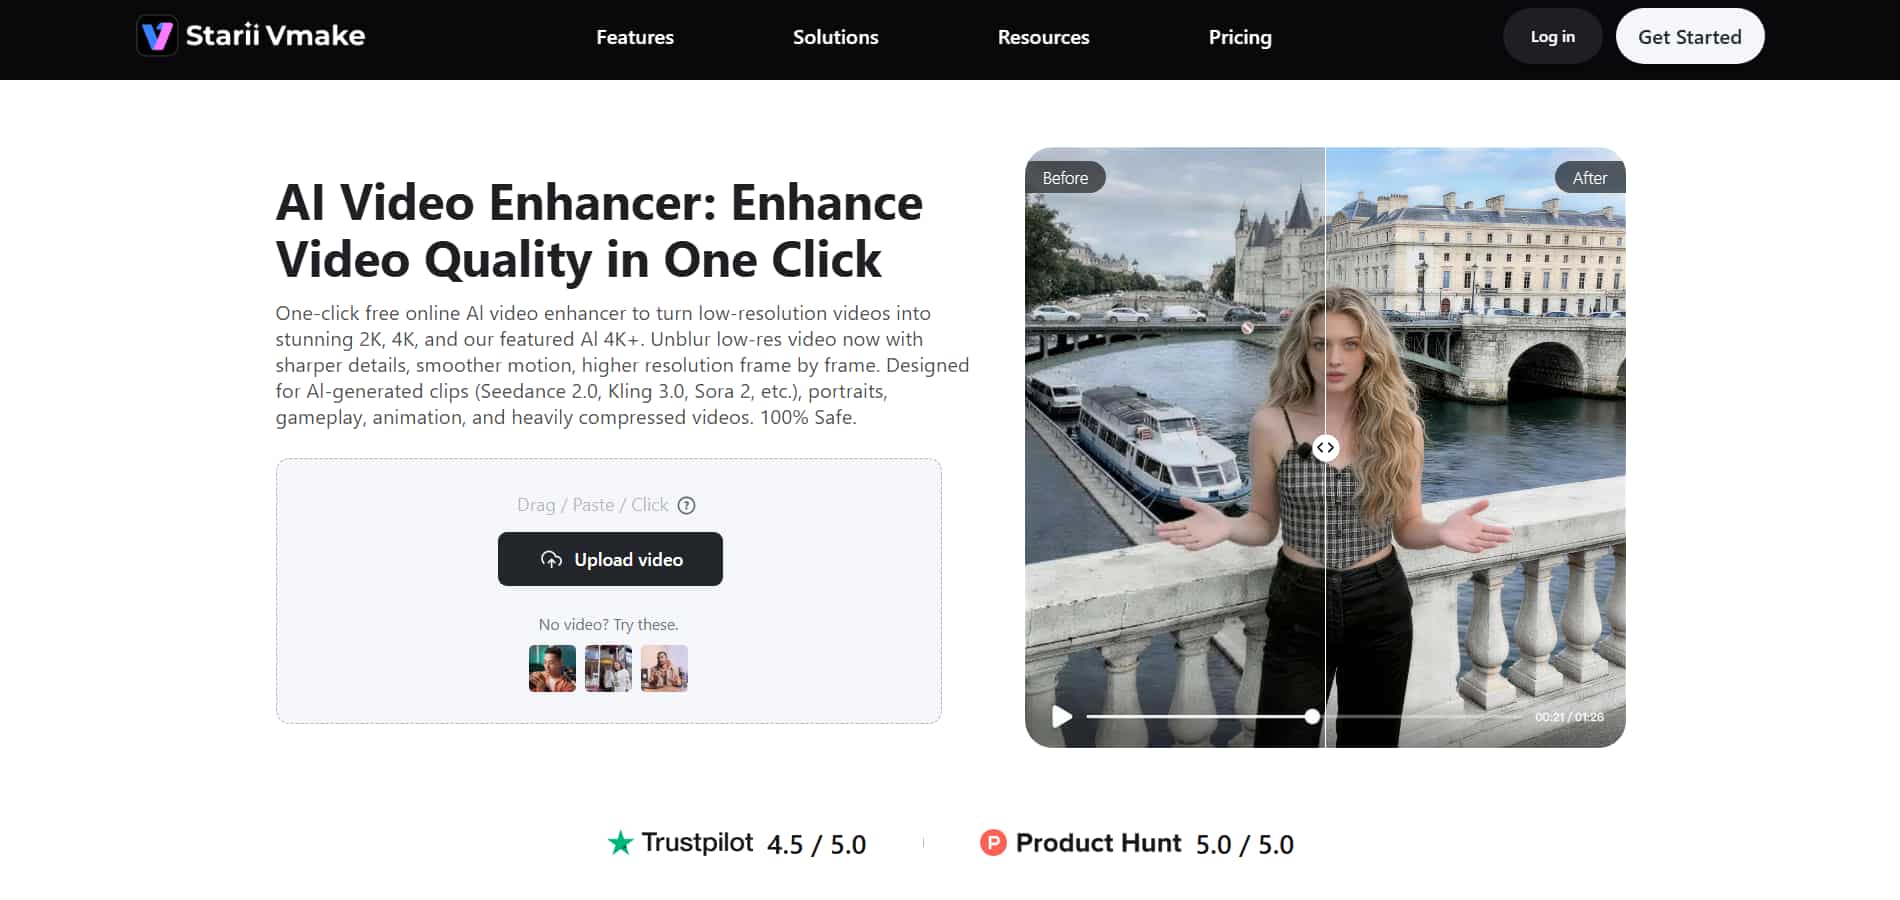
Pro tip: Elevate your video quality with Vmake video enhancer
Before you go into the art of color grading, your footage needs to be technically sound. No matter how good your colorist is, if your video is low-resolution, has too many compression artifacts, or has digital noise, you are going to have a hard time.
In 2026, Vmake AI Video Enhancer will be an integral part of your professional toolkit. Vmake uses advanced artificial intelligence to analyze each frame, recovering lost information and making fuzzy edges crisp, so your canvas is perfect. If you start with high-quality, enhanced footage, your color corrections will sit more organically on the image, avoiding the breakup you see in low-quality files. Hence, closing the gap between consumer-level recording and cinematic quality.
Step-by-step guide to using Vmake AI video enhancer:
Step 1: Upload your footage
Getting started is easy. Simply drag and drop your video into the workspace or upload it straight from your device. Vmake supports popular formats, including MP4, MOV, AVI, M4V, and more, so you can start editing without worrying about compatibility. If you are working with several clips, you can also upload the batch at once for enhancement to save time and keep your workflow moving.
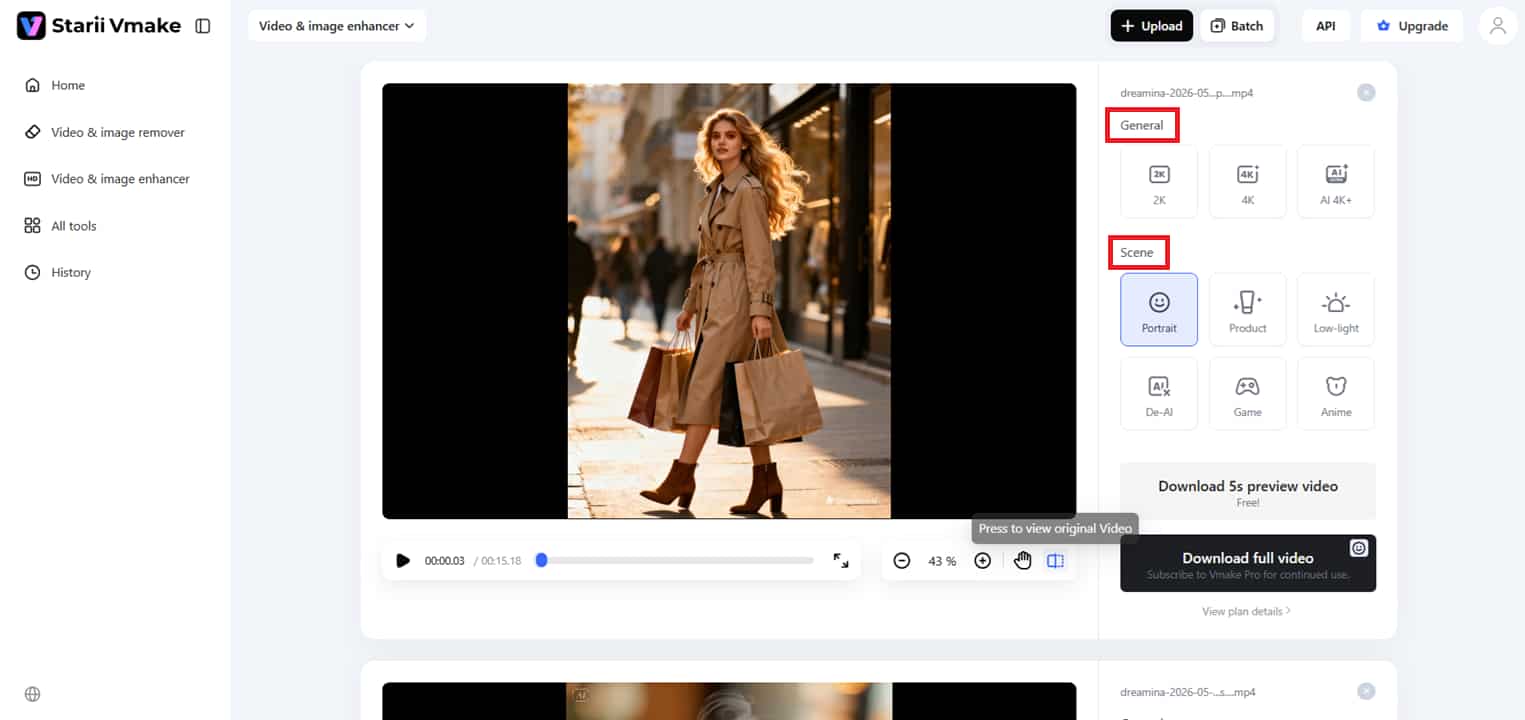
Step 2: Enhance visuals with AI
After uploading your video, the AI will automatically scan the footage and improve the overall visual quality to 2k, 4k, or AI 4k+. It sharpens details, improves clarity, eliminates noise, and makes footage look cleaner and more polished before the color grading stage ever begins. The site also provides a range of enhancing choices for portraits, products, gaming videos, anime visuals, and low-light film for more specific outcomes.
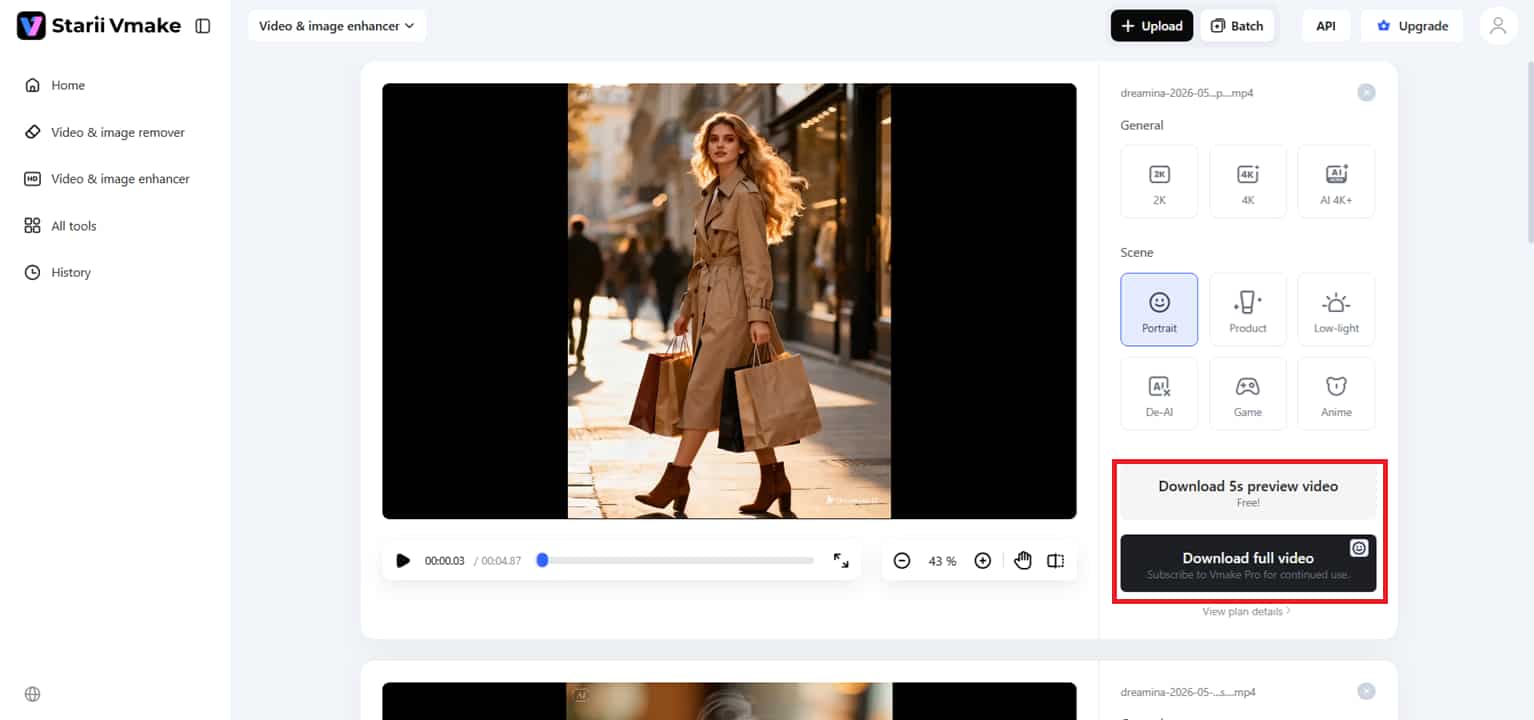
Step 3: Preview and export
Check the final quality and sharpness in the preview of the upgraded version after the enhancement procedure. When you are happy with the results, you may download either a 5-second preview clip or the fully upgraded video. You can then continue editing and color grading with much cleaner, more professional-looking material.
Key features of the video enhancer tool:
-
AI-powered upscaling: Dramatically enhance your video quality and turn low-res samples into razor-sharp 4K footage. The AI smartly reconstructs missing pixel data to make sure everything looks sharp and detailed.
-
Advanced noise reduction: Quickly clean up grainy or "noisy" footage, especially in low-light video. This feature smooths the image's roughness without losing the textures that make it look genuine.
-
One-click detail recovery: Instant recovery of detail in faces, textures, and backdrops. Great for correcting hazy photos or refining fine details lost during filming.
-
Efficient batch processing: Upload and improve multiple movies at once to save time. This gives the entire production a uniform, professional look without processing each clip individually.
-
Tailored enhancement models: Pick from targeted presets that focus on different content types, such as Portraits, Products, Gaming, Anime, and Low-Light situations, for a totally customized touch.
Color grading tips & techniques

-
Grade with intent: Proper color grading isn't only about making your footage appear cool. Each alteration should help the mood, emotion, or message you want to convey to your viewers as they watch the scenario.
-
Use complementary colors: To make your graphics instantly more stunning, pair colors that are opposite each other on the color wheel, such as teal and orange. The contrast naturally draws the eye and can give your footage a more dramatic, theatrical sense. Complementary colors can work well to balance a setting if applied thoughtfully, without becoming too heavy or overwhelming.
-
Lift the blacks: Lifting the blacks basically lightens the darkest regions of your image instead of keeping them completely deep and aggressive. This minor change can make footage look more natural, softer, and closer to a film look. It's a subtle technique typically utilized in movies to give pictures a smoother, more delicate cinematic feel.
-
Control shadows and highlights independently: Shadows and highlights affect a scene's mood differently, so editing them separately gives you greater control over depth and lighting. It also helps to preserve vital information in both dark and bright areas.
-
Calibrate your monitor: Your modifications may look radically different on other devices if your screen is showing the wrong colors. A calibrated monitor allows you to make more reliable editing decisions and maintain consistent colors throughout.
-
Step away and review: Watching a video for long periods can desensitize your eyes to small variations in color. Often, if you stop for a bit, then look at the work again, the issues will be more obvious.
-
Don't over-grade: When editing, it is easy to overdo contrast, saturation, or sharpness. Usually, a small tweak makes for a cleaner, more professional, and visually pleasant outcome.
Common color grading mistakes to avoid
-
Over-saturating colors (looks artificial): When you are trying to make things pop, it's easy to overdo the color grading in footage. But over-saturated graphics typically look false, harsh, and irritating rather than cinematic and refined.
-
Skipping color correction before grading: Many novices apply creative looks before correcting simple problems such as exposure or white balance. If the film is not properly fixed beforehand, the final output may look uneven and difficult to balance later.
-
Ignoring monitor calibration: If your monitor isn't calibrated properly, your footage can look perfect on one monitor, but a completely different on another. Properly calibrated display settings let you make better editing decisions and keep your colors consistent everywhere.
-
Applying the same grade to all footage: Not all the scenes have to be the same. Often, small adjustments to lighting, location, and mood are needed to maintain a genuine, emotionally balanced image.
-
Inconsistent grades across a series or film: The project can feel disjointed and less professional if you continually change your colors from scene to scene. Maintaining a similar visual style will make the entire film or video feel just a little more seamless, polished, and easier for the spectator to remain engrossed.
Conclusion
Color grading is what gives films and images their emotional depth and cinematic mood. It helps creators set the mood, increase visual consistency, and make material more appealing for viewers. The right colors can transform the viewer's experience of a scene, whether you're editing films, YouTube videos, advertising, or social media content. Today, professional-quality editing has never been easier or more accessible, thanks to tools like DaVinci Resolve and Adobe Premiere Pro. However, with the proper workflow, imagination, and expertise, even a simple video may become a visually spectacular story that leaves a lasting impression on viewers.
Looking to get cleaner, clearer, and more polished footage before you dive into color grading? Give Vmake a try. This is indeed the best and easiest-to-use video enhancer tool that boosts video quality with AI-powered enhancements and delivers more cinematic-looking results.
FAQ's
What does color grading mean?
Color grading is the procedure of modifying the colors, contrast, brightness, and tones in a video or photo to achieve a given mood or visual style. It helps content appear more theatrical, emotional, and polished for viewers. Tools such as Vmake can help make the video better before editing. This will result in cleaner, more professional-looking final visuals.
What is the best free color grading software for beginners?
DaVinci Resolve is one of the greatest software programs for beginners because it is a professional application that costs nothing. It is often used for both simple editing and professional cinematic color work. Many creators also use Vmake before it to improve film quality before the grading process.
How is color grading different from using a filter?
Filters often apply a single pre-made effect to an entire image or video with one click. Color grading is significantly more nuanced, allowing producers to manage tones, shadows, highlights, and the overall mood. Tools like Vmake help filmmakers prepare clearer, crisper video, so the final grading results appear more natural and cinematic.
Does AI color grading replace professional colorists?
AI technologies can help speed up editing by automatically correcting colors, exposure, and overall visual balance. They are especially good for newbies, social media creators, and fast editing workflows. Professional colorists are still vital, though, because the human experience and vision required for creative storytelling, emotional tone, and artistic decisions are still important. Tools such as Vmake are best used as intelligent helpers to enhance video quality, saving producers time and improving visual quality.

You May Be Interested

Airbrush Video Enhancer Review 2026: Features, Pros, and Cons

Picwand Video Enhancer 2026 Review: Features & Alternatives

Video Color Correction vs. Color Grading: What's the Difference?
Human Eye FPS: Understanding Visual Limits & Frame Rates
The Psychology of Color in YouTube Thumbnails: The 2026 Masterclass for High CTR
