Video Compression Artifacts: How to Fix, Types and Common Causes
 Ken Dawson2026-05-03 10:00
Shrinking file sizes saves server space and makes streaming possible. That's the main reason the industry relies on video compression. But shrinking files almost always creates video compression artifacts. This damage manifests as sudden pixelation, heavy blurring, or really strange color shifts. Uploading pristine footage to any major platform guarantees some level of degradation. Knowing exactly what causes these glitches and learning how to minimize them—prevents the final cut from looking like a low-resolution product.
What are video compression artifacts?
When software reduces a file's overall footprint, the encoding algorithm strategically discards data it assumes the human eye will overlook. Sometimes the system calculates this perfectly. More often than not, however, it estimates incorrectly and leaves behind distinct digital scarring.
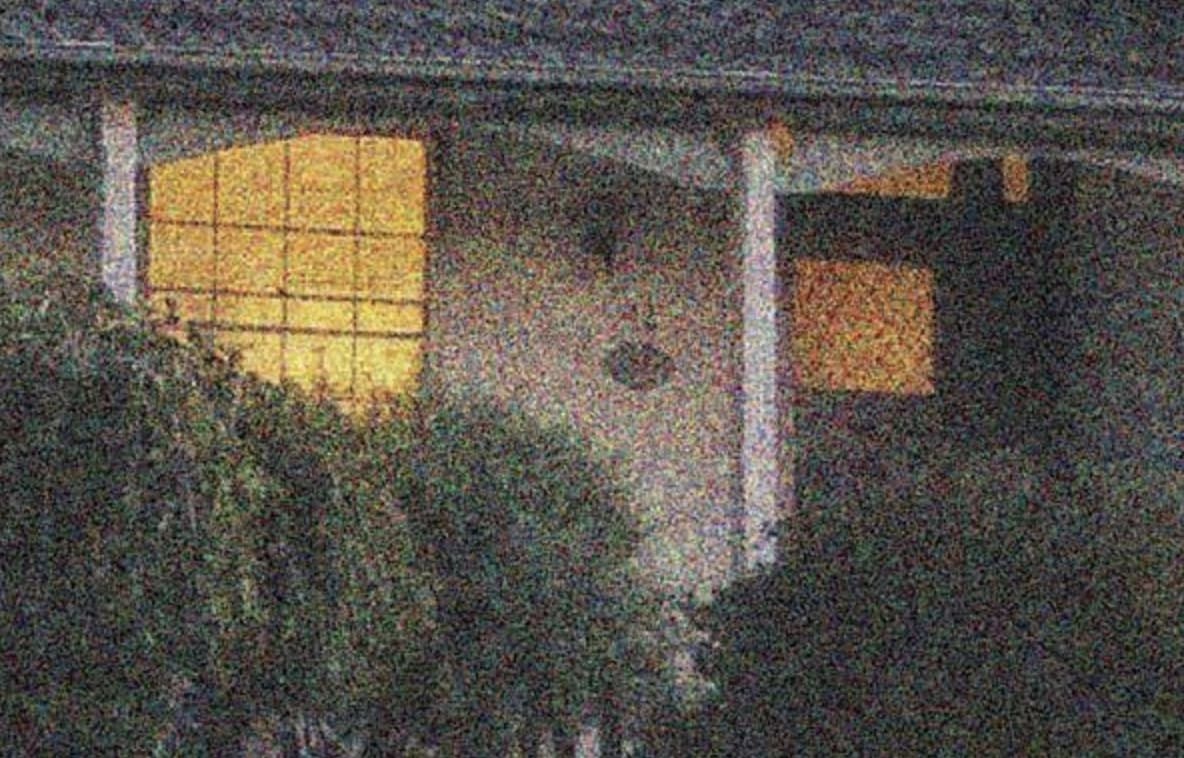
These visual distortions—widely categorized as compression artifacts or simply video artifacts—typically materialize as unnatural blocky formations within the frame. A noticeable fuzziness frequently develops around sharp edges. Deep shadows and low-light environments suffer the most severe degradation, often collapsing into a disorganized, noisy mess almost immediately after processing.
Achieving the complete elimination of these issues remains practically impossible. Major online platforms relentlessly compress incoming uploads to conserve their own server bandwidth. Consequently, digital professionals must learn to mitigate this inherent quality loss, as accepting a certain baseline of visual damage is simply a reality of media distribution.

Types of video compression artifacts
Different types of video compression artifacts affect visual quality in distinct ways. Recognizing these helps in diagnosing and fixing issues effectively.
Blocking (Macroblocking)
Blocking, also known as macroblocking, appears as visible square blocks in the video frame. This breaks everything. The screen turns into Lego bricks. Fast motion starves the bitrate, causing the grid to appear rapidly. Sports footage suffers constantly. Honestly, viewers hate this the most because it ruins the immersion. Fixing severe blocking often blurs the underlying texture too much, sadly.
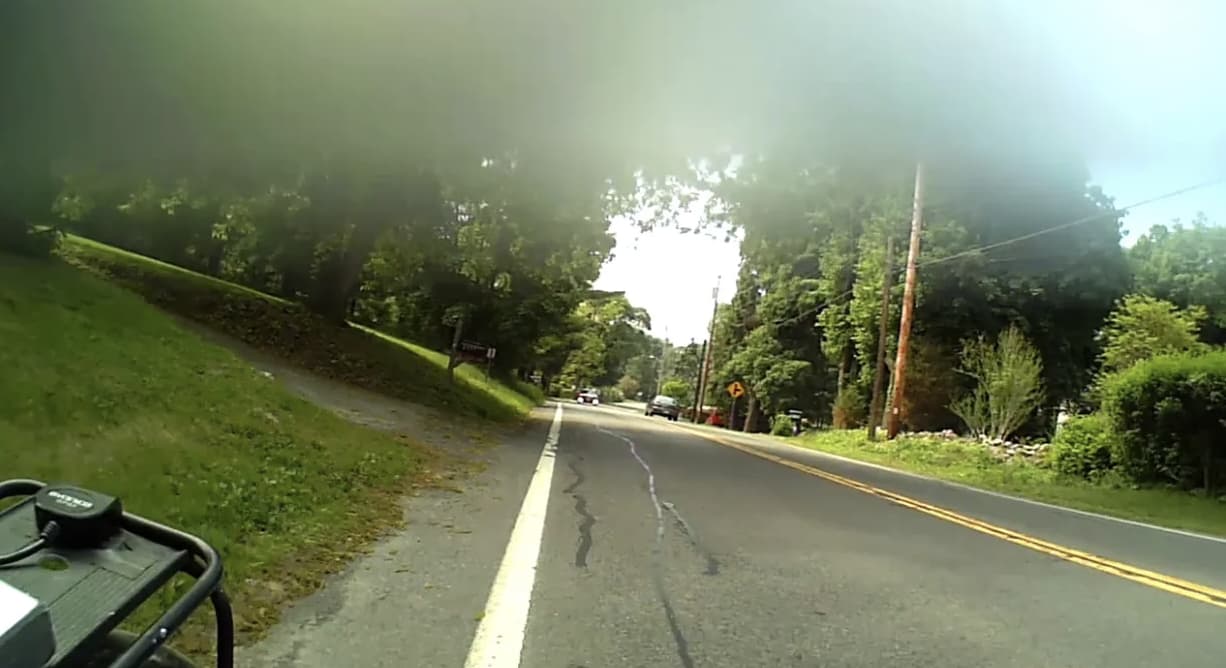
Blurring
Blurring reduces the sharpness of a video, causing fine details to disappear. Your sharp 4K footage suddenly resembles a cheap 2005 webcam. The algorithm just rounds off the details to save space. Phones hide it well. On a big monitor, it's a total disaster. One catch: if the original shot missed focus, no bitrate bump will save those edges.
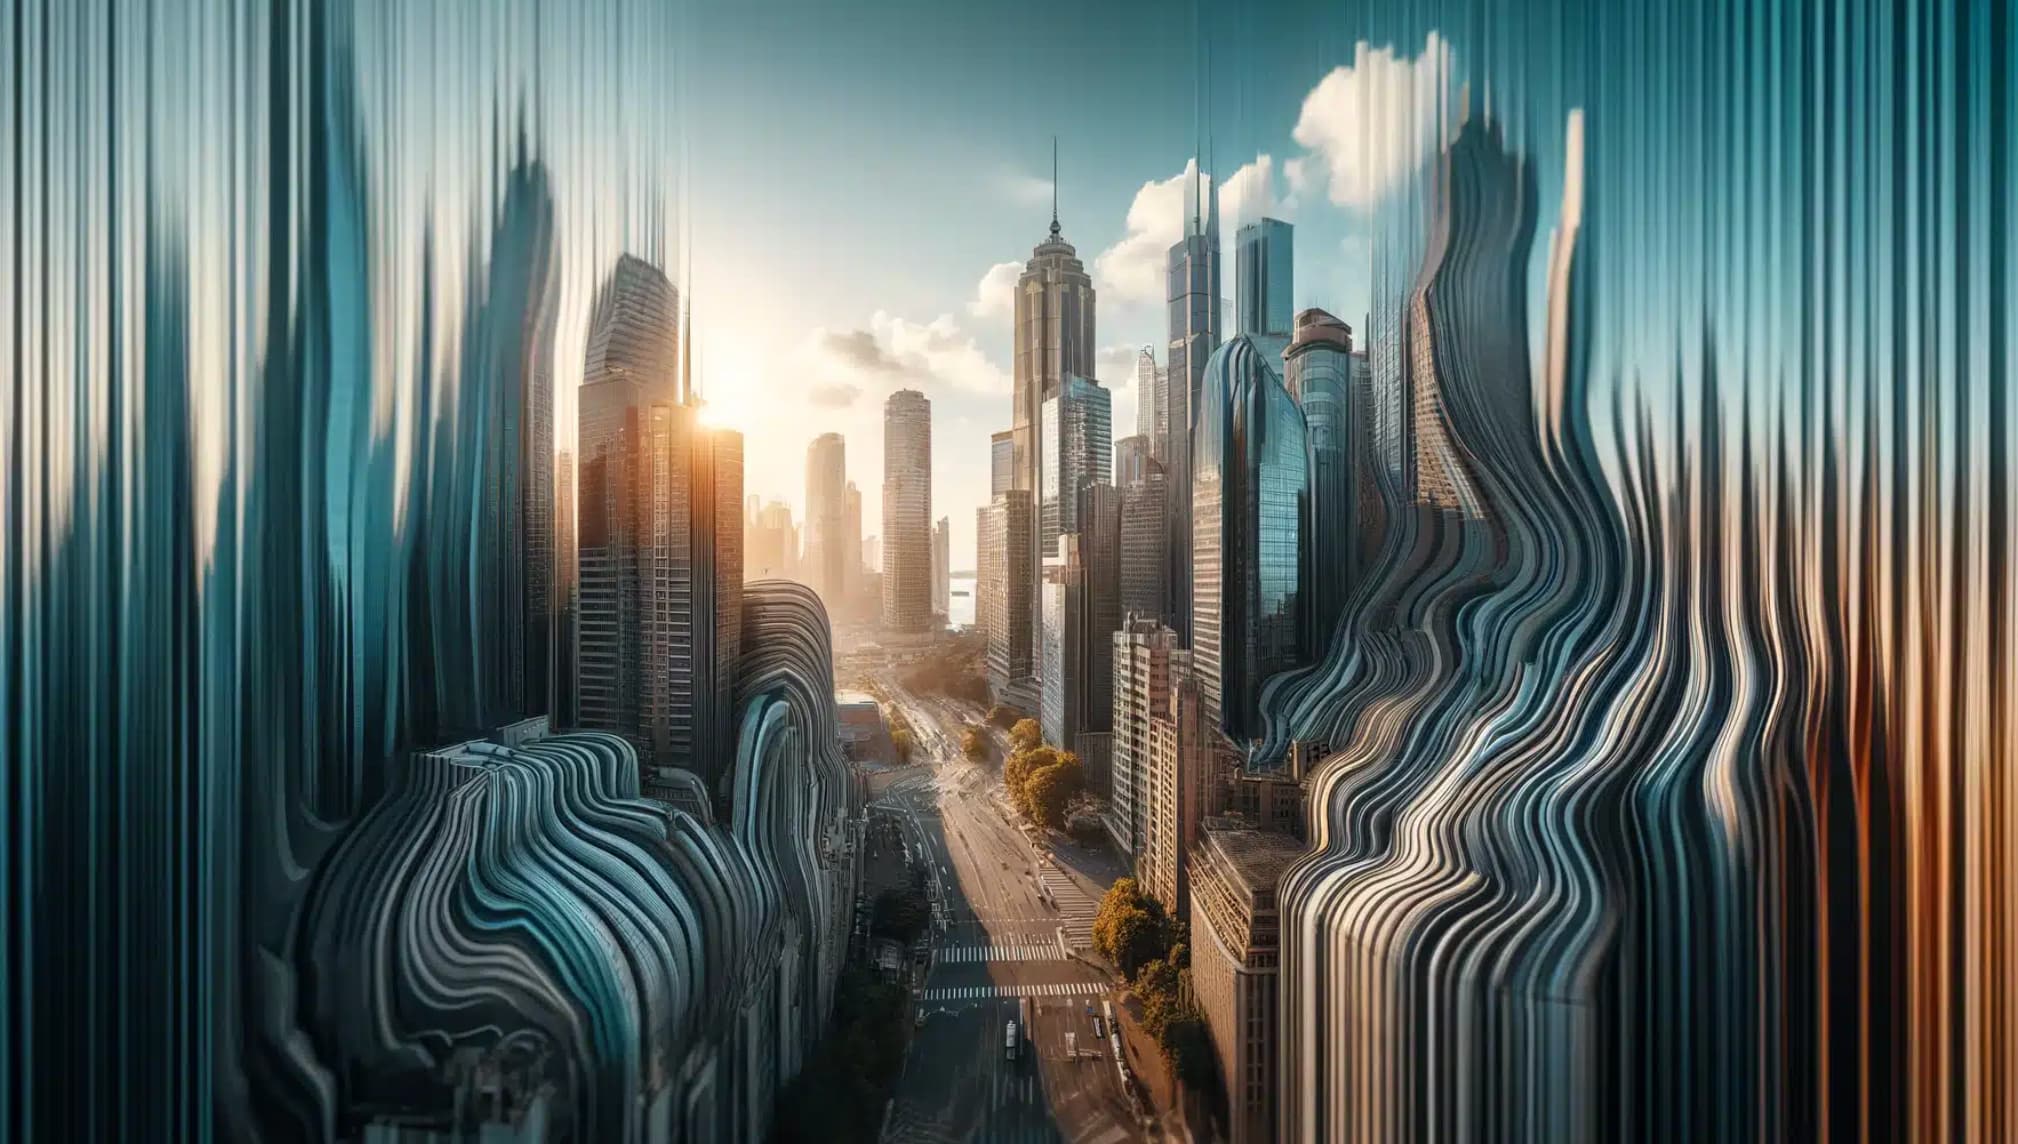
Banding
Banding occurs when smooth color gradients break into visible bands. Look at a sunset in a compressed video. Instead of a smooth fade, you see distinct, ugly stripes of color. That's banding. It's one of the hardest things to fix because the data for those middle colors is just gone.

Ringing
Ringing artifacts appear as faint outlines or halos around sharp edges. Ringing looks like a weird ghost or a halo around the edges of objects. The algorithm tries too hard to keep an edge sharp and ends up creating a digital echo. It's distracting once you notice it. Most basic filters actually make this worse by trying to "sharpen" the ghosting.
Mosquito Noise
Mosquito noise manifests as flickering or shimmering around edges and moving objects. This looks like a swarm of tiny dots buzzing around the edges of people or text. It’s annoying. This is the part most tools get wrong because they mistake the noise for actual detail and leave it in.
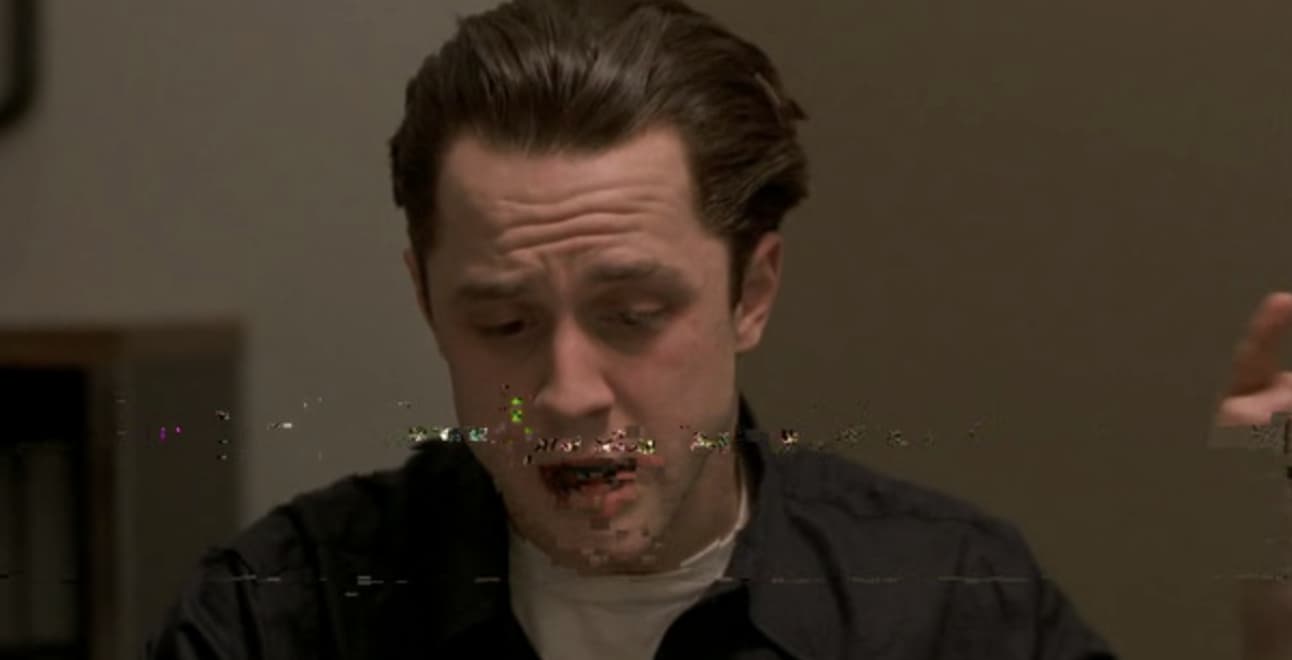
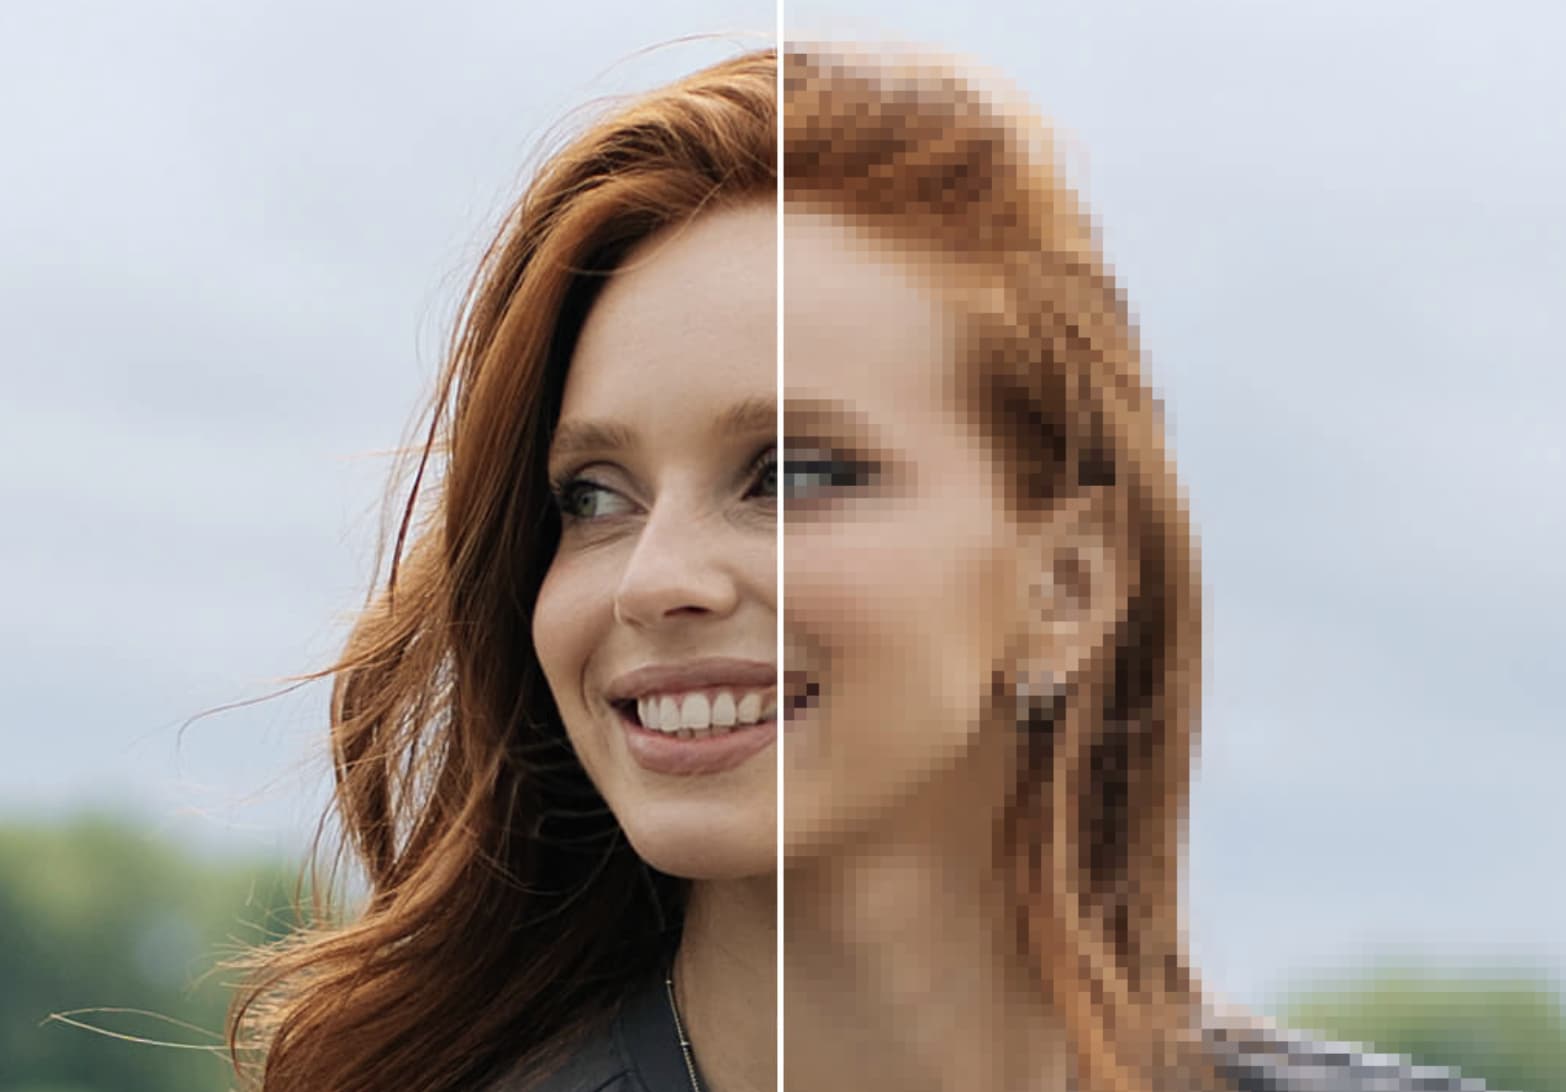
Pixelation
Pixelation is one of the most recognizable video compression artifacts, where individual pixels become clearly visible. Everyone knows this look. Individual pixels become massive and obvious. Resolution was too low. Or the file was crushed too hard.
What causes video compression artifacts?
Several technical and practical factors contribute to the appearance of video compression artifacts:
-
Low bitrate: Bitrate determines how much data is used to encode a video. This acts as the primary offender. If you don't allocate enough data to encode the visual information, the resulting file starves. It's a simple mathematical reality.
-
High compression: Excessive compression removes too much data from the original video. We often shrink files aggressively to conserve server space or bandwidth. You gain storage efficiency. The downside is a severe loss of image fidelity, and this exchange rarely favors the viewer's experience.
-
Encoding issues: Using outdated codecs creates unnecessary distortion. Inefficient software struggles to process complex data during the export phase.
-
Repeated compression cycles: Every time you save, export, or upload a video, it undergoes another round of data loss. It behaves much like making a photocopy of a photocopy. The original clarity degrades progressively until the structural integrity collapses entirely.
-
Streaming platform limitations: One can upload a perfect, high-resolution file. Unfortunately, platforms like Vimeo or YouTube will still apply their own algorithms to optimize it for their servers. It's incredibly frustrating for professionals. One simply can't bypass these platform-level constraints most of the time.
How to spot video compression artifacts?
-
Look for blocky patches in fast motion scenes: Rapid movement triggers this macroblocking effect constantly. The encoder simply can't allocate enough data to preserve fine details when the action gets heavy. Frankly, sports broadcasts suffer the most under low bitrates. It can get distracting.

-
Notice color banding in gradients: Color banding appears when smooth transitions between shades break into visible steps or layers. Watch the sky in a compressed clip. It breaks. A smooth fade turns into harsh, jagged steps. Backgrounds and shadows suffer heavily here. The gradient shatters into separate blocks instead of actually blending together. I find fixing this level of banding incredibly tricky. Heavy correction usually just injects weird digital static straight back into the frame.

-
Identify flickering edges or shimmering: Flickering or shimmering around edges is typically caused by mosquito noise or unstable compression. Unstable compression generates this specific mosquito noise around sharp silhouettes. High-contrast areas make the jitter glaringly obvious. Don't bother looking for this in a paused frame. The shimmering really only reveals itself during active playback.

-
Check for blurred textures and lost details: Blurring occurs when compression removes fine textures to reduce file size. Aggressive encoding strips out fine textures to drop the file size. Surfaces that should stay sharp—like hair, intricate fabrics, or text—suddenly look soft or completely undefined. It's a frustrating reality that lost texture data is almost impossible to fully recover.

-
Spot unnatural outlines (ringing/haloing): Ringing artifacts create faint outlines or halos around objects, particularly along sharp edges. Ghost-like halos appear around objects due to ringing artifacts. The algorithm attempts to force contrast along sharp edges while simultaneously dropping data. These specific visual distortions pull focus away from the subject.
Vmake AI: A great tool for handling video compression
Addressing video compression artifacts manually can require advanced editing knowledge and significant time investment. AI-powered tools simplify this process by automating detection and correction while maintaining visual consistency.
Vmake AI video enhancer looks at every single frame to find blocking and lost details. It reconstructs missing visual information to restore sharpness. The system works pretty well on low-quality clips, though heavily compressed dark scenes still give it trouble. You don't need a background in video engineering to get decent results out of it.

Key AI capabilities
-
De-blocking: Smooths out the macroblocks. It blends the grid lines back together so motion looks less fragmented.
-
De-noising: Kills the grain and unwanted noise in the picture. Flashing pixels disappear. Dark footage cleans up nicely.
-
Detail restoration: Reconstructs lost textures and fine elements using AI-based pattern recognition. This helps recover sharpness and depth, making the video appear closer to its original quality.
-
Upscaling: Enhances video resolution by generating additional detail instead of simply enlarging pixels. This produces clearer, higher-resolution output with reduced pixelation, particularly useful for low-quality videos.
-
Color correction and enhancement:Adjusts brightness, contrast, and color balance to correct inconsistencies caused by compression. This ensures more accurate tones and improves overall visual consistency without oversaturation.
-
Motion stabilization and refinement: Smooths jittery or uneven motion caused by compression artifacts. This improves playback quality and ensures more stable, natural-looking movement in dynamic scenes.
How to remove video compression artifacts with Vmake AI
Relying on software for visual cleanup saves hours. Vmake AI processes the data and exports cleaner files without needing constant babysitting. Miracles aren't on the menu. A heavily degraded clip won't suddenly look like pristine cinema. Code has hard limits.
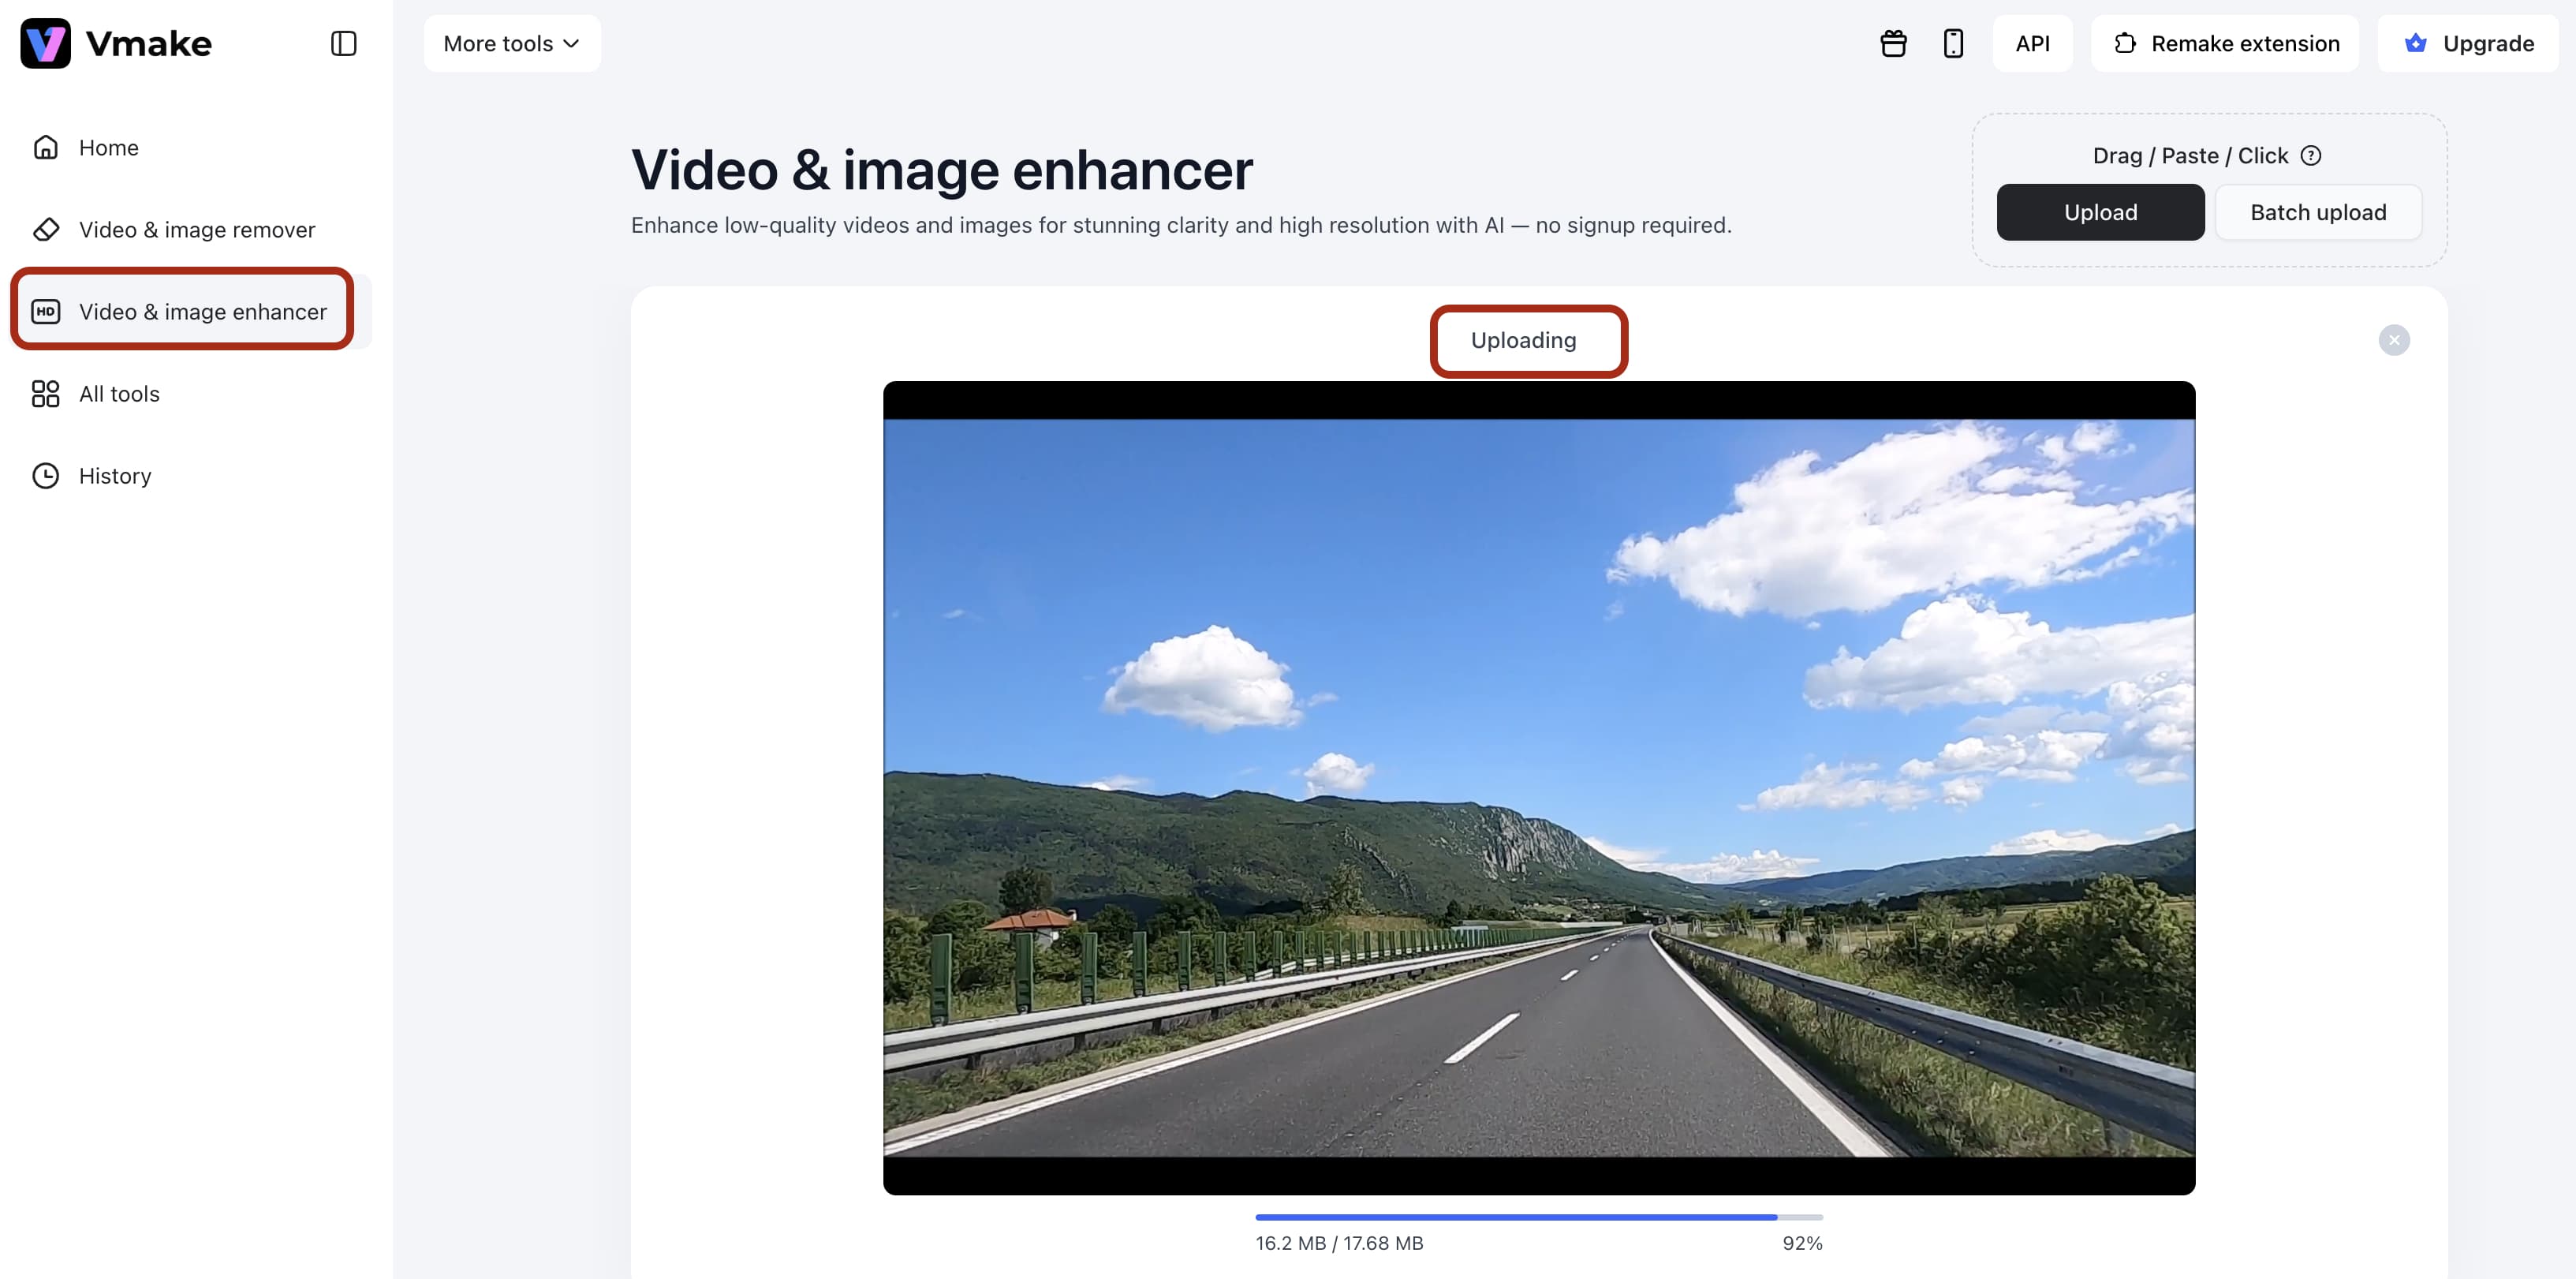
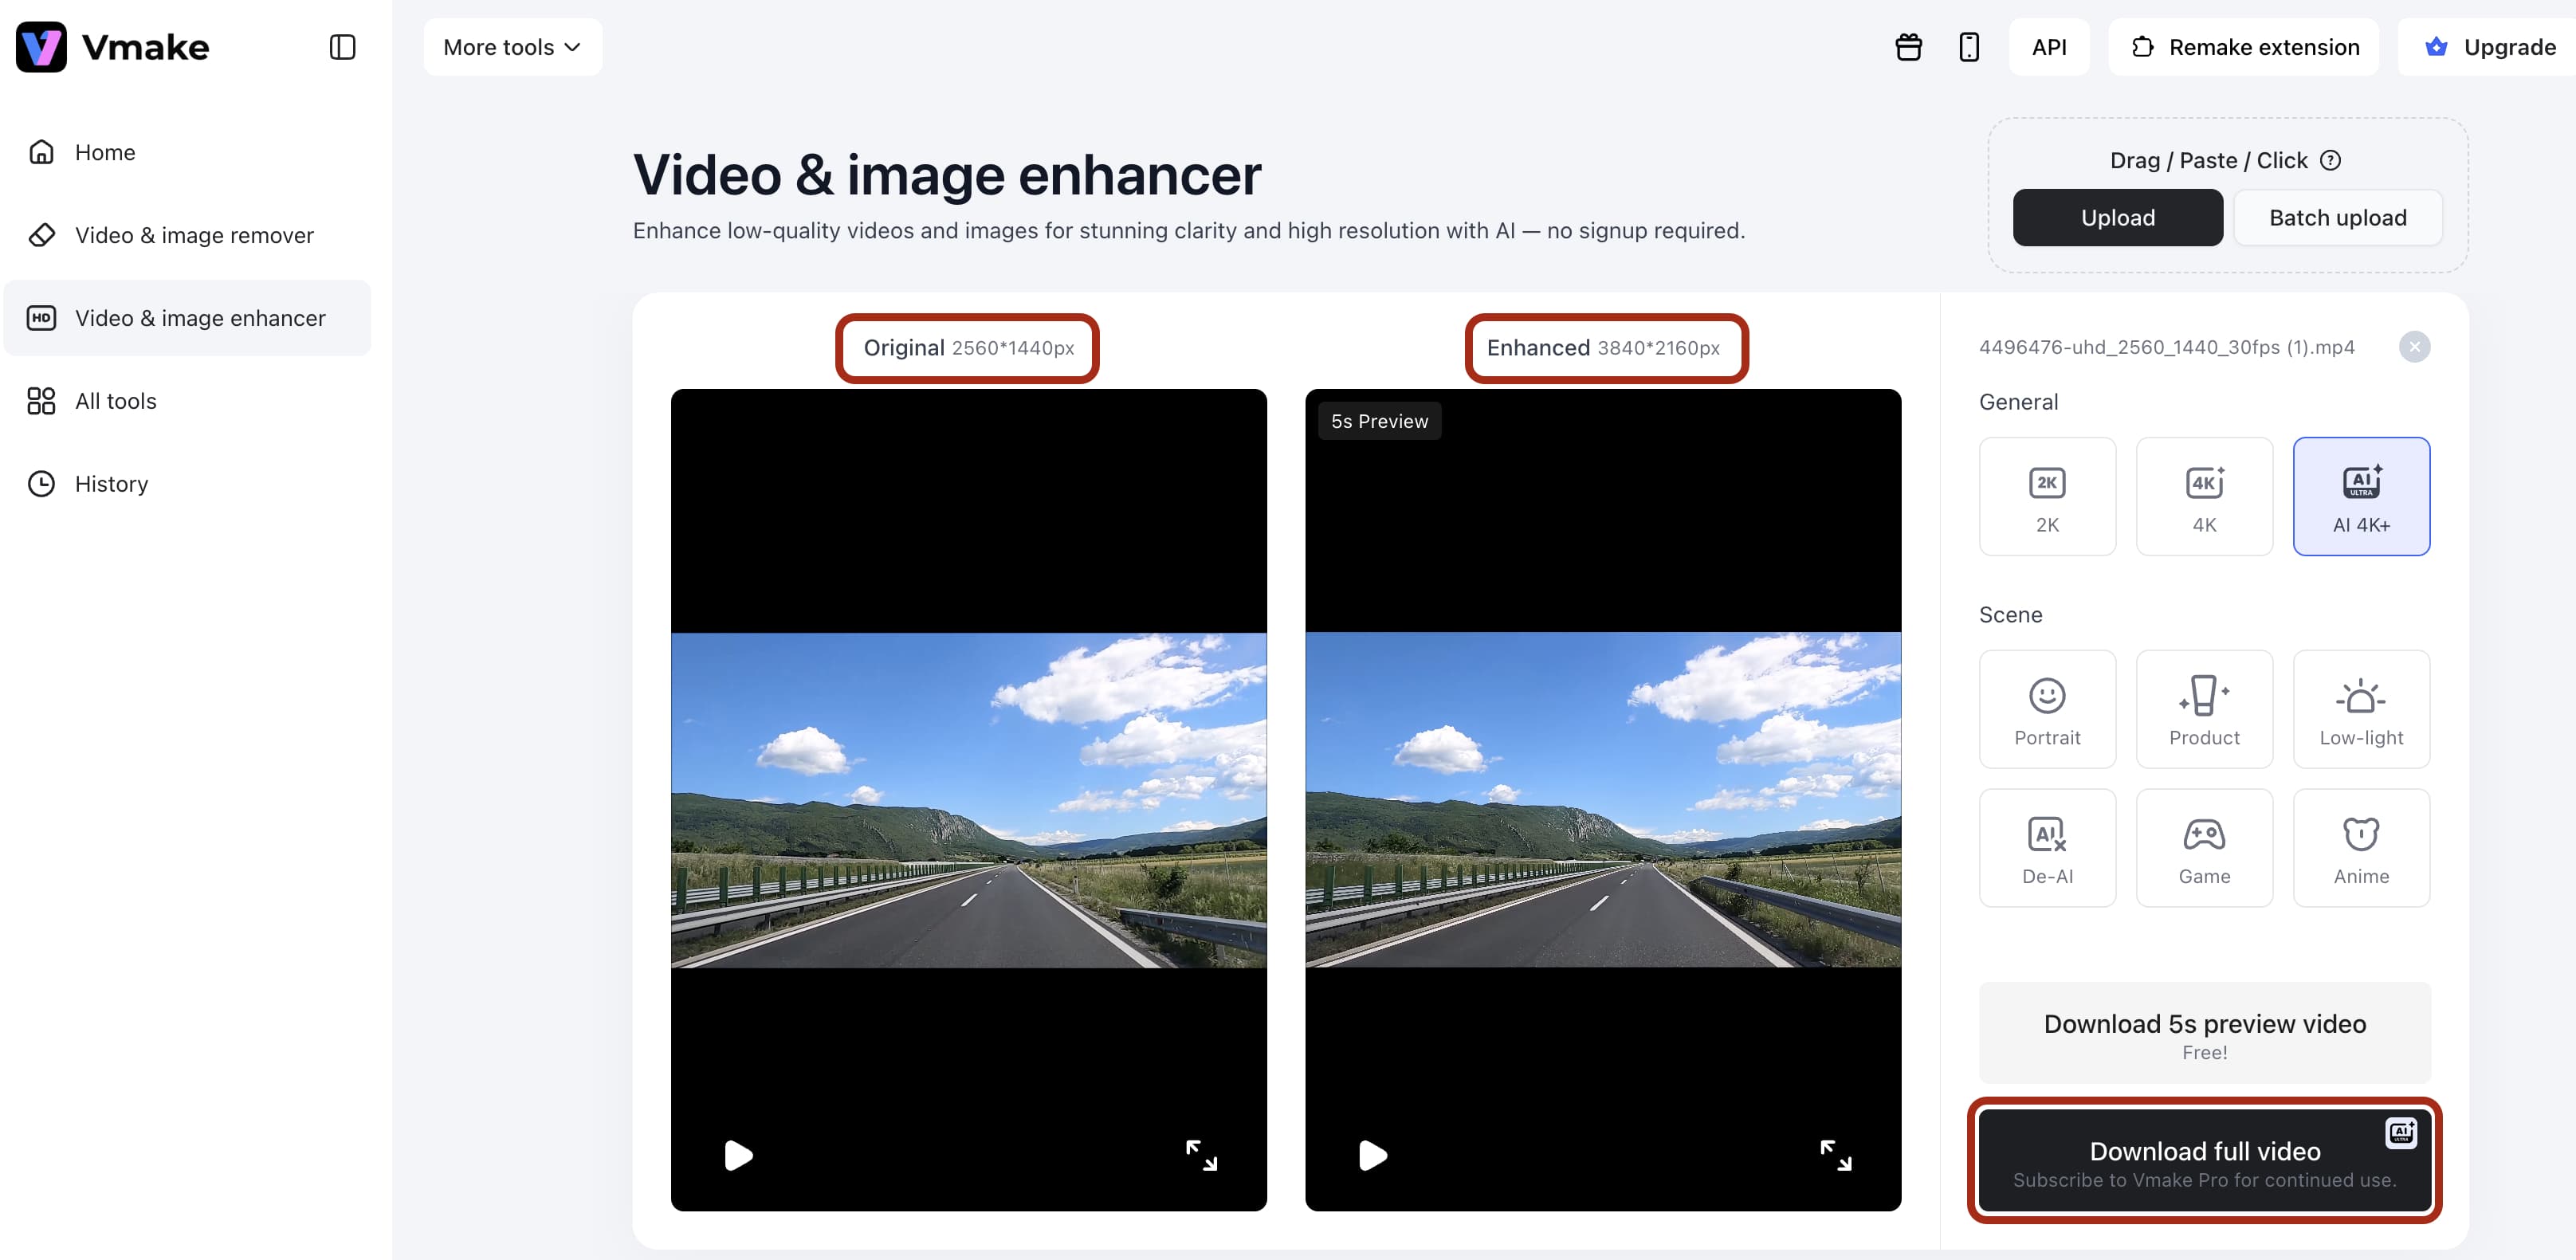
Step 1: Upload your video
Select the "Upload" option and choose the video file with visible compression artifacts. The system accepts most standard formats. Once uploaded, the system prepares the video for detailed frame-by-frame analysis.

Step 2: AI detects compression artifacts automatically
The engine analyzes the footage entirely on its own. It identifies macroblocking, noise, blurring, and color inconsistencies frame by frame. Targeted corrections like de-blocking and detail restoration apply automatically. Skipping the manual tagging phase saves hours of tedious work.
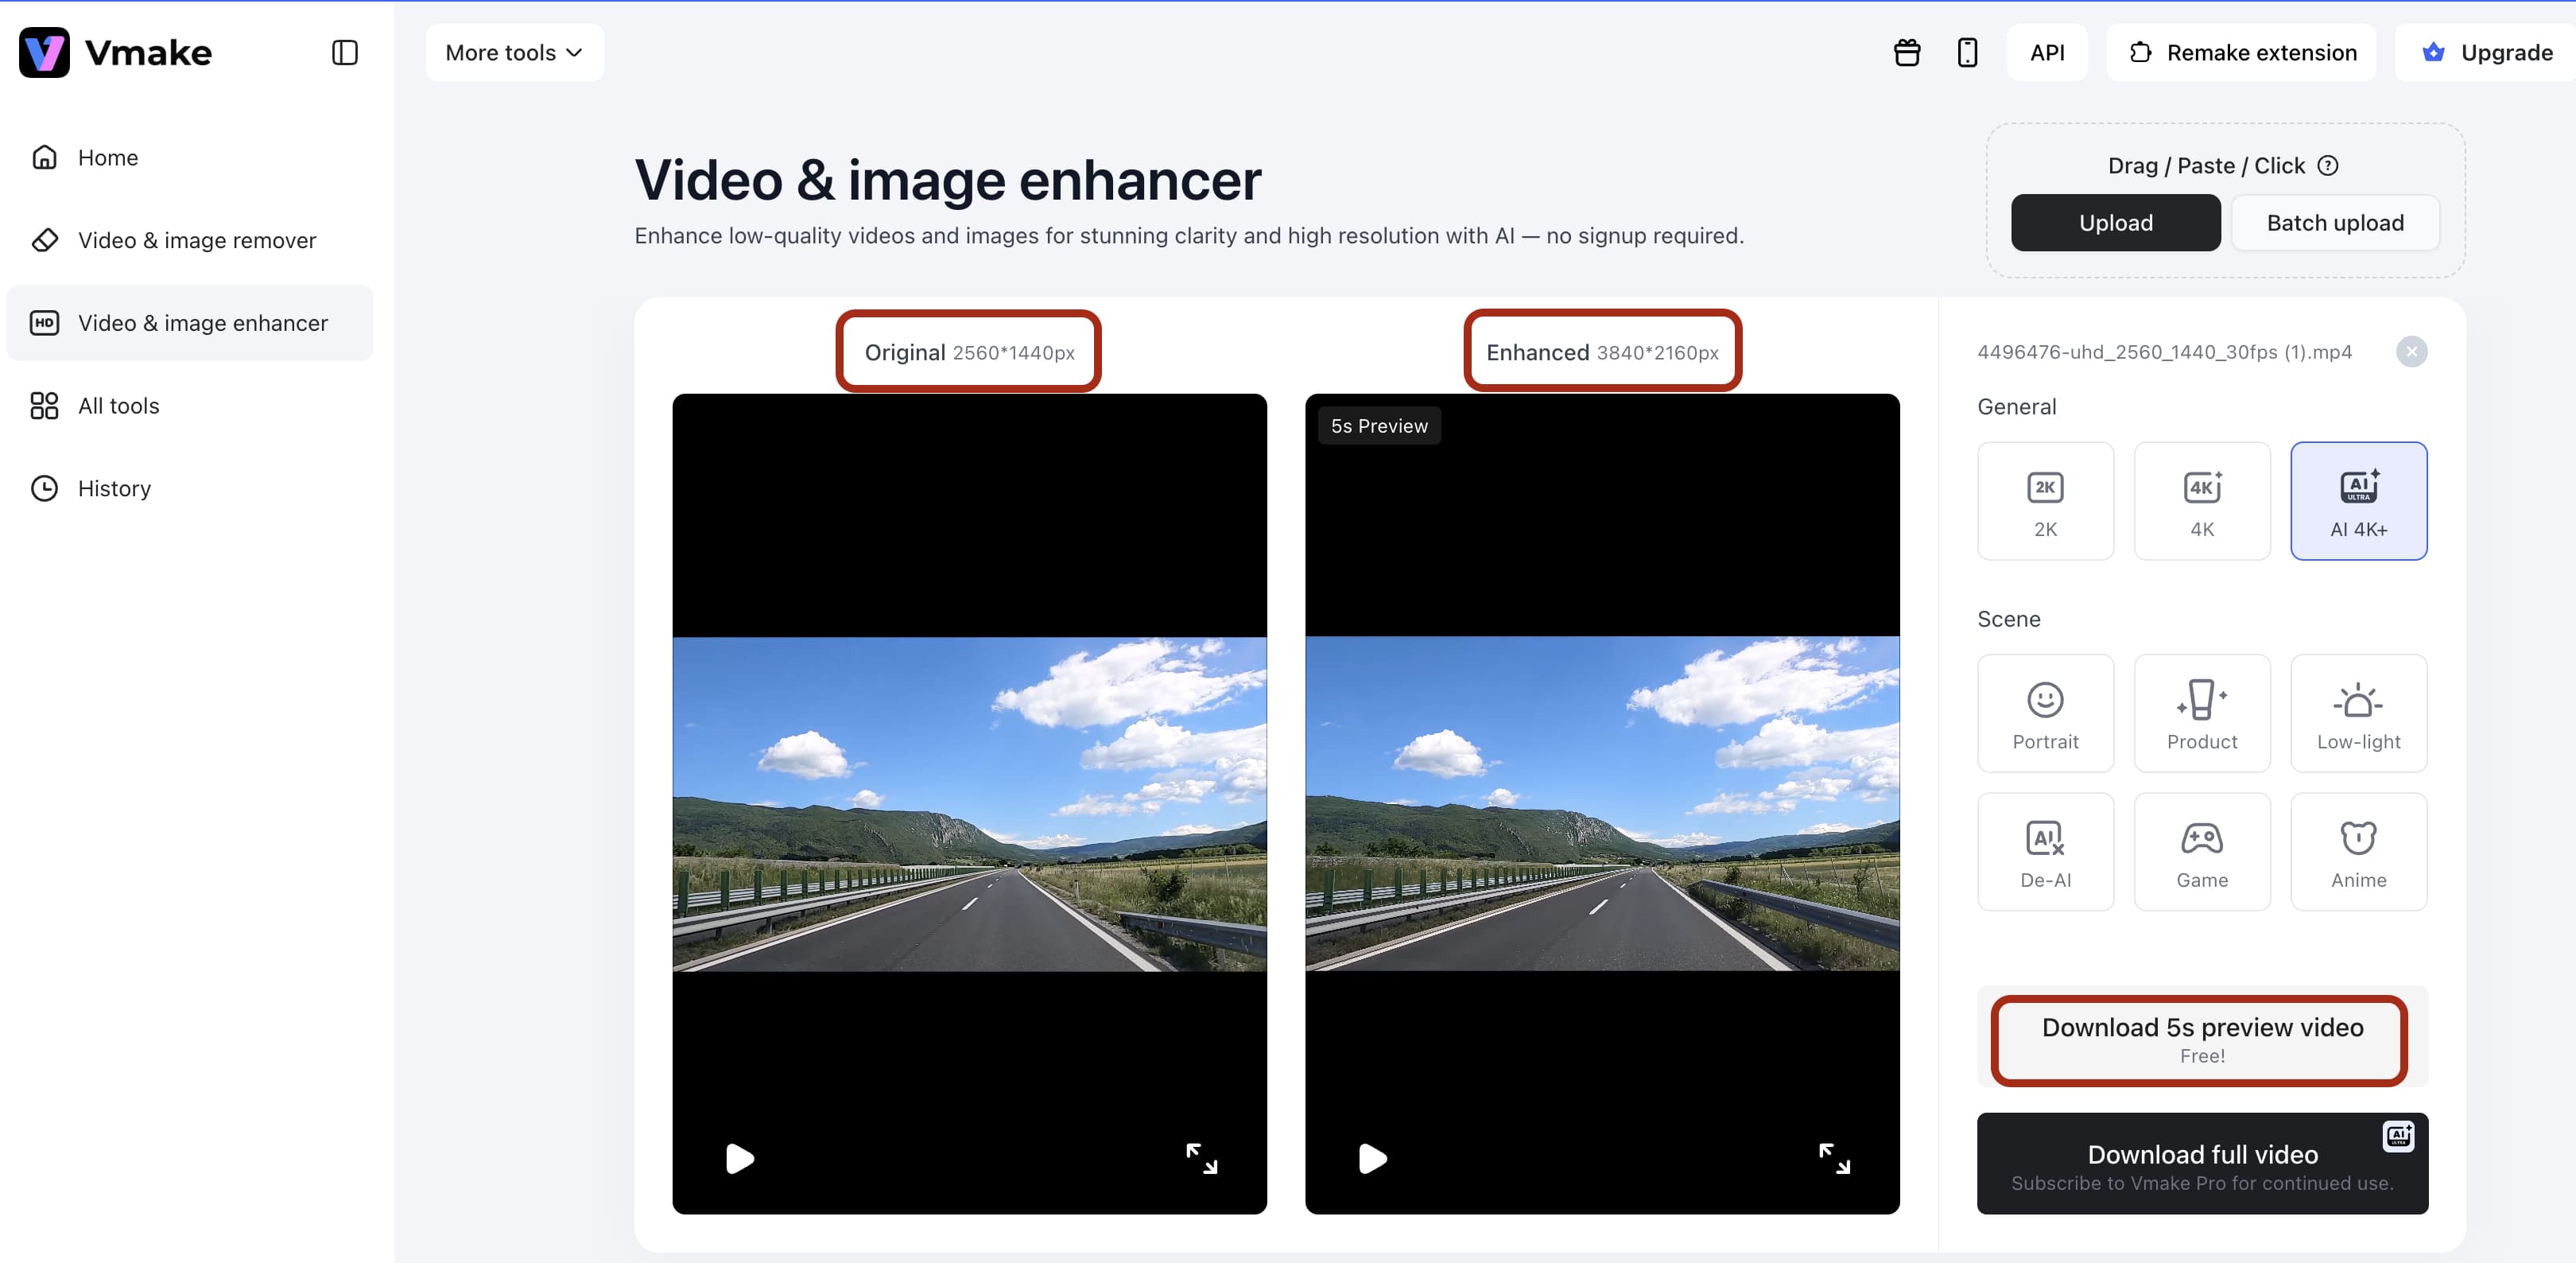
Step 3: Preview and optimize enhancements
Check the "Preview" option to compare the new output against the original clip. You'll see the improvements in sharpness immediately. Adjust the settings if the initial pass didn't quite hit the mark. Sometimes the automated smoothing goes slightly overboard on human faces, so keep an eye out for that. It requires a delicate touch.
Step 4: Download high-quality video output
Select the "Download" option to export the processed video. The platform generates a high-quality version with reduced video compression artifacts and improved visual clarity. The final file is optimized for sharing, publishing, or further editing.
Best practices to prevent video artifacts
Preventing video compression artifacts is often more effective than correcting them after they occur.

-
Shoot in higher resolution: Capturing raw footage at a higher resolution preserves critical visual data. It blunts the overall impact of compression down the line. It's basic math.
-
Use proper lighting: Well-lit environments yield cleaner details. Bright scenes compress far more efficiently than moody, low-light setups.
-
Export with optimal settings: Picking the right bitrate and codec prevents unnecessary quality loss. Don't just rely on default presets. Adjust them manually based on the scene.
-
Avoid excessive compression: Every round of encoding damages the file. Minimize re-saving to protect the structural integrity. The digital death spiral is very real. It breaks the footage down fast.
-
Choose the right format for platform: Match the strict upload requirements of your target platform. Submitting the exact format they prefer helps bypass a second, highly destructive round of server-side compression. People often wonder why platforms don't just handle high-res files properly in the first place.
Conclusion
Video compression artifacts are a common outcome of reducing file sizes for storage and distribution. Glitches ruin good footage. Shrinking files always carries a serious risk of introducing ugly noise. Automated tools fix the worst of the damage. Original source quality still dictates the final result, regardless of the post-processing applied. Maybe one day bandwidth limits won't dictate visual fidelity at all.
FAQs
-
What are video compression artifacts?
Video compression artifacts are visual distortions that show up after you shrink a video file. Blurring, pixelation, and weird color bands happen because the system discarded visual data to save space.
-
What causes compression artifacts?
Compression artifacts are typically caused by low bitrate, aggressive compression, or repeated encoding. Low bitrates cause the most damage. Encoding the same clip multiple times or aggressively crushing the file size will also wreck your footage. Social media platforms ruin video quality by applying their own heavy compression during the upload phase.
-
How to fix video blocking artifacts?
Always export your initial file at a much higher bitrate. If you've already lost the original quality, AI-driven software can smooth out the grid patterns. You might lose a tiny bit of background texture in the process, however.
-
Can AI remove compression artifacts?
Mostly, yes. Software like Vmake AI identifies visual distortions and cleans up the noise automatically. Just remember that no algorithm can invent high-resolution details that were never recorded in the first place.
-
What is the best tool to fix video artifacts?
One would want something fast that doesn't require a steep learning curve. Vmake AI does a great job cleaning up glitches without forcing you to manually tweak every single frame.
-
Does compression always reduce quality?
Technically, it does. You're always losing some data. But if you balance your export settings correctly, the human eye won't catch the difference. Push the limits too far, and the damage becomes impossible to ignore.

You May Be Interested

5 Tools to Create Eye-Catching Visual Hooks for Short Videos

6 Best Free AI Tools for Video Color Correction in 2025

2026 Topaz Labs Video Enhancer: Hands-On Review

How AI is Revolutionizing E-Commerce Product Photography and Videos?
