How To Create 3D Model AI Figurines With AI Tools: Step-by-Step Guide for 2025
 Ken Dawson2025-09-16 14:22
In the rapidly evolving world of digital creativity, making 3D models using AI has become a game-changer. AI can help users to generate detailed prompts from simple ideas and then convert those prompts into creative high-quality 3D figurines.
Do you also want to create a 3D model for yourself or give something special to your loved ones? This article dives deep into the process of generating prompt, to using cutting-edge AI technology for creating 3D models, and then printing it flawlessly. Let’s get started!
What is a 3D Model AI Figurine?
The concept of 3D model AI figurines is getting popular all around the world ever since the release of Google’s latest AI model, Gemini 2.5 Flash image. It is a digitally created small hyperrealistic figure generated or enhanced using artificial intelligence. The figure is first designed with AI tools like Gemini and then undergoes 3D printing to be kept as a realistic mini-avatar.
The use of AI in 3D printing has revolutionized 3D printing by allowing more customization, providing better accessibility, and making the whole process quicker. Because of its precision and cost-effectiveness, the use of AI in 3D printing is growing significantly. According to the Research and Markets’ report, by 2029, it will grow to $12.55 billion at a compound annual growth rate of 39.6%.
This growth is attributed to efficiency and the increasing demand of custom-made products in entertainment, gaming, printing, and many other industries. Industry Arc mentions that it is estimated for the 3D printing industry to surpass $118.0 by 2030 due to increasing investment by the government in 3D projects. It is because the hyperrealistic printed models can prove highly useful in making prosthetics and parts of machines for international space projects.
Real-world user experiences highlight how AI is producing a huge positive impact for creating 3D figurines. One satisfied Reddit user mentioned the use of Nan Banana AI technology to create a figurine of his beloved pet. Even with zero knowledge of 3D modeling, he could pull it off perfectly thanks to artificial intelligence technology.
A 3D model hobbyist, who found it very difficult to learn 3D modeling software such as Blender, could easily build a mini avatar through an AI tool. This is evidence that AI did not only do things quicker but made it possible for many hobbyists and professionals to share their creativity more effectively.
Thrilled to create your own 3D avatar and fill up the collection of your favorite characters without shelling out a significant amount? The next sections will guide you thoroughly about creating captivating 3D models using AI tools and some insights on getting the best results.
How 3D Model AI is Revolutionizing Custom Figurines in 2025?
By 2025, 3D model AI technology has revolutionized the industry of custom figurines to a great extent. With AI producing highly customized, professional-grade miniatures has become more convenient than ever before. Widely used AI platforms such as Google’s Nano Banana provide easy-to-use interfaces for users to import images or enter text prompts to generate tailor-made models without much technical expertise.
It has reduced the time required for manual 3D sculpting and enabled quick and effortless making of unique collectibles for personal and commercial use. This democratization fuels a surge in creative self-expression and novel business ventures offering on-demand figurine services.
Benefits of Using AI for Creating 3D Model Figurines
1. Faster Turnaround
Use of AI in 3D model creation has improved the speed of the entire process by providing automation for the work that traditionally has been labor-intensive. The sculpting of a 3D figurine using a hand tool can take hours to days. In contrast, AI can quickly turn text or image prompts into the model within seconds.
2. Cost Savings
Using AI also reduces the cost by eliminating or minimizing the need to buy licenses for expensive manual editing tools, hiring specialized artists, and big teams. Moreover, the AI-driven tool creates the designs with more accuracy which reduces the material wastes associated with trial and error 3D model sculpting. It saves both money and resources.
3. Personalization
AI enables customers to create hyperrealistic figurines in their own style and preferences. With simple prompts, you can create your own personalized characters, tweak their poses, clothes, and accessories to your desired perfection. Such democratization of 3D design promotes creativity and freedom of personal expression.
4. Versatality
Existing AI 3D modeling software supports varied styles ranging from realistic miniatures to fantasy characters. They design models that are compatible with different 3D printers and animation tools. This allows designers in various industries, such as video games, entertainment, and advertising, to easily integrate AI-solicited figurines into their workflow.
5. Easy to Learn
Unlike the traditional 3D modeling tools and softwares, AI-assisted creation is a user-friendly process. From crafting prompts to making a whole 3D avatar, Ai can assist you in everything. This makes 3D modeling simple, easy-to-learn, and interesting. As there are no steep learning curves, this lowers the barrier for artists, hobbyists, and businesses who are new to 3D design.
Best Free AI Tools for Creating 3D Model AI Figurines
Here’s a detailed comparison of the best free AI tools that offer both text-to-3D conversion and image-to-3D conversion.
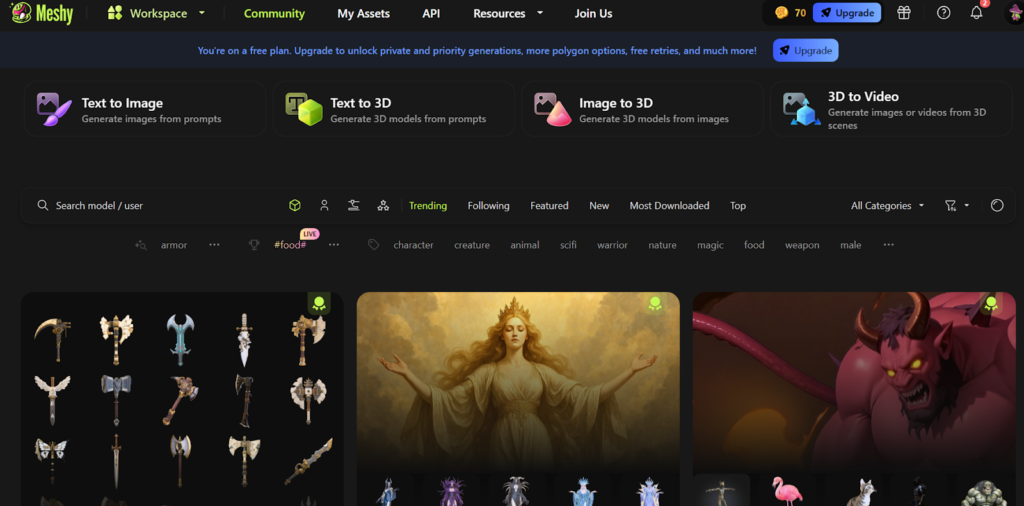
1. Meshy AI
Meshy AI is a powerful AI tool that can help you create 3D models within a few minutes. It is a multilingual model that offers diverse art styles with more than 500 game-ready animated presets. With smart remesh and automated rigging features, you can easily balance details and create high-quality models.
It also supports PBR textures like diffuse, metallic, and roughness. On top of everything, it can work on more than 50+ 3D modeling tasks at once.
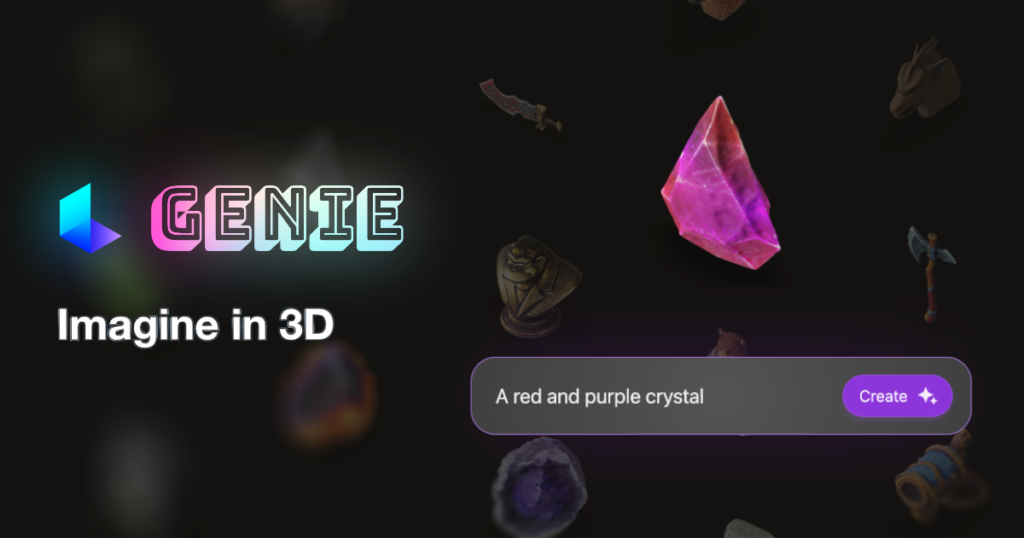
2. Luma Labs AI
Luma Labs AI gives you the freedom of bringing your favorite anime characters and avatars into reality with just a few simple prompts. Its AI model, Genie, is like a wish-granter in the world of technology. You give your prompt and it will magically create a 3D model within seconds.
You can download the model as it is or the tool also provides you with customization options to adjust the settings according to your needs. Moreover, it is accessible on both iPhone and web.
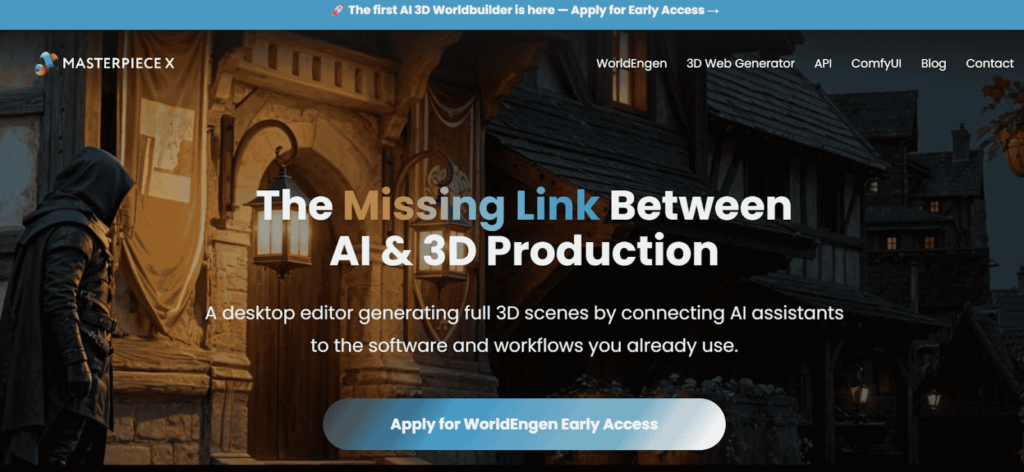
3. Masterpiece X
Masterpiece X is featured by many big technology companies like Forbes and NVIDIA. This web app uses curated AI models to produce high-quality output. You can generate anything from animals to realistic avatars or even other objects by providing simple text prompts.
The tool provides access to its community library that features pre-made 3D models. You can use these models, remix them in VR, and sculpt them to your preferences.
4. 3D AI Studio
3D AI studio can help you turn complex tasks into easy workflows for free. Chosen by professionals working at international companies like Unity, Epic Games, and Radai, the tool uses advanced AI to convert text and image prompts to 3D within seconds.
It features Automatic remesh feature to improve efficiency and accuracy in designs. You can also access its big 3D library to get inspirations about your 3D figurine.
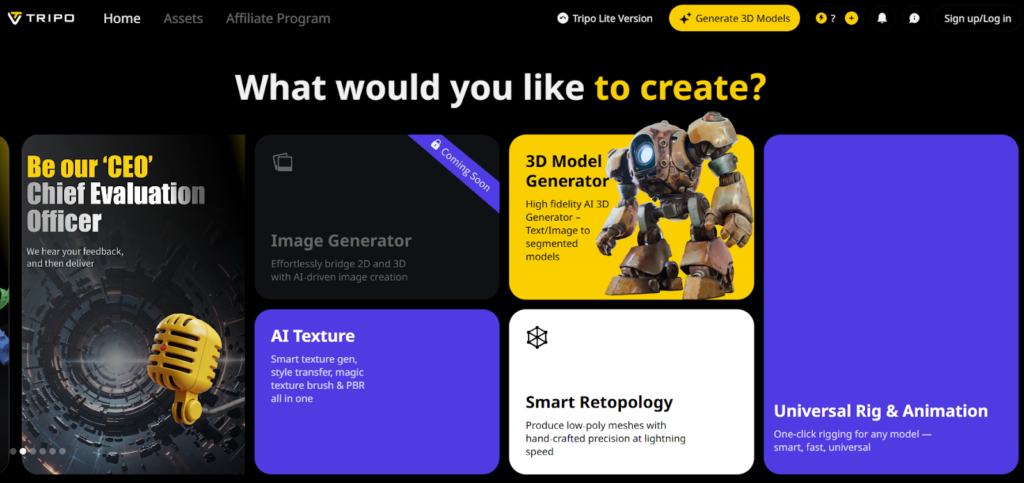
5. Tripo AI
Lastly, you can try Tripo AI. This high fidelity 3D AI generator generates the model in segments. The ability to edit each segmented part separately allows precise control to minimize errors and enhance accuracy.
It offers multi-language support thus making it easier for users to provide prompts in their native language. Moreover, all the projects are stored in a cloud-based storage so that users can get access to their data from anywhere and any device easily.
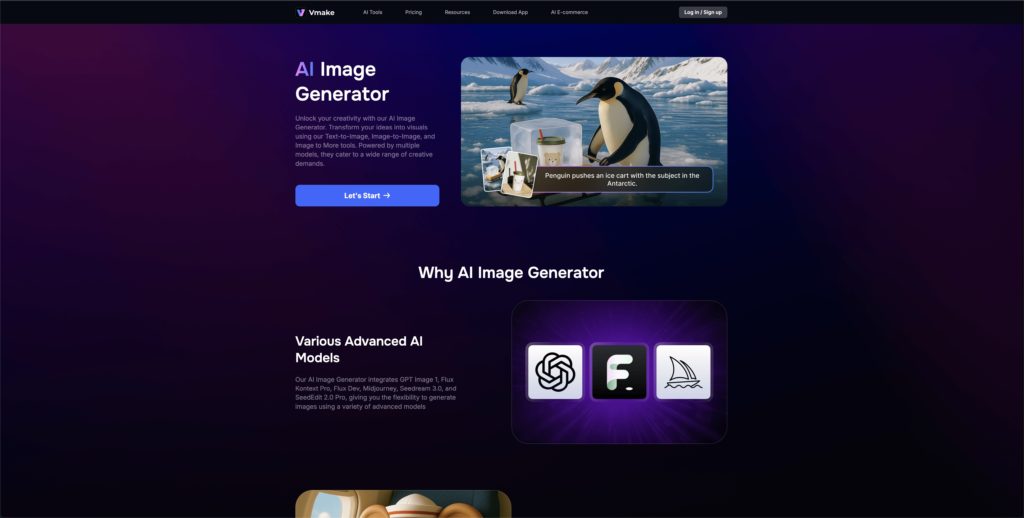
6. Vmake AI
You can also use Vmake AI image generator to create the perfect model for your 3D figurine. This free AI tool has a user-friendly interface that even children can easily use to generate their favorite 3D avatars.
It is integrated with several generative AI technologies including Google’s Nano Banana, GPT image 1, and Flux Dev. With each technology, you can experiment and achieve different outputs to get the results that fits perfectly with your expectations.
Comparison Chart of Best Free AI 3D Model Generators
| Tools | Free Credits | Best For | Export Formats | Pros | Cons |
| Meshy AI | 100/month | Realistic figurines, texturing | FBX, GLB, OBJ, STL, 3MF, USDZ, BLEND | Fastest tool, 500+ animation presets. | Free users have Limited priority in queue |
| Luma Labs AI (Genius) | Unlimited | Fantastical characters | OBJ, FBX, GLB, USDZ, and BLEND | Generates photorealistic 3D models, Supports video-to-3D capture | Genie lacks advanced mesh editing |
| Masterpiece X | 250 free credits | quickly and intuitively create 3D models | GLB, FBX, or USDZ | Text-to-3D with NPL integration, User-friendly for beginners |
Struggles with texture details |
| 3D AI Studio | No free credits | Image-based portraits | FBX, OBJ, STL, GLB, DAE (Collada), USDZ, and USDC | User-friendly for quick prototyping, Supports multi-format 3D export | Tends to slow down sometimes |
| Tripo AI | 300/month | Multi-image inputs | GLB, FBX, OBJ, USD, and STL | Fast, has auto-rigging features | tends to fill hollow sections which reduces mesh accuracy |
| Vmake AI | 5 free credits | AI fashion model generation | JPG | Easy-to-use, versatile image generation models | Watermark on free exports |
Step-by-Step Guide to Generating Your First 3D Model AI Figurine for Free
With the free AI tools that can generate 3D models, creating a customizable action figurine has become easier and affordable. This step-by-step guide offers a full free-only path, that is often overlooked by others, to help you create a perfect 3D model. From rough sketching to print-ready figurine, we will guide you thoroughly.
Step 1: Brainstorm and Craft Your AI Prompt for Generation
First you need to craft a proper prompt for the AI tool to generate the model exactly according to your requirements. Provide a general description first and then add details including color, texture, and an overall vibe.
For example, if you want an action figure of yourself, try this: “Generate a 3D figure of a real human as a 6-inch figurine. The model should have realistic facial features and expressions, human-like skin and hair texture. The skin tone should be pale with medium length slightly messy brown hair. It should have a relaxed pose with casual modern style clothing. It should be STL ready with a printable mesh”
Detailed prompts like this can help the AI understand your exact needs and process information accordingly.
Pro tip: You can use ChatGPT and other similar AI tools to generate a detailed prompt by giving them a rough idea about what you want.
Step 2: Generate the Base 3D AI Model with Free AI Tools
Now it is time to generate the base 3D AI model. For this, you can use free AI tools that allow quick transformation of text prompts or 2D images into hyperrealistic AI models. Here is how you can use Meshy to generate the base model:
- Go to Meshy and sign up for free.
- You will be directed to the homepage of Meshy AI generator. Choose “Text to 3D” or “Image to 3D” option.

- Enter a detailed prompt you just generated including the texture, colors, and key features you want in your model.

- Click generate and you will be presented with 4 drafts.
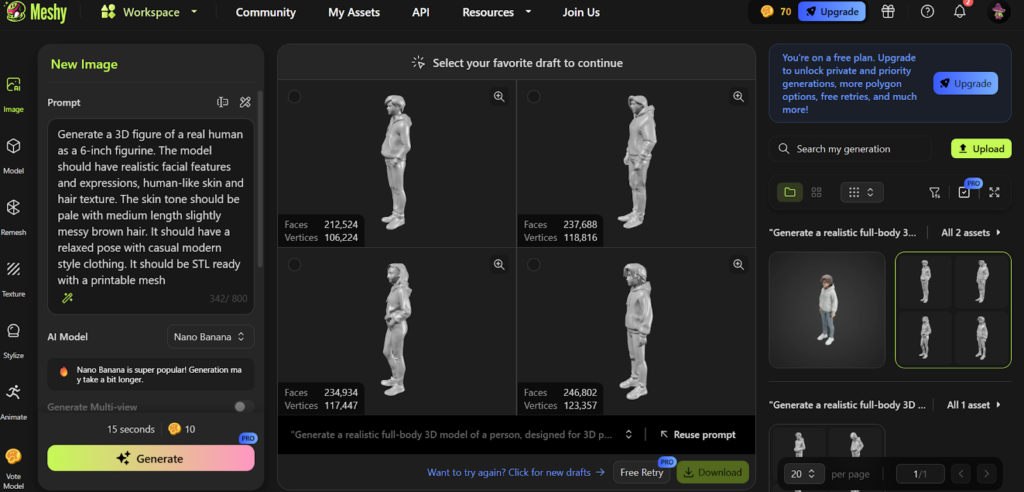
- Select the one that is closest to your requirements and tap on confirm.
- It will generate a texture. You can now refine the model by adjusting topology, texture detail, remesh, and rigging.
- Once everything is complete, you can download the final file in the OBJ file.
Alternatively, you can use Canva to generate a 2D model first and then convert it into 3D using Luma Genie. Here’s how:
- Go to Canva and open “Canva AI.”
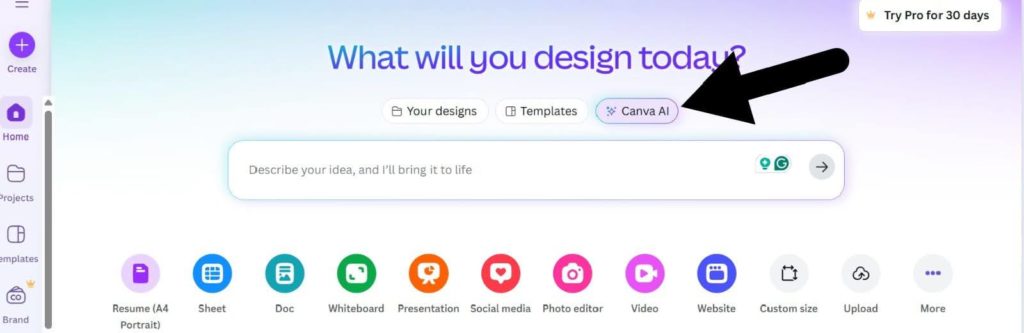
- Click on “Create an image” and write the prompt of the character you want to create.
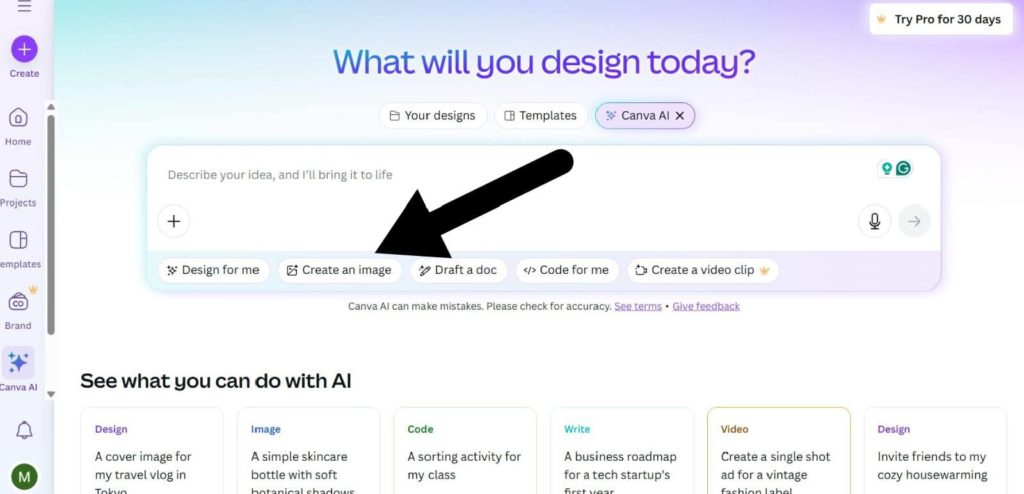
- Once the image is generated, export it and go to the Luma Genie AI generator.
- Access the AI tool and upload the image you downloaded from Canva.
- It will analyze the image and create a 3D mesh with colors, textures, and other elements extracted from the photo.
- You will be presented with four variants.
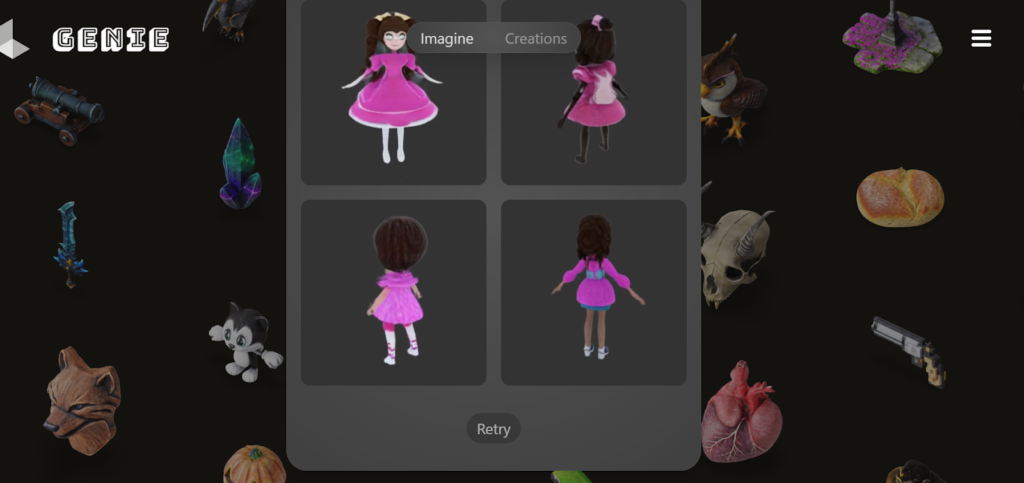
- Download the final version in OBJ file format.
You can also use Vmake AI which is an easy-to-use tool and provides reliable results.
To use Vmake for 3D image generation:
- Go to Vmake AI image generator and select one option from “Text-to-image” or “Image-to-image” generation.
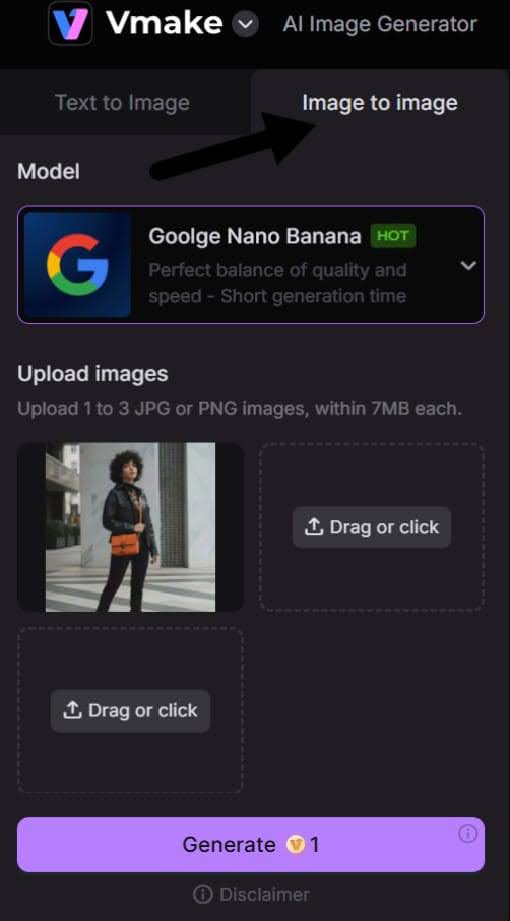
- Tap on “Upload” to upload the picture for image-to-image generation or provide a text prompt.
- Select the AI model you want to use.

- Click “Generate” and wait for a few seconds.

- Tap on “Download.”
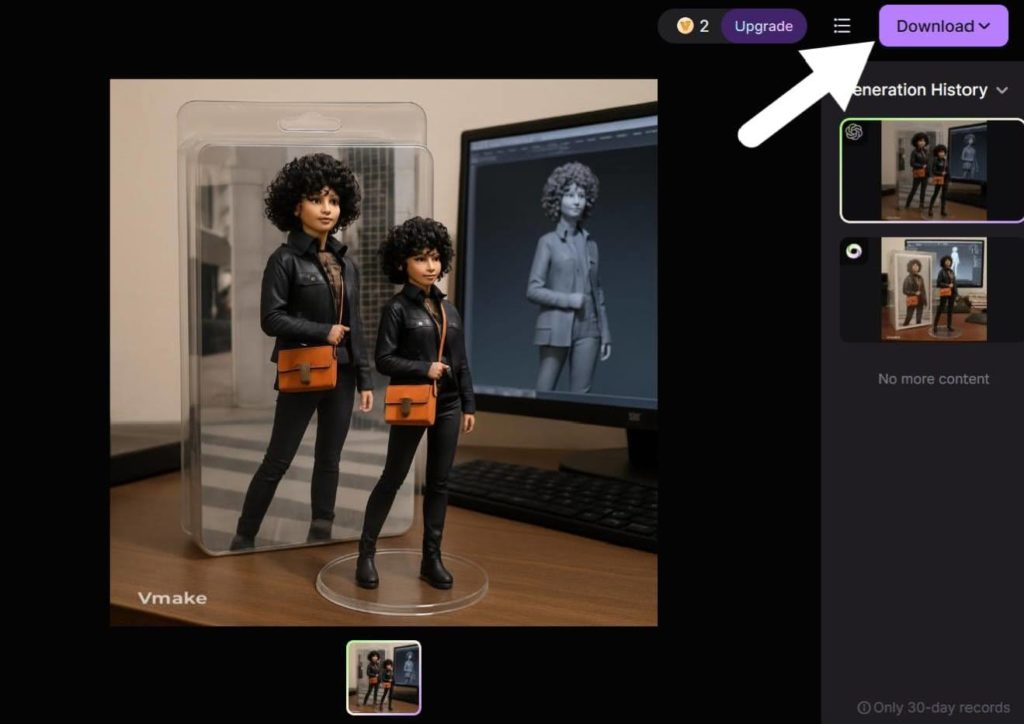
Vmake exports the file in JPG. You can use any JPG to SLT converter to convert the image in a format compatible with a 3D printer and prepare the model for printing.
Troubleshooting issues:
- If there is a blurry texture, the prompt might be the issue. Provide a clear and simple prompt to avoid confusion. If it is an image prompt, provide high-resolution images with a clear background.
- If the app is continuously crashing, close all the other heavy programs, refresh the browser and try again.
Step 3: Refine and Customize Your 3D AI Model Figure
For this:
- Open the software (Blender), go to files, and import the generated model.
- Use Blender’s Sculpting tool to add fine details such as hyper realistic nails and hair. You can use the crease brush for this purpose.
- Adjust the height scale to 15cm to eliminate the need of supporting structures required during 3D printing. For this, go to “Scene properties”, click “units”, and adjust the length to 150mm.
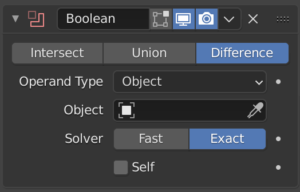
- For a functional action figure, use Boolean modifiers to carve spaces and add joints.
- Select the object, add a Boolean Modifier, select the joint mesh as the target, and choose the operation (Difference to cut away, Union to combine).
- Once refinements are complete, export the file as an STL format.
Pro Tip: You can use Blender’s Bool tool to make the process of adding a boolean modifier easily and quickly. While exporting the file, set the size unit to 1.00 and enable “scene unit” to maintain the exact size in the slicer software.
3D Printing and Finishing Your 3D AI Figurine: Steps for Perfection
Set up the Station
You need to set up the perfect printing station first. For this, you will need a desk, a printing shelf, and some printing essentials. Here’s a detailed breakdown:
Desk
You need to set a stable 3D printer desk as unstable desk can cause vibration leading to layer shifting and poor surface finish. Repurposing furniture can be a cost-effective solution for this.
Most of the 3D printing community uses IKEA’s Lack table. You just need 2 tables stacked over each other, 4 magnets, some screws, and a powercable extension to make a perfect enclosure. All of this costs less than $50 together.
You can also use a photography tent made with porous material for a low-effort enclosure but never leave it unsupervised as it can heat up anytime.
Printing Shelf
Having a 3D printer shelf allows you to keep things organized and within reach. You can use a pegboard shelf that has customizable hooks and fixtures to meet your storage needs. Place it near the monitor for a smooth workflow.
Printing Essentials
- For printing, you will need PLA filament or resins, glue stick or blue painter’s tape, digital calipers, scrapers and spatulas, tweezers, and deburring tools.
- For post-printing, keep acrylic modeling paste, sandpaper, dremel rotary tools, filament dryer, and nitrile gloves with you.
Print the Model
Let’s get started with printing the model.
Printing
For printing, use Cura which is a free slicer tool.
- Go to settings and set the layer height to 0.2mm to get prints with fine details.
- Go for a 20% infill to save printing time and prevent the waste of excess material.
Bed Adhesion
- For proper bed adhesion and prevention of warping, you need a heated bed. Heat the printer’s build plate to a target temperature (it varies with material).
- After heating the bed, apply blue painter’s tape to it so that the filaments stick perfectly and there are no lifted corners.
Note: The process should be done in an enclosure to minimize temperature fluctuations and maintain a warm environment.
Post-Printing Smoothing
- To make the surface more smooth after printing, use acrylic modeling paste and apply thin coats over the printed surface. Use a palette knife to spread it smoothly and then scrape off the excess materials.
- Let it dry and then use a fine-grit sandpaper to sand the model.
- Apply multiple coats of a primer that is compatible with your printing material to prepare it for paint.
Pro Tip: Let the first coat of primer dry before applying the next coat. Do this for every next coat and then sand again for a perfect finish.
Advanced Customization
Here’s some advanced customization tips to make everything flawless:
- You can use UV unwrap in blender to precisely map textures into the skin and nail areas.
- Design nails, and hair for your model as separate add-ons with snip-fit features to print them separately and give different textures and colors. This makes the model look more realistic.
To keep the 3D printed figure, you can create a custom display box. Wondering how to make a 3D box? Here’s how:
- Give a prompt like “clear acrylic display box for a 15cm 3D model. It should have hinged lids.”
- Print the base with PLA filament and go for clear acrylic sheets for the sides.
- Seal the edges with epoxy resin and you got your model a beautiful little custom display box.
Troubleshooting issues
Got some issues during printing? Here are some common problems and their easy solutions:
- If your prints have messy cobweb like filaments attached to them, increase the retraction filament by 1mm and optimize the speed to a medium level. You can also try lowering the temperature and refrain from using moist filaments.
- Under-extrusion occurs when you get weak prints with thin layers. To solve this, adjust the filament diameter exactly to the filament size,calibrate the extruder settings, and ensure there is no blockage in nozzle, bowden tube, or extruder gear.
- Layer shifting can be due to misaligned pulleys, excessive printing speed, or loose belts. Check all these one-by-one to sort out the problem.
Real-World 3D Model AI Success Stories
From public to big companies, using AI to create 3D models proved beneficial for everyone. A reddit user who had zero knowledge about 3D modeling used AI to create the perfect gift for his coworkers. Thanks to the artificial intelligence technology, he succeeded.
Other than public, famous platforms like SuperAGI, incorporated 3D modeling into their workflow. With AI, they achieved a 25% increased accuracy in model-making, a 20% increase in customer engagement, and 15% improvement in customer satisfaction.
These success stories reflect AI’s key role in reducing development time, saving costs, and creating personalized experiences.
Conclusion
The process of creating a 3D AI model from scratch to printing it can be quite overwhelming as creation and refinement can take lots of time and effort. AI makes everything easier by reducing the making time from days to just a few hours.
Thanks to this technology, even beginners can generate their custom 3D figurines for collecting avatars, gifting them, or use them for commercial purposes. All you need to do is follow the simple steps mentioned above to start your journey towards an affordable 3D AI figurine mastery.
Vmake Video Watermark Remover

You May Be Interested

Seedance 2.0: What's New & How to Use It

123APPS Watermark Remover Review (2026): Pros, Cons, and Pricing

5 Best Valentine's Day Video Ideas for eCommerce in 2026

How to Create a YouTube Thumbnail? Create YouTube Thumbnails Using AI
