How to Enhance Video with Davinci Resolve Studio: Step-by-Step Guide
 Ken Dawson2026-05-15 10:00
Enhancing video quality is essential when working with low-resolution, noisy, or poorly lit footage. With powerful tools like AI upscaling, noise reduction, and advanced color grading, DaVinci Resolve Studio offers a professional solution to improve visual clarity and detail. From fixing grainy clips to sharpening soft footage and optimizing exports, this guide covers practical, real-world techniques used by editors. Whether you're restoring old videos or refining new content, you’ll learn how to enhance video efficiently and achieve clean, high-quality results.
Introduction to video enhancement in DaVinci Resolve Studio
DaVinci Resolve Studio is a professional video editing program that has advanced tools for colour grading, visual effects, and post-production. The software has three advanced video enhancement features: AI-based Super Scale for upscaling, noise reduction in time and space, and detailed sharpening controls.
Editors can use the tools to make the video better by using a node-based workflow system that gives them structured control over the editing process. DaVinci Resolve Studio lets users get professional-quality results by giving them precise control over both low-quality clips and high-resolution footage.
How to enhance video with Davinci Resolve Studio
The process of improving videos in DaVinci Resolve Studio requires multiple tools, which users should apply in a specific sequence to achieve better visual results by increasing clarity and detail and enhancing overall visual quality. The correct sequence of steps will help you prevent two main problems: artifacts and overprocessing.
Stage 1: Organize your timeline
Before you start, create a dedicated video track for all clips that need enhancing. Name it "Upscale" and change its color (e.g. to orange) for easy identification later.
Stage 2: Set your target resolution
Once you've finished your edit, in Project Settings, switch the timeline resolution to your final desired output, say 4K. This makes sure DaVinci Resolve works on the correct frame.

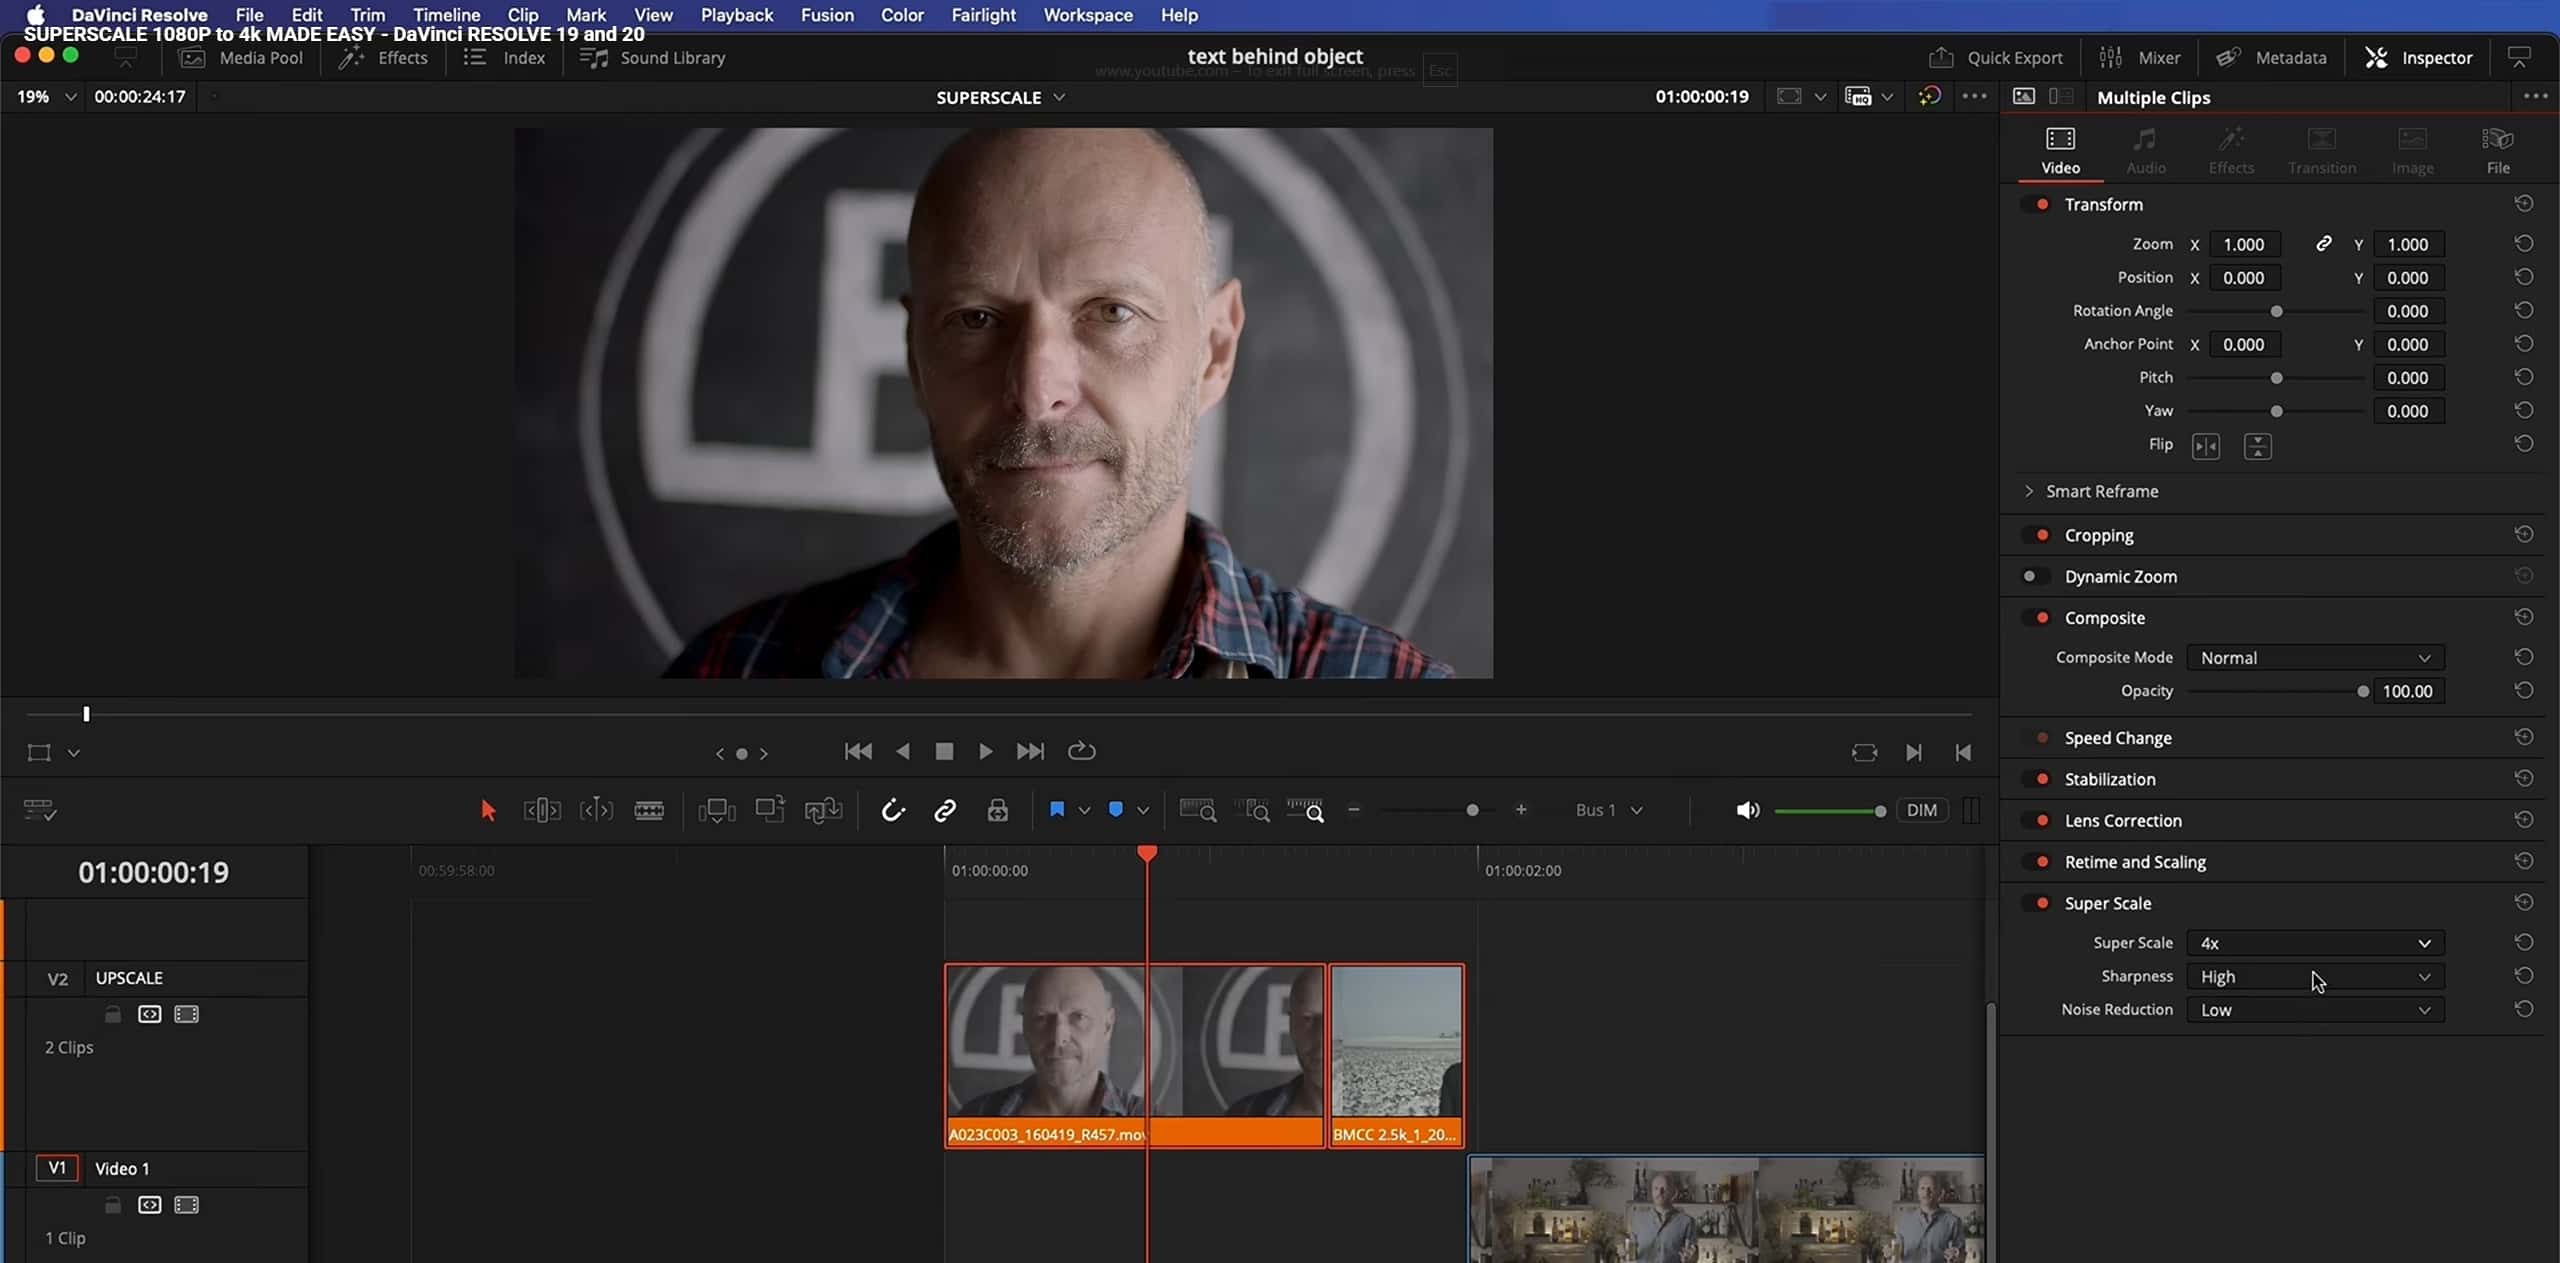
Stage 3: Enable SuperScale
Highlight all the clips on your upscale track. In the Inspector tab, navigate to the Video section, locate SuperScale, and enable it.
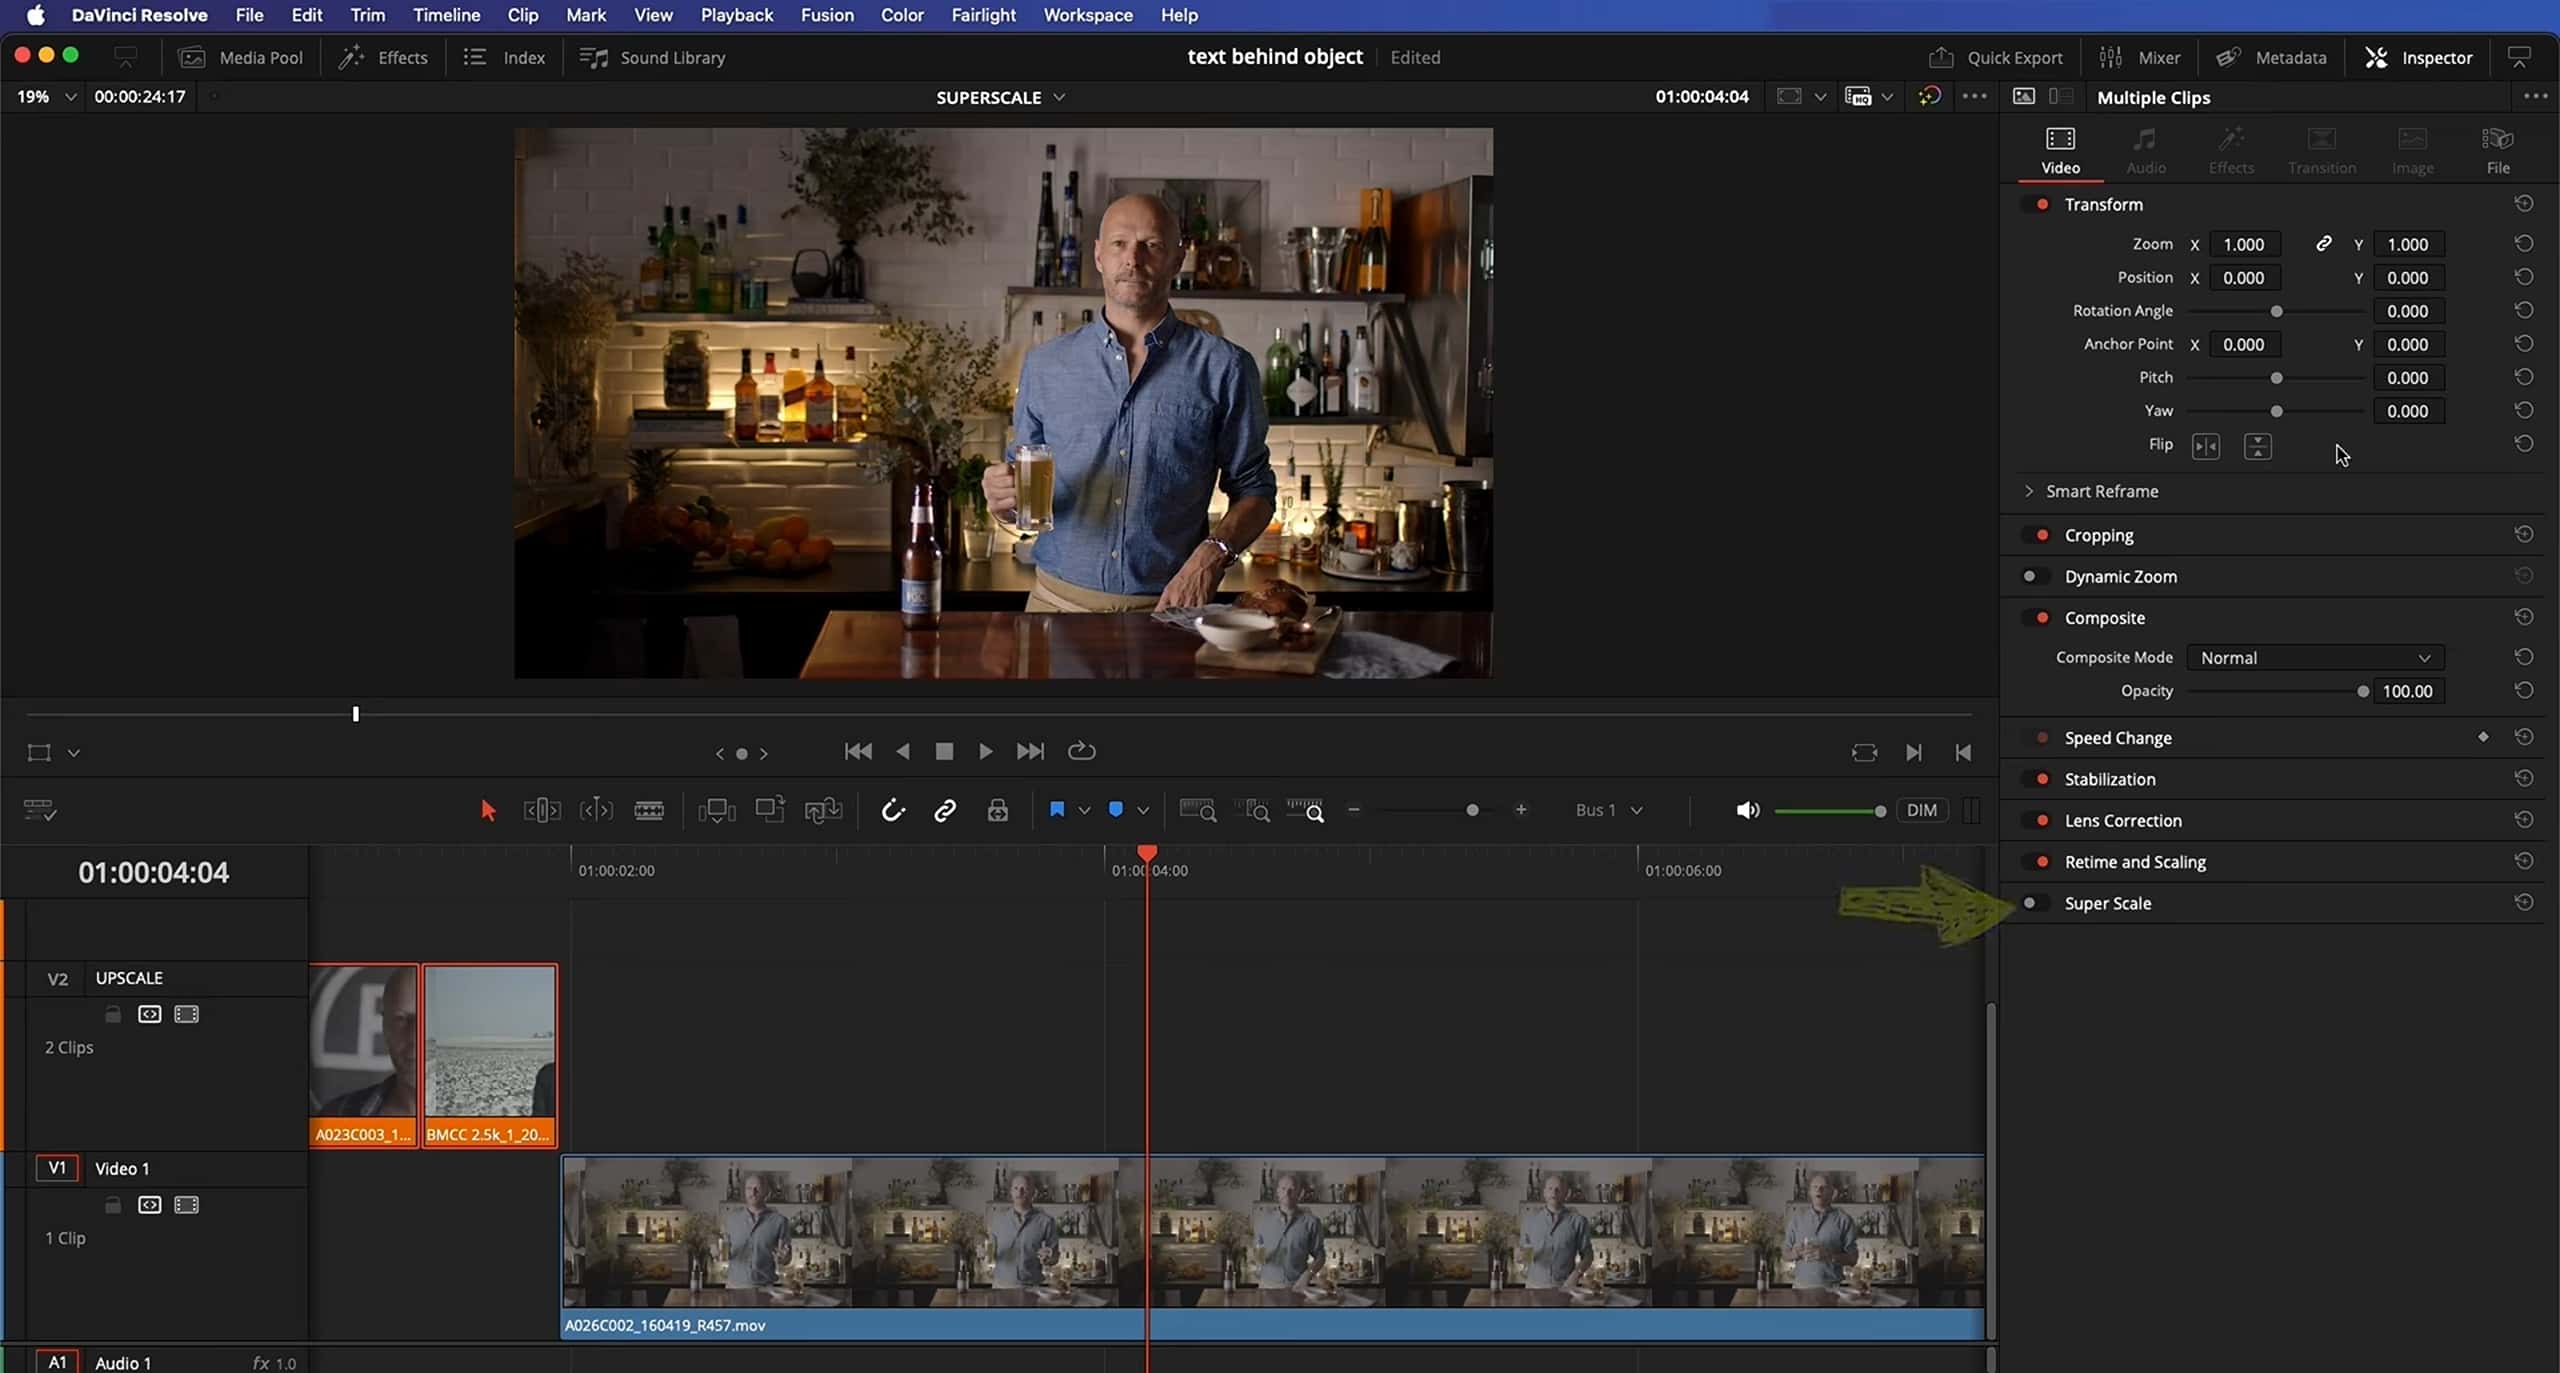
Stage 4: Adjust enhancement settings
For the most professional look, you'll want to dial in the SuperScale parameters to fit your footage. If your source material is 1080p, then set the scale to 4x to match 4K output. You can play with the sliders, but the best balance for high-end results is usually Sharpness set to High and Noise Reduction set to Low.
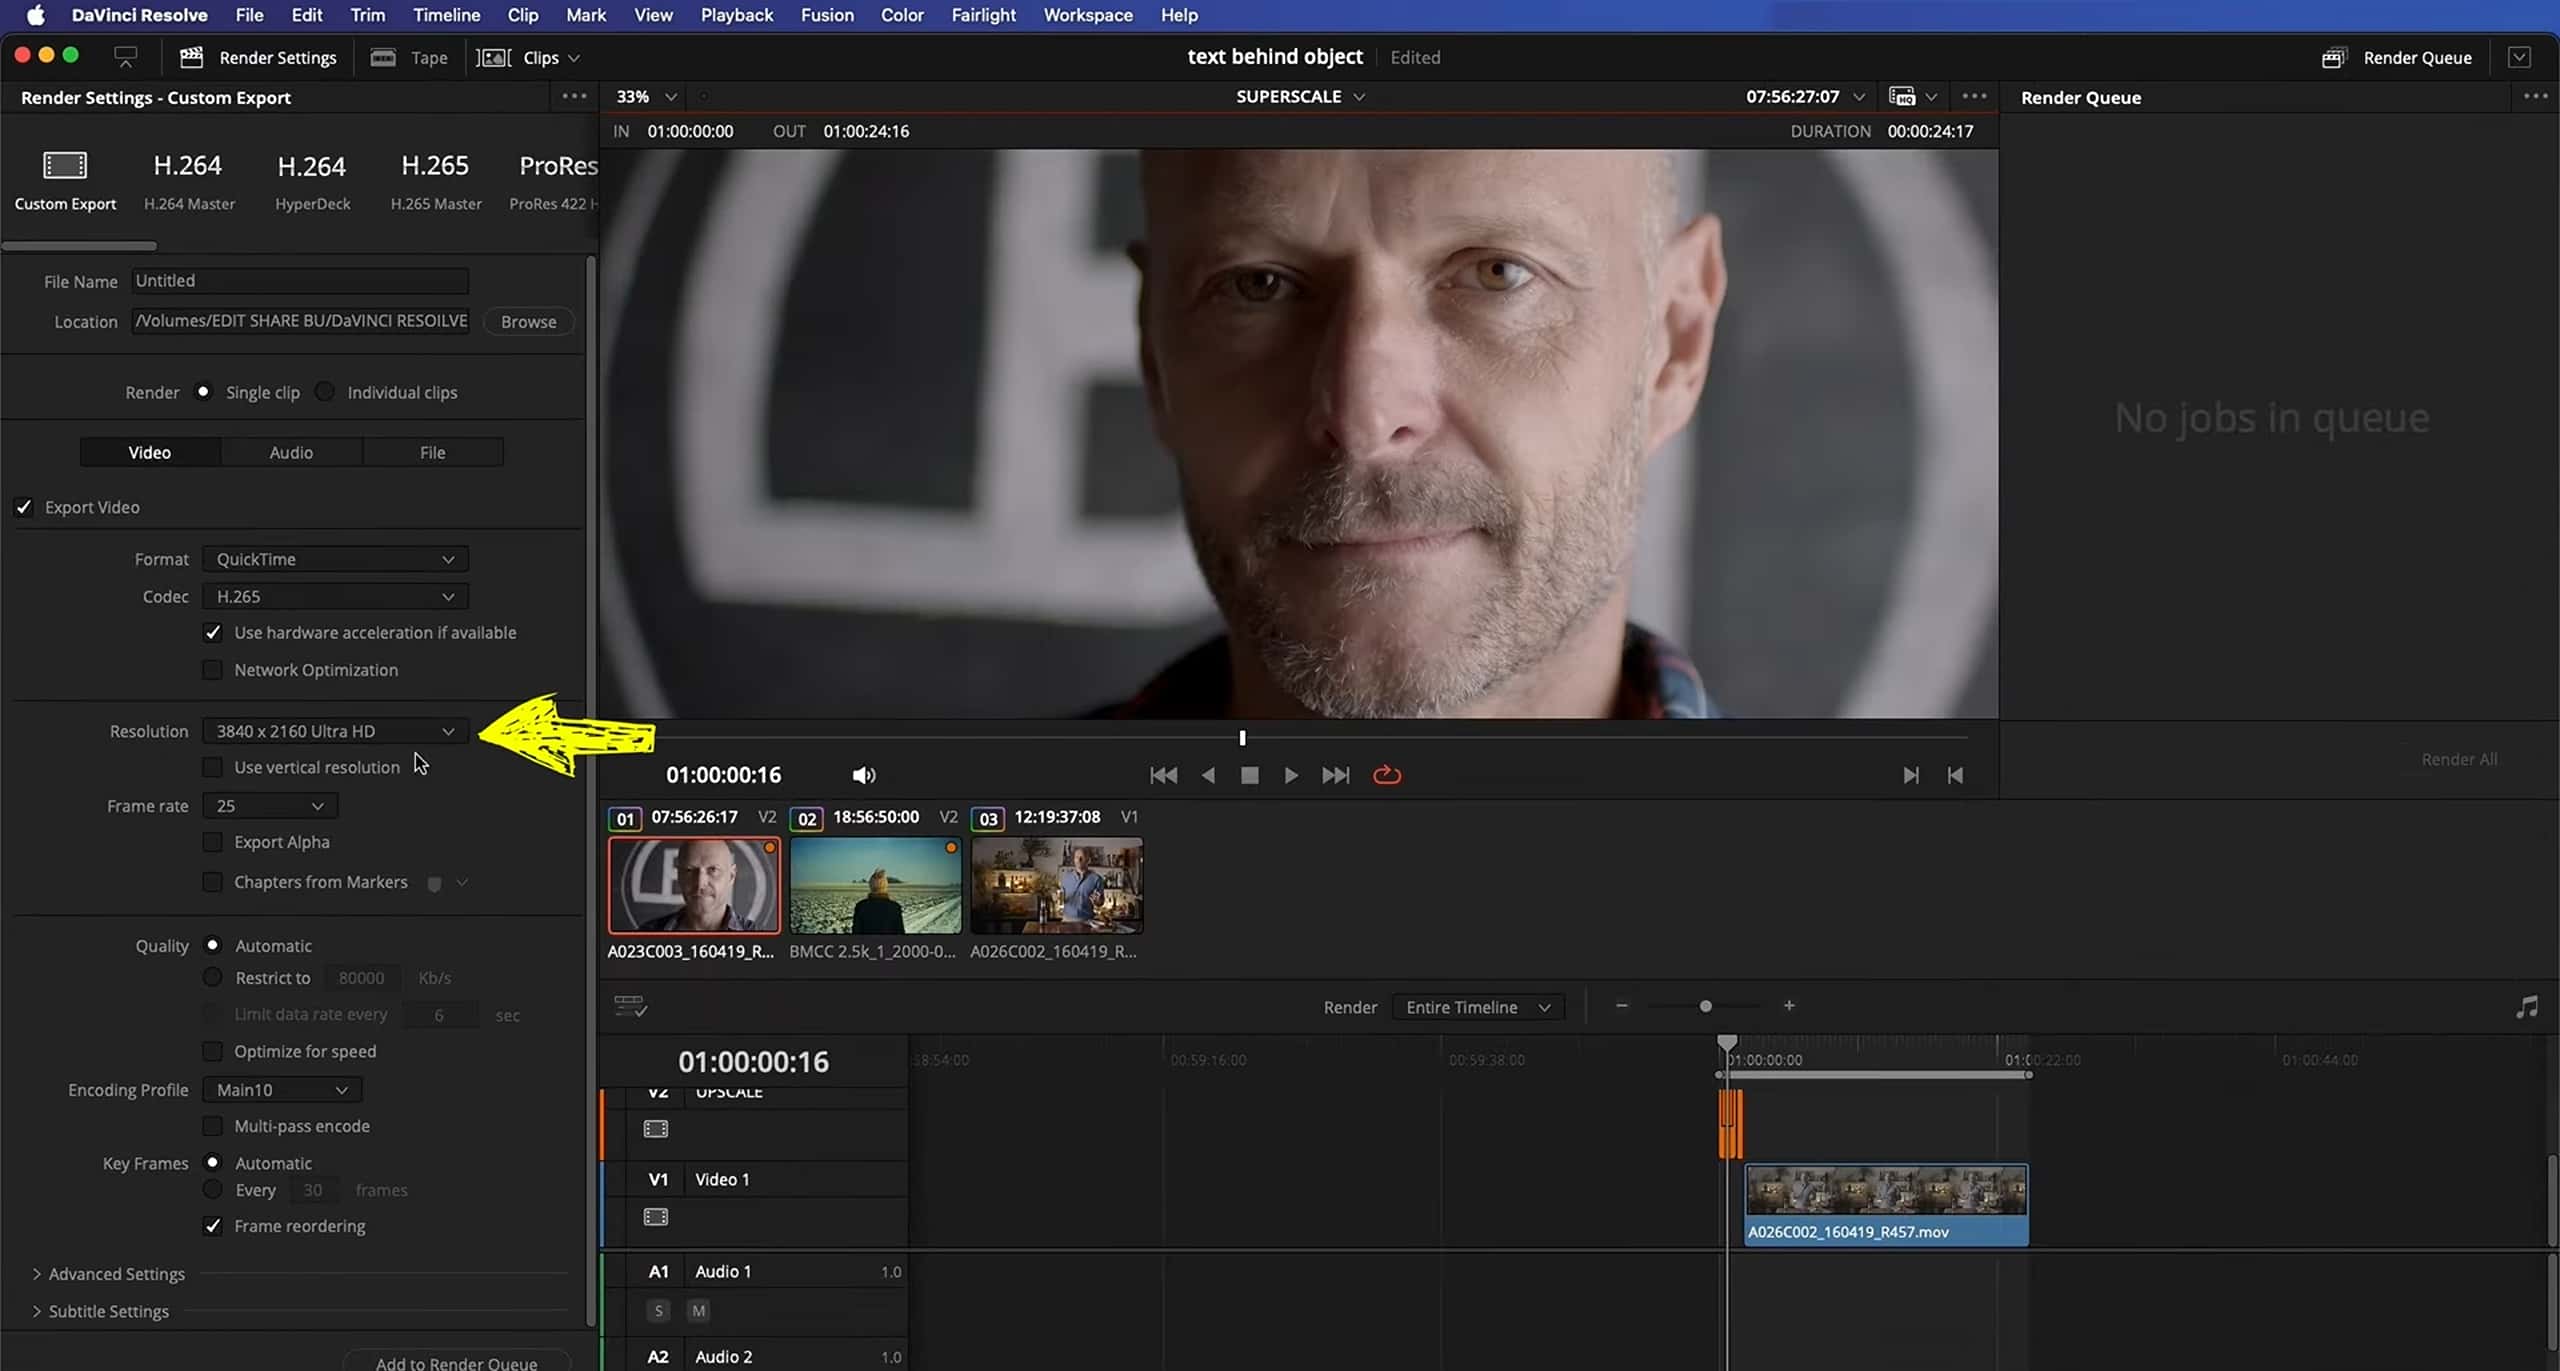
Stage 5: Configure high-quality render settings
On the Deliver page, pick a good 10-bit codec such as ProRes 422 HQ, ensuring that Constant Bit Rate is on. In Advanced Settings, be sure to tick the boxes for "Force debayer to highest quality" and "Force sizing to highest quality.
Alternative method: Enhance video instantly with Vmake AI
Editing in DaVinci Resolve Studio can be intimidating, and if you no longer have access to your original media files, then enhancing your footage with Vmake AI video enhancer is significantly quicker. With our one-click AI technology, your videos can be enhanced without time-consuming tweaking or complex editing programs. Ideal for novice users or times when you are short on time. Upscale, denoise, and enhance video clarity with just one click, without the need to tweak a variety of tools.
Step-by-step guide
Step 1: Upload your video
You need to choose the upload option before selecting the video file you want to edit. Vmake supports multiple formats, enabling users to complete their tasks quickly and without difficulty.
Enhance your videos instantly with Vmake now!
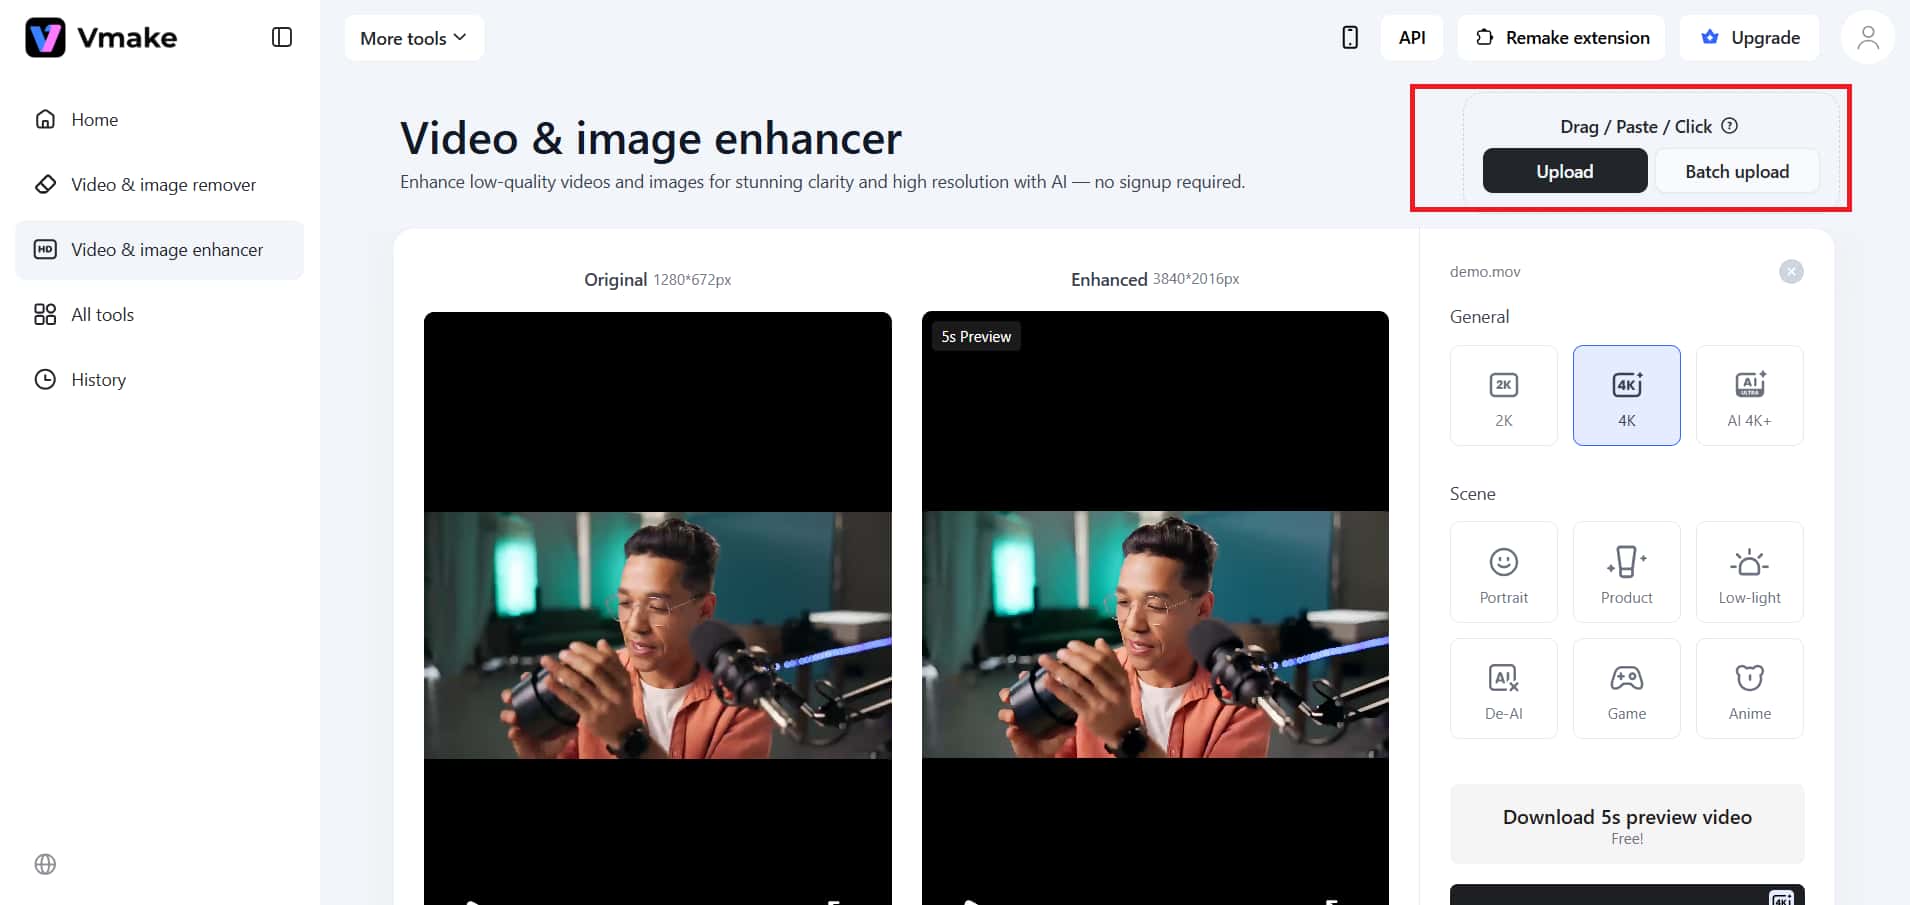
Step 2: Choose the desired resolution
You can choose from three available resolutions, which include 2k, 4k, and AI 4k+. The video should be enhanced using the available lighting and editing options, based on your selected resolution. You have the ability to make edits while keeping all elements of the content clear and detailed.
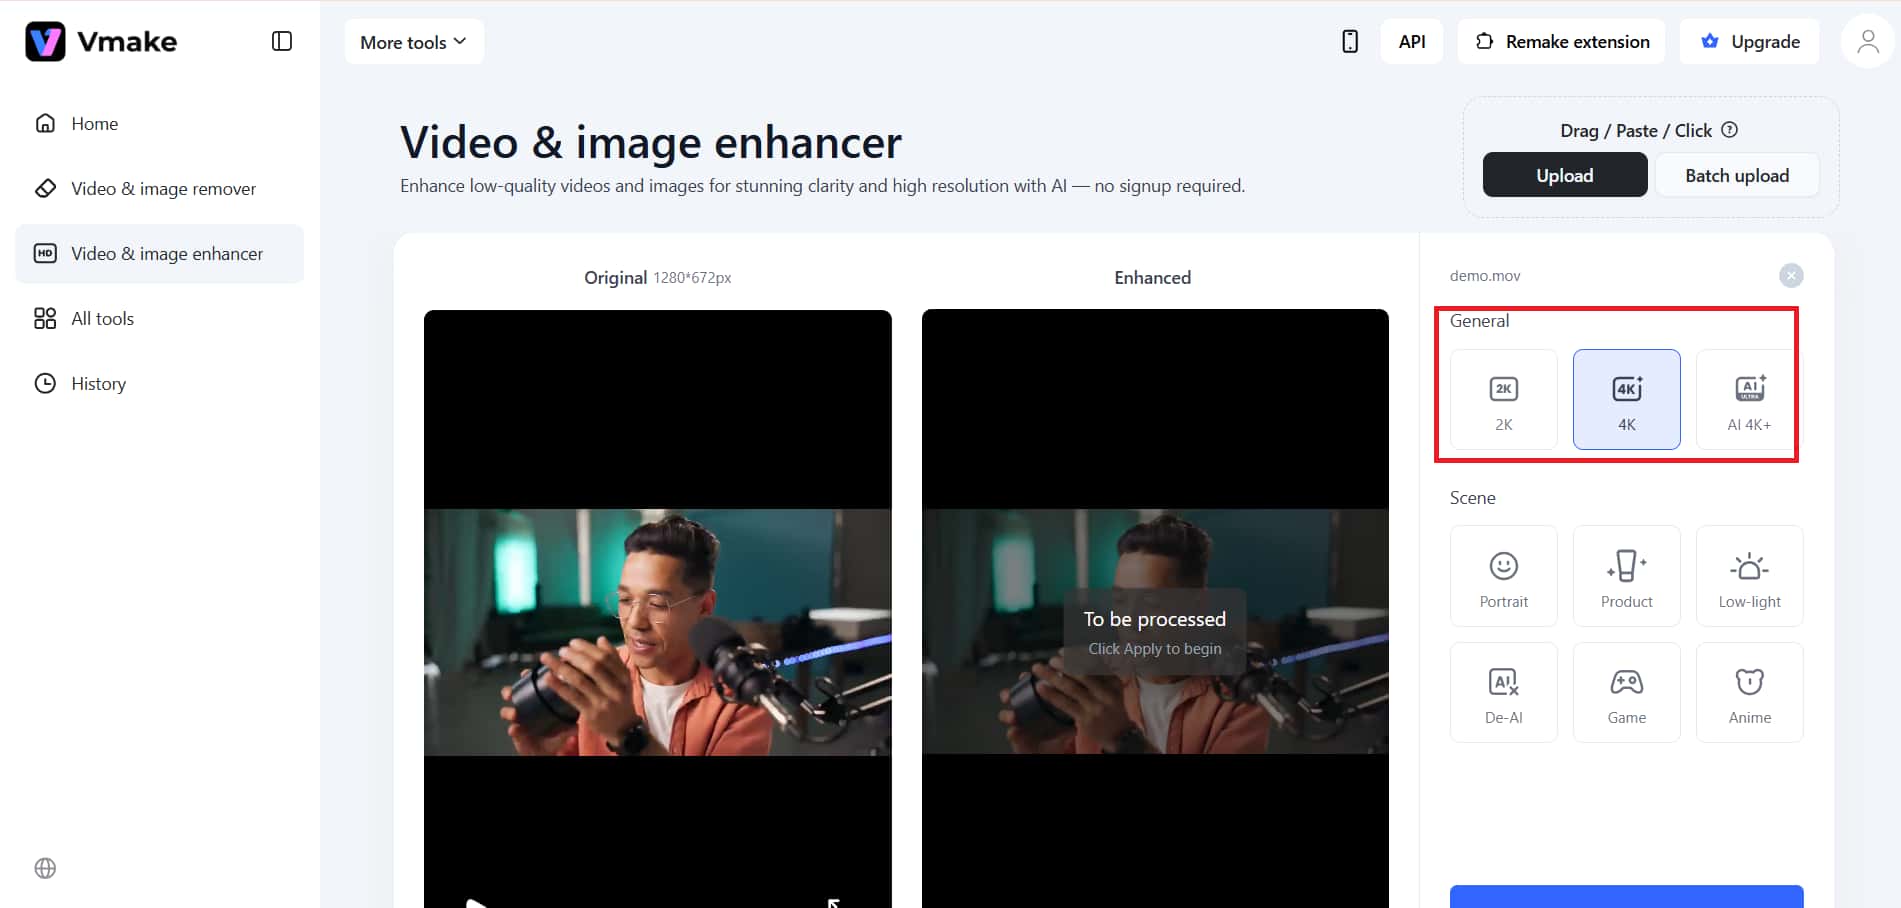
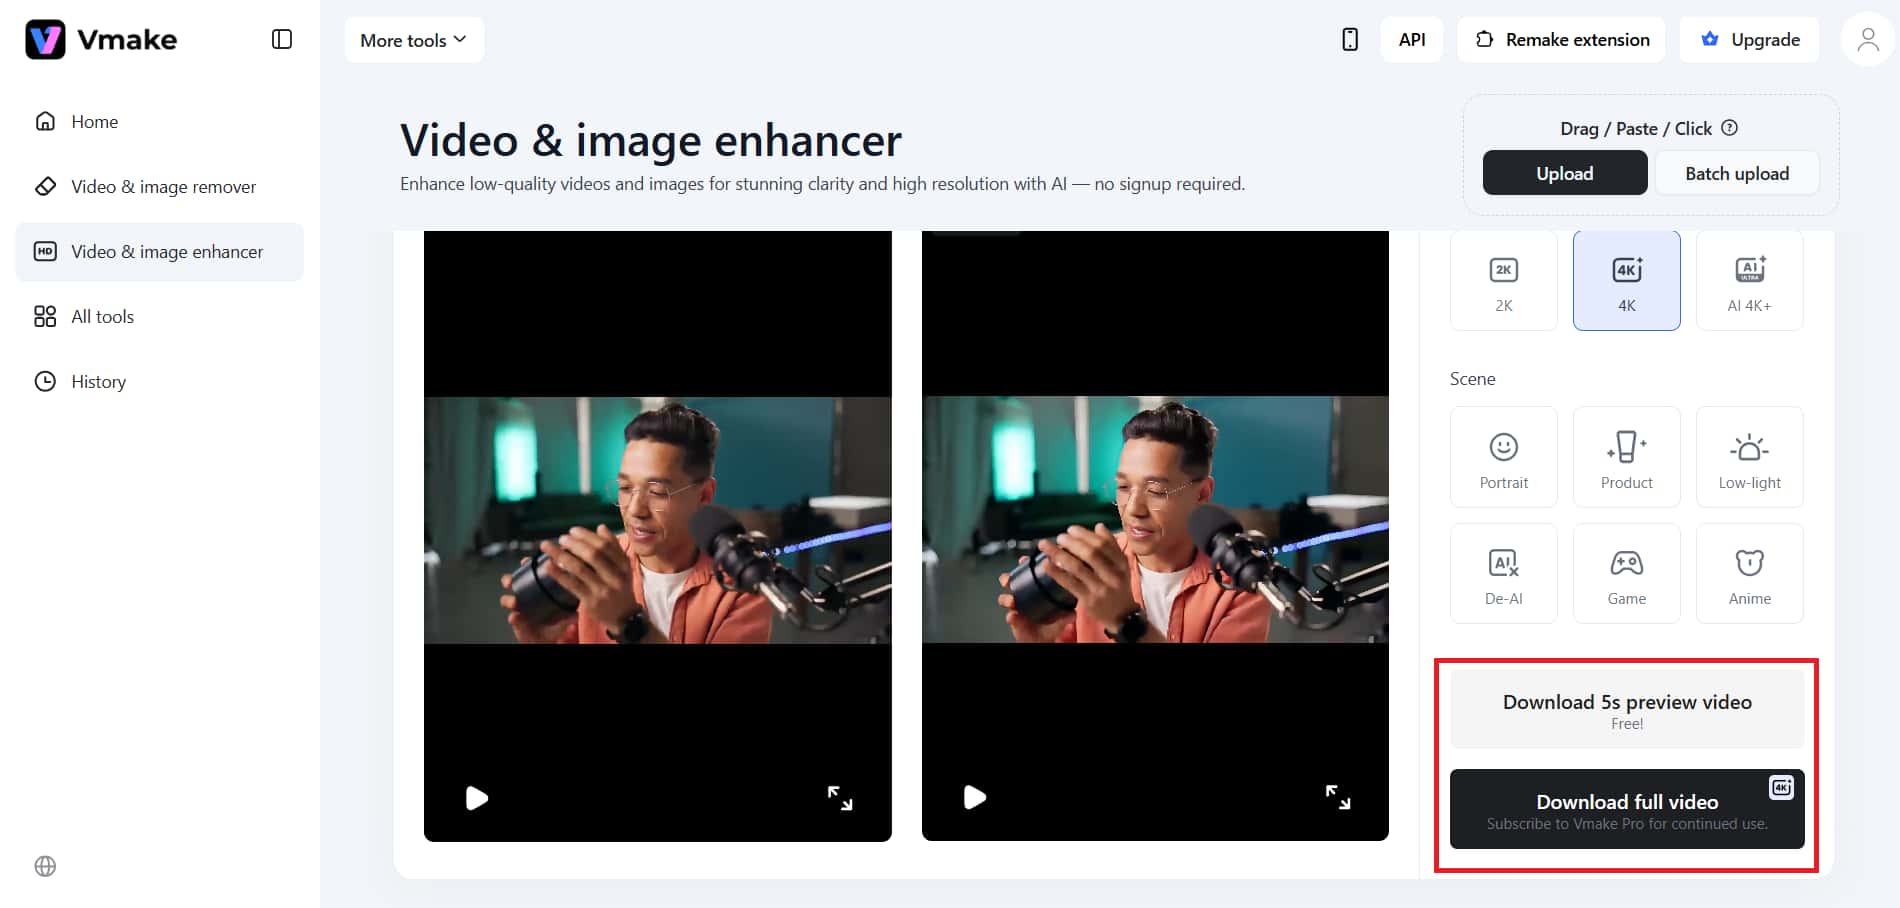
Step 3: Process and download
You should apply the changes to your video, which the Vmake enhancer will process. The process will finish when you download the complete file, which contains high-quality output.
Key features:
-
One-click AI enhancement: The system enhances video quality through automatic processes that boost video clarity, decrease noise, and increase resolution. The system requires no user intervention because all video enhancements occur automatically without any need for manual editing work or technical system changes.
-
No advanced editing skills required: The system eliminates the requirement for users to perform node-based editing tasks or establish detailed configurations that professional tools usually need. The system enables all users to enhance their video quality results with only basic operational tasks.
-
Bulk processing & smart stacking Boost your productivity by processing up to 30 videos at once. Seamlessly stack cleanup tasks—like removing platform watermarks and burned-in captions—in a single, high-speed pass.
-
Fast and user-friendly processing: The system delivers fast results through its straightforward interface, which enables all users to operate the system. The system enables users to improve their videos through direct video enhancements without needing complicated operational procedures or software installation.
More ways to achieve video enhancement effects
To improve the quality of a video, you might need to use more than one tool. You can make things much clearer, more detailed, and more visually appealing by using the right methods within a structured workflow.

AI-based upscaling (super scale)
-
Super Scale uses deep learning technology to achieve clip-level video scaling through its interpolation system. The software enables users to stretch video content while preserving the original video structure and all its detailed elements.
-
The system offers 2x and 4x scaling options that use edge reconstruction technology to maintain visual sharpness while reducing visible pixelation during video enlargement.
-
The method delivers the best results for delivery upscaling, as it enhances perceived detail and improves the appearance of lower-resolution content on high-definition displays.
Noise reduction workflow
-
Temporal noise reduction uses motion-compensated analysis across multiple frames to reduce noise while preserving movement and detail.
-
Spatial noise reduction smooths noise at the pixel level within a single frame. The technique removes grain from the image without using motion data.
-
The process must be executed before sharpening or detail enhancement because it prevents noise from becoming more pronounced.
Detail enhancement and sharpening
-
The radius and amount, together with threshold settings, determine the sharpening application method, which protects edge definition while preventing excessive image processing.
-
Midtone detail enhances micro-contrast by revealing texture and depth without changing the overall exposure distribution of the image.
-
Edge isolation techniques enable sharp detail enhancement while protecting against halo artifacts and irregular boundary formation around subjects.
Color and contrast optimization
-
The three adjustments of lift, gamma, and gain help to separate the different tonal regions of shadows, midtones, and highlights, which results in better tonal balance and improved visual clarity.
-
The process of increasing contrast makes everything look sharper because it makes details more visible without resorting to strong sharpening techniques.
-
The color space adjustments help to make the footage look better by increasing accuracy and depth, and maintaining visual consistency for a more professional appearance.
Conclusion
Ultimately, cleaning up video comes down to Perception. There are many tools in DaVinci Resolve Studio that can greatly enhance clarity, minimize noise, and improve detail. But you can't fix poorly captured source with post-processing. The cleanest, highest-quality videos will come from great source material. Applying small, smart post-processing steps in the correct order will result in a visible improvement to your final product. Test different adjustments, try new workflows, and know when to stop processing. It's possible to always create cleaner, crisper, and more professional videos that look like they were produced today.
FAQs
Do I need a powerful PC to enhance video in DaVinci Resolve Studio?
The advanced features of noise reduction and AI upsampling require good GPU performance for their operation. The system will deliver better playback and rendering performance when users have a dedicated GPU together with sufficient RAM and fast storage devices.
Can I enhance video quality without the Studio version?
You can enhance video with basic tools in the free version, but you cannot use professional features like high-quality noise reduction without DaVinci Resolve Studio. This restricts how much polishing you can do.
How much can video quality realistically be improved?
Enhancement can help make footage clearer, less noisy, and more finished-looking. Enhancement won't be able to recreate the detail you lost from super-compressed videos. But your results will vary based on your original footage.
Which comes first: editing or video enhancement?
The tasks, such as cutting, trimming, and arranging clips, should come first. Further, the second step should be noise reduction, sharpening, and color grading. This ensures a cleaner workflow and avoids unnecessary processing.
Does enhancing video increase file size?
Enhanced videos have larger file sizes due to higher resolution. This is because an increase in quality requires more data in order to preserve detail and reduce the effects of compression. Therefore, one must choose the right export settings for enhanced quality.

You May Be Interested

5 Free Tools Help You Make Green Backgrounds for Seamless Video Editing

Airbrush Watermark Remover Review (2026): Features and Pricing

Video Watermark Remover Made Simple with Vmake

How to Add Auto Captions in DaVinci Resolve

Instagram Video Download Without Watermark: Step-by-Step Guide
